Follow the article’s guidelines to install GCC on the Windows system.
How to Install GCC on Windows
To install GCC on Windows, follow the below-given steps:
Step 1: First, visit here and download MinGW Utility for Windows. The MinGW utility makes the GCC installation simple on the Windows system.
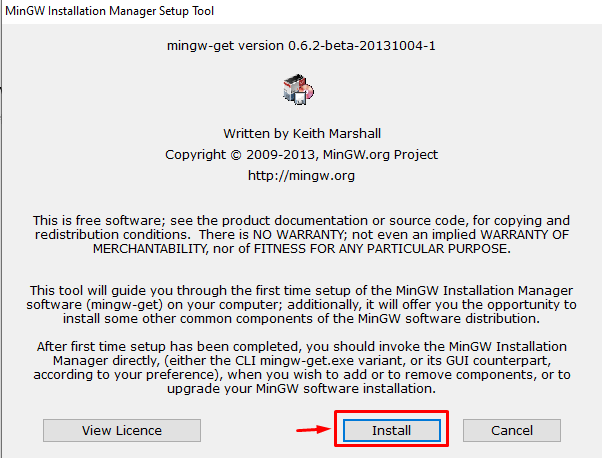
Step 2: After downloading the MinGW, you can run its .exe file on Windows.
Step 3: Go with the “Install” button.
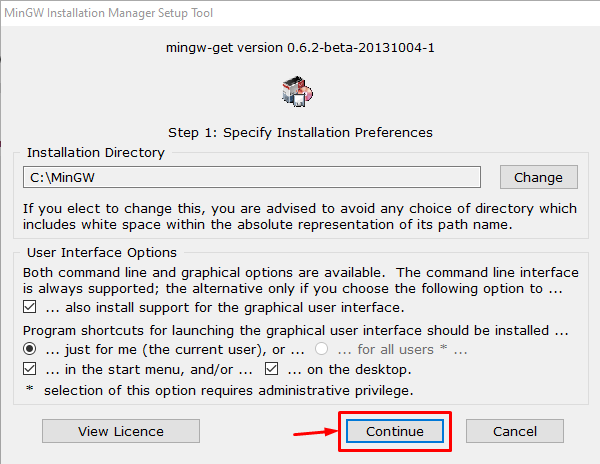
Step 4: Select the installation directory and click the “Continue” button.
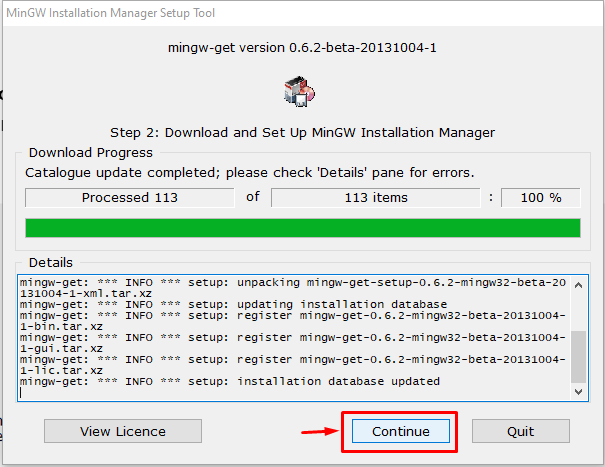
Step 5: After completing the MinGW installation on Windows, select the “Continue” button.
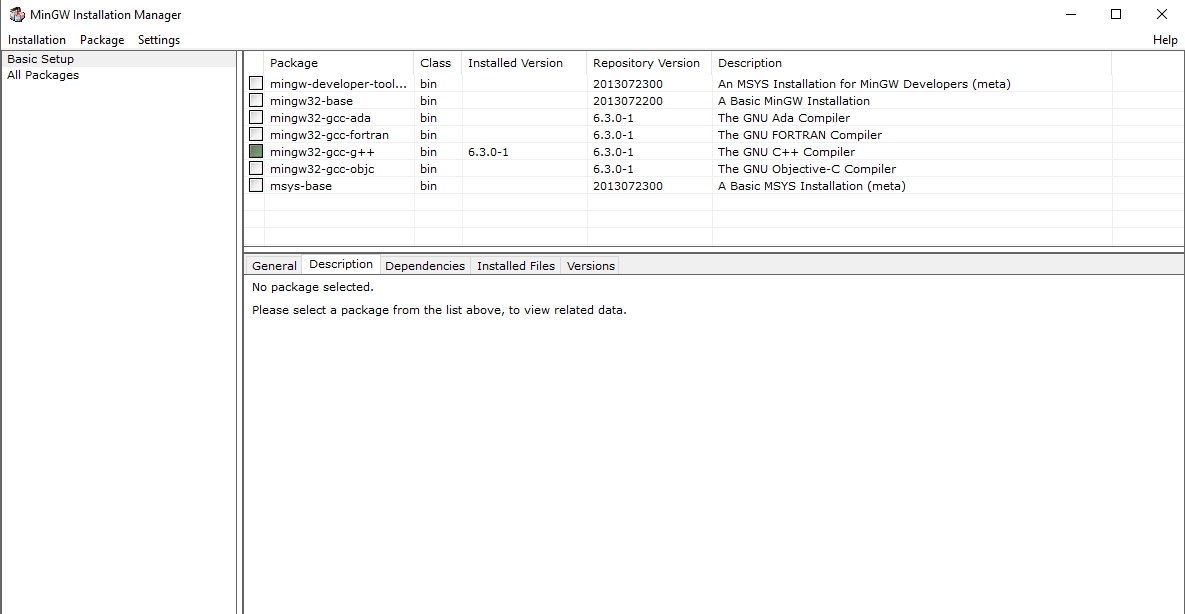
This will open the MinGW installation manager on the desktop.
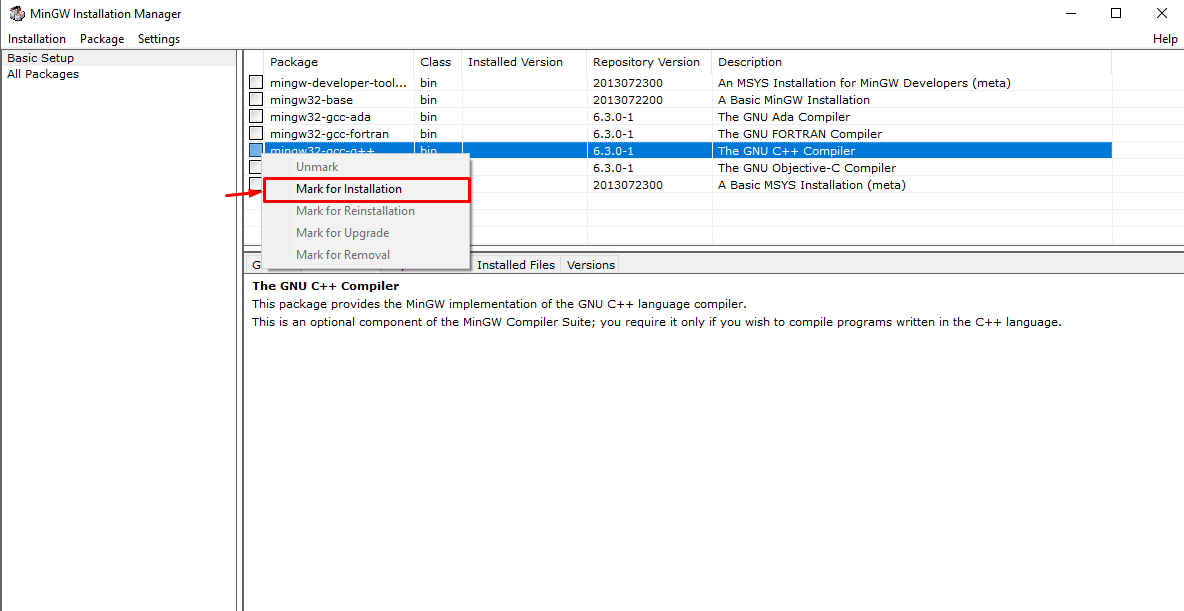
Step 6: Now, right click on the mingw32-gcc-g++ and mark it for installation.
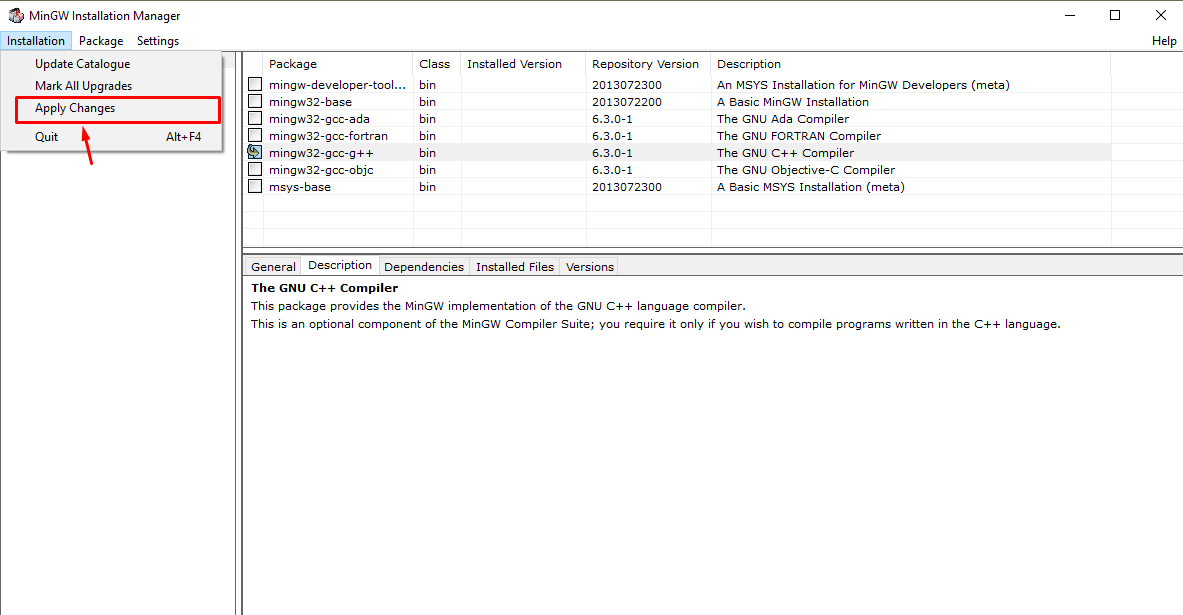
Step 7: Head towards the “Installation” tab and select “Apply Changes”.
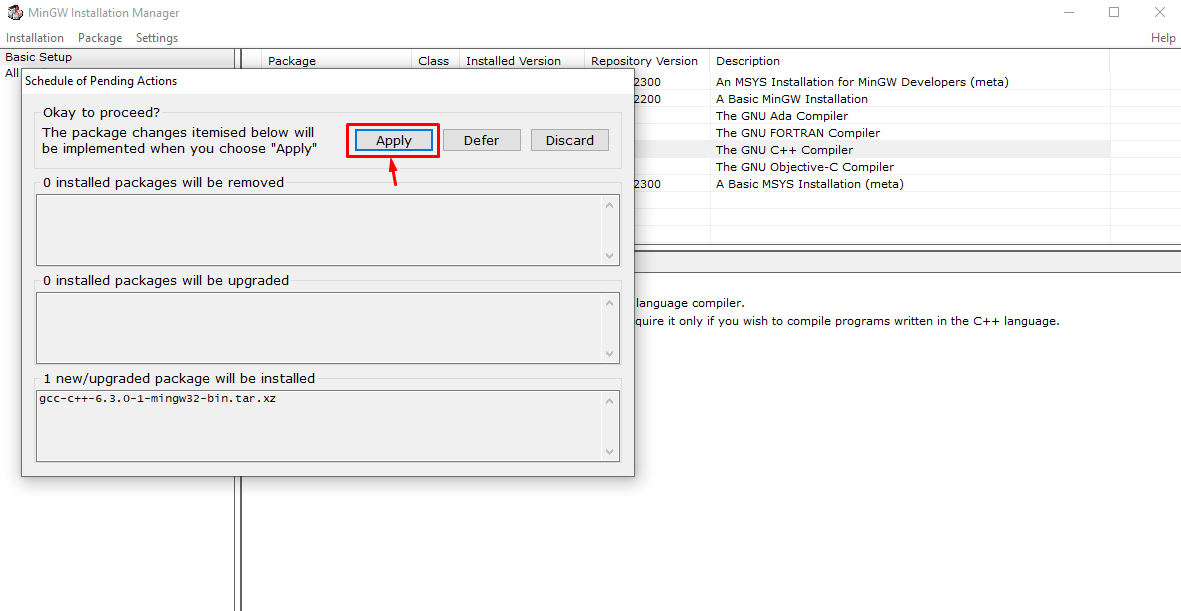
Step 8: Select the “Apply” button to begin installing the GNU C++ package on the Windows system.
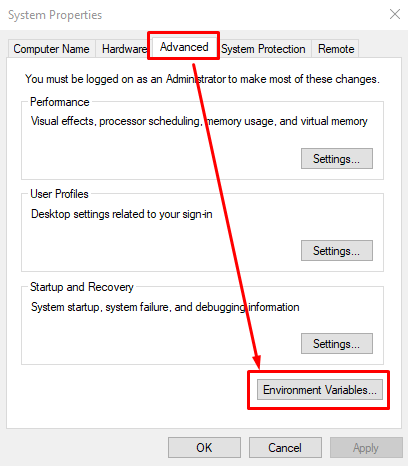
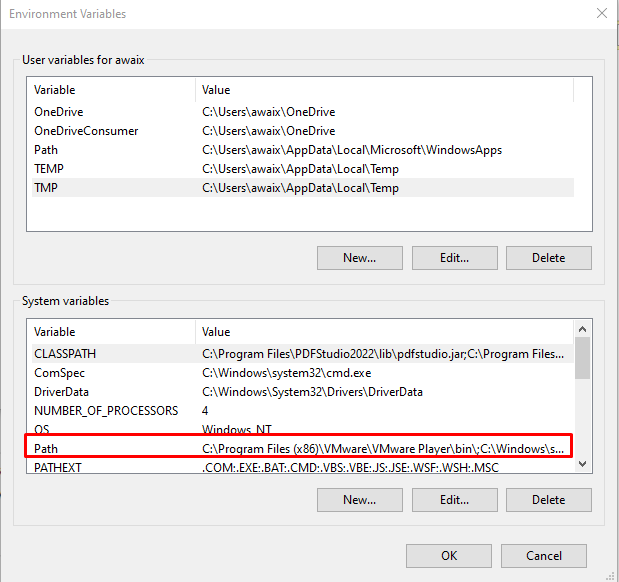
Step 9: Now go to “Advanced System Settings” and navigate to “Environment Variables”.
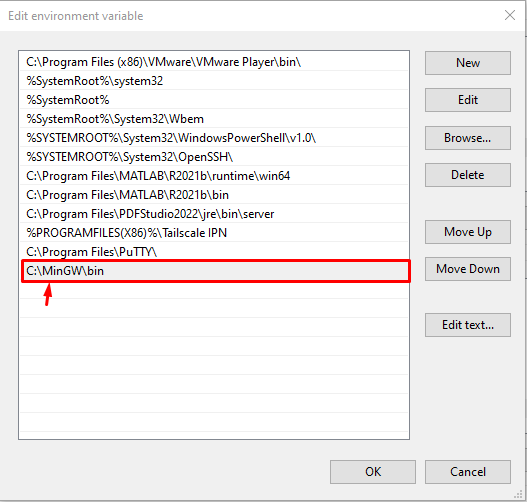
Step 10: Double-click on the “Path” variable.
Step 11: Add the “C:\MinGW\bin” to the list.
Step 12: Press the “OK” button, then open Command Prompt and enter below-given command to confirm GCC installation on Windows.
If the above command outputs the GCC version, it means that you have successfully install it on Windows system.
Conclusion
The installation method of GCC on the Windows system is simple, which requires downloading and installing MinGW utility on the system. Then installing mingw32-gcc-g++ from the MinGW dashboard. After that you have to add the “C:\MinGW\bin” path in the Environment Variables available in the Advanced System Settings. You can then confirm the installation of GCC using the “gcc –version” command in the Command Prompt.

