Elasticsearch is an open-source, free, distributed analytical search engine that is used for various kinds of data such as numeric data, unstructured data, and semi-structured or structured data. It is known for its scalability, speedy search, and rest APIs. Elasticsearch is compatible with different platforms like Windows, Linux, and Mac OS.
This blog will demonstrate how to install and set up Elasticsearch with .zip on Windows.
How to Install and Set up Elasticsearch With .zip on Windows?
The latest version of elasticsearch is only installable through a .zip setup and can be downloaded from Elasticsearch’s official website. To install elasticsearch with a .zip file on Windows, follow the following steps.
Step 1: Download Elasticsearch .zip Setup
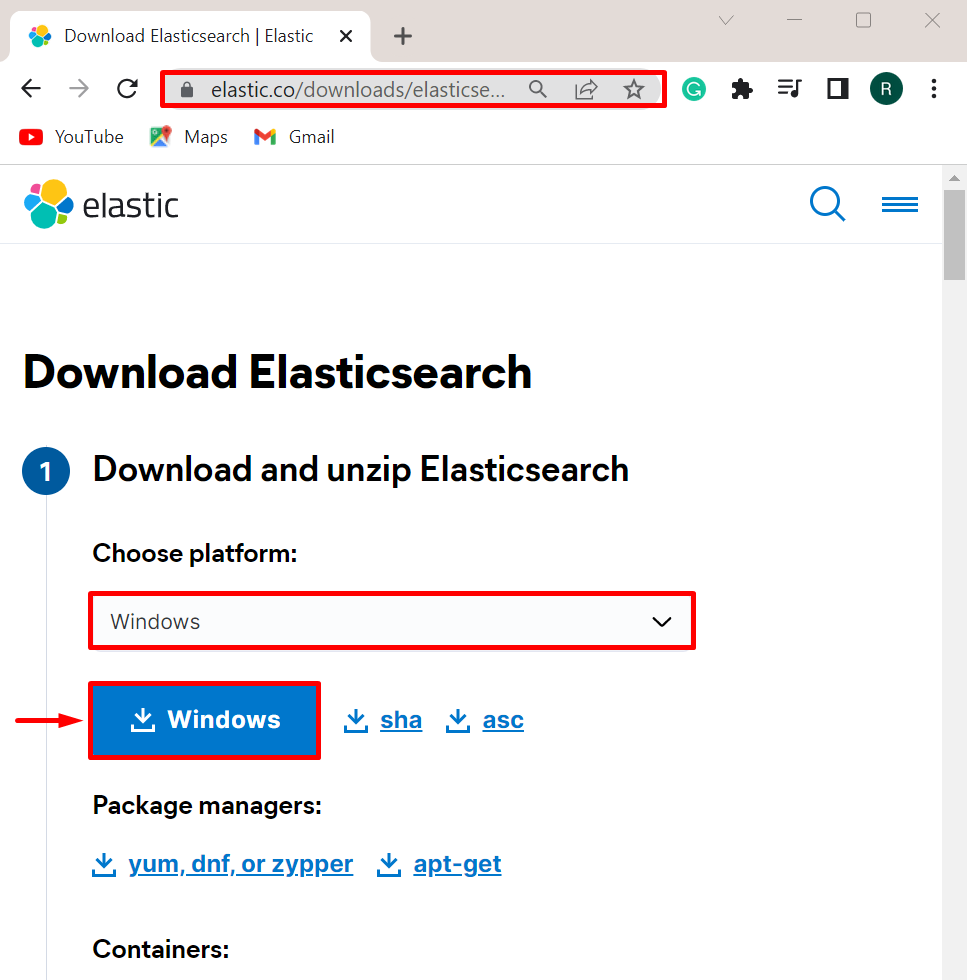
First, navigate to the Elastic official website and download the zipped setup for Windows:
Step 2: Extract the Zip Setup
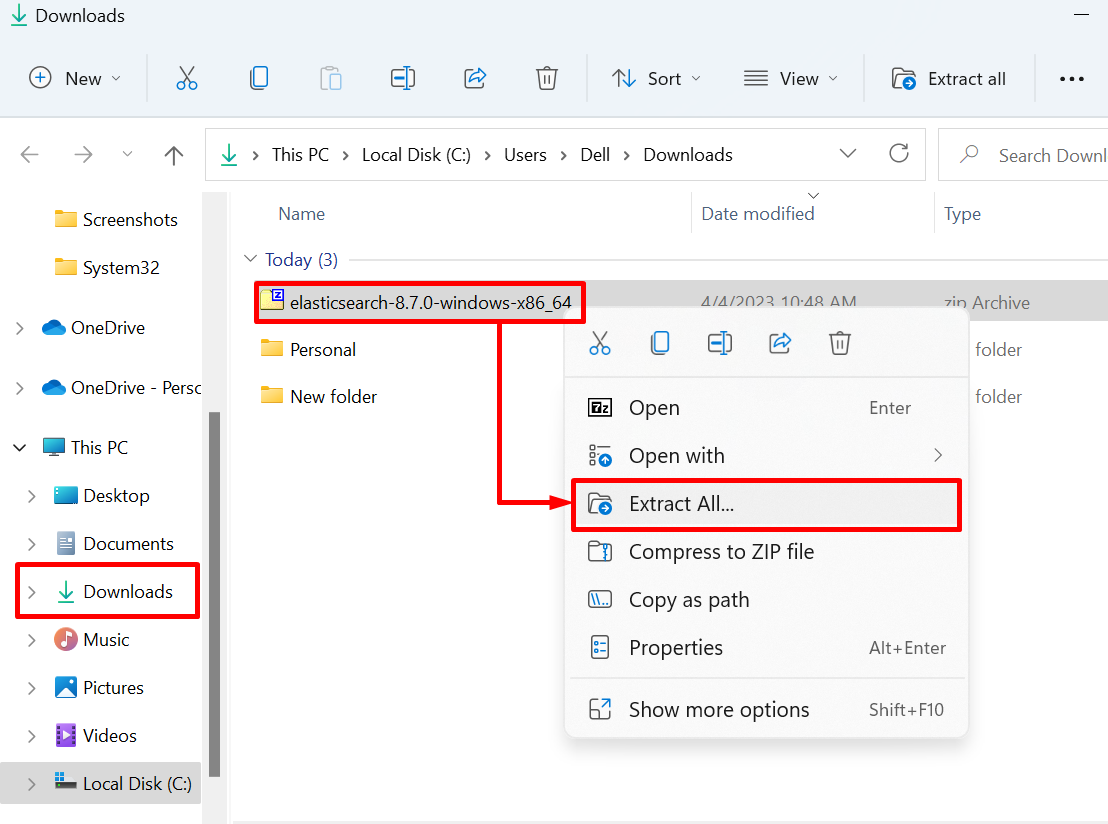
In the next step, open the “Downloads” directory of the system, right-click on the Elasticsearch setup, and hit “Extract All” to extract the setup:
Choose the directory where you want to extract the setup and hit the “Extract” button:

Step 3: Configure Additional Configurations
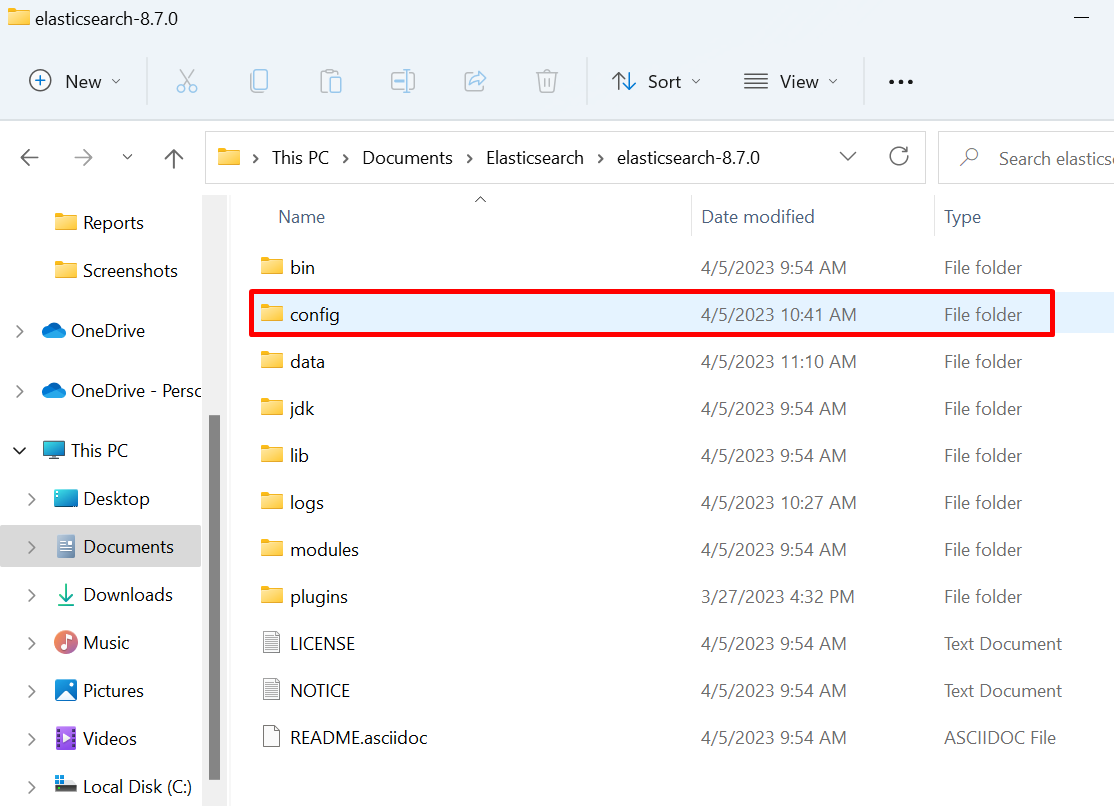
After extracting the setup, open the “config” directory and make some additional changes in the “elasticsearch.yml” file:
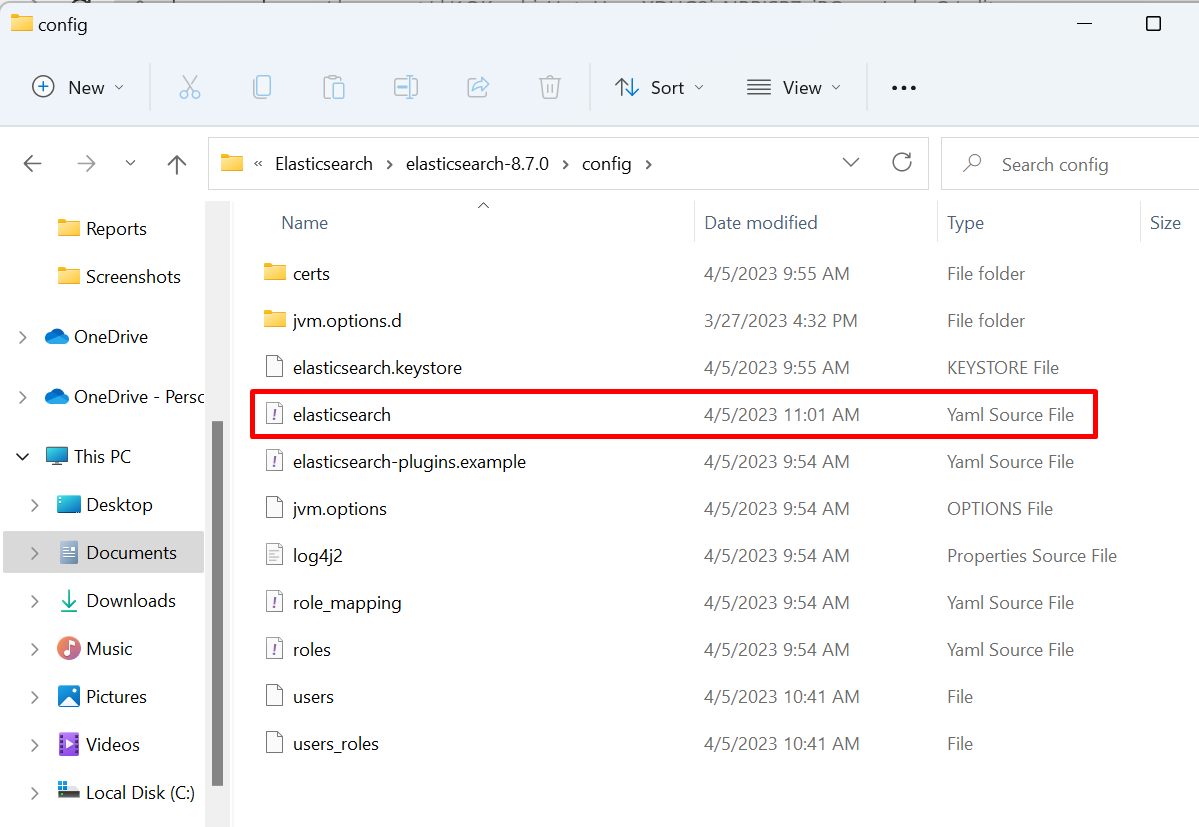
For this purpose, first, open the “elasticsearch.yml” file:
Add the following line into the file as shown below. This will enable the auto-creation of system indices:

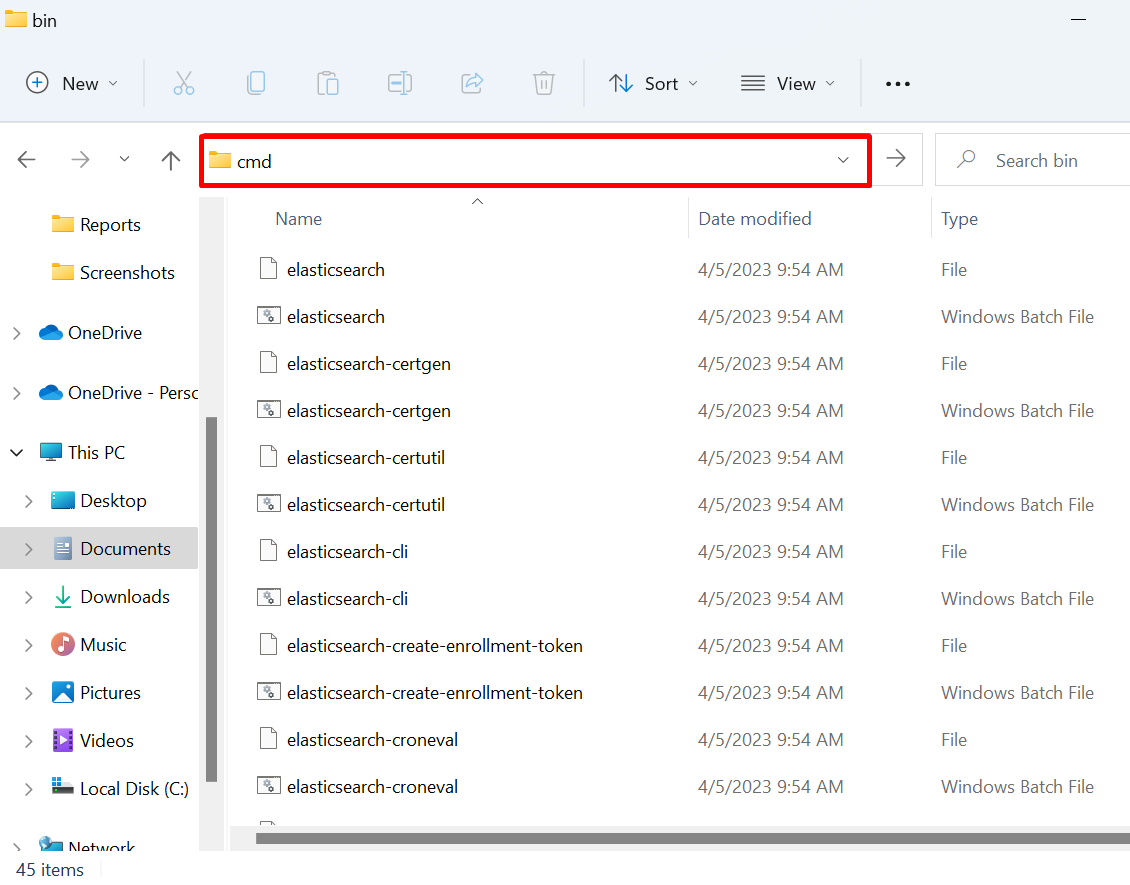
Step 4: Open Elasticsearch “bin” Directory in Command Prompt
Next, open the “bin” directory of the Elasticsearch setup:

In the bin directory, launch the Command Prompt by searching “cmd” in the address bar:
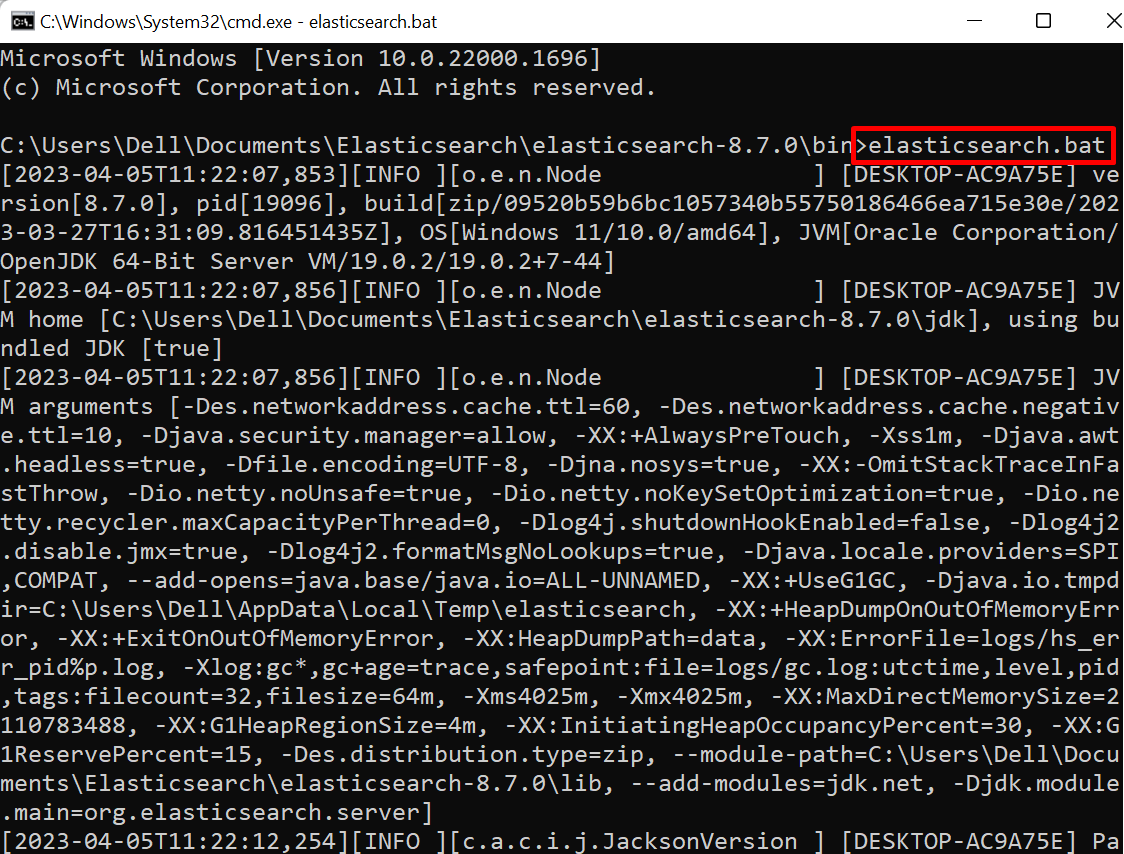
Step 5: Execute Elasticsearch.bat File
Next, execute the “elasticsearch.bat” file in Windows Command Prompt:
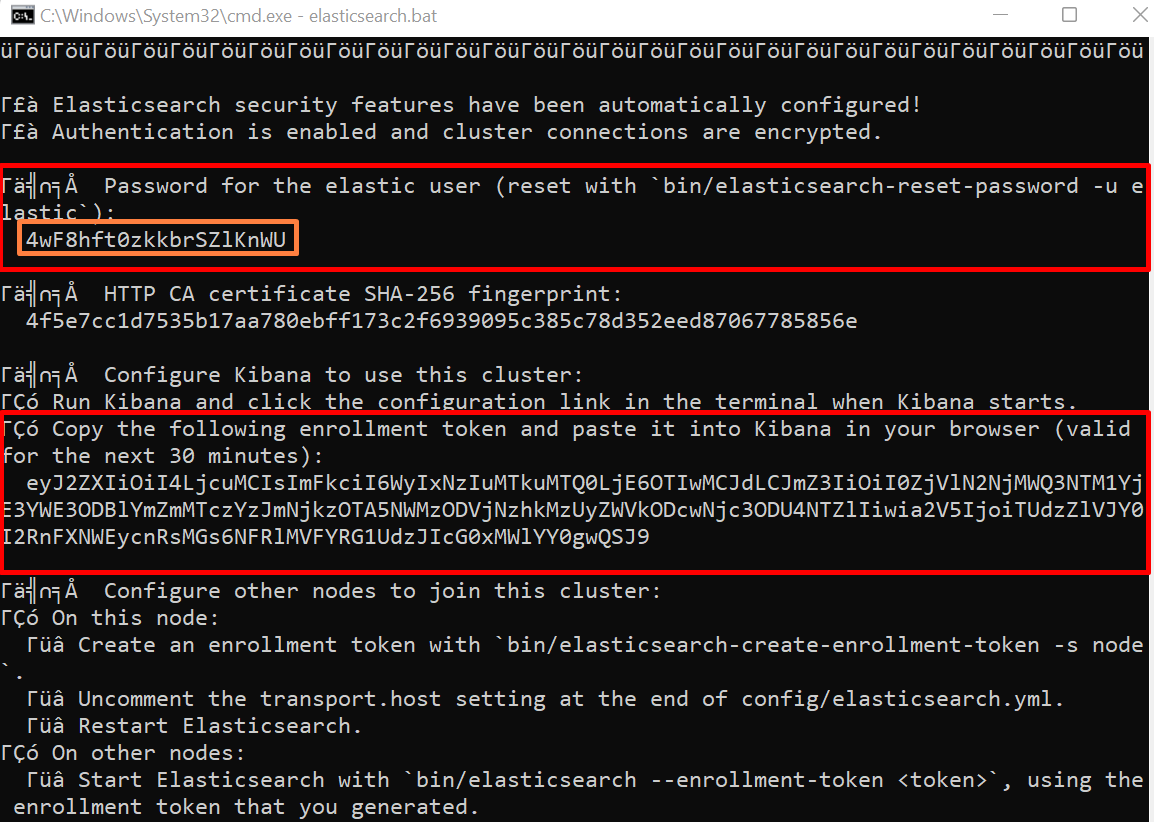
When the elasticsearch.bat is executed for the first time, the login information for the elasticsearch user, as well as the Kibana configuration token, will be given and displayed:
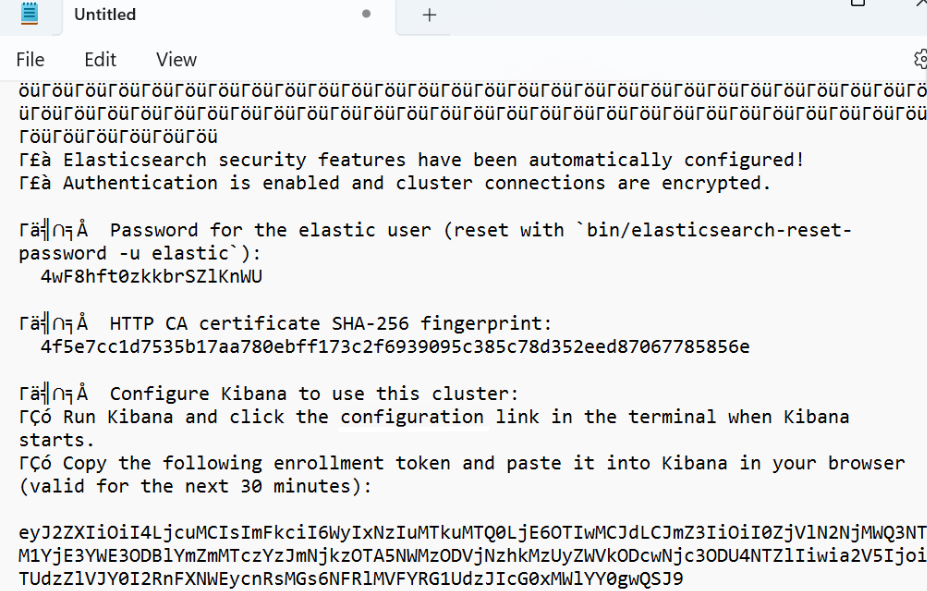
Step 6: Create Backup of Elasticsearch Token, Username, and Password
You can save the user login information and the Kibana configuration token for later use in Notepad or another text document as a backup by copying it from the Command Prompt to a text document:
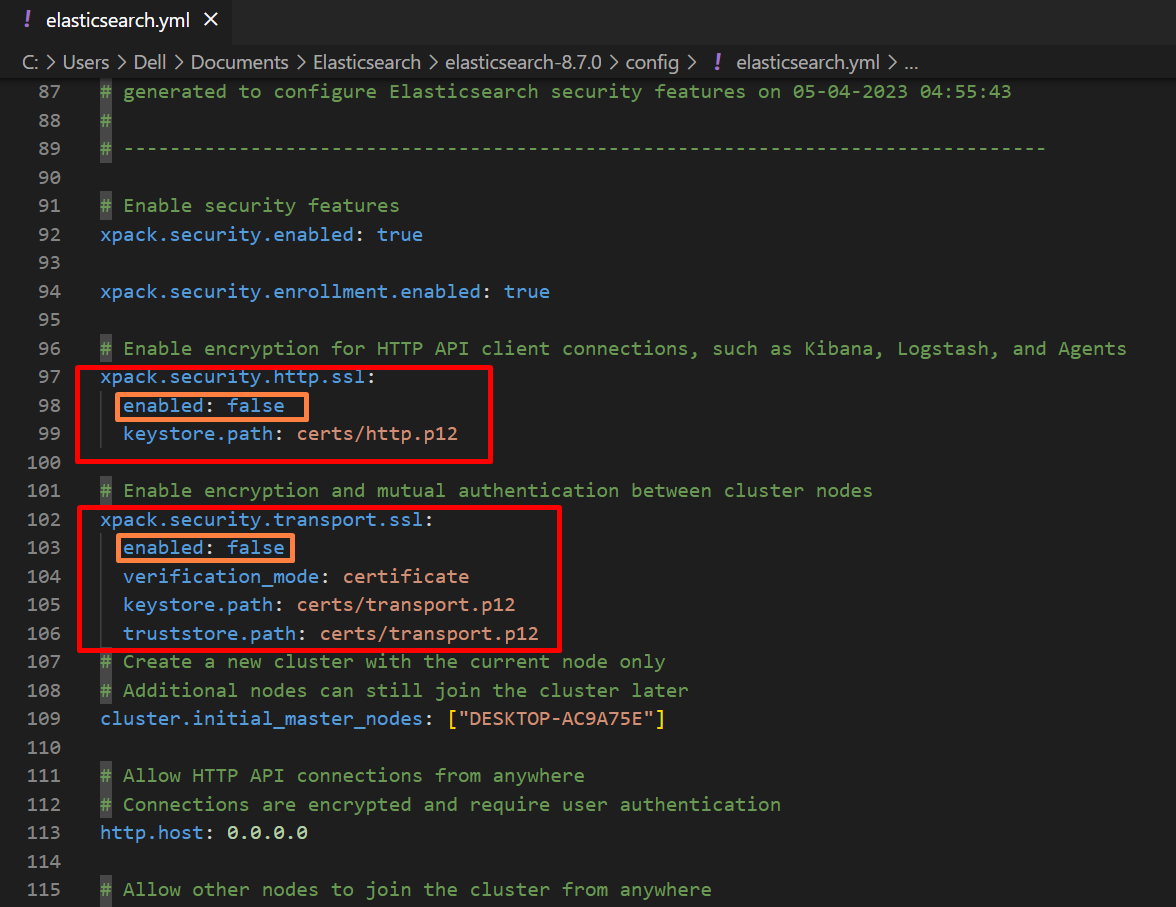
Step 7: Disable SSL Security Option
Next, again open the “elasticsearch.yml” file from the “config” folder and uncomment the mentioned line:

Next, disable the SSL security option by setting the “enabled” value as “false”:
Save the changes and check if elasticsearch is running or not:
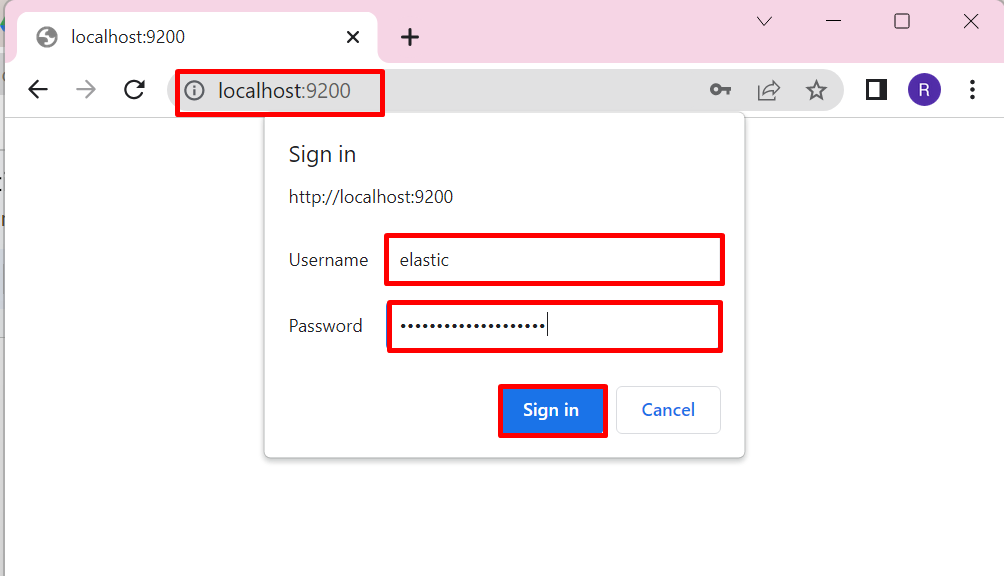
Step 8: Verify Elasticsearch is Running
For confirmation, navigate to the “http:localhost:9200” in your browser. After that, provide the elastic user login credentials that were saved in Notepad in step 6 and hit the “Sign in” button:
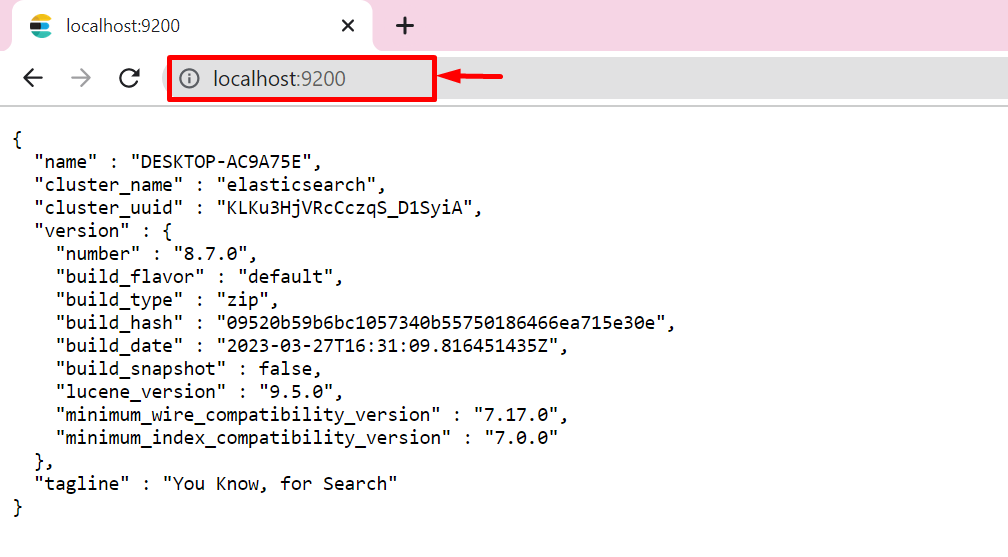
Here, you can see we have successfully started and logged in to elasticsearch:
That’s all about installing Elasticsearch with .zip on Windows.
Conclusion
To install Elasticsearch with a “.zip” setup on Windows, first, download the Zip setup from the official website and extract it. After that, open the “bin” directory of the elasticsearch and execute the “elasticsearch.bat” file in Command Prompt. This will provide the user’s credentials and Kibana configuration token. Next, open the browser and navigate to localhost port “9200” and verify if elasticsearch is running or not. This blog has illustrated the method to install and set up Elasticsearch with “.zip” on Windows.