The popularity of Java in the software industry has always made it a good choice for developers. To develop and execute the java-based program we can use Eclipse which is the most popular IDE (Integrated Development Environment) among software developers. Other than Java, it supports many other programming languages such as C#, C++, Perl, and PHP. It comes with a variety of plugins and extensions to enhance the usefulness of your programming experience, as well as all of the essential tools for writing and testing software.
There are two main methods to install Eclipse that are as follows. This article will provide you with extensive details of how you can install this application on Ubuntu: Installation using the terminal, Installation using the GUI.
How to install Eclipse using terminal
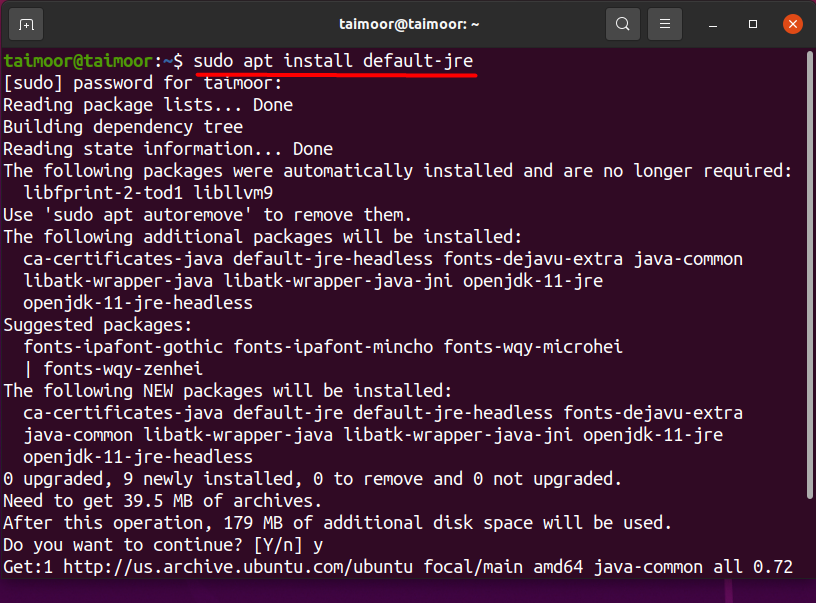
Before the installation of Eclipse IDE, you first need to install java in the runtime environment (JRE). The reason is that it is based on a Java application, and you can’t run it without installing JRE. You can install JRE by typing.

After installing the JRE the next step is to install the snap package manager if it is not available on your system by default and you can do that by typing the following command in the terminal.
After verifying and installing the snap package manager, you are ready to install the Eclipse ide.
How to install Eclipse using the GUI
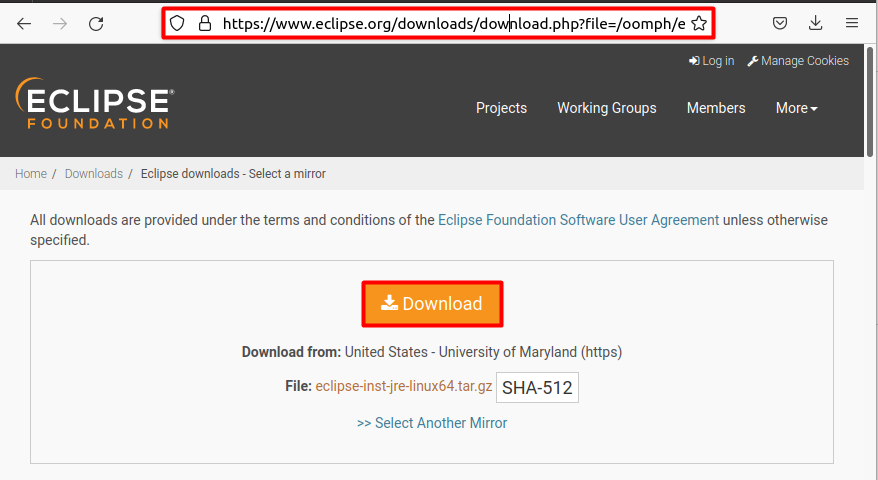
The second method that you can use to install the Eclipse ide is by using the graphical user interface (GUI). For this, you need to visit its official website and download the setup that will be downloaded in the .tar format.
There are two main ways to extract the .tar file that are as follows:
- Extraction using the terminal
- Extraction using the GUI
Extraction using the terminal: Extracting the file using a terminal will place the extracted content in the home directory, for that you need to type the following command in the terminal.
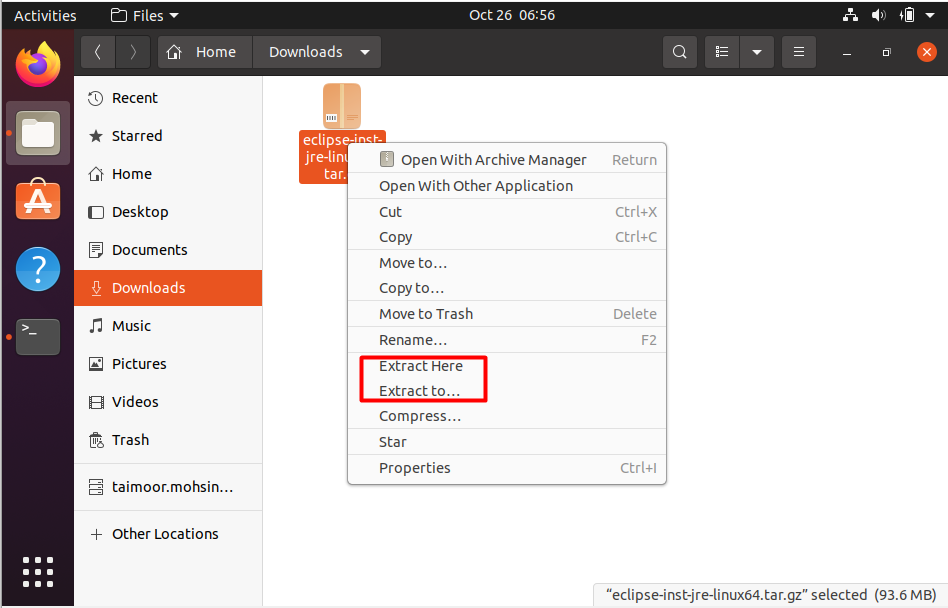
Extraction using the GUI: If you want to extract using the GUI then you need to right-click on the file and select the extract option from there as displayed below.
This will extract the .tar file and you can see its content as well. There is a specific file with the name of “eclipse-inst” that you need to execute for the installation. Just like the extraction process, you can also install the application in two main ways which are as follows, using the GUI and the terminal.
Installation using the GUI: In this method you need to execute the “eclipse-inst” that you can find in the extracted folder as shown below that will initiate its setup.
Installation using the terminal: In this method, you first need to access the folder where the extracted files are available and you can do that by typing.
After that, you need to execute the “eclipse-inst” file by typing the below-mentioned command in the terminal that will initiate its setup.
This will open multiple options for the installation process and you can choose any of them as per your requirements. In our case, we have selected the first option which is “Eclipse for IDE Java Developers” and after its installation, you can open it either by typing eclipse in the terminal or clicking on the Applications tab and looking for the Eclipse application on the search bar as displayed below.
After opening this application, you will see its home screen with multiple options and features and you can use them accordingly.
How to uninstall Eclipse IDE in Ubuntu
If you want to uninstall this application then you can do that by clicking on the Ubuntu software application tab and then looking for the eclipse application in the installed tab as shown below. Select this application and then click on the remove button to uninstall this application.
This method is for apps that are installed using Ubuntu software center.
There is another method to uninstall the eclipse application by using the snap manager by typing the following command in the terminal.
The above method is for software installed using snap manager.
Conclusion
Eclipse IDE is a great tool to build programs based on the Java programming language. It comes with a variety of plugins and extensions to enhance the usefulness of your programming experience, as well as all of the essential tools for writing and testing software. In this article, we have discussed two different methods on how you can install the Eclipse IDE on Ubuntu. The first one is by using a snap manager and the second one is by using a GUI. You can follow either of them and can install this application.


