What is Debian?
The Debian operating system is based on the GNU/Linux operating system. It was one of the first Linux distributions and is still widely used today. It is a foundation for many other distributions, including Ubuntu, Mint, Kali, etc. For application installation, Debian uses the apt-get or aptitude package managers. It is frequently employed as a server or workstation operating system.
Features of Debian 11 (Code Name: Bullseye)
- Newer desktop versions like Gnome 3.38, KDE Plasma 5.20
- Newer packages
- Kernel LTS 5.10 version of Kernel
- ExFAT support
Steps to Download And Install Debian 11 (Bullseye) on Virtual Box
Step 1
Download ISO file from the official website here
What is an ISO file?
ISO is a commonly used extension for an image of a disc formatted using an ISO 9660 file system standard, often known as CDFS, and intended for compact discs. A disc image is simply an electronic representation of the data as it would appear on a disc (in this case, a CD-ROM or DVD). The disc image might contain everything that would normally be stored on a drive, such as an operating system, data, software, media files, and so on.
While ISOs are not required to install any operating system, they may be a simple alternative for installing an operating system into a new virtual machine if you are utilizing a virtual machine.
Step 2
Create bootable media once the ISO file is downloaded. Bootable media can be created using any of the following:
Rufus, Ventoy, WoeUSB
Step 3
Now, create Virtual Machines to run our Operating System. For this, we will be using Virtual Box in this tutorial. However, you can also go for VMWare.
Next, create a new Virtual Machine in the Virtual box and name it with your choice.
Step 4
We will assign memory and hard disk to the VM since it is virtually an operating system and will need some running resources. This step is recommended to have high RAM and Hard Disk in your machine while installing Virtual Operating Systems as we will be sharing the memory with the Virtual Machine Instance.
Create a “Virtual Hard Disk” for our use case and select RAM according to your machine.
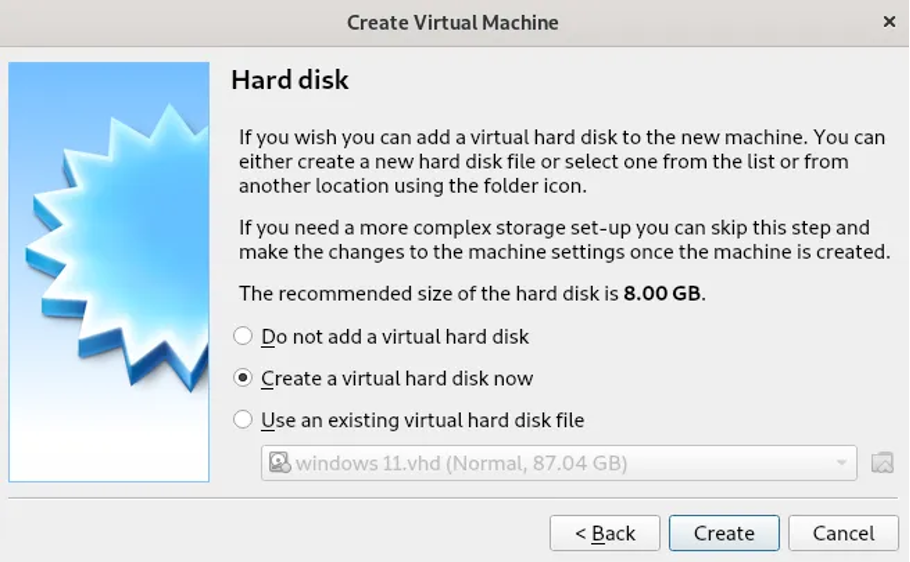
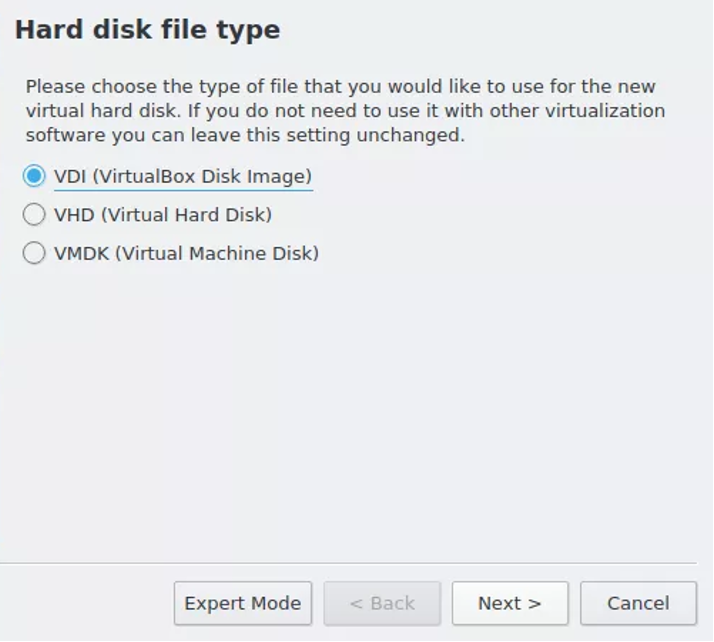
Choose the storage type as “Dynamically Allocated” in the next step.
Step 5
We have now created a VM instance in VirtualBox. Let’s load the ISO file.
Go to Storage -> Click on “Empty” below “Controller: IDE” -> Go to the ISO file location and mount it.
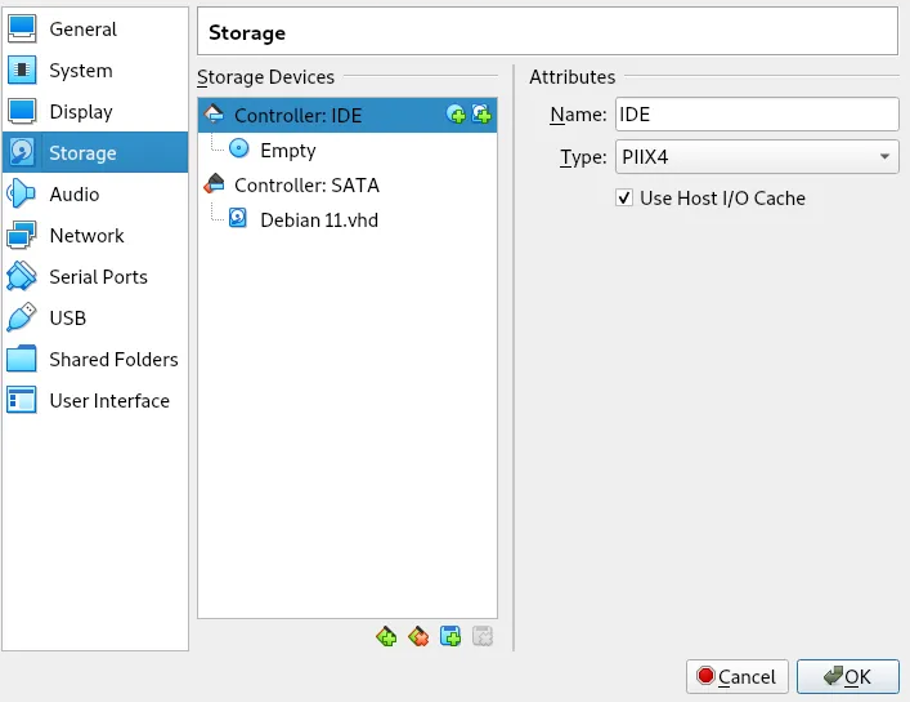
You have now created the VM for your new Operating System.
Next, we will deal with the core installation of the Debian Operating System. The below guide would remain the same irrespective of whether you install it in VMWare, VirtualBox, or physical machine.
Step 6
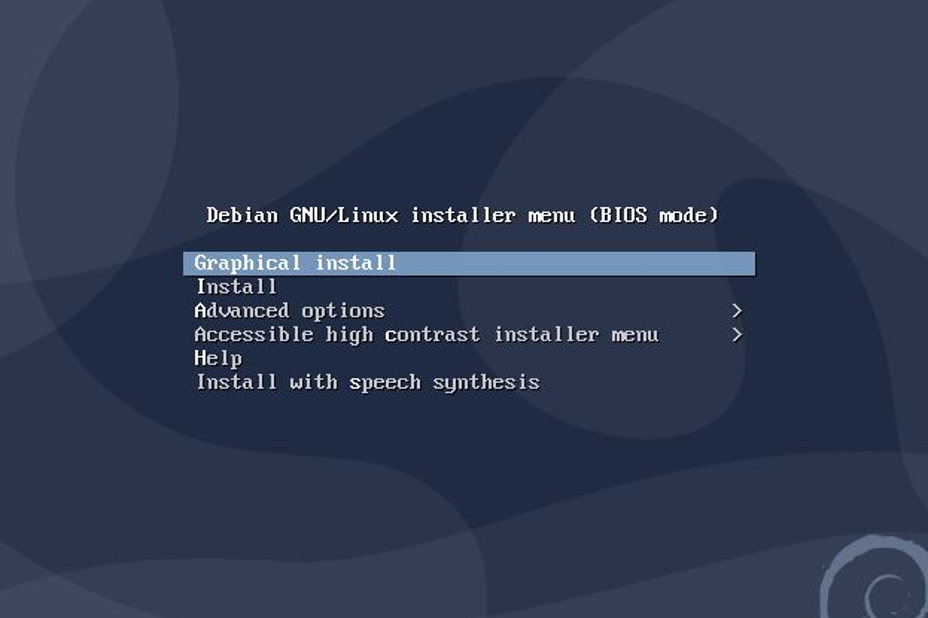
Start the virtual instance you created. It is analogous to starting a physical machine using a bootable disk or USB while dual booting your system. You should see the below screen once you start your instance. Choose the “Graphical Install” option.
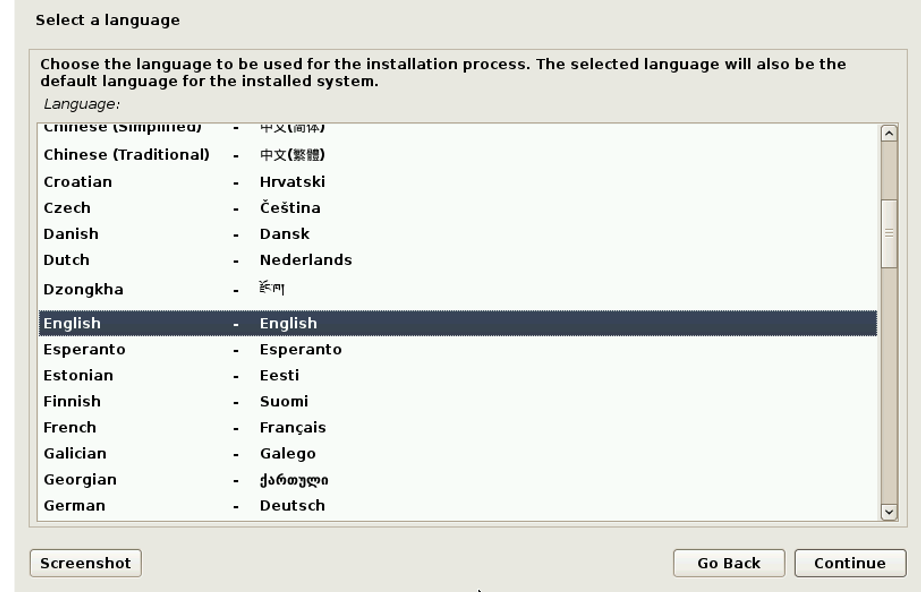
Select your preferred options in the “Location”, “Timezone”, “Language”, “KeyBoard Configuration” in forthcoming sections and install these components.
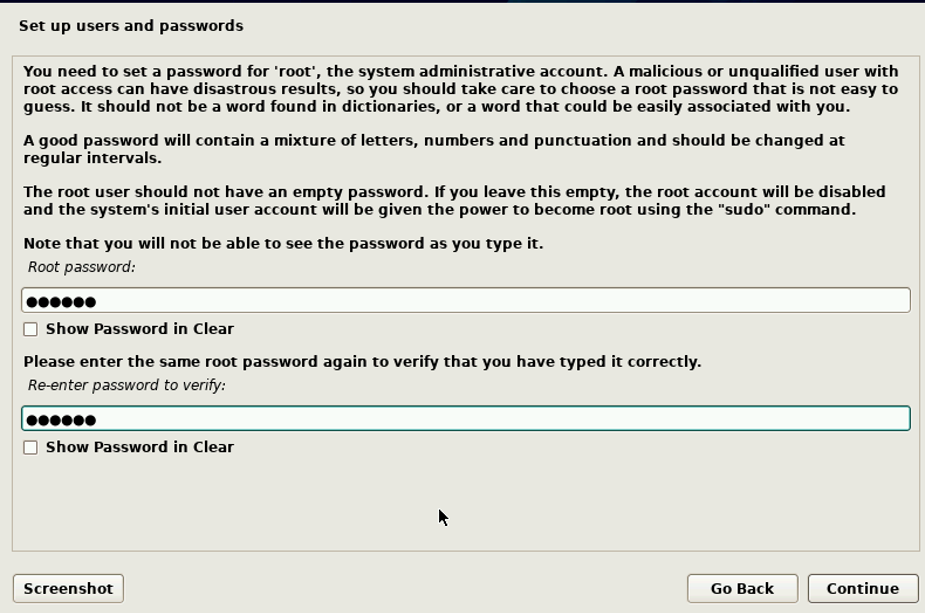
Once the components are installed, you will be asked to enter the hostname of the root user and password as shown:
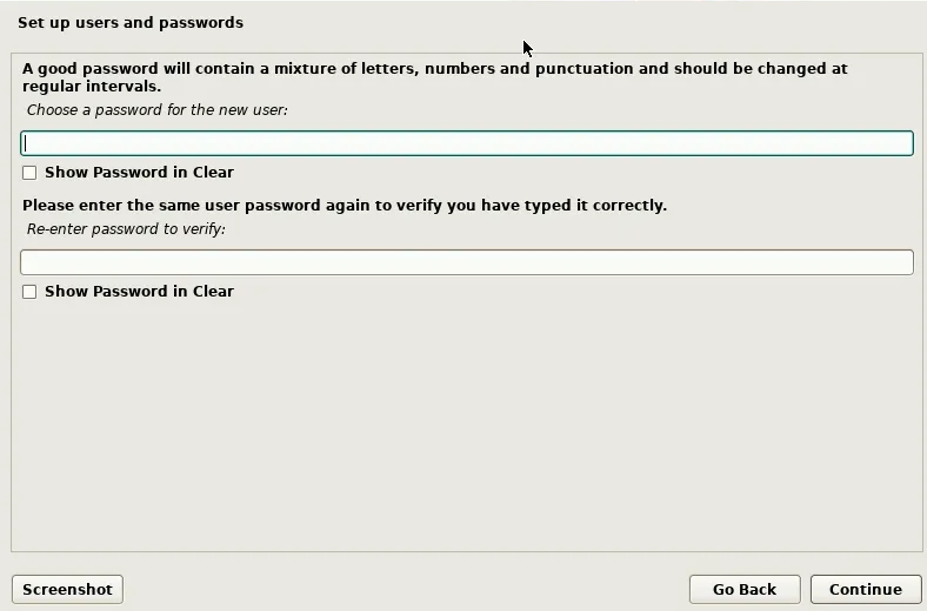
You can also be asked to create a new user after the above steps.
After creating the user, you will then be choosing how you want your disk partition.
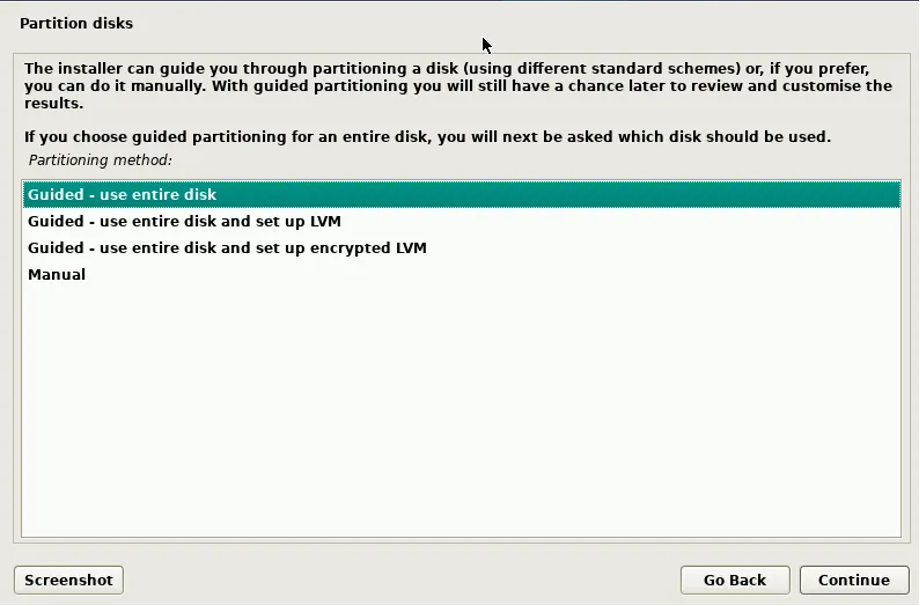
Select the disk to be partitioned according to your system.
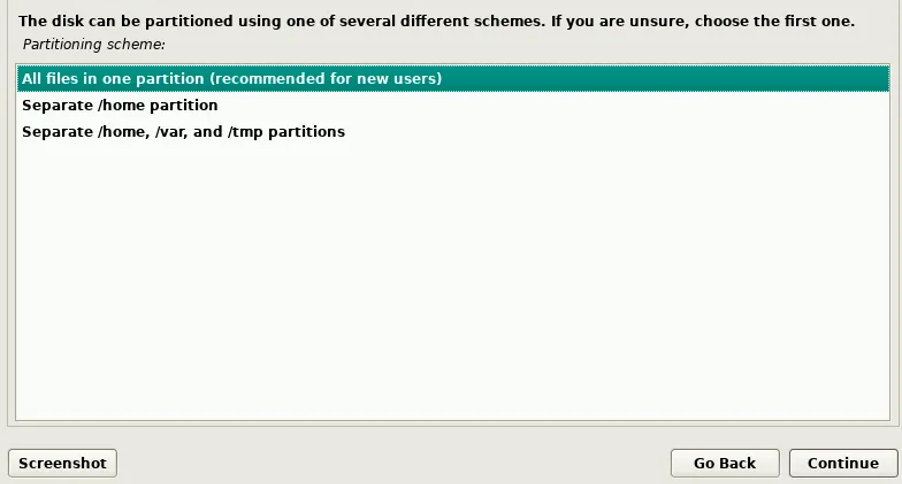
Finally, choose how to store your files: in one directory or multiple directories.
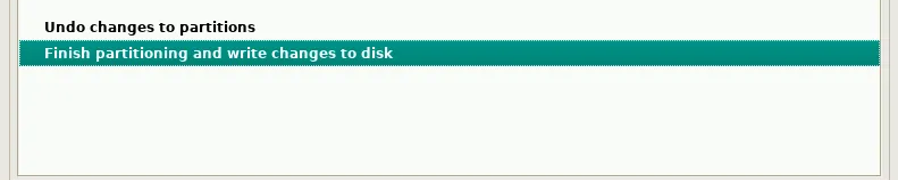
Finally, finish partitioning and write changes to your disk by approving all the conditions.
The base system installation then begins.
You will also be asked to include additional media. Select “No” if you don’t have any additional media.

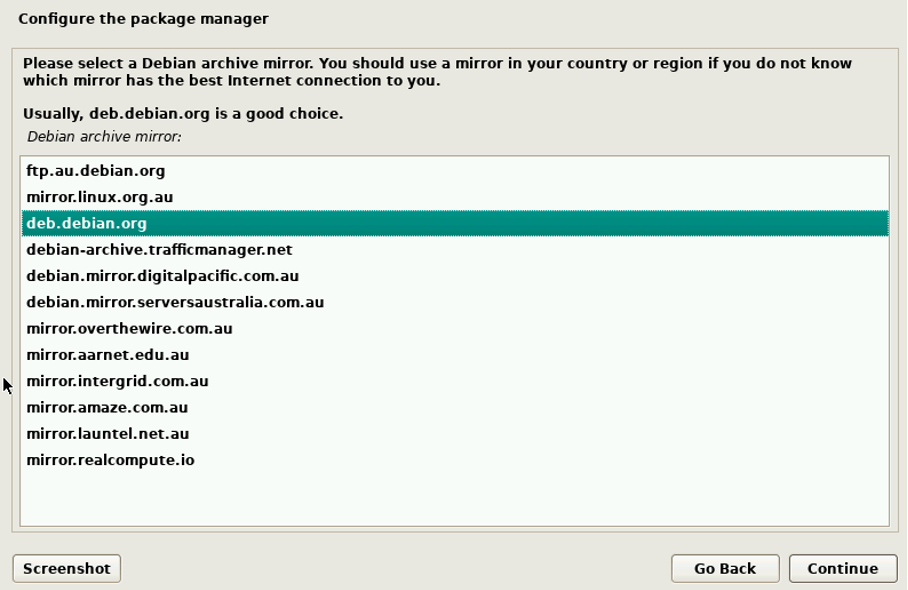
Now you configure your package manager by selecting the nearest location to you since the resource will be downloaded from the selected location.
Select Debian archive mirror as shown below:
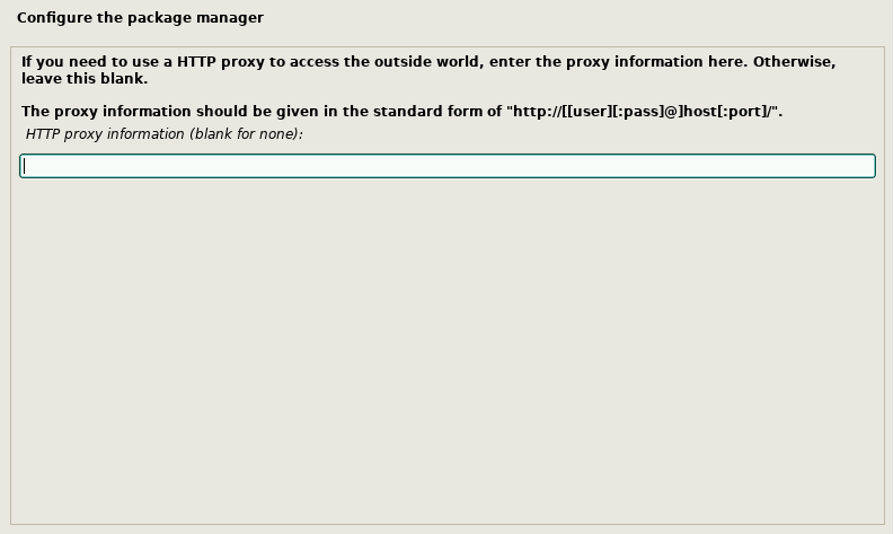
Add your HTTP proxy server to access the archive if needed (this step is optional)
The next option will be to participate in a survey. You can select “No” here if you wish to do this later on.
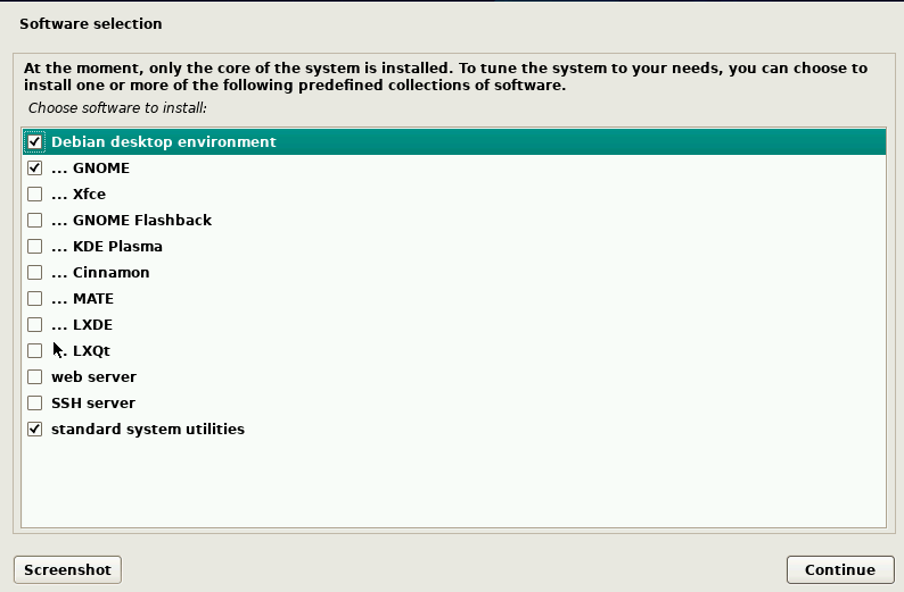
Here’s the time to choose Desktop Environment. We have chosen Gnome here as it is the most common one.
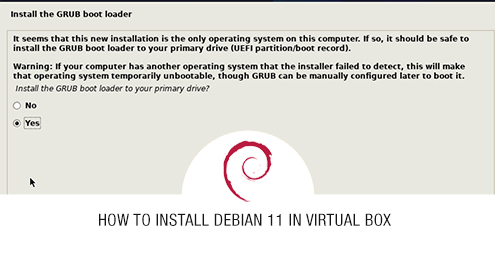
Select “Yes” to install Grub
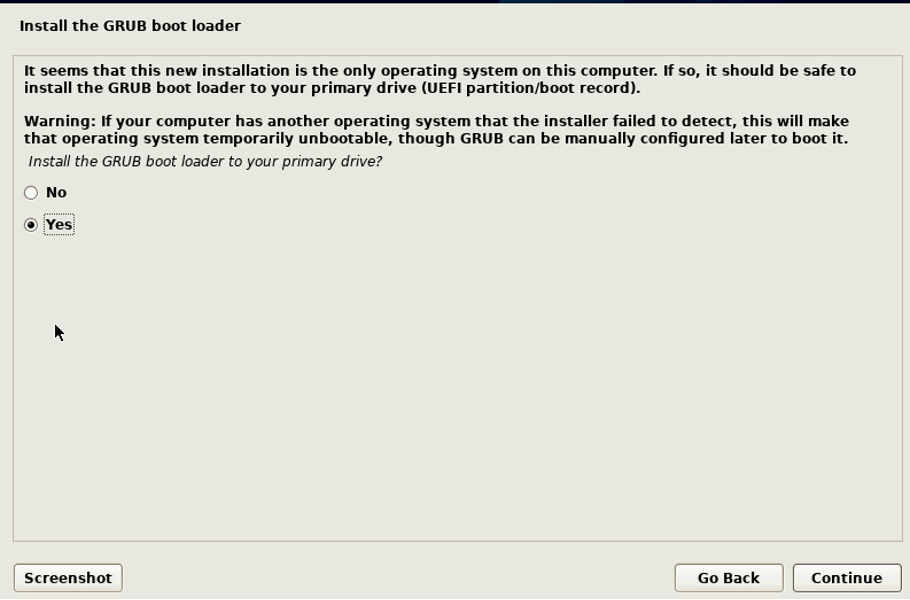
Choose a device in the next step for boot loader installation. The installation will now start. Once the installation is completed, you will be asked to boot the system. Once done, you will see the new Operating System installed in your VirtualBox.
Conclusion
This article showed how to install Debian 11 in VirtualBox, which you can access as a virtual machine. We have also covered the core installation and configuration steps for Debian 11.