DaVinci Resolve is a professional video editing and color-grading software that has gained popularity in recent years among filmmakers, video editors, and content creators. Developed by Blackmagic Design, DaVinci Resolve offers a range of advanced features for editing, color grading, audio post-production, and visual effects. Whether you’re a seasoned professional or just starting out, DaVinci Resolve is a powerful tool that can help you take your video production skills to the next level.
In this article, we will take a closer look at the features and benefits of DaVinci Resolve, as well as provide the step-by-step instructions on how to install and use the software on a Linux machine.
Importance
DaVinci Resolve is a useful software tool in the world of video editing and color grading. Here are a few reasons why:
Professional-Grade Features: DaVinci Resolve is a powerful software tool that offers a wide range of professional-grade features for video editing, color grading, audio editing, and visual effects. It is used by professional filmmakers and video editors around the world for its high-quality tools and features.
Cross-Platform Compatibility: DaVinci Resolve is available on multiple platforms including Windows, macOS, and Linux which make it accessible to a wider audience. This cross-platform compatibility makes it easier for the users to work on projects across different devices and platforms.
Collaboration Tools: DaVinci Resolve offers collaboration tools that make it easy for multiple users to work on the same project simultaneously. This feature is essential for video production companies and teams who need to collaborate on complex projects.
Speed and Performance: DaVinci Resolve is known for its speed and performance, even when working with high-resolution video files. It utilizes the power of the GPU to speed up the processing which results in faster rendering times and smoother playback.
Cost-Effective: DaVinci Resolve offers a free version with a wide range of features that can be used for most basic video editing tasks. This makes it an attractive option for users who are just starting out and may not have the budget for expensive software tools.
Installation Guide
Before we begin, let’s take a look at the system requirements for DaVinci Resolve on Linux.
System Requirements:
- A 64-bit operating system
- CentOS 7.3 or later, Red Hat Enterprise Linux 7.3 or later, Ubuntu 18.04 LTS or later
- 16 GB of system memory
- Blackmagic Design Desktop Video version 10.4.1 or later
- NVIDIA/AMD/Intel GPU running CUDA 11.2 or later with at least 4GB of graphics memory
Step 1: Download the DaVinci Resolve Installer
The first step is to download the DaVinci Resolve installer from the official website. Go to the Blackmagic Design website and navigate to the DaVinci Resolve page. From there, click on the “Download Now” button and select the Linux version of the software.
Step 2: Extract the Installer
Once the download is complete, navigate to the directory where the installer was downloaded and extract it using the following command in the terminal:
Note: Replace the “DaVinci_Resolve_17.0b9_Linux.tar.gz” with the actual filename of the installer.
Step 3: Install the Dependencies
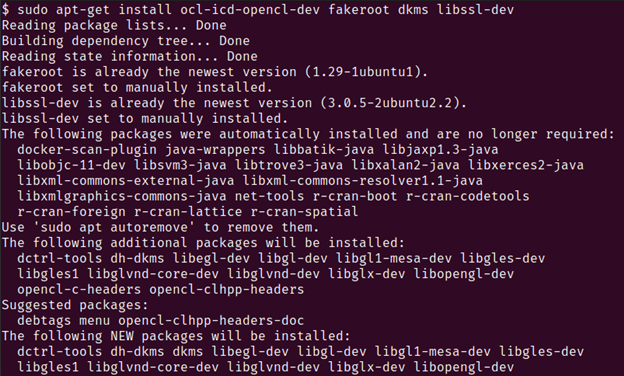
Before we can install the DaVinci Resolve, we need to make sure that all the necessary dependencies are installed on our system. To do this, run the following command in the terminal:
You should see an output that is similar to the one in the following:
This installs the OpenCL development libraries, Fakeroot, DKMS, and OpenSSL development libraries.
Step 4: Install the NVIDIA Driver
If you have an NVIDIA GPU, you need to install the NVIDIA driver with at least version 440. For Ubuntu 18.04, you can use the following command:
Step 5: Install the DaVinci Resolve
To install the DaVinci Resolve, navigate to the directory where the installer was extracted and run the following command in the terminal:
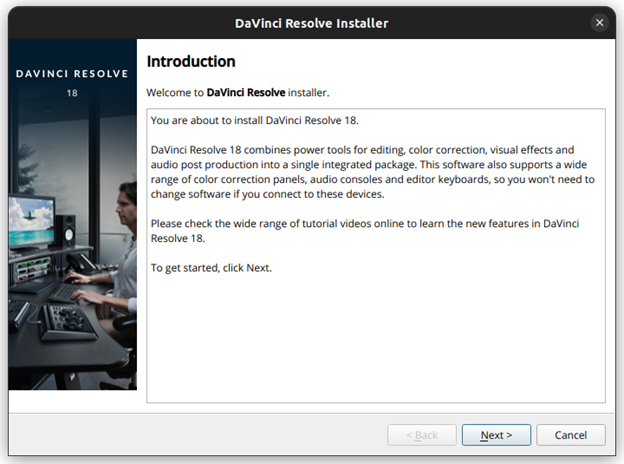
You will see that the instance of the Davinci Installer opens up which looks like this:
Follow the on-screen instructions to complete the installation.
Step 6: Configure the DaVinci Resolve
Once the installation is complete, launch the DaVinci Resolve from the “Applications” menu or by running the following command in the terminal:
When you launch the DaVinci Resolve for the first time, you will be prompted to configure the software. Follow the on-screen instructions to set up the project and system preferences.
That’s it! You have successfully installed the DaVinci Resolve on Linux. You can now start using the software to edit and color grade your videos. Keep in mind that DaVinci Resolve is a professional-grade software and may have a steep learning curve. To better understand the functionality, be sure to check out the official documentation and tutorials to get the most out of the software. Additionally, it’s worth noting that DaVinci Resolve requires a powerful system with a dedicated graphics card to run smoothly. If you’re experiencing performance issues, consider upgrading your hardware or adjusting the settings accordingly in DaVinci Resolve to optimize the performance.
Conclusion
DaVinci Resolve is a powerful video editing and color-grading software that offers a wide range of advanced features for professionals and beginners alike. Its cross-platform compatibility, collaboration tools, speed and performance, and cost-effectiveness make it an attractive option for video production companies, filmmakers, and content creators. With its advanced features for color grading and audio post-production, DaVinci Resolve stands out as a top choice for those looking to create high-quality videos that stand out from the crowd. By following the step-by-step instructions in this guide, you can get started with DaVinci Resolve and unlock the full potential of this powerful software. Whether you’re creating a content for social media, YouTube, or the big screen, DaVinci Resolve is a valuable tool to take your video production skills to the next level.


