We will cover the complete installation of Boost C++ on Ubuntu 22.04.
Two Ways of Installing the Boost C++ on Ubuntu 22.04
You have two options to install the Boost C++ library on Ubuntu 22.04. First, you can install it via the Ubuntu apt repository, but that won’t give you the latest release. Alternatively, you can install it from its source code which gives you an access to the latest release.
1. Install the Boost C++ via APT
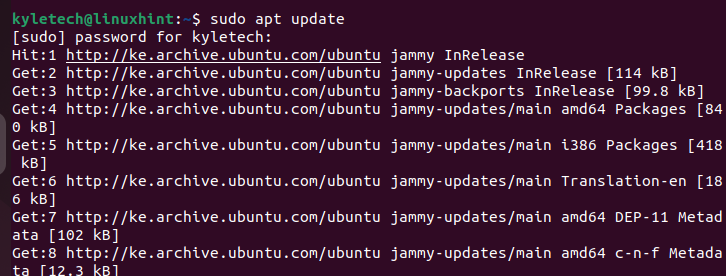
Installing it via the apt repository is the most convenient approach for a quick installation of Boost C++ on your Ubuntu 22.04. Start by updating the repository.
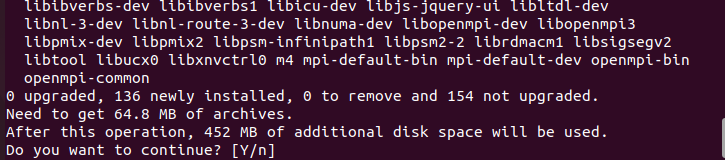
The next step is installing the libboost-all-dev package which contains the Boost C++ development libraries.
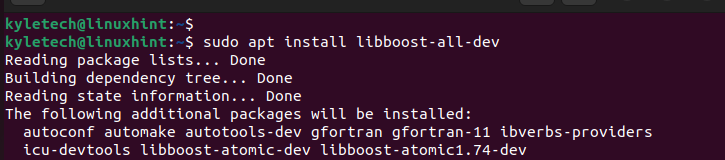
The Boost C++ packages are large in size. Press y to confirm the installation. Ensure an adequate space on your system to accommodate the installation.
Once the package completes the installation, verify that the installation is successful by checking the install Boost C++ version.

The installed version is 1.74, but that’s not the latest release. To get the latest release, use the second installation method which we will discuss later in this article.
When you install the Boost C++ via APT, you can uninstall the installed package and the dependencies with the following command:

2. Install the Boost C++ via Source Code
For someone who are looking to get their hands dirty by installing the latest Boost C++ libraries, you must install them via its source code.
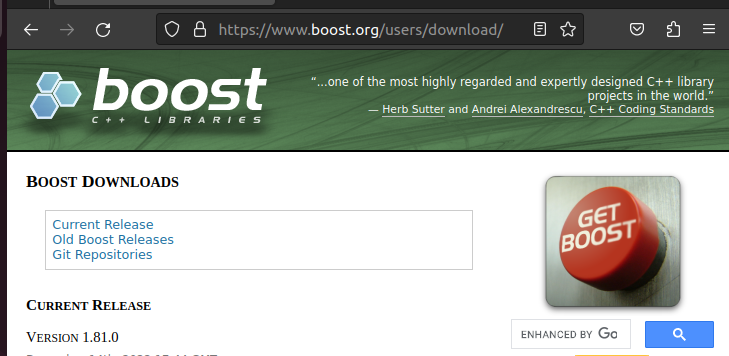
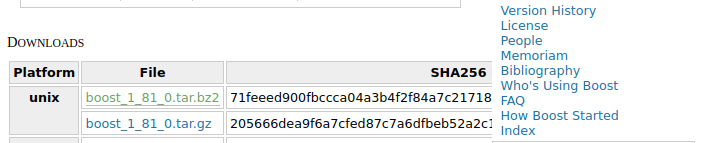
Start by visiting the Boost C++ website and open the “Downloads” section. Locate the option for the “Boost Downloads” and click on the “Current Release”.
A list of available current releases that you can download will appear. Right-click on the “tar.gz” option and copy its link. You can also click on it to start the download.
On your terminal, use wget to download the file via the terminal. Use the link that you copied with the wget command to initiate the download.

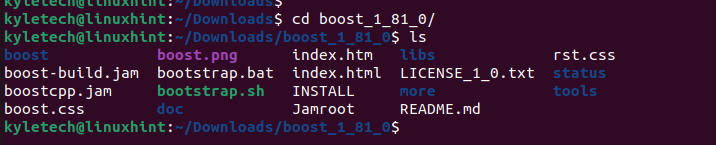
Once the download completes, navigate to the download directory. Here, we move the file to our “Downloads” to verify that we downloaded the tar file which contains the source code.

Extract the archive file with the following command:

Navigate into the extracted “Boots” directory.
We must install the required dependencies to support the installation of the Boost C++. Run the following command and all the dependencies will install:

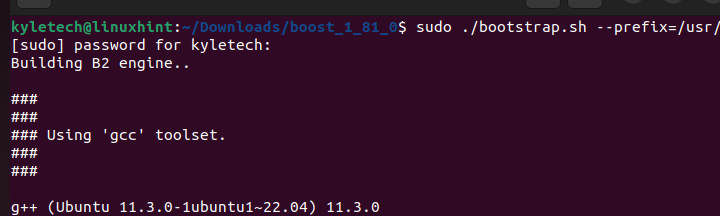
We then need to set up the Boost’s bootstrap. The following command starts the Bootstrap script and builds the B2 engine:
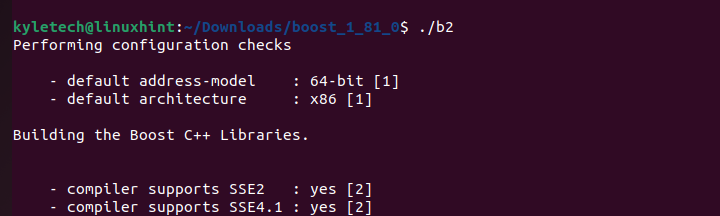
You can now run the generated B2 engine.
Lastly, install the Boost C++ using the B2.

Once the program runs, the installation will complete, and you will have the Boost C++ libraries available on your system. You can then invoke them when writing your C++ projects.
Conclusion
The Boost C++ is a handy library to work with C++ projects. It offers different libraries that you can use. We covered two ways of installing it on your Ubuntu 22.04. You can directly install it via APT or using its source code. Use the method that is convenient for your case.