Amazon Web Services (AWS) provides services on the cloud so the user can get multiple services without managing them on-premise. AWS offers the user to create and manage AWS resources with the help of the AWS Command Line Interface (CLI). This can save a lot of time by not going through multiple steps for each configuration.
This guide will explain the process of installing AWS CLI on CentOS.
How to Install AWS CLI on CentOS?
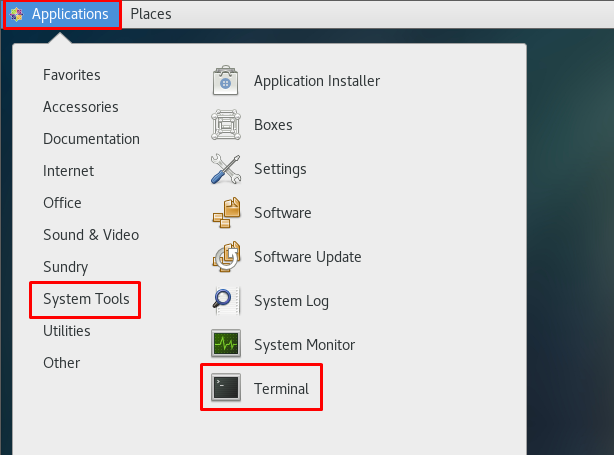
To install AWS CLI on CentOS, simply login to the CentOS from the system and click on the “Terminal” from the “System Tools” section:
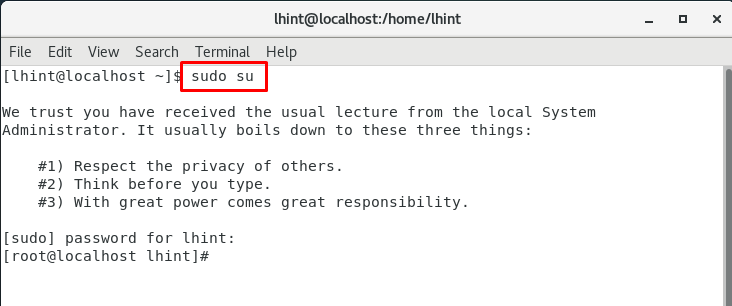
On the Terminal, type the following command to get the “Root” privileges:
Running the above command will prompt to enter the password for the administration’s access:
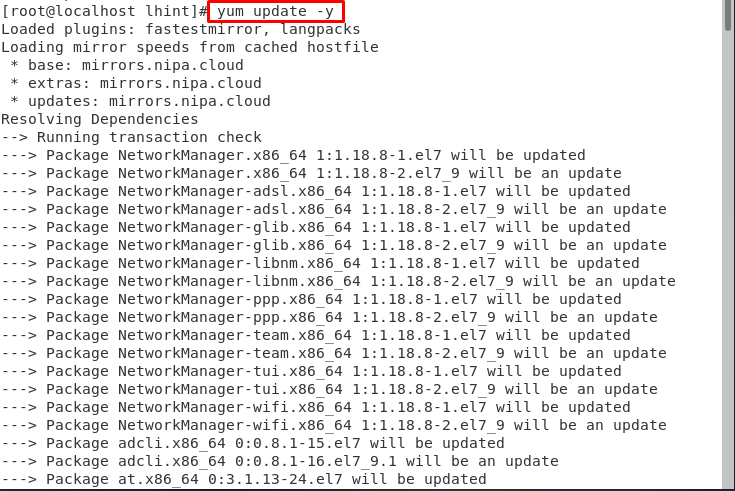
Type the following command to update the packages:
Running the above command will display the following output:
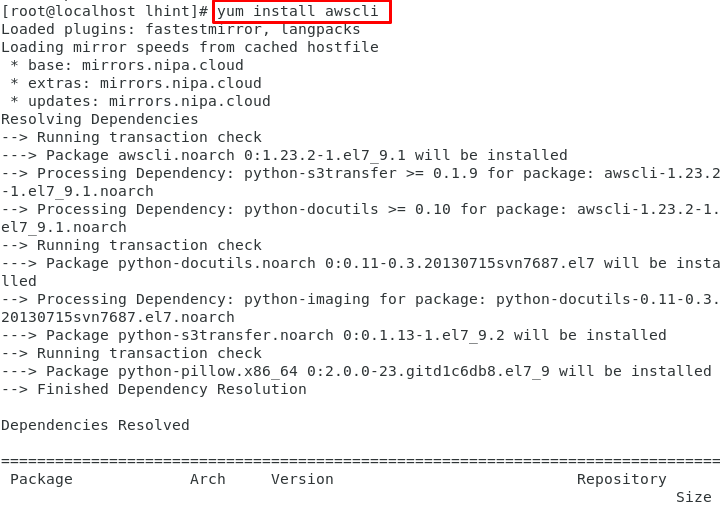
Once yum is updated, simply type the following command to install the AWS CLI:
The AWS CLI installation will take some time:
After that, verify if the AWS CLI is installed by using the following command:
Running the above command will display the installed version of AWS CLI:
You have successfully installed AWS CLI on CentOS and the next step is to configure it. To learn how to configure the AWS CLI, simply click here.
Conclusion
To install Amazon Web Service (AWS) Command Line Interface (CLI) on CentOS, start by logging into CentOS from the local system. After that, update the “yum” packages to the latest versions and then install AWS CLI on CentOS using the “yum install awscli” command. Once the AWS CLI is installed, verify the installation with the help of the “aws –version” command. This guide was all about the AWS CLI installation on CentOS.


