
httpd is an apache web server in Red Hat-based distros, while it is called apache on Debian distros. It depends on the OS you use. For example, in RHEL 6.2, it is called httpd, and in Ubuntu, it is called apache2.
In Fedora Linux, the httpd package provides the Apache webserver application.
What will we cover
In this tutorial, we will see how to install Apache webserver from the source file as well as from the Fedora repository.
It is recommended that you first read this post and then apply it to your system. This will make sure that you correctly configure the apache web server.
Prerequisites
- Fedora Operating System installed
- User account with root access
- Internet connectivity to download various files.
Method 1. Installing from source code
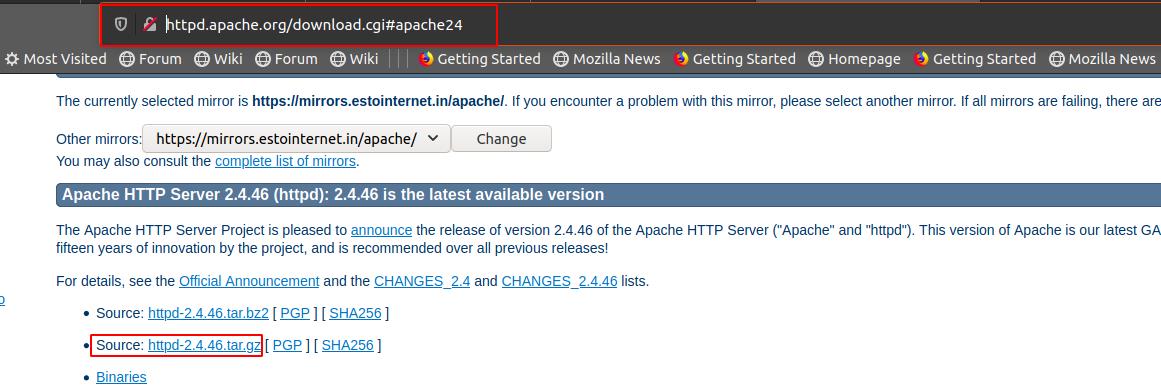
Step 1. Open a web browser and go to the apache download page. At this article’s writing, the latest and stable version available for Apache HTTP Server (httpd) is 2.4.46. Download the file as shown below:
Another way to get the file is using the wget command. Open the terminal and run the following command:
This is shown below:

The benefit of using the source code is that you always get the latest available version of the software.
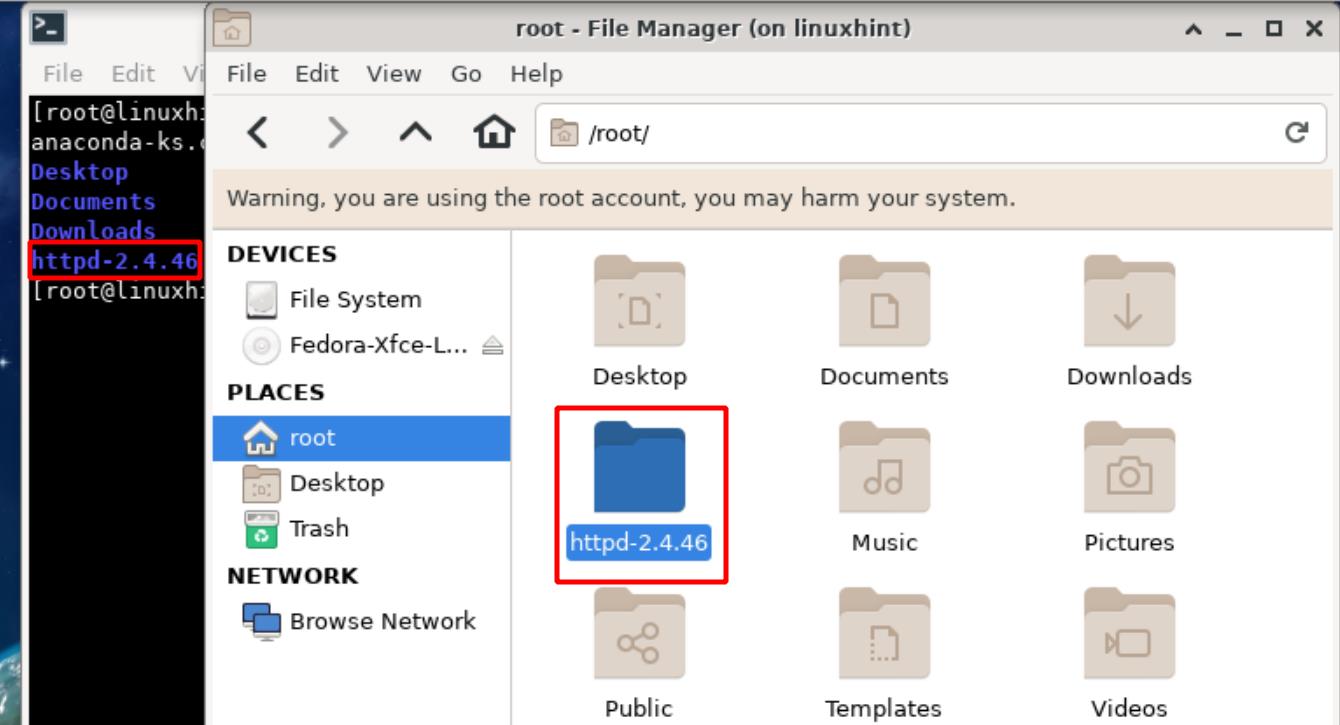
Step 2. Once we get the source file, we can start with the commands’ gzip’ and ‘tar’ to extract the file. The exact name of the file depends on the available version you have downloaded. In our case, it is httpd-2.4.46.tar.gz.


After running the above command, you can see the extracted folder as here:
Step 3. Now go to the extracted directory with the command:
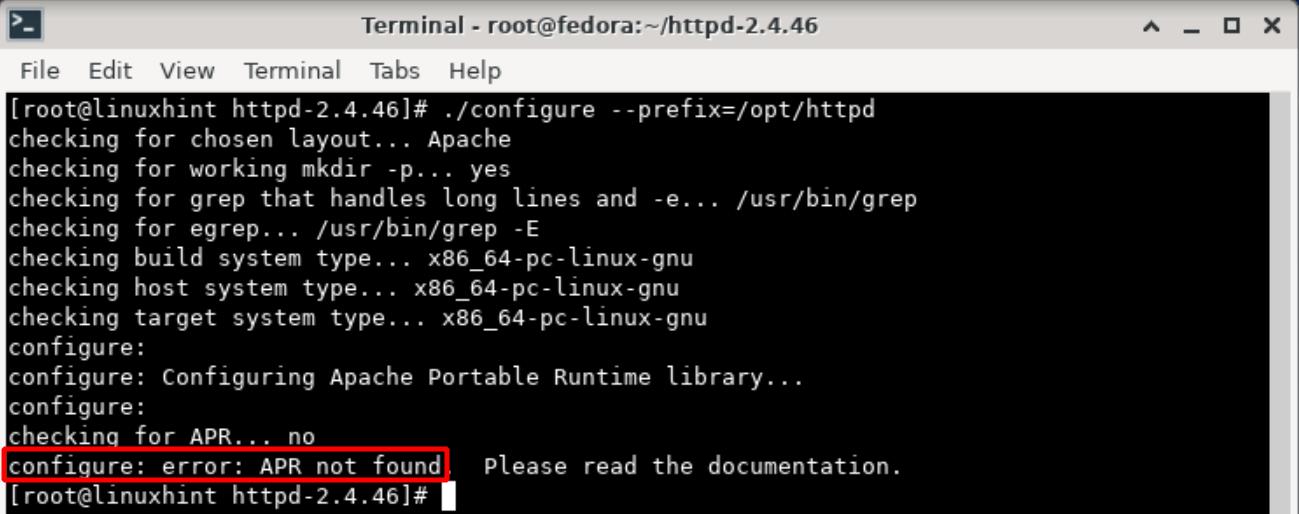
Step 4. We now need to run the configure script to configure the apache. This is available inside the root directory of apache, i.e., the current directory. But before running this script, make sure where you want to install apache.
You can install the apache server in the default location. For this, you have to run the script simply:
If you want to install apache in a directory other than the default, use the following syntax:
Inside the ‘–prefix=’ enter the path of installation. In our case, we will install apache inside the /opt/httpd directory. For this, follow the instruction below:
1. Create a directory inside /opt as shown below:
2. Run the script as shown below:
The configure script will take some time to run and verify the features on your system. It will also prepare Makefiles to compile the apache web server.
Note for several errors when running the ./configure script:
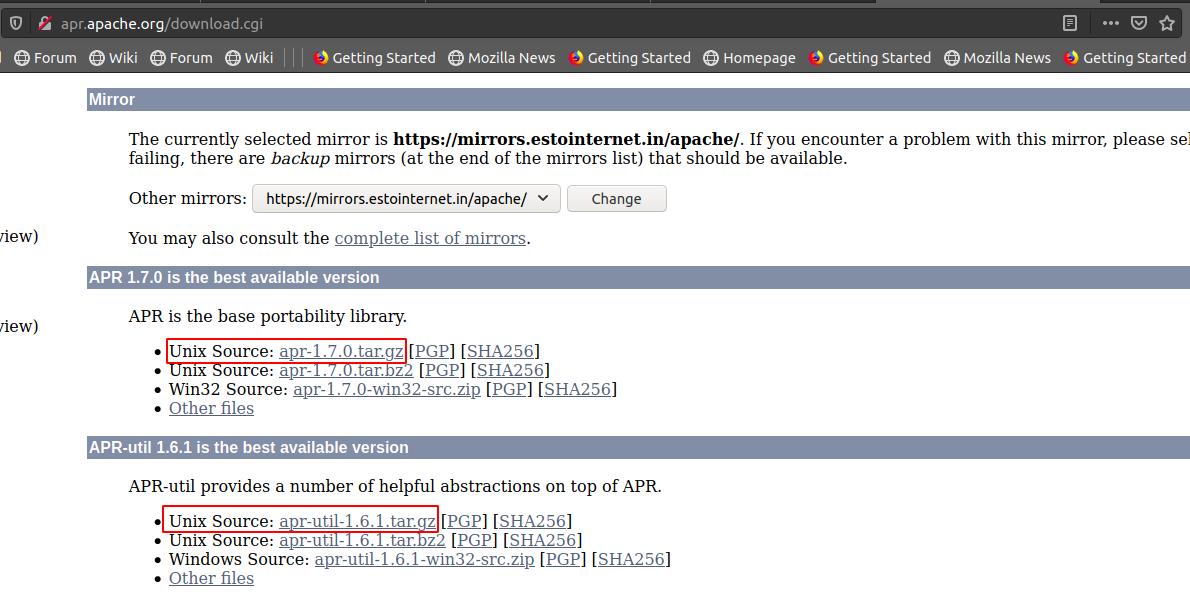
1. You may get the following error “configure: error: APR not found”:
For fixing this error, you need to download the apr-*.tar.gz from here.
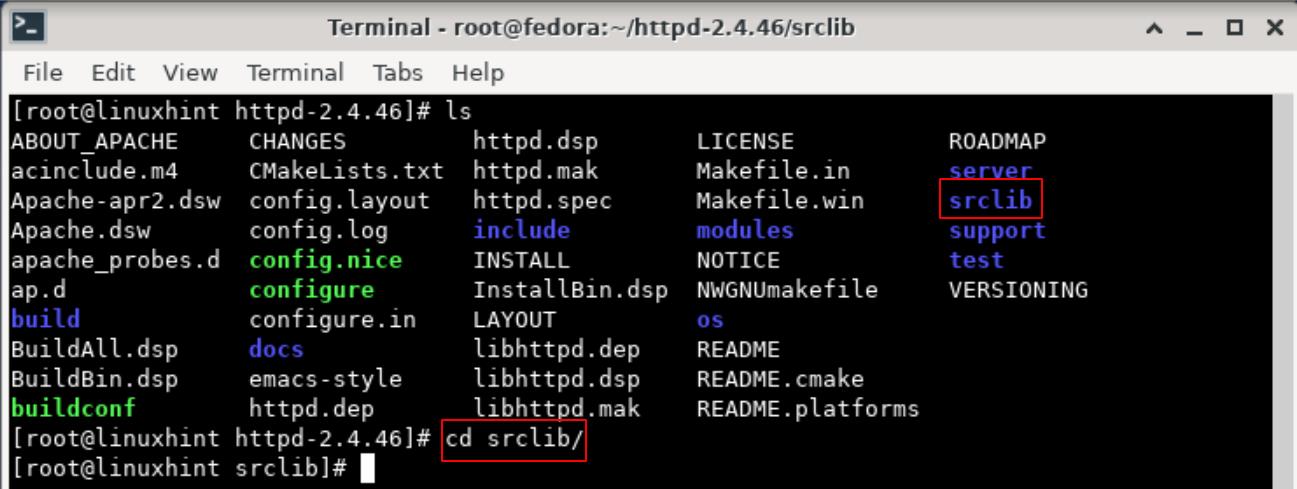
Now extract this directory inside the ‘srclib’ directory, which is available in the apache httpd distribution folder. To extract the file, use the command:
# tar xvf apr-1.7.0.tar.gz
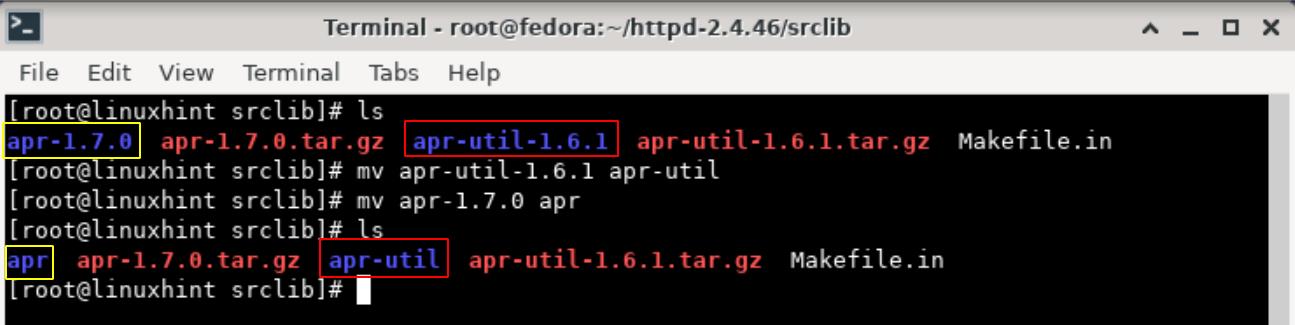
Now rename these files by removing the version number as here:
# mv apr-1.7.0 apr
2. If the error is “configure: error: pcre-config for libpcre not found.” Then you just need to install the PCRE devel package as shown below:
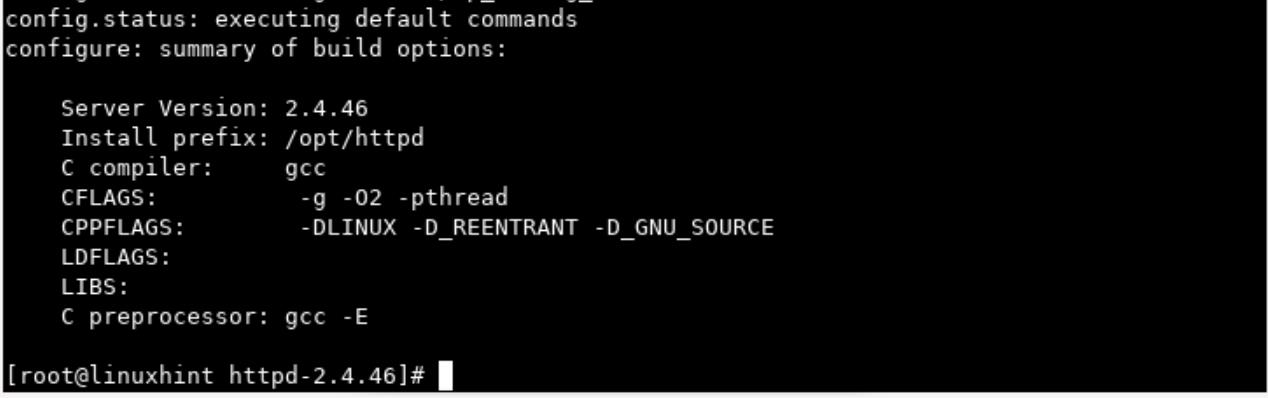
Now continue to run the configure script as before. In last it would print the summary as shown here:
Step 5. To build the several components that comprise the Apache web server, use the following command:
This may take significant time to run this command as it will compile the base configuration. It largely depends on system hardware and also on the number of modules enabled.
If you get an error like “fatal error: expat.h: No such file or directory”, you will need to download expat from here. Now extract the file inside some directory. We are using /opt/httpd for extraction.
Now go to the extracted directory and run the following command one by one to configure expat:
# ./configure
# make
# make install
Now again run the configure script by specifying the path of expat installation:
Step 5. Once the make command finishes, we are ready to install the packages. Run the command:
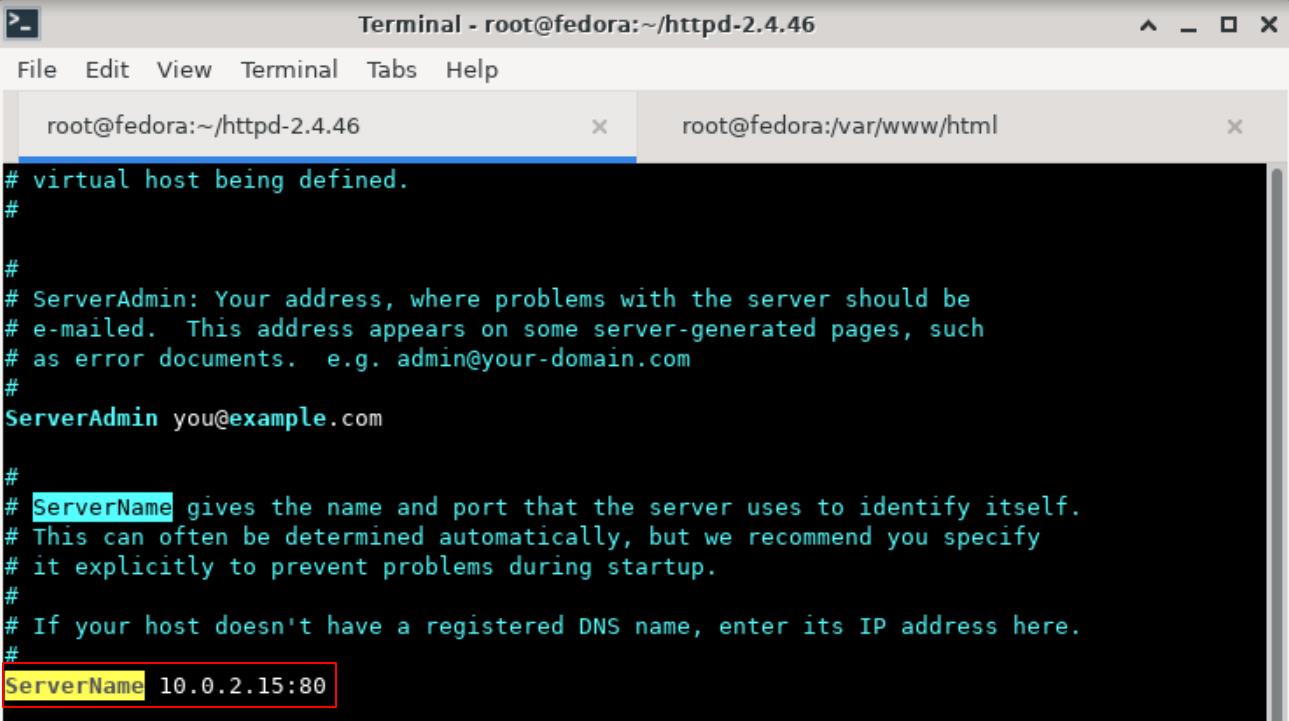
Step 6. To customize your apache server, use the httpd.conf file located inside:
Where PREFIX is the path of apache installation. In our case it is /opt/httpd/, so we use:
Inside this file, change the ServerName directive to the IP address of your system.
Step 7. Now apache is ready to use; we only need to start the service from the directory where it is installed. For e.g., if you have installed the apache inside /opt/httpd, then run the command:
Method 2. Installing from Fedora Repository
Installing Apache httpd from the Fedora repository is quite easy; just follow the below steps:
Step 1. Open a terminal (ctrl+alt+f2) with root user or at least with superuser privileges.
Step 2. Now use the following command to install apache:
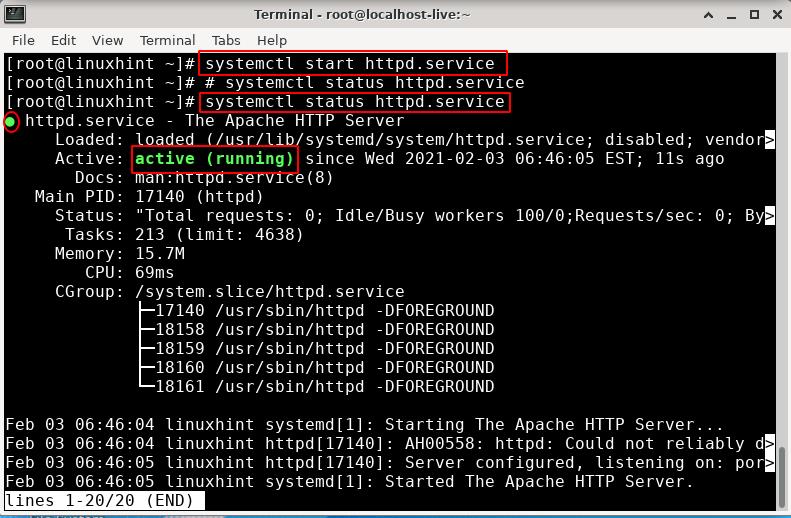
Step 3. Start and check the status of the apache service with the command:
# systemctl status httpd.service
It should show a running status
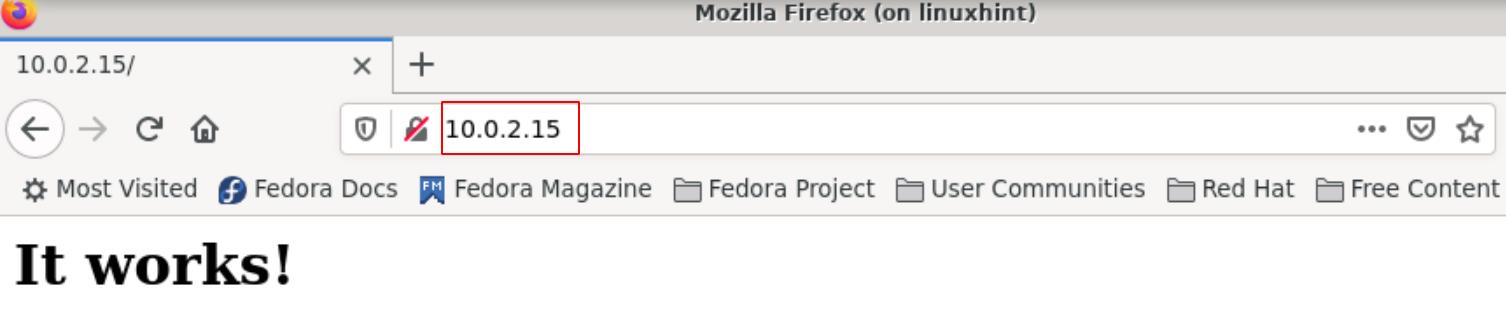
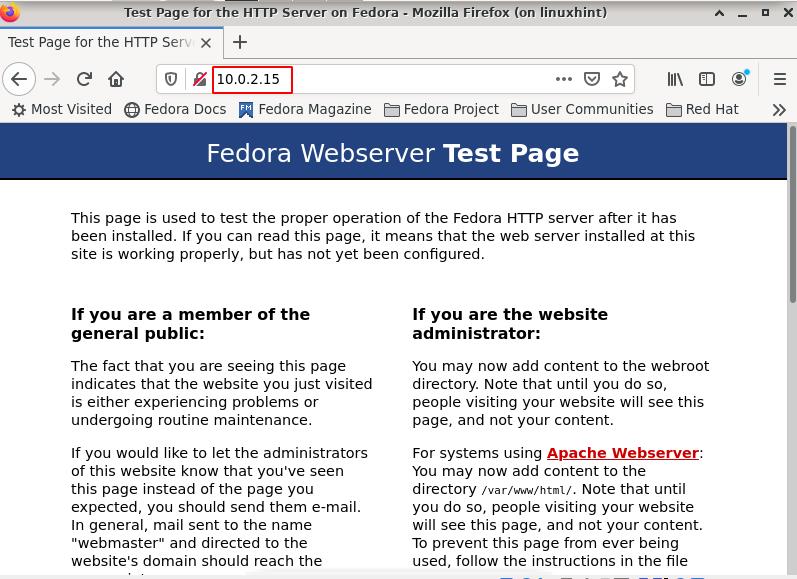
Step 4. Open a web browser and enter your system IP. It would show the following page:
Conclusion
Congratulations, You have successfully configured the Apache webserver. In this guide, we have learned how to install apache from the source file and Fedora repository.