
Main Features of EasyOCR
EasyOCR can detect text in over 80 languages and scripts. It includes pre-trained models for these languages but you can use EasyOCR to train your own models from scratch. Besides digital and printed text based content found in images, EasyOCR can also detect and extract handwritten text. Other main features of EasyOCR include ability to batch process multiple images at once, ability to limit and block certain characters from a language, an option to convert extracted lines into paragraphs, ability to resize and magnify images to improve detection accuracy, and so on.
Installing EasyOCR in Linux
You can install EasyOCR in Linux using the pip package manager. To install pip package manager in Ubuntu, use the following command:
Pip package manager is available in official repositories of many Linux distributions, so you can install it from the stock package manager. You can also follow official installation instructions available here to install the pip package manager in your Linux system.
After you have successfully installed the pip package manager, run the following command to install EasyOCR in Linux:
Using EasyOCR in Linux
The following image will be used to extract text through various EasyOCR commands explained below:

To extract text from the above image, you will need to run a command in the following format:
The first option “-l” can be used to specify the language of the text content you want to be captured by EasyOCR. You can specify multiple languages using command separated language codes. The “-f” switch is used for specifying the input image file. A list of all languages supported by EasyOCR and their codes can be found here (scroll down to see them).
After running the above command, you should see following output in the terminal:
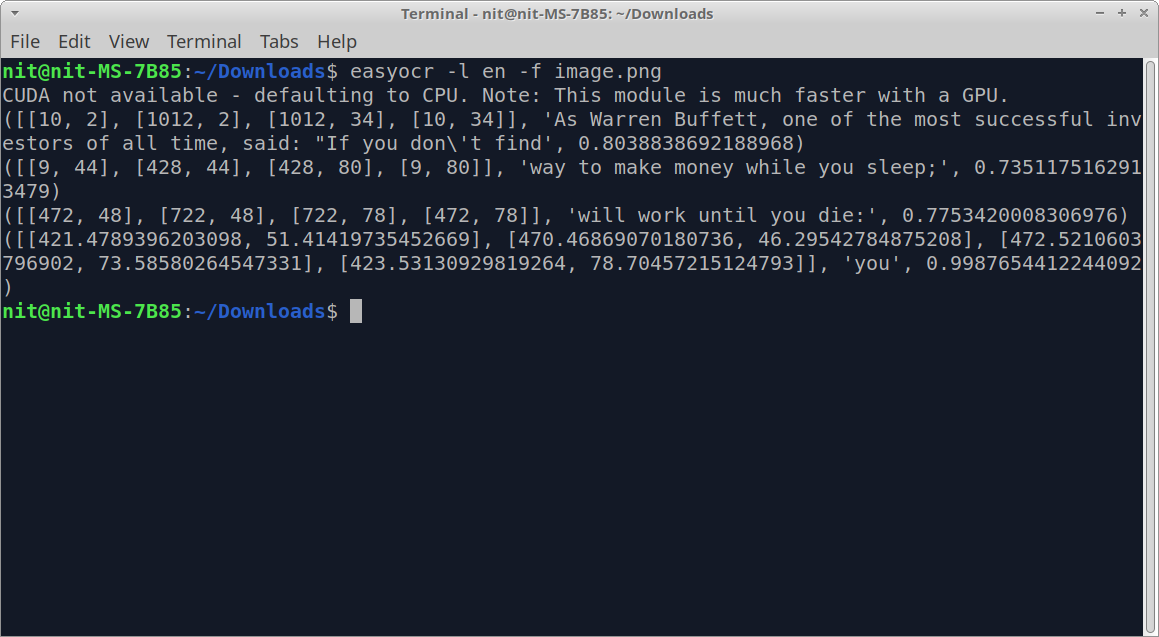
The output shows certain numbers and the text extracted from the image. This output can be read in the following format: coordinates of individual text pieces > detected text > confidence level. So the numbers on the left most side represent coordinates of the identified text boxes while the number on the right most side indicates how accurate the extracted text is.
If you just want to get detected text in human readable form, add “–detail 0” switch to the above command:
After running the above command, you should get some output similar to this:
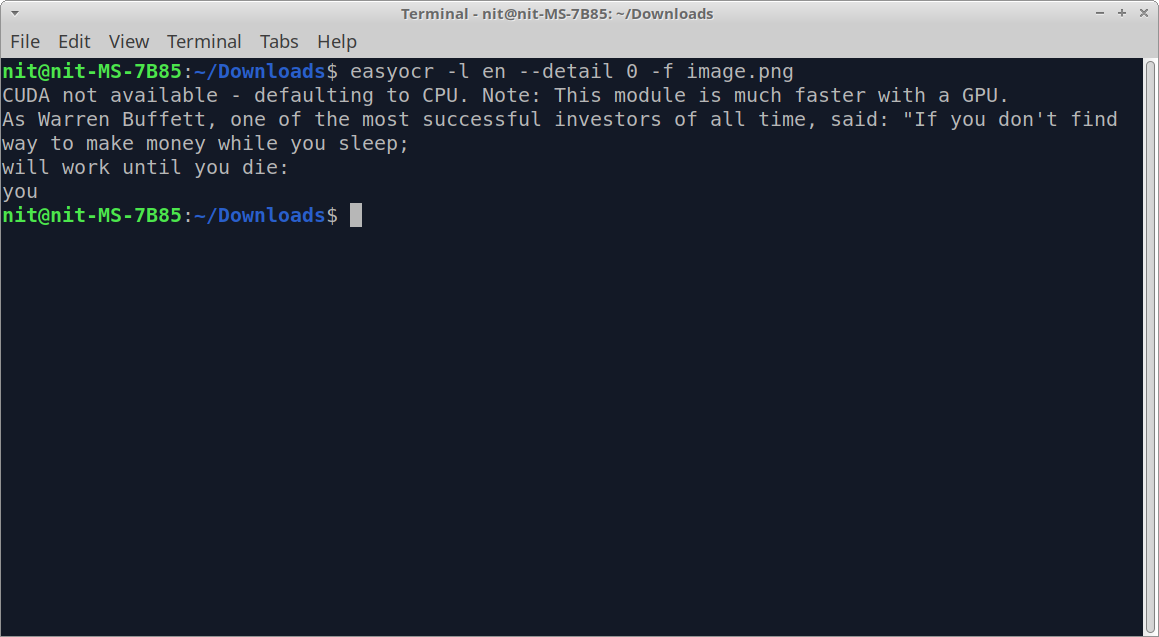
As you can see in the output, the extracted text is not in the proper order. You can try the “–paragraph True” command line option to join individual pieces and sentences in proper order.
After running the above command, you should get some output similar to this:
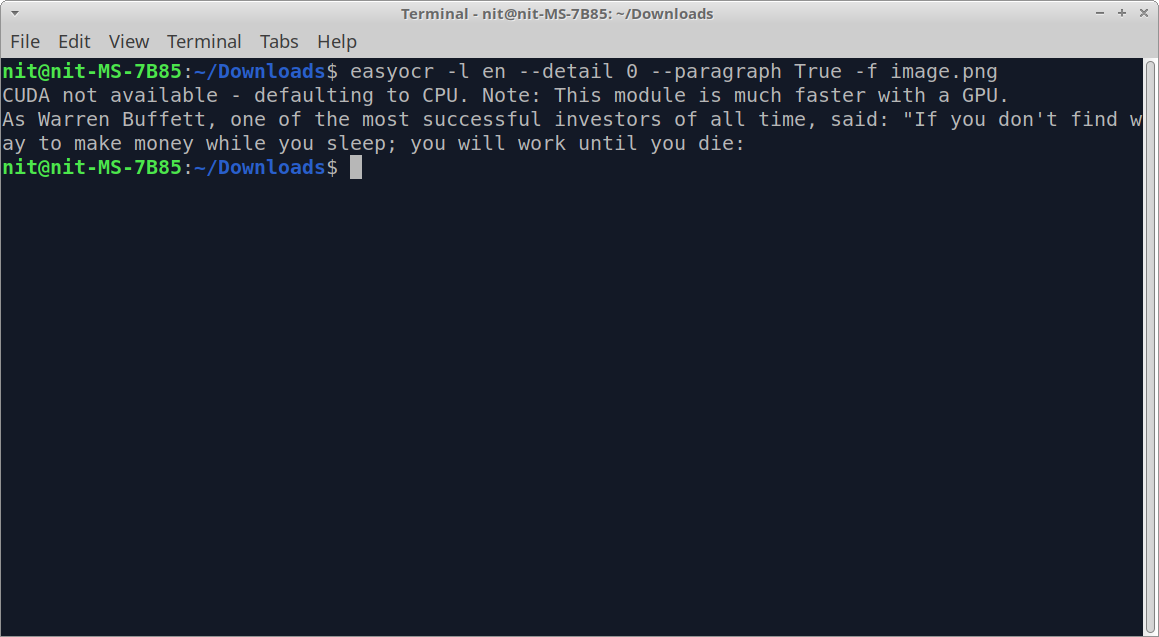
Note that depending on the quality and clarity of an image and the text content of the image, certain inaccuracies may always be present in the extracted text and you may have to make manual corrections to fix them.
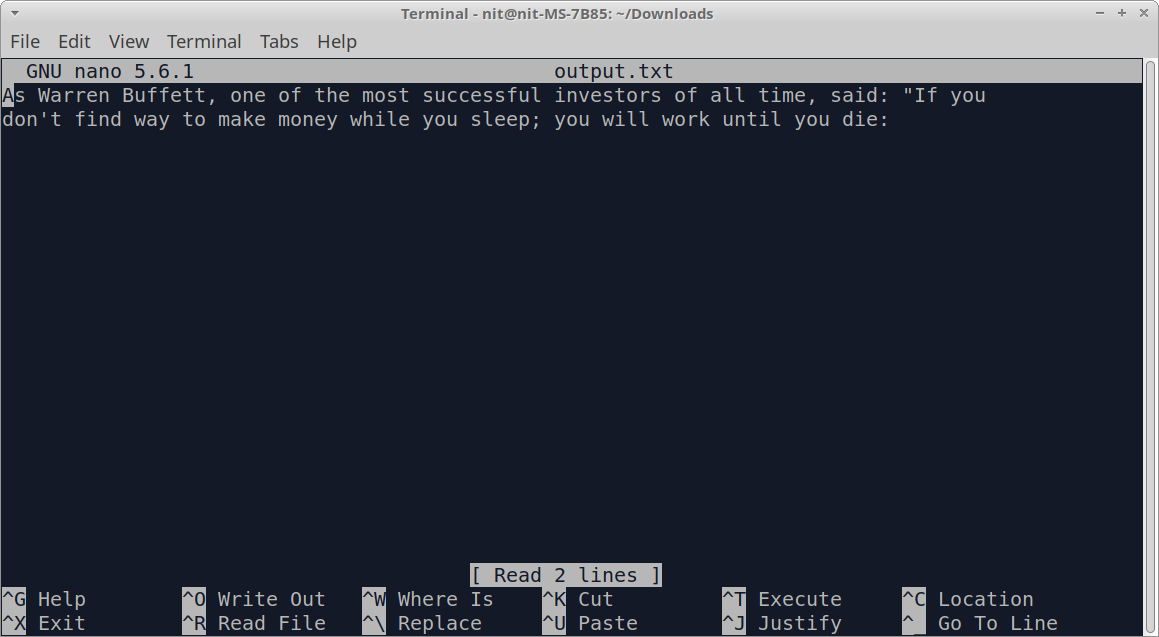
To save the identified text to an external file, use the “>” symbol and supply a name for the output file. Here is an example command:
To know more about all command line options supported by EasyOCR, use the following command:
Using EasyOCR in Python Programs
EasyOCR is also available as a Python library, so you can import its main module in your Python programs. Below is a code sample illustrating its usage in a Python program:
reader = easyocr.Reader(['en'])
result = reader.readtext('image.png', detail=0, paragraph=True)
with open("output.txt", "w") as f:
for line in result:
print(line, file=f)
The first statement is used to import the “easyocr” module in your Python program. Next, a new instance of “Reader” class (base class) is created by supplying a list of languages supported by EasyOCR as the main argument. If your image contains text in multiple languages, you can add more language codes to the list. Next, the “readtext” method is called on the “reader” instance and the path of the image file is supplied as the first parameter. This method will identify and extract text from the supplied image. The two optional arguments, “detail” and “paragraph” are the same as the command line options explained above. They simplify the text by removing unnecessary elements.
After running the above command, you should have following line in “output.txt” file:
You can read more about EasyOCR’s Python API from here. An online version of EasyOCR is available here to test.
Conclusion
EasyOCR is a command line text extraction tool that comes with pre-trained models for numerous languages. This makes it easy for end users to quickly identify and extract text from images without having their own language models. It also provides detailed coordinates for bounding boxes around identified and tokenized words, making it easy to analyze individual pieces of texts.