Within this article, we will let you learn the use of the insmod command in the Ubuntu 20.04 Linux operating system on the shell terminal. To cycle over the kernel’s request for modules, we invoke the init() module. Afterward, using the init module, we hand over the power to the kernel, and the kernel calls the sys_to_init_module() method. Thus, the insmod instruction, which loads the kernel modules, can be used. We insert the SpeedStep-lib in this instance using the instruction listed beneath.
In the “ko” modules, the components are connected to the computer system. The operating system shouldn’t recognize this address once you clone the component into the designated place and move it. No matter how the Ubuntu systems are loaded, the modules can’t be reloaded repeatedly at the very same location; even if they are activated at two separate locations, they cannot be utilized multiple times.
The kernel supports a variety of loadable plugins by referring to the “ko” documents in the Linux distribution’s core. They offer drivers for non-Linux distributed hardware, including the IoT expansion slots, as members of Linux System 3.0. The root runs when you type the modprobe module package name to add a kernel package. Modprobe, by convention, tries to fetch your package from some other core components that make up the /lib/modules/kernel. The version/kernel/drivers/ dependency prototype must be equipped before a component can be imported.
To reload the “ko” modules, we use the insmod software. The loaded kernel components may be seen using the Lsmod application; otherwise, one can visit the proc/ components for further details. Before starting with the use of the insmod instruction at the shell, we have to make sure that our system is up to date and doesn’t contain any updates to be fulfilled within the shell. After this, we execute the update instruction with the use of the apt package and the sudo privileges. The execution starts after asking for the sudo user password to continue this process. We provide the passcode for the sudo account and press the Enter key to continue this update. The system starts to get updated after the use of this instruction. This process is completed within a few seconds of 2 minutes.

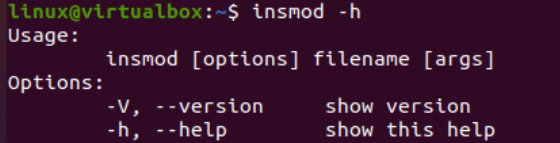
The insmod command of the Linux system came up with many options with it. If no parameters, directory names, or values are given, the insmod instruction may give an error. As a result, the -h option provides both the basic syntax and a list of the different parameters that may be rummage-sale with the insmod instruction. So, we try the “-h” option with the insmod instruction in the shell and get the usage along with its option description on our screen.
You can see the usage line output of the following instruction as it starts with the “insmod” keyword followed by the flag option to use along with the filename and arguments to be applied. Just like we add the –h option to get help for it.
Let’s say you want to take a look at the installed version of insmod for your Linux system on the shell and you don’t know how to do that. The “-V” options are very well known by the Linux users to find out the version of any Linux package or module that has already been installed. So, the folowing image is used to help you here.
We use the insmod keyword with the “-V” option in the query area of the terminal shell as displayed. The execution of this instruction returns the kernel mode version, i.e. Kmod version 27, at our shell screen along with some of the properties listed on the next line. These are those properties that can be achieved by the use of the insmod instruction.

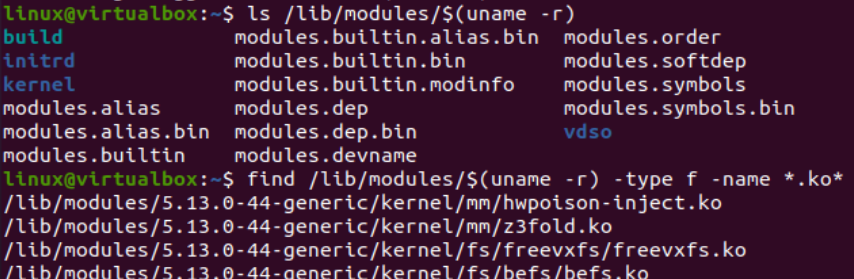
We use the list instruction to list down all the kernel modules that are found so far in our Ubuntu 20.04 Linux system. We use the path “/lib/modules/” with the “$(uname –r)” to display their dependencies. Along with that, you can also use the keyword “type” followed by the “f” flag for file, and “-name” for adding the file name. We use the “*.ko” character to list all the “ko” files in the particular folder.
Moving within some more inner folders of the modules folder from the particular path, we now have the Ubuntu folder. We use the “ls” instruction to list the contents of the Ubuntu folder. The “Ubuntu-host” folder is displayed. Using the cd instruction again, we move within this folder and listed its items. The “ko” file is displayed.

We use the insmod instruction with the same file name to add this module to the kernel.

After this, use the dmesg command with the “tail -1” option to display the loaded kernel packages.

Make sure to have a file with the “.ko” extension at its end within your system that needs to be added to the Linux kernel. Try the insmod instruction with the name of a “ko” file with sudo rights. The “dmesg” along with the “tail” query will display the respective result.
![]()
Conclusion
This article is all about the use and the working of insmod for the kernel of the Linux operating system. It has been specially designed to add some package or module to the core of a Linux system, especially with some “ko” files. This is it about this article. You can implement these commands on any Linux flavor.