- Backup EBS volume
- Increase EBS volume size
- Increase partition size
- Extend filesystem
- Extend ext4 filesystem
- Extend XFS filesystem
Backup EBS volume
Before increasing the size of the EBS volume, it is always a good practice to have a backup of the EBS volume; in case something goes wrong, you have the backup of the EBS volume, and you can restore your data. Visit the following link to login to the AWS management console.
https://console.aws.amazon.com
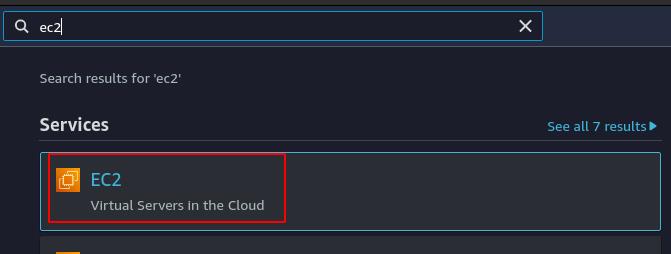
After logging into the AWS management console, go to the EC2 services.
Before starting, make sure you use the new EC2 console because the old EC2 console may differ slightly. In order to switch to the new EC2 console, turn on the ‘New EC2 Experience’ button on the top left corner of the EC2 service.

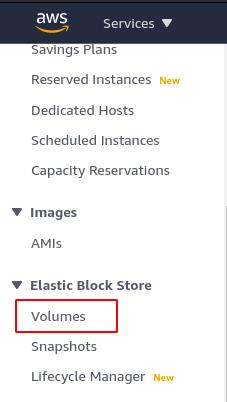
After switching to the new EC2 console, select the ‘Volumes’ option from the left side panel under ‘Elastic Block Store’.
It will display all the available EBS volumes there. Select the EBS volume of the instance you want to resize and click on the ‘Action’ button on top.
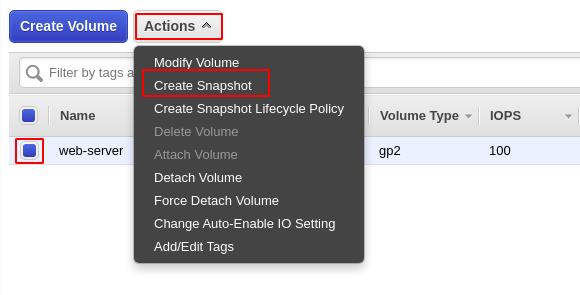
Select the ‘Create Snapshot’ option from the dropdown menu, and it will ask for the description for the snapshot. Add a description and click on the ‘Create Snapshot’ button at the bottom right corner.

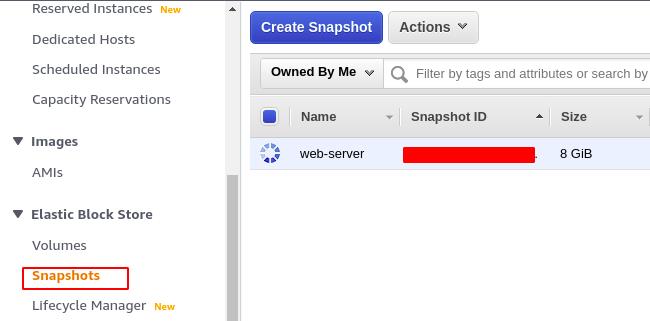
Select the ‘Snapshot’ option from the left side panel under the ‘Elastic Block Store’ section, and it will show a snapshot being created there.
Increase EBS Volume size
After taking the snapshot of the EBS volume, the first step is to increase the EBS volume size of your EC2 instance from the EC2 console. Select the ‘Volumes’ option from the left side panel under ‘Elastic Block Store’.

It will display all the available EBS volumes there. Select the EBS volume of the instance you want to resize and click on the ‘Action’ button on top.

From the dropdown list, select the ‘Modify Volume’ option, displaying a pop-up.

From the pop-up, it is clear that the volume type can also be changed along with the volume size. The size field shows the current size of the EBS volume, i.e., 8 GB. Increase the size of the EBS volume to the desired value and clicks on modify.
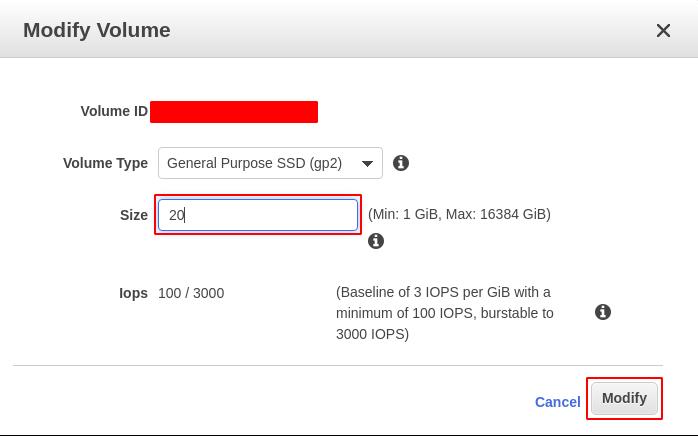
After clicking on the ‘Modify’ button, a new pop-up appears, asking for your consent to apply the changes.
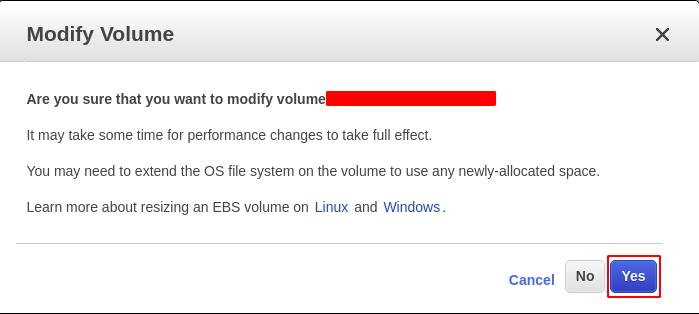
Click on the ‘Yes’ button, and it will start modifying the EBS volume. It can take some time to modify the volume. Check the state of volume and wait for the optimization to complete.

Increase partition size
After increasing the EBS volume size, connect to your instance over SSH to check the EBS volume size.
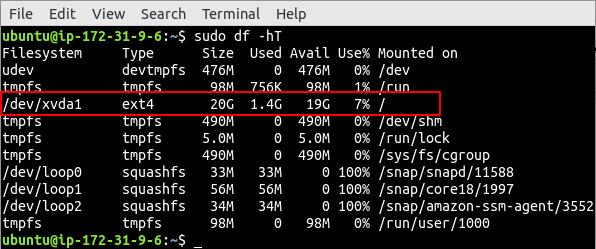
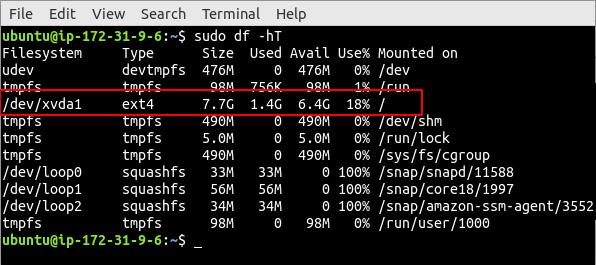
Now use the df command to list all the filesystems mounted on your disk.

The root filesystem size (/dev/xvda1) is still 8 GB, and its type is ext4. Now use the lsblk command in the terminal to check whether the disk has an extended partition.
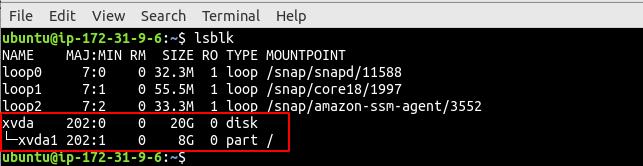
The root volume (/dev/xvda) has a partition (/dev/xvda1). The size of the volume is 20 GB, but the size of the partition is still 8 GB. Now use the growpart command in the terminal to extend the partition size.
Again use the lsblk command in the terminal to verify if the partitions size extended.

Extent filesystem
So far, the volume size and the partition size have been extended. Use the df command to check if the root filesystem has been extended or not.
The size of the root filesystem is still 8 GB, and it needs to be extended. To extend different types of filesystems, different commands are used.
Extend ext4 filesystem
In order to extend an ext4 filesystem, the resize2fs command is used.
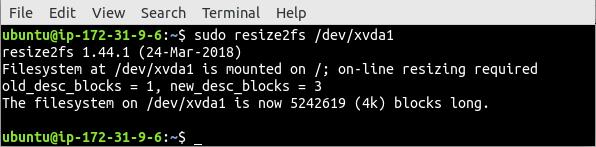
Now again, list all the filesystems on your EC2 instance using the df command.

After running the resize2fs command, the size of the filesystem is increased.
Extend XFS filesystem
To increase the XFS filesystem size, the xfs_growfs command is used. If the XFS tools are not installed on your EC2 instance, use the following command to install.
After installing the XFS tool, extend the XFS filesystem using the xfs_growfs command.
Conclusion
As a cloud solution architect or system administrator, limited resource provisioning on the cloud initially and later scaling the resources with increased traffic is a good practice. Almost all cloud service providers provide the ability to scale the resources when needed. This blog explains the step-by-step procedure of increasing the disk space on an AWS EC2 instance.