Installing ImageMagick
We will be needing ImageMagick for everything, so let’s install it:
ImageMagick Commands
In ImageMagick, there are a few commands that we ought to know about (convert, identify, mogrify, composite, montage, compare, stream, display, animate, import, and conjure), but for resizing, we only need to know of three of them:
Convert: Convert is a command used to convert between formats, resize, blur, crop, despeckle, dither, draw on, etc. The great part about the convert command is that there are two files at the end: the original file and the transformed file.
Mogrify: Mogrify is a command used to resize an image, blur, crop, despeckle, dither, draw on, etc. However, the difference between the convert command and the mogrify command is that in the mogrify command, the original image is overwritten. Thus, only a single file exists at any instance.
Identify: the identify command describes the image, such as format, Exif info, resolution, etc. So, when you carry out a transformation, such as reducing the size of an image, it’s always wise to double-check that it was carried out by using the identify command to tell us its specifics.
You can find out more about ImageMagick by typing:
Convert, Resize – Absolute Size
So, the first way to resize the image is to use the resize switch in conjunction with the convert command. In this case, we’re using the resolution.
Example
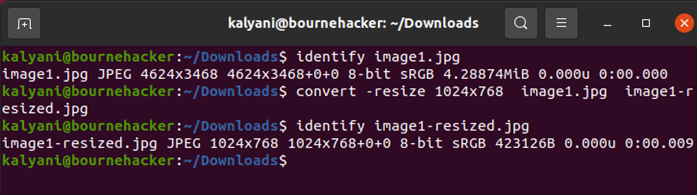
My original photo is 4624×3468; you can find out this information using the identify command. So, let’s see what happens when you use the resize switch. With the resize switch, you can pass the resolution you want. After that, I pass the name of the original picture (image1.jpg) and the transformed picture’s name (image1-resize.jpg). Please note that the transformed image is the image that was reduced in size. The name you give it will be the name of the new reduced image created. And as you can see in the following image, the convert command resized the image:
Convert, Resize – Percentage
You can also use the percentage (%) sign with the resize switch.
For example:
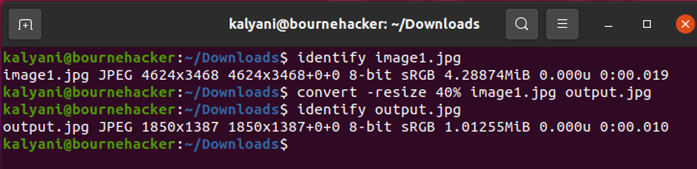
As you may have noticed, the original image was 4624×3468, and the new reduced image is 1850×1387. In this case, the reduced image is 40% of its original image (4624×0.4=1850).
Convert, Resize – Maximum Area
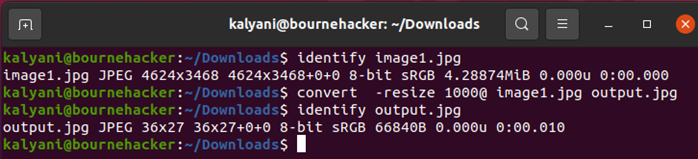
In the following example, you can define the maximum pixel area that the picture/image can consume. For this, you must use the @ flag in addition to the resize switch:
Example
Please remember that my image1.jpg is originally 4624×3468. However, after the resize, the size of the picture is 36×27.
Why is this so?
It’s so because 36×27=972 is below the maximum pixel area limit of 1000. Basically, 1000 is the maximum pixel area for the picture, where pixel area is height times width.
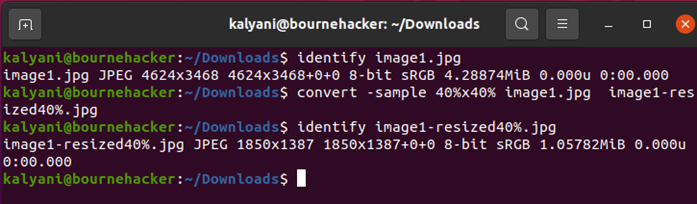
Convert – Sample
Alternatively, you can do it using the sample switch.
Example
In this case, as you can see, we asked the convert command to reduce the image to 40% of its original size. The latter translates into an image that is 1850×1387.
Here, we use the sample switch to reduce the picture by 40%. We then pass it the name of the original image (image1.jpg) and the name we want to call our new reduced image.
Once again, use the identify command to see whether the reduction took place or not.
Convert, Scale
Scale is similar to resize.
Example
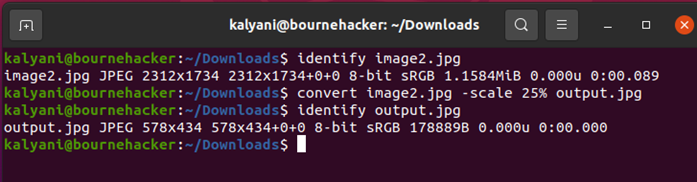
In this case, my original image was 2312×1734. I scaled it to 25% – so 2312×0.25 = 578. The final image is 578×434.
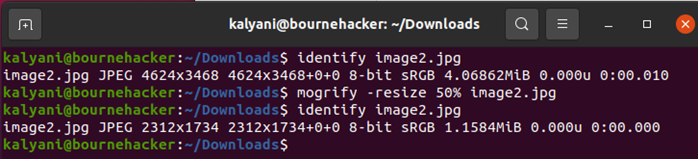
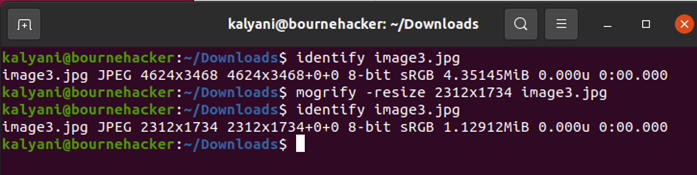
Mogrify, Resize – Absolute Size & Percentage
Mogrify, as described before, is used to do things similar to the convert command. However, it saves over the original file. Thus, you don’t get to keep the original.
For example:
Please note that we don’t add a second file name because we will replace the original file.
Example
Conclusion
Learning how to reduce or enlarge the size of an image is not complicated. Most people tend to flock to websites and other software to do that. They wouldn’t have known is that, on Ubuntu, it’s as easy as pie. Using ImageMagick, its convert and mogrify commands, you can reduce or enlarge the size of an image and subsequently check that the size was reduced or enlarged using the identify command. And what’s more, you can reduce or enlarge the size of an image using a percentage, the maximal pixel area, absolute size, etc. In this tutorial, we covered how to resize the image using only a few commands. So, the next time you need to shrink or enlarge a picture/image, think of ImageMagick!
For more information about resizing using ImageMagick, check out other Linux Hint articles and visit https://legacy.imagemagick.org/Usage/resize/#noaspect.