Installing the ImageMagick
We will need the ImageMagick for this process. First, let’s install it using the following syntax:
Mogrify
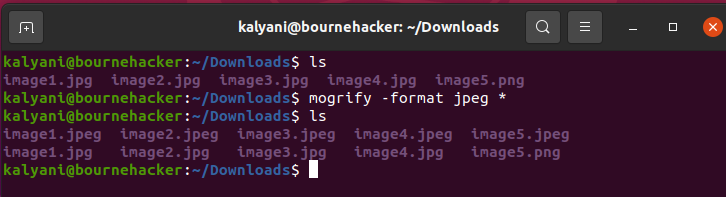
Suppose that we have 1000 photos that all have the “.png” extension. Suppose further that we want to transform all of them to a “.jpg” file.
Now that we’re done supposing, we can start writing the code.
Here, we’re telling the ImageMagick that there are lots of “.png” images to use each one with a “.png” extension. We then tell the ImageMagick with the format switch to transform the image into a jpg image. Here, the format switch prevents the images from being overwritten. Typically, the distinction between mogrify and convert is that mogrify overwrites the original files. But this is not the case when we use the format switch (an exception to the rule).
The great part about this small piece of code is that it will batch convert as many pictures as you want. And it’s a one-liner! However, in this case, we save all the new files within the same folder as the old files.
Now, suppose that I want to save them in a completely different directory altogether. We have a bunch of *.jpg and we save them in a new folder called newfolder. Suppose further that the original files are in the Downloads folder.
(The idea here is that all of the original files are in the Downloads folder, and we create a folder called newfolder to dump the transformed pictures.)
mkdir newfolder
mogrify -format png -quality 100 -path ~/Downloads/newfolder *.jpg

So, what happens here? We apply the mogrify command and add a new switch called path. The path switch ensures that the new images created were dumped in the specified folder (newfolder).
Now, let’s suppose that we have a combination of jpg images and png images and we want to transform them into jpeg.
In this case, instead of specifying which images we want to convert, we just put a star. The star means to convert everything.
If there are folders there, it will kind of crash so use the path switch as well.
Convert
Now, let’s write something a bit different using the convert command instead of the mogrify command (the mogrify command overwrites the original files).
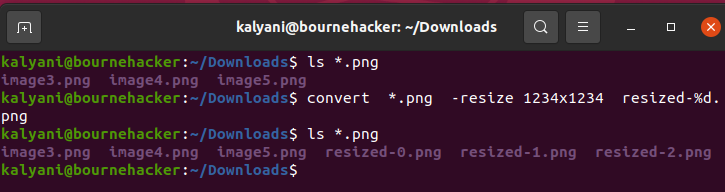
What did you notice here? We did the batch conversion using the convert command. To rename the file, we use the term “resized-%d.png”. What’s this “%d” sign in the name? The rest of the name makes sense, right? And the “%d” means to number them with 0, 1, 2, etc.
Another quick example:
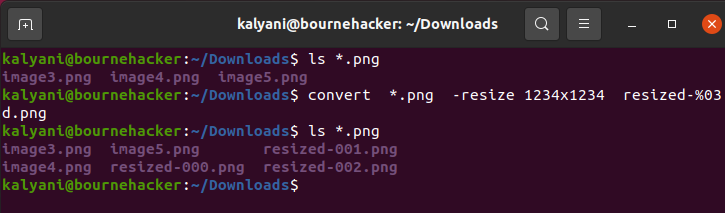
What does the “%03d” mean? Well, look at the output. It renames it with 3 digits this time. Now, instead of seeing the resized-0.png, we see the resized-000.png.
Loops
You can also write the loops.

In this case, we’re still using a one-liner but it’s a bit more complex. In this case, we say that for each image called f, we convert the image and rename it to “$f.png”. As you might have noticed, if the image is called “image1.jpg”, it renames it to “image1.jpg.png”. This command is a little flawed, so let’s look at the other ways to rename the image.
Previously, we used the mogrify command. It didn’t overwrite the images because of the format switch. But had the format switch not been there, when resizing for example, it would have overwritten the file. So, what if we want to use the convert command?
Let’s try to understand this command.
The first part of the command is as follows:
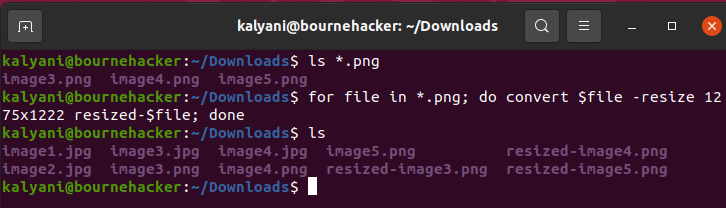
The *.png refers to all the png files. What this means is “for any single file in the pile of files”.
The core command is as follows:
This part simply takes the $file (a file) and resizes it using the resize switch and then chucks out a file called resized-$file.
We then end with done. This part is obvious enough.
Easy enough, right?
Conclusion
Batch converting is a very useful process. It prevents us from having to re-type a command a million times over. In Imagemagick, the simplest way to batch transform a million images is by using the mogrify command. However, if not used in conjunction with the format switch, it writes over the original image. For example, if you use the mogrify command to batch convert a bunch of pictures to resize them, it overwrites the original images. Sometimes, this may not be what you want, and in such cases, you can resort to writing a little script. The script itself is a one liner and you can use the convert command if you wish, so that’s the good part. But it’s a bit more complex than the simplest of the batch conversions done using the mogrify command. Either way, the point is that you no longer have to transform one picture at a time. You can go ahead with the batch conversions which can convert thousands upon thousands of pictures in a moment.