Screen recording feature is useful for various purposes, from creating video tutorials to troubleshooting technical issues. Fortunately, Linux also has screen recording utilities that offer simple to use UI and various features.
On the other side there are some Linux distros containing the built-in screen recorders like screencast. The Screencast lets you choose whether to record the whole screen or a particular selection. You can use it for educational tutorials, content creation, technical support, and official collaboration(recording meetings for future reference). So in this quick guide, we have included the ways to install and use the screen recorder in Linux.
Peek: Screen Recorder in Linux
Peek is one of the best screen recording tools available, but it is not a pre-installed utility. That’s why you have to install it by running the following command:
| Operating System | Command |
| Debian/Ubuntu | sudo add-apt-repository ppa:peek-developers/stable
sudo apt install peek |
| Fedora | sudo dnf install peek |
| CentOS | flatpak install flathub com.uploadedlobster.peek
flatpak run com.uploadedlobster.peek |
Once you install the Peek utility, you can open it from the Application Menu or run the following command:
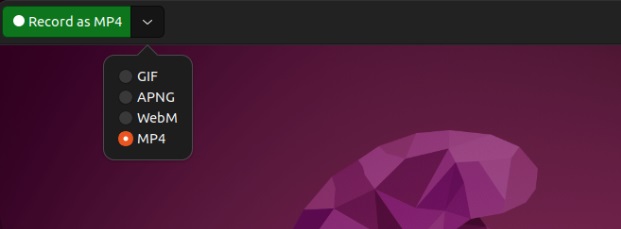
Now, you can select the type of format in which you want to record your screen. For example, let’s select MP4 from the menu:
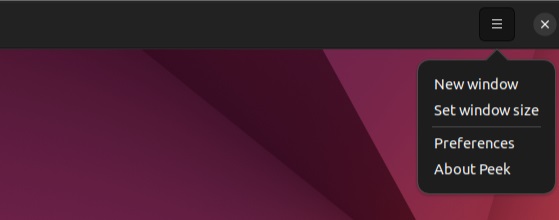
Finally, click on the green button to start recording. Moreover, you can change the window size from the three lines at the top right corner:
GNOME Built-In Screen Recorder
Linux distributions come with different screen recording tools, but one of the most commonly used is GNOME’s built-in screen recorder. GNOME is a part of many distros, such as Fedora, Ubuntu, Debian, RHEL, SUSE, etc. So you can use the following steps to use screen recorder:
To open the Screen Recorder, you can either press CTRL + Alt + Shift + R or Navigate to your system’s applications menu and search for “take a screenshot.”
Now, from the menu, you can choose to record the whole screen or just a selection, depending on your requirements. For instance, let’s record the screen by clicking on Screen. It will remove the adjustable selection frame seen in the above image.
Finally, you can start recording by clicking on the record button. Once the system starts the recording, you will see the current recording progress on the top-right of the screen, as shown in the image below:
When you want to stop and save the recording, click the white square(stop recording) button accompanied by the recorded time. This action will result in a pop-up suggesting that the screencast is recorded, which you directly click to view the recording.
In Ubuntu systems, you can access the screen recordings by navigating to Home > Videos > Screencast.
A Quick Wrap-up
Recording the screen is an ordinary Linux user’s fundamental and essential task. It helps troubleshoot the system, create video tutorials, collaborate officially, and more. Therefore, here we have explained the simple ways to use the screen recorder in Linux. You should remember the shortcut mentioned above to open the recording tool efficiently.


