“PyTorch Lightning” is a scaled-down version of the PyTorch framework with none of the latency and all of the features of PyTorch. PyTorch Lightning is remarkably adept at its objectives of reducing processing times, increasing flexibility of research, allowing changes in code in real-time, and ensuring quick results.
In this article, we will show how to use PyTorch Lightning to make the workflow faster.
How to Use PyTorch Lightning?
The mode of operation of PyTorch Lightning is relatively simple to understand. Start by installing lighting using the “pip” installation package. After that, import the required libraries, and define a “lightning module” and a dataset. Then, train and use the model as needed. The lack of boilerplate code in Lightning can make the entire process smooth and swift at the expense of that exceptionally in-depth control of PyTorch.
Follow the code and the steps given below to first install and then use “PyTorch Lightning” to create a machine learning model for linear regression.
Step 01: Install the Required Libraries
Use the “pip” installation package to install the necessary libraries. Following are the libraries that are needed to begin a project using PyTorch Lightning:
- Torch – the primary library for PyTorch
- Torchvision – added functionality for PyTorch
- Pytorch-lightning – it contains all the additional features of lightning.
!pip install pytorch-lightning
!pip install torchvision
In the screenshot below, the libraries are seen to be installed in the IDE:

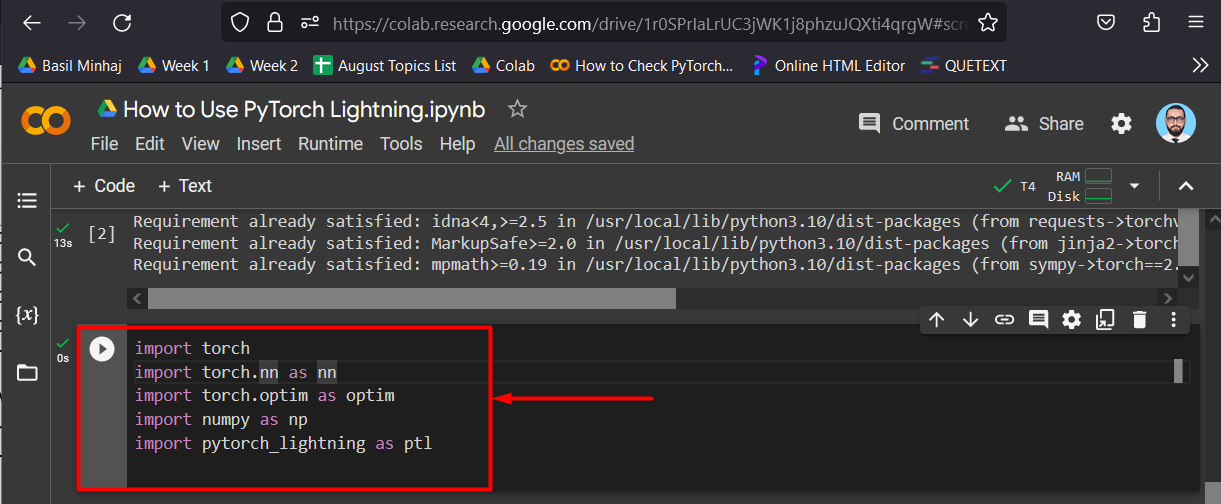
Step 02: Import the Installed Libraries
Next, import the installed libraries into the project using the “import” command:
import torch.nn as nn
import torch.optim as optim
import numpy as np
import pytorch_lightning as ptl
Import the following libraries:
- Torch – It has all the functionalities of PyTorch.
- Torch.nn – Neural Network library of PyTorch.
- Torch.optim – This library is used for the optimization of our models.
- Numpy – It includes mathematical operations and functions that can be applied to matrices and arrays.
- PyTorch_Lightning – to use the PyTorch Lightning Framework.
The names of libraries are shortened for ease of use in the code.
The libraries are imported in the screenshot below:
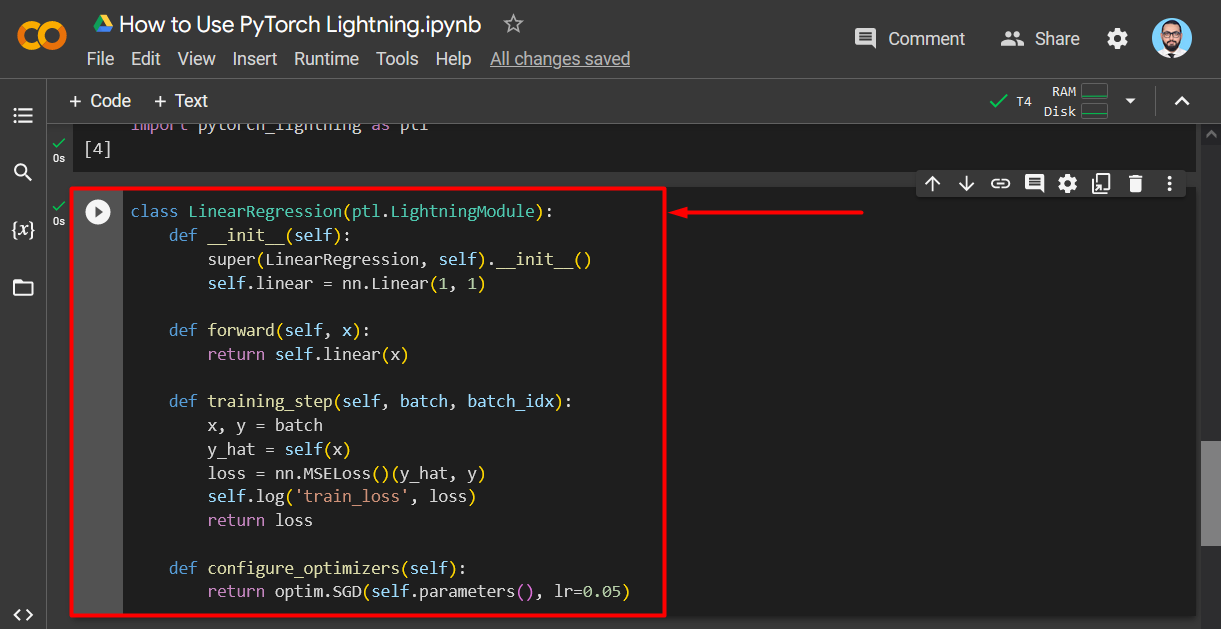
Step 03: Define the Linear Regression Class
Next, define the “LinearRegression” model class which is in itself a part of “ptl.LightningModule”:
def __init__(self):
super(LinearRegression, self).__init__()
self.linear = nn.Linear(1, 1)
def forward(self, x):
return self.linear(x)
def training_step(self, batch, batch_idx):
x, y = batch
y_hat = self(x)
loss = nn.MSELoss()(y_hat, y)
self.log('train_loss', loss)
return loss
def configure_optimizers(self):
return optim.SGD(self.parameters(), lr=0.05)
The above code works as follows:
- Use the “__init__” method to create an architecture that consists of 1 input and 1 output as shown with the “nn.Linear(1,1)” method.
- Then, use the “forward” method to define the flow of data, i.e. the forward pass, in the model.
- Next, input the logic for training the model for linear regression as shown in the code above with the loss function “nn.MSELoss()”.
- Use the “self.log()” method to check the progress of the training.
- Lastly, specify the optimizer configuration of the transformer and the “learning rate” denoted by “lr”:
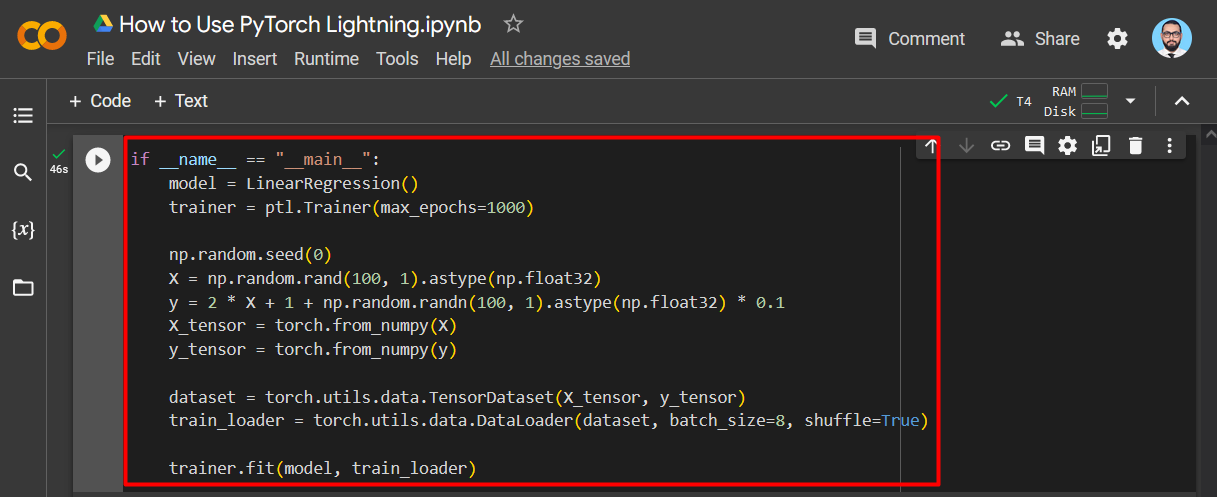
Step 04: Create a Linear Regression Model
Next, utilize the common “if” condition to create the linear regression model as shown:
model = LinearRegression()
trainer = ptl.Trainer(max_epochs=1000)
np.random.seed(0)
X = np.random.rand(100, 1).astype(np.float32)
y = 2 * X + 1 + np.random.randn(100, 1).astype(np.float32) * 0.1
X_tensor = torch.from_numpy(X)
y_tensor = torch.from_numpy(y)
dataset = torch.utils.data.TensorDataset(X_tensor, y_tensor)
train_loader = torch.utils.data.DataLoader(dataset, batch_size=8, shuffle=True)
trainer.fit(model, train_loader)
The above code works as follows:
- Use the “LinearRegression()” to define the model.
- Use the Lightning Function, “ptl.Trainer()” to specify the number of “epochs” as shown above.
- Assign random numbers in the variable “X” by using the “np.random.rand()” method.
- Then, define the equation to obtain the value for the dependent variable “Y” as shown above.
- The “torch_from_numpy()” method is used to convert a numpy array to a PyTorch tensor for compatibility.
- Next, use the “torch.utils.data.TensorDataset()” method to assign the “X” and “Y” tensor to the
“dataset” variable. - Lastly, use the “trainer.fit()” method to commence training:
The output is shown below:
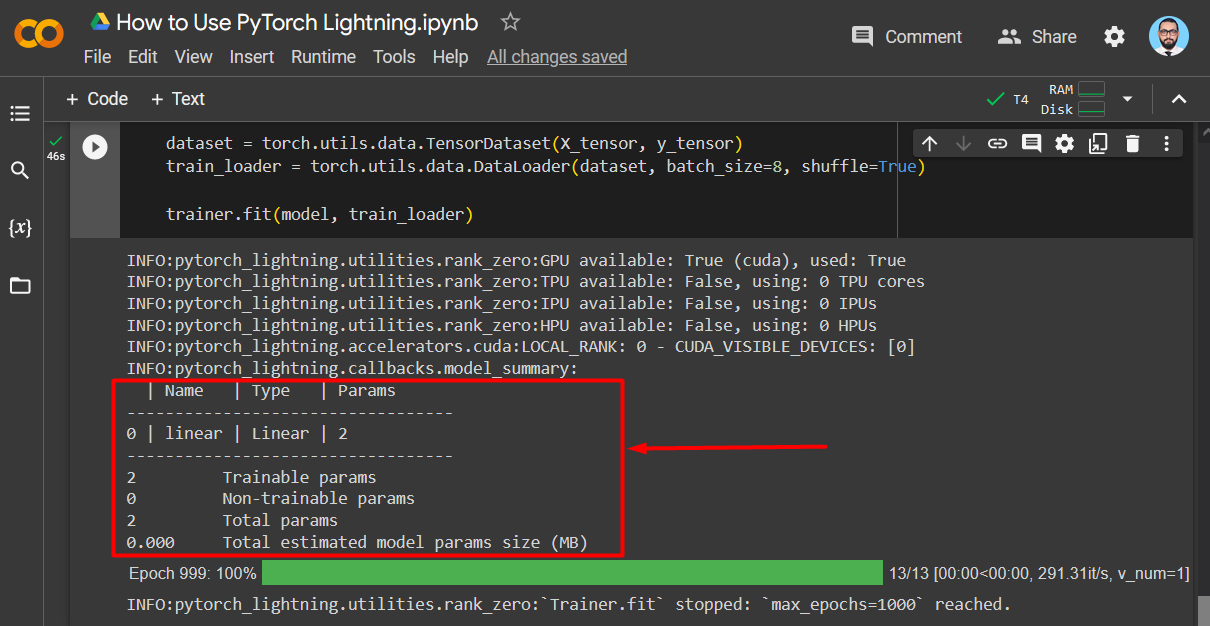
In the output screenshot shown above, it can be clearly seen that:
- The model has 2 Total Parameters.
- The number of Trainable Parameters is 2.
- The number of Non-Trainable Parameters is 0.
Note: You can check the Google Colab Notebook where we ran our model.
Pro-Tip
The best feature of PyTorch Lightning is that using it can make your machine learning projects become hardware agnostic. This means that whatever work you are doing, its processing does not depend on the specifications of your computers. You can work on the same model across various devices without any issues of compatibility.
Success! We have just shown how to install PyTorch Lightning in Google Colab and use it to run a linear regression model.
Conclusion
To use the PyTorch Lightning, install its lightning version of PyTorch within Google Colab. After that, import the “pytorch_lightning” library. Then, run a simple regression model in Lightning by using the “Linear Regression” function of the “Lightning Module”. PyTorch Lightning has remarkable features of lightning to improve workflow and remove redundancies. That is all about PyTorch lighting.