The utility uses pcap and GNU library to perform regex string searches. ngrep stands for Network grep that is similar to the regular grep utility. The only difference is that ngrep parses text in network packets by using regular or hexadecimal expressions.
In this article, we learn about a command-line, feature-rich utility known as ngrep that is handy for quick PCAP analysis and packet dumping.
Introduction
ngrep provides grep-like capabilities for the third layer of the OSI model, that is, currently, the tool works with IPv4/6, TCP, UDP, ICMPv4/6, IGMP protocols. Hence, the utility recognizes various protocols, captures live traffic, and examines captured pcap files. The best advantage of the ngrep utility is that a regular grep user can use his text parsing knowledge in ngrep.
Getting Started
Update the Ubuntu repository and install ngrep utility via apt-get package management tool:
ubuntu@ubuntu:~$ sudo apt-get install ngrep
The tool requires sudo-privileges to run deep packet inspection commands. Whereas the general tool syntax is as follows:
The patterns are the regular expression users search for in a network packet. The filter option indicates Berkeley packet filter (BPF) that includes a series of keywords to specify packet selection rules. The keywords include protocol, source, or destination host, and ports, etc.
Capture Packets
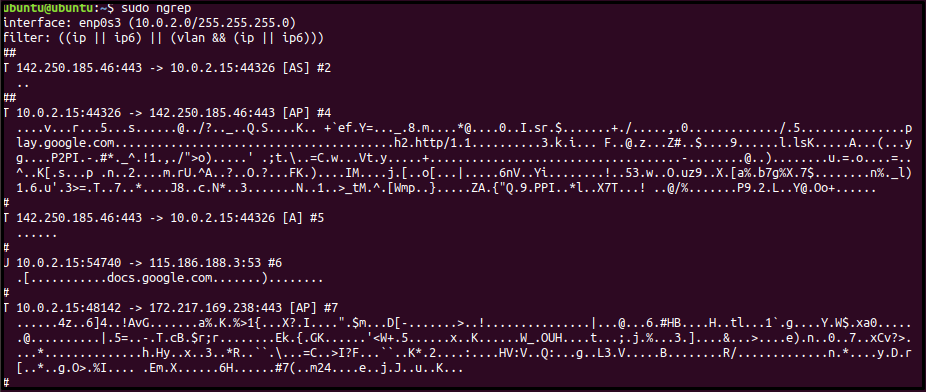
No filter option captures all packets from the default interface, for instance, the following command will capture all network packets from all the interfaces.
To list all the available interfaces, use the following command and press TAB multiple times to output all interfaces:
enp0s3 lo
Basic Usage
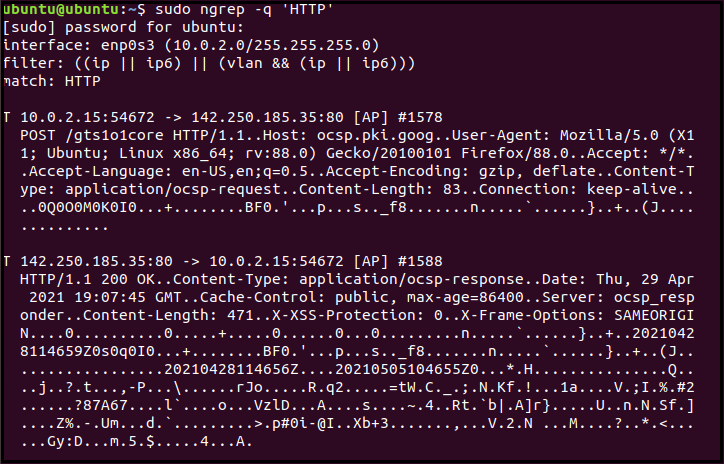
The output to the above command shows loads of packet details on the terminal. ngrep offers a quiet “-q” option that queries all the interfaces and protocols for a specific string match, quiets the output, and only prints packet header details of relevant payload.
[sudo] password for ubuntu:
interface: enp0s3 (10.0.2.0/255.255.255.0)
filter: ((ip || ip6) || (vlan && (ip || ip6)))
T 10.0.2.15:35524 -> 142.250.180.46:443 [AP] #1
...."7c.X]e.Nu...m.'.U.....&....u.%z...
T 10.0.2.15:35524 -> 142.250.180.46:443 [AP] #2
......h..'.@aQ?aN}.'K...
T 142.250.180.46:443 -> 10.0.2.15:35524 [A] #4
......
The above command with the ‘HTTP’ string displays/catches packets with the searched string.
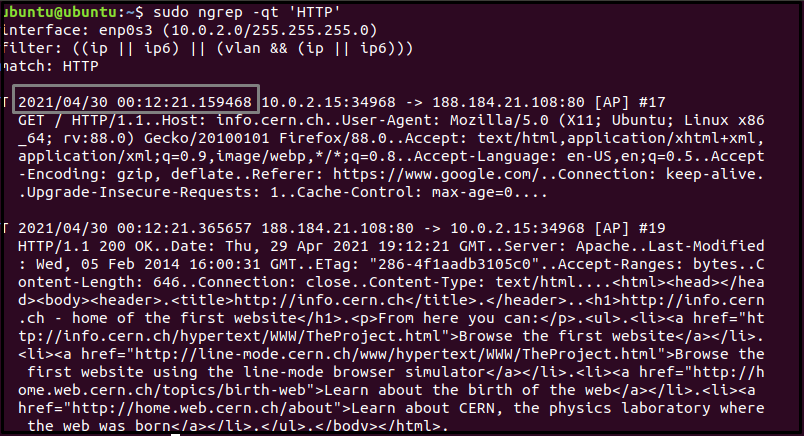
Add the t flag in the above command to print a timestamp with the match information in the YYYY/MM/DD HH:MM:SS.UUUUUU format. Similarly, using the T flag will print elapsed time between immediate matches and timestamps in +S.UUUUUU format.
interface: enp0s3 (10.0.2.0/255.255.255.0)
filter: ((ip || ip6) || (vlan && (ip || ip6)))
match: HTTP
T +24.714768 10.0.2.15:48096 -> 142.250.185.35:80 [AP] #1453
POST /gts1o1core HTTP/1.1..Host: ocsp.pki.goog..User-Agent: Mozilla/5.0
Use the -W option with a byline flag to print output in an easy-to-understand and legible format.
T 10.0.2.15:48570 -> 142.250.185.35:80 [AP] #589
POST /gts1o1core HTTP/1.1.
Host: ocsp.pki.goog.
User-Agent: Mozilla/5.0 (X11; Ubuntu; Linux x86_64; rv:79.0) Gecko/20100101 Firefox/79.0.
Accept: */*.
Accept-Language: en-US,en;q=0.5.
Accept-Encoding: gzip, deflate.
Content-Type: application/ocsp-request.
Content-Length: 83.
Connection: keep-alive.
ngrep saves the captured network traffic in a pcap format that can be uploaded to Wireshark for deeper packet analysis. Use the -O option to write the searched output to a pcap file:
Just like any other network sniffing tools, ngrep allows reading saved network traffic such that the -qt option helps to filter the captured traffic instead of an interface.
BPF Filters
BPF includes rich syntax to filter packets based on IP address, ports, and protocols. The following commands search the traffic for TCP and UDP packets:
ubuntu@ubuntu:~$ ngrep -W byline 'HTTP' 'udp'
To filter all the packets on the enp0s3 interface for port 80, run the following command:
Similarly, use the given below commands to match the headers containing HTTP string from destination and source host:
ubuntu@ubuntu:~$ ngrep -q 'HTTP' 'src host '10.0'
Lastly, the following command with a host filter matches all headers from the “10.0.2” ip address.
String-based Network Packet Search
The ngrep utility can combine the above commands to search TCP packets on port 80 for a specific string of ‘User-Agent’.
where -i option ignores the case for regex expression.
Similarly, the below command displays all the packets on port 80 with the GET or POST string.
interface: enp0s3 (10.0.2.0/255.255.255.0)
filter: ( tcp and port 80 ) and ((ip || ip6) || (vlan && (ip || ip6)))
match: ^GET|^POST
#######
T 10.0.2.15:59876 -> 34.122.121.32:80 [AP] #7
GET / HTTP/1.1..Host: connectivity-check.ubuntu.com..Accept:
###########
T 10.0.2.15:48634 -> 34.107.221.82:80 [AP] #18
GET /success.txt HTTP/1.1..Host: detectportal.firefox.com..User-Agent: Mozilla/5.0
#######
Conclusion
The article introduces ngrep, a packet sniffing tool that parses traffic using regular expressions. We discuss and cover all the basics to advance ngrep commands and options that facilitate network administrators in their day-to-day tasks.


