This guide will provide steps to demonstrate how to uninstall MySQL from Windows.
Uninstall MySQL From Windows
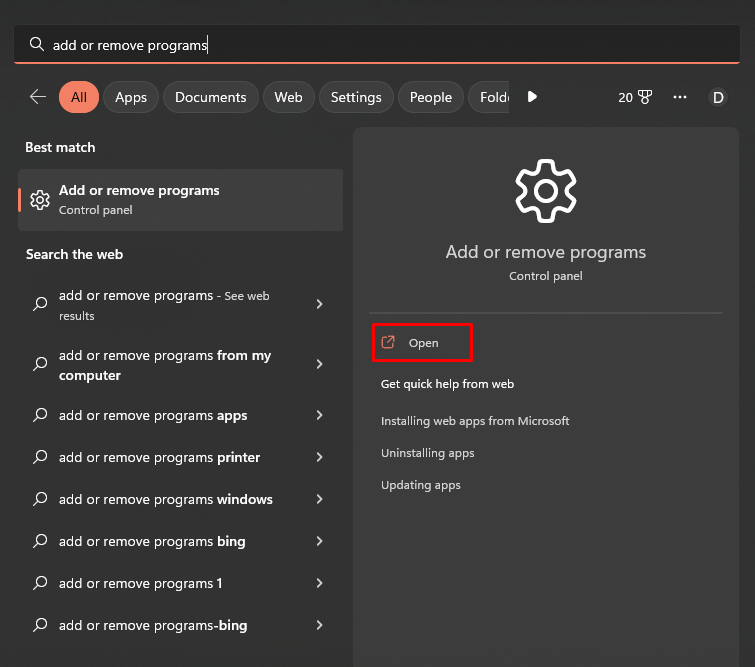
In the Start menu, search “Add or remove programs” and click on the “Open” button to uninstall MySQL from Windows:
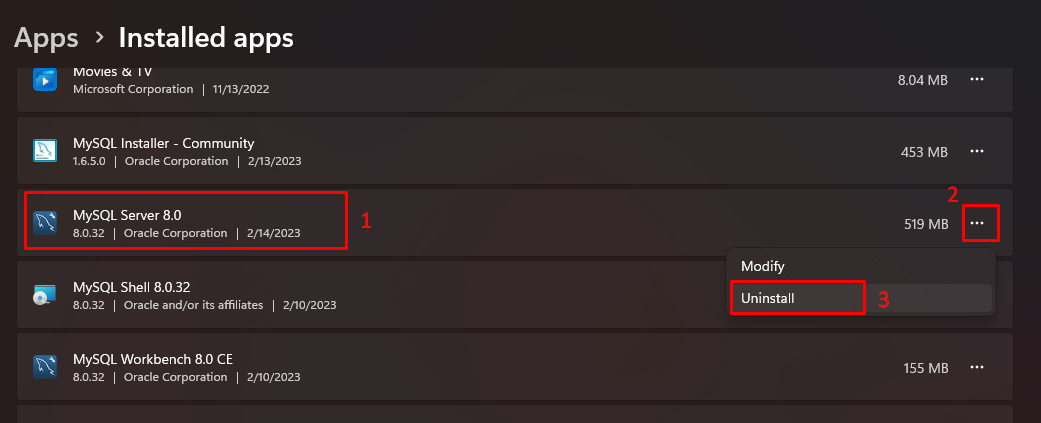
If you are using Windows 11, Select the “MySQL Server,” click on “…” to open the list, and select the option “Uninstall”:
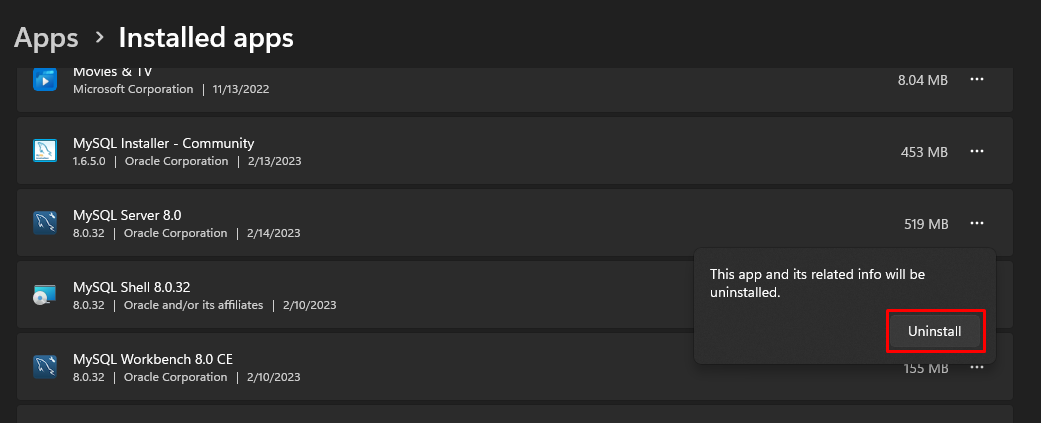
Click on the “Uninstall” button:
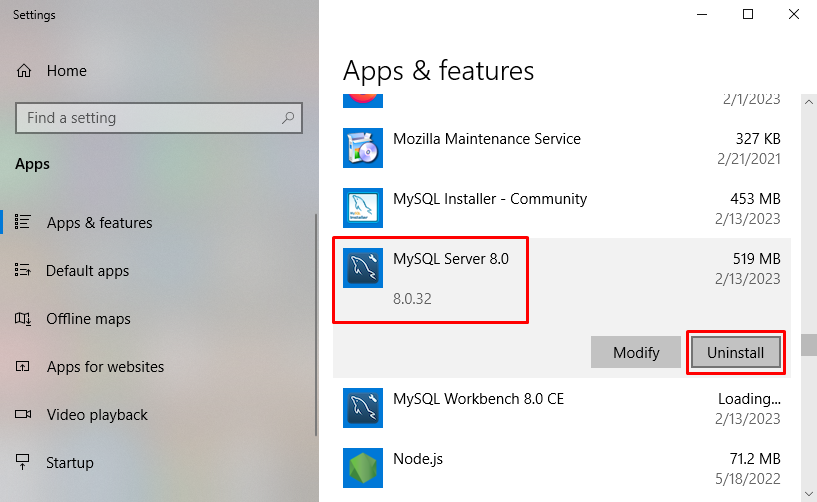
Or if you using Windows 10, select the “MySQL Server” and click on the “Uninstall” button:
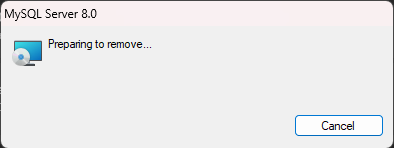
The uninstallation process will consume some time:
Once the process is complete. The “MySQL Server” is uninstalled successfully, as it is visible in the output:
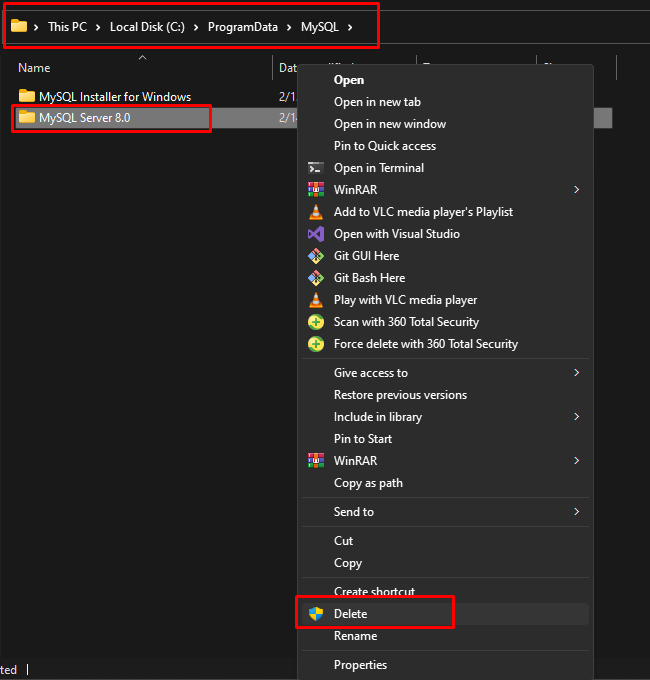
After that, simply go to the default directory “C:\ProgramData\MySQL\” where MySQL was installed and delete the available files:
To verify whether MySQL is uninstalled or not, by typing:
The error in the output confirms that MySQL is uninstalled successfully:
Conclusion
To uninstall MySQL from Windows, search and open “add or remove programs”, Locate the MySQL Server, and uninstall it. Head into the directory where MySQL was installed and remove the available files. To confirm if MySQL is uninstalled or not, use the command “mysql –version”. This guide demonstrated the process for uninstalling MySQL from Windows.

