PowerShell is a Windows administration tool used for task automation. More specifically, it is utilized for performing tasks that need administrator-level privileges. PowerShell version 5.1 comes pre-installed on Windows and can be updated to version 7. However, it can also be installed manually using specific resources.
This write-up will overview the method for the installation of PowerShell on Windows.
How to Install Windows PowerShell (Step-by-Step Guide)?
Observe these methods to install PowerShell on Windows:
Method 1: Install PowerShell from Microsoft Store
Windows has a Microsoft store that includes several third-party as well as Microsoft apps. PowerShell is also available in the catalog of the Microsoft store. It can be easily installed with the aid of a few clicks.
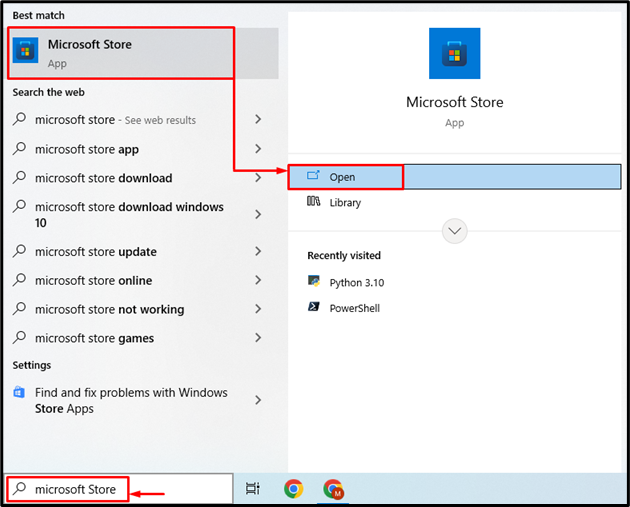
Step 1: Launch Microsoft Store
First, navigate to the “Startup” menu and launch the “Microsoft Store”:
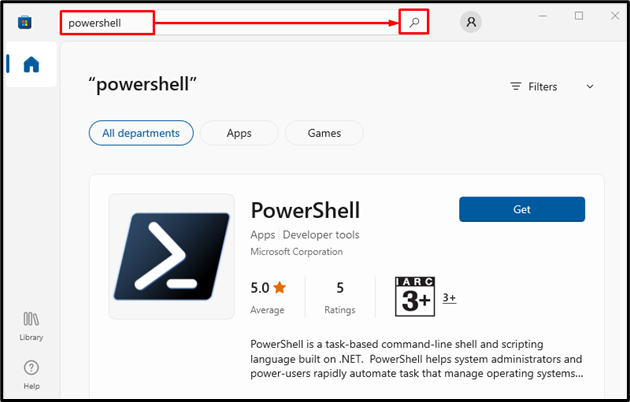
Step 2: Locate PowerShell
Move on to the search bar, then type “powershell” and click on the search button:
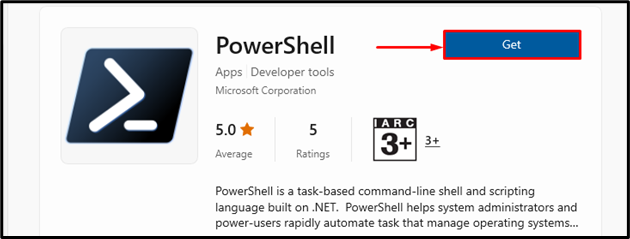
Step 3: Install PowerShell
After locating “PowerShell”, hit the “Get” button to install it:
Method 2: Install PowerShell from GitHub
PowerShell can also be downloaded from the GitHub repository. Try the below-provided steps to download PowerShell from the GitHub repository and install it.
Step 1: Download PowerShell Installer
First, download the suitable PowerShell architecture, such as 64-bit or 32-bit according to your requirements by clicking on any of the below-given links:
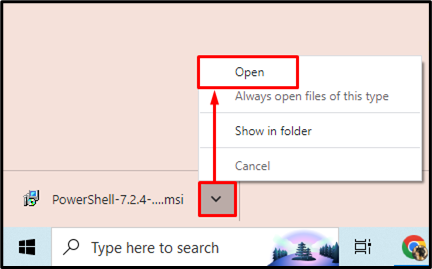
When the download is completed, click on the arrow and select the “Open” button to start installation:
Step 2: Install PowerShell
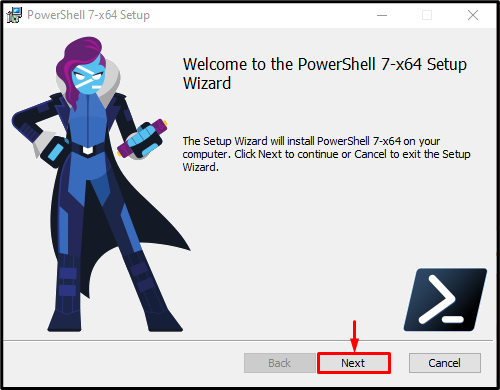
After launching the PowerShell setup, trigger the highlighted button:
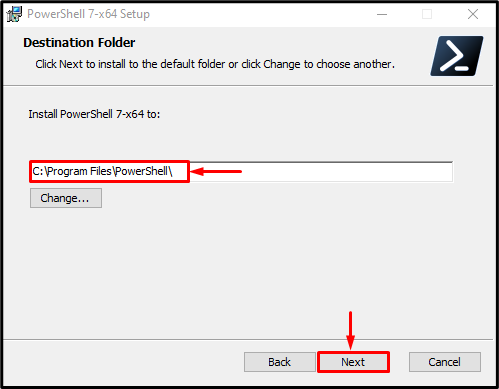
Choose the target installation directory and trigger the highlighted button:
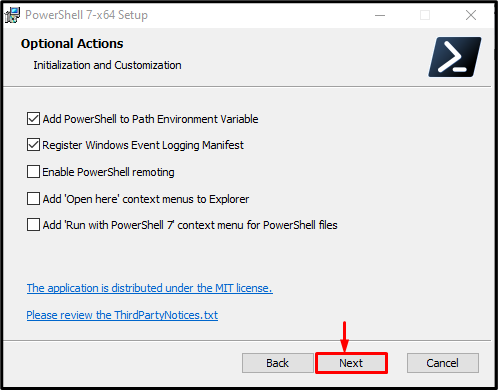
Again, trigger the highlighted button:
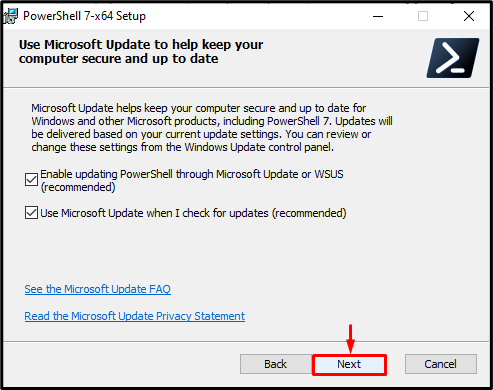
Similarly, hit the highlighted button:
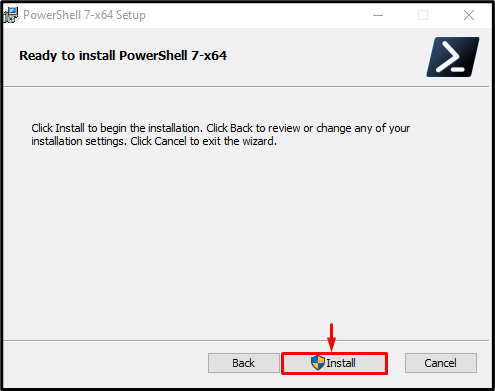
Then, trigger the specified highlighted button:
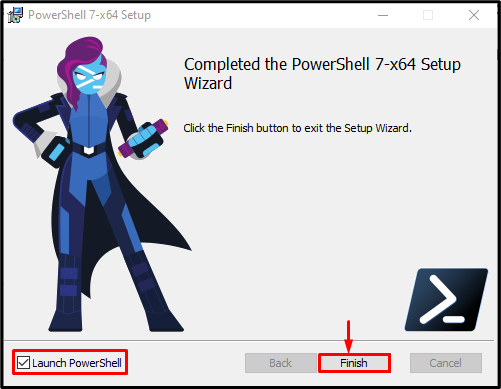
Finally, click on the highlighted button to finish the PowerShell installation. In case, if you want to launch “PowerShell” after finishing the installation then also check the “Launch PowerShell” checkbox:
It can be observed that PowerShell 7 has been installed and launched successfully:
Method 3: Install PowerShell Using Command Prompt
The third and last method to install the PowerShell is via the “Command Prompt”.
Step 1: Launch Command Prompt
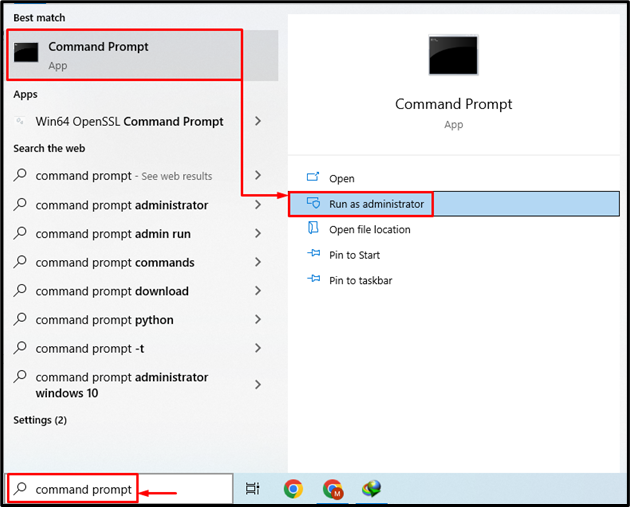
First, navigate to the “Startup menu”, search, and launch “Command Prompt” as an administrator:
Step 2: Install PowerShell
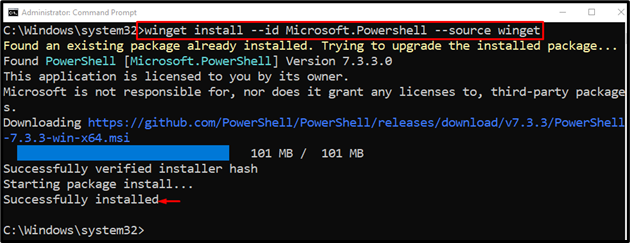
Execute the given command to install the PowerShell via CMD:
That was all about installing PowerShell on Windows.
Conclusion
PowerShell can be installed on Windows by first moving towards the “Microsoft Store” and there look for the PowerShell. When found just click on the “Get” button to install PowerShell. It can also be installed via the GitHub repository or CMD. This write-up demonstrated the procedure for installing PowerShell on Windows.

