This post will explain how to install Kubernetes on Amazon Linux EC2.
How to Install Kubernetes on Amazon Linux EC2?
For the purpose of installing Kubernetes on Amazon Linux EC2, check out the following instructions.
Step 1: Create an EC2 Instance
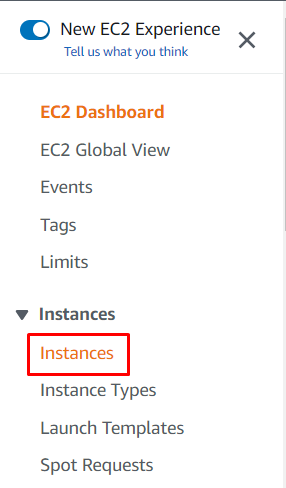
Visit the AWS EC2 dashboard from Amazon’s platform and click on the “Instances” page from the left panel:
Click on the “Launch instances” button to configure the instance:
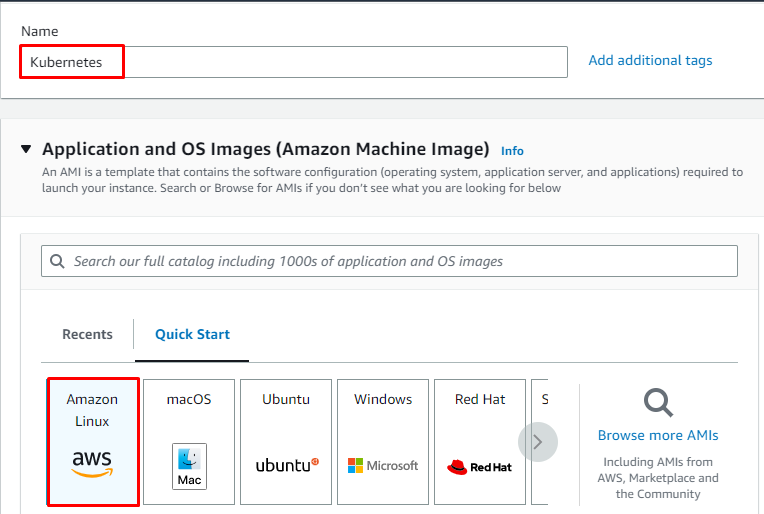
Enter the name of the instance and choose the “Amazon Linux” from the “Quick Start” section:
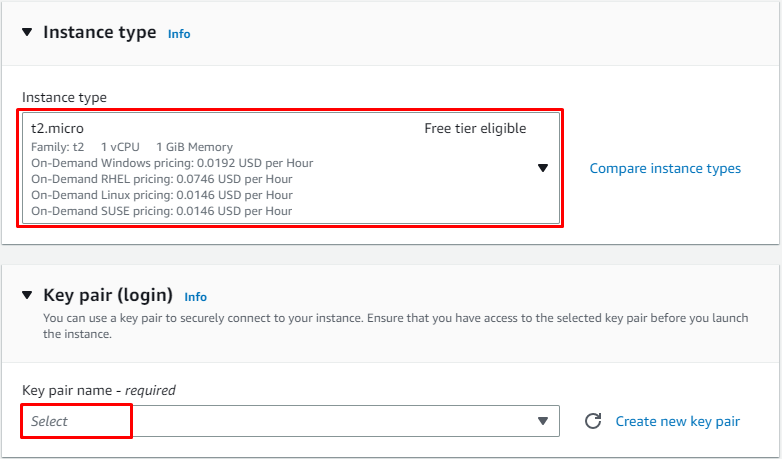
Select the Free tier eligible instance type and provide the private key pair file:
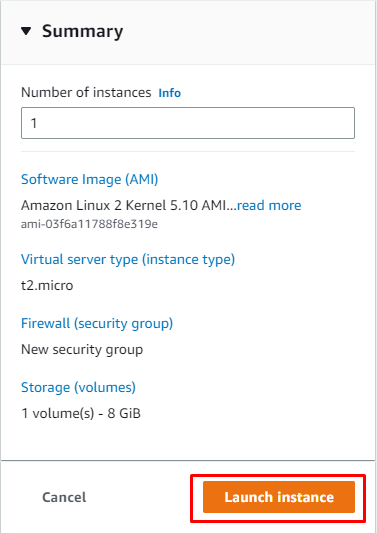
Review the summary of settings and click on the “Launch” button:
Step 2: Connect to the Instance
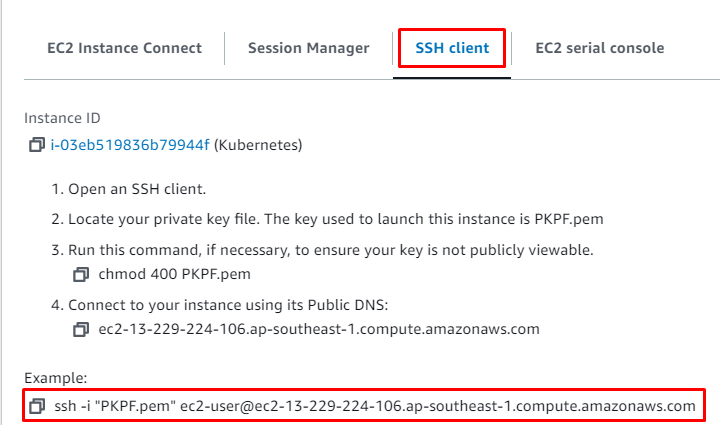
Select the instance to click on the “Connect” button from the instances page on the EC2 dashboard:
Copy the command mentioned in the screenshot below:
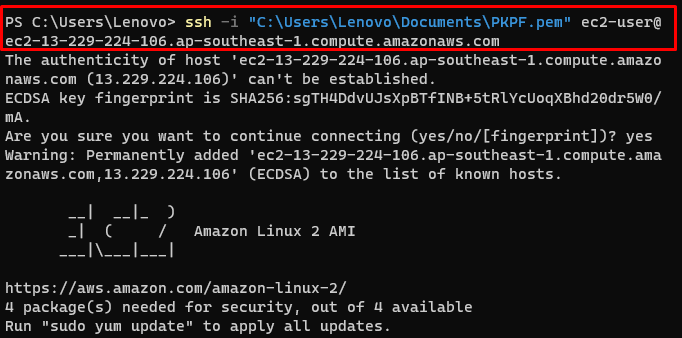
Use the command provided by the platform on the Terminal and change the path of the key pair file from the local system:
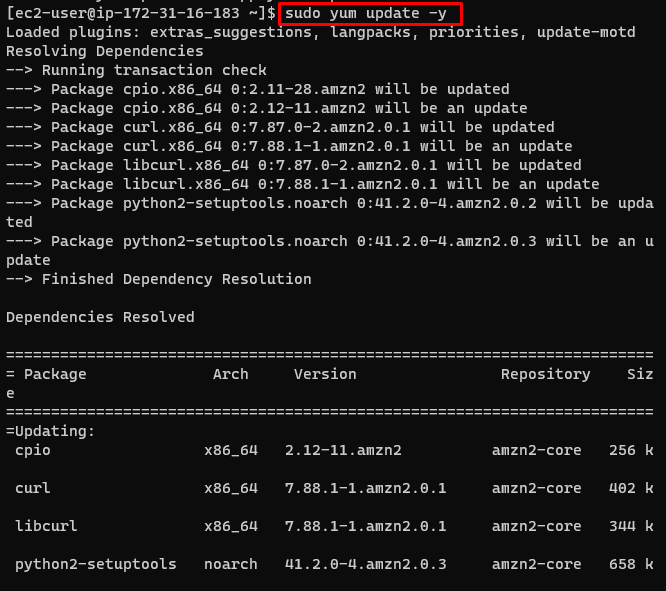
Update the yum packages:
Step 3: Install Prerequisites
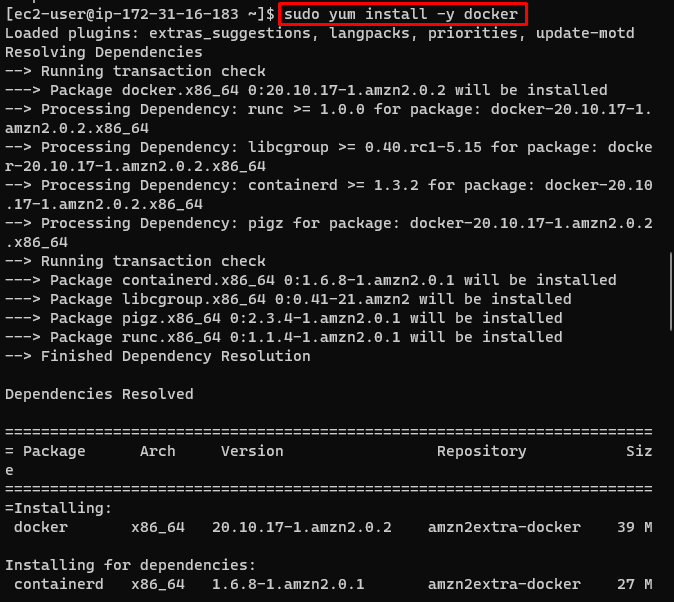
Install Docker before installing Kubernetes:
After the installation of Docker, start its relevant services:
Enable the Docker:
Step 4: Install Kubernetes
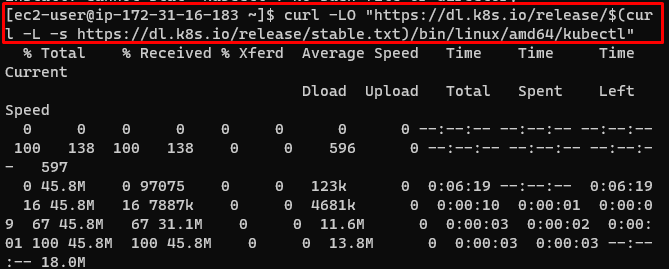
Download the latest version released by the official website:
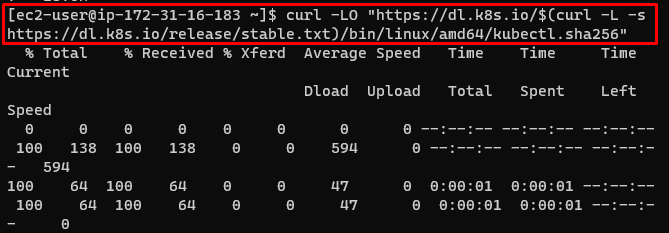
Validate the download by installing the kubectl checksum:
Use the checksum for the validation:
The resultant “OK” message signifies the successful validation:
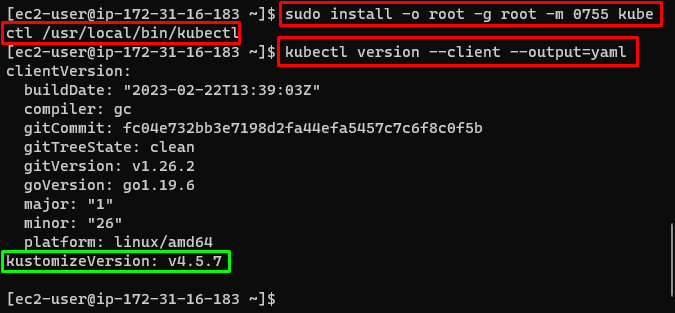
Install the Kubernetes:
Verify the installation:
Running the above command will display the installed version of kubectl:
This guide has explained the process of installing Kubernetes on Amazon Linux EC2.
Conclusion
To install Kubernetes on Amazon Linux EC2, create an instance using Amazon Linux Machine Image and connect to it. Install the Docker container on the instance and then start and enable its services. After that, download Kubernetes on the instance and validate using checksum. Once validation is complete, install kubectl and verify its version. This guide has explained how to install Kubernetes on the EC2 instance.

