With Linux, you have room to switch between different desktop environments. By default, Ubuntu 24.04 comes with the GNOME desktop. However, if you prefer installing other desktop environments, such as KDE, there is an easy way of doing so.
Each desktop environment offers a different view of the desktop icons and the customizations. Besides, you can have more than one desktop environment and switch between them when logging in. If you prefer KDE over GNOME, you can install the KDE on Ubuntu 24.04. You can install its full or standard version, and we’ve covered the steps to do so. Read on!
Step-by-Step Guide to Install KDE on Ubuntu 24.04
The installation of KDE follows a few basic steps. First, we must update the package indexes. Next, we select which KDE package to install. We then set which display manager to use, and once we reboot the system, we can select which desktop environment to use.
Here are the detailed steps we will use.
Step 1: Update and Upgrade the System
To prepare for the installation, we must first update and upgrade the system. This step is crucial in refreshing the package indexes to retrieve the latest KDE version while also updating the installed packages.

Step 2: Install KDE
There are two options when installing KDE. You can install KDE Standard or KDE Full. KDE Standard only provides the essential applications such as browser, text editor, file manager, etc. This version doesn’t install all the available applications. Instead, it keeps things simple by only installing the core applications for basic functionalities.
Install KDE Standard using the below command.
However, the KDE Full version will install all the packages bundled with the desktop environment. It installs the core applications and all other available extras, such as games. The KDE Standard takes up about 1.6GB of disk space, while the KDE Full takes 3.8 GB. To install KDE Full, execute the below command.
We’ve installed KDE Standard for this guide.

Confirm the prompt to continue installing KDE.

Step 3: Select the Display Manager
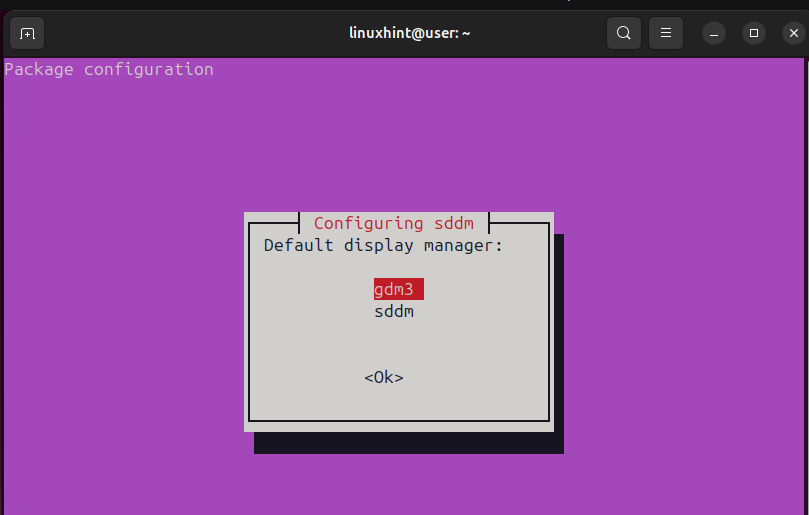
After confirming the installation, you will get prompted to select which display manager to use. Before that, click on ‘OK’ to check the available display managers.

Next, select which display manager to use. You can use the gdm3 or sddm display manager. Once you’ve selected which to use, proceed with the installation by clicking on ‘OK.’

The installation will continue, and once KDE completes the installation, we will be ready to start utilizing it.
Step 4: Switch to KDE
To switch to KDE, let’s first reboot the system.

On the logging page, select Plasma (X11) as the desktop environment before you enter your credentials to log in.

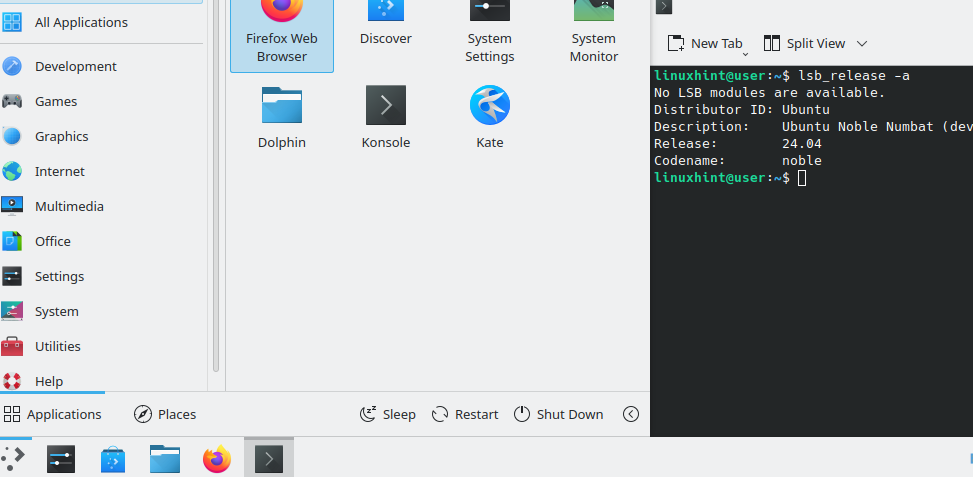
Once logged in, you will immediately notice that the desktop environment has changed. The user interface will look different, including the installed applications. KDE has an interface like the one we have in the image below.

That’s it! You now have KDE on Ubuntu 24.04. Go through the desktop environment to get comfortable with the user interface and the various utilities it offers.
Conclusion
GNOME is the default desktop environment for Ubuntu 24.04. However, you can install and use other desktop environments, such as KDE. Besides, you are free to switch between different desktop environments when logging into your Ubuntu 24.04. This post explains how to install KDE on Ubuntu 24.04.
