The “git filter-branch” command rewrites the entire history of the branch, which means that any commits that are removed or modified will be lost permanently. Therefore, it is highly suggested that you back up your repository before utilizing this command. Moreover, this command creates new commits and SHA hash. So, it is not recommended to use it in a public branch.
This article will discuss:
-
- What are the Basic Filter Options Available for the “git filter-branch” Command?
- How to Utilize the “git filter-branch” Command With the “–tree-filter” Option?
- How to Utilize the “git filter-branch” Command With the “–index-filter” Option?
- How to Utilize the “git filter-branch” Command With the “–msg-filter” Option?
What are the Basic Filter Options Available for the “git filter-branch” Command?
The basic filter options for “git filter-branch” commands are given below:
| Filter options | Description |
| –env-filter <command> | Modify the environment where users make commits. |
| –tree-filter <command> | Rewrite the tree and its content. |
| –index-filter <command> | Rewrite the index. |
| –parent-filter <command> | Rewrite the commit’s parent list. |
| –msg-filter | Rewrite the commit messages. |
| –commit-filter<command> | Perform commits. |
| –tag-name-filter <command> | Rewrite the tag name. |
| –prune-empty | Instruct git-filter-branch to remove empty commits. |
How to Utilize the “git filter-branch” Command With the “–tree-filter” Option?
Sometimes users want to remove a specific file from all commits due to some reasons, such as if the file contains some confidential or secret information. In this situation, utilize the “git filter-branch –tree-filter ‘rm -rf <file-name>’” command to remove a particular file from the entire history of a repository.
Follow the provided instructions to do so.
Step 1: Navigate to Local Repository
First, write out the given-below command and redirect to the desired directory:
Step 2: View Repository Content
Next, display the current repository’s content using the following command:
According to the below output, the current repository contains two files. Choose a particular file that needs to be deleted. For instance, we have selected the “file1.txt” file:

Step 3: Remove File From Entire History
Then, run the provided command along with the selected file name to remove that file:
Here:
-
- “–tree-filter” option is used to specify a command to run on each tree in the branch.
- “rm -rf” option is utilized to delete the “file1.txt” file:

Note: If the file is not present in some commits, then executing the “‘rm filename” option will not work for trees and commits.
Step 4: Verify Changes
Lastly, ensure whether the file has been removed by viewing the repository’s content:

How to Utilize the “git filter-branch” Command With the “–index-filter” Option?
If the user wants to modify the index of the repository rather than the entire branch, the “git filter-branch –index-filter” command can be used. This can be useful for removing specific files from the index.
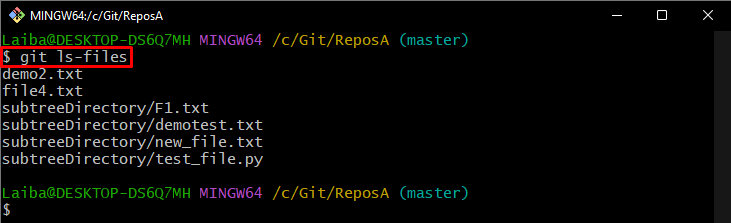
Step 1: View Files of Repository
Execute the below-stated command to list the available files of the current repository:
The below image displays the list of files. Select the desired file that you want to remove from the index. For instance, we have selected the “file4.txt” file:
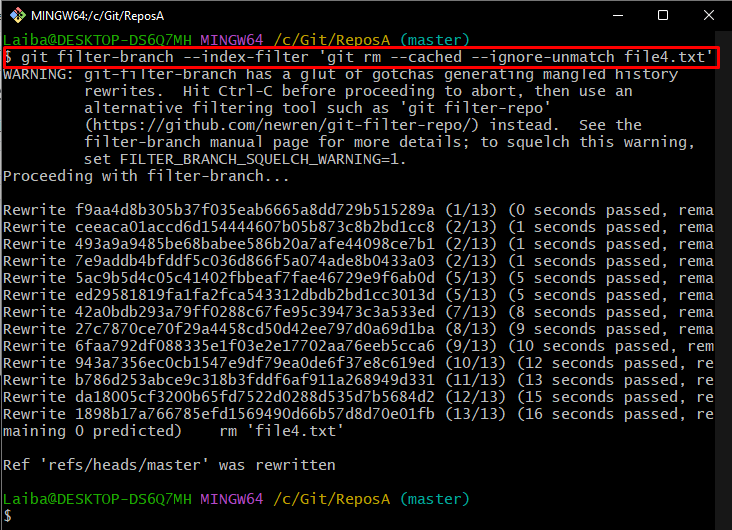
Step 2: Remove File From Index
Then, remove the selected file from the index by writing out the following command:
Here:
-
- “–index-filter” specifies the command that will be used to filter the index.
- “–cached” option removes/deletes files from the index.
- “–ignore-unmatch” ignores any errors:
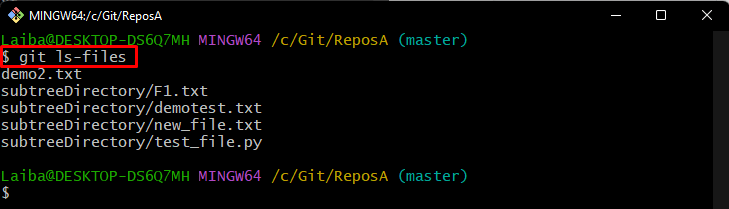
Step 3: Verify Changes
Lastly, run the given-provided command to ensure that the file has been deleted from the index:
How to Utilize the “git filter-branch” Command With the “–msg-filter” Option?
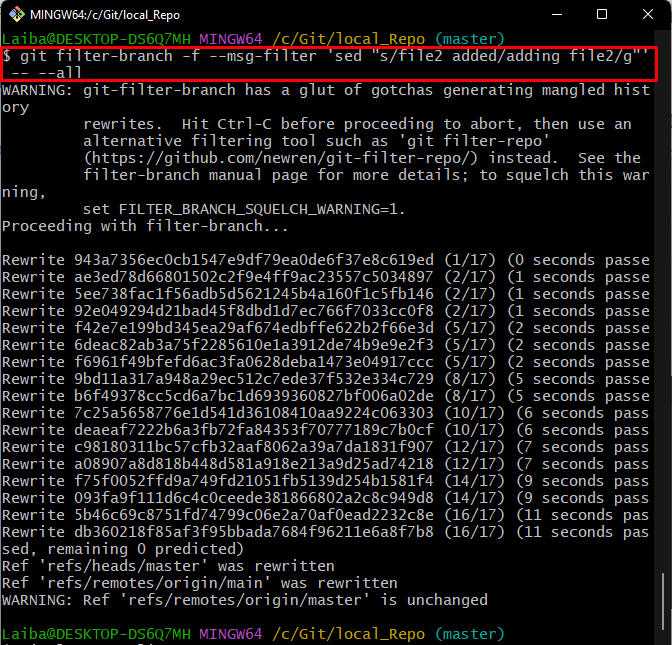
Sometimes users want to rewrite the specific commit message from the log history. For this purpose, the “git filter-branch -f –msg-filter ‘sed “s/<old-commit-message>/<new-commit-message>/g”‘ — –all” can be used.
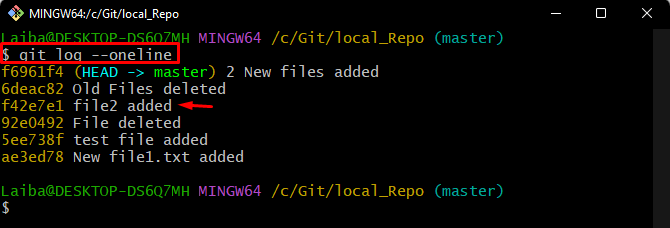
Step 1: View Commit History
First, check the commit SHA hash history of the current working repository:
In the below screenshot, the commit history can be seen. Choose the desired commit message that needs to be rewritten. For instance, we have selected the “file2 added” commit message:
Step 2: Rewrite Commit Message
Next, execute the following command to rewrite the selected commit message:
Here:
-
- “–msg-filter” option is used to change the commit message.
- “-f” option performs the operation forcefully.
- “sed” command searches for the string “file2 added” in the commit message and replaces it with the “adding file2” message.
- “— –all” option applies the filter to all branches in the repository:
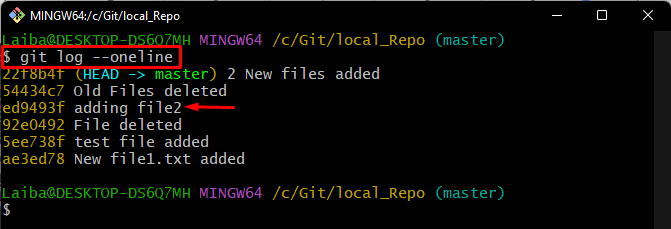
Step 3: Verification
Lastly, verify the changes by checking the commit in the history:
It can be observed that the old commit message has been replaced with the new commit message:
That was all about the “git filter-branch” command in Git.
Conclusion
The “git filter-branch” command is used to rewrite the commit history of a particular branch or all branches in a repository. It allows users to perform various operations on commits, such as removing files, modifying commit messages, etc. Moreover, this can be used to clean up a specific repository and remove sensitive information. This article explained about the “git filter-branch” command and its filter options.