In this article, I will show you how to create a Ubuntu 24.04 LTS virtual machine (VM) on Proxmox VE.
This article is the foundation of the Proxmox VE Ubuntu 24.04 LTS VM GPU passthrough guide. Once you have a Ubuntu 24.04 LTS Proxmox VE VM set up, you can passthrough a GPU (i.e. NVIDIA GPU) to the Ubuntu 24.04 LTS VM and do amazing things on the VM.
Table of Contents
- Downloading Ubuntu 24.04 LTS ISO Image and Uploading it to Proxmox VE
- Creating an Ubuntu 24.04 LTS VM on Proxmox VE
- Installing Ubuntu 24.04 LTS on the Proxmox VE VM
- Removing the Ubuntu 24.04 LTS ISO Image from the Proxmox VE VM
- Installing QEMU Guest Agent on the Ubuntu 24.04 LTS Proxmox VE VM
- Passthrough an NVIDIA GPU to the Ubuntu 24.04 LTS Proxmox VE VM
- Conclusion
Downloading Ubuntu 24.04 LTS ISO Image and Uploading it to Proxmox VE
To install Ubuntu 24.04 LTS on a Proxmox VE VM, you will need the ISO installation image of Ubuntu 24.04 LTS.
You can download the ISO image of Ubuntu 24.04 LTS from the official Ubuntu website.
Ubuntu has different flavors featuring different Linux desktop environments. You can use any Ubuntu flavors you desire. Only the installation methods will differ.
Once you’ve downloaded an ISO installation image of Ubuntu, you must upload the Ubuntu ISO installation image on your Proxmox VE server.
Creating an Ubuntu 24.04 LTS VM on Proxmox VE
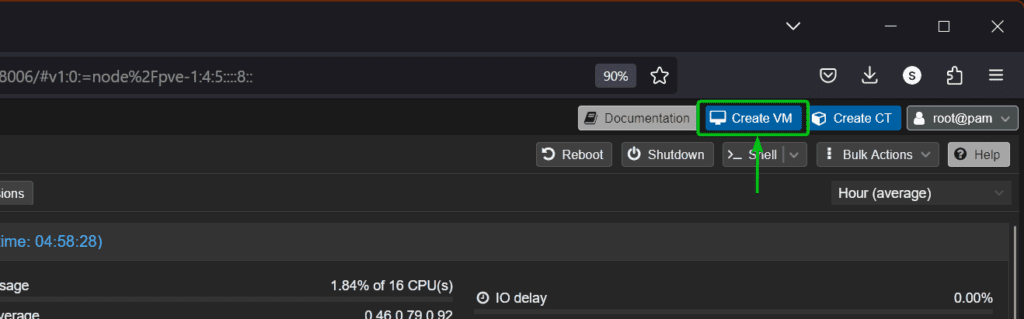
To create a new Ubuntu VM on Proxmox VE, click on Create VM from the top-right corner of the Proxmox VE web management interface.
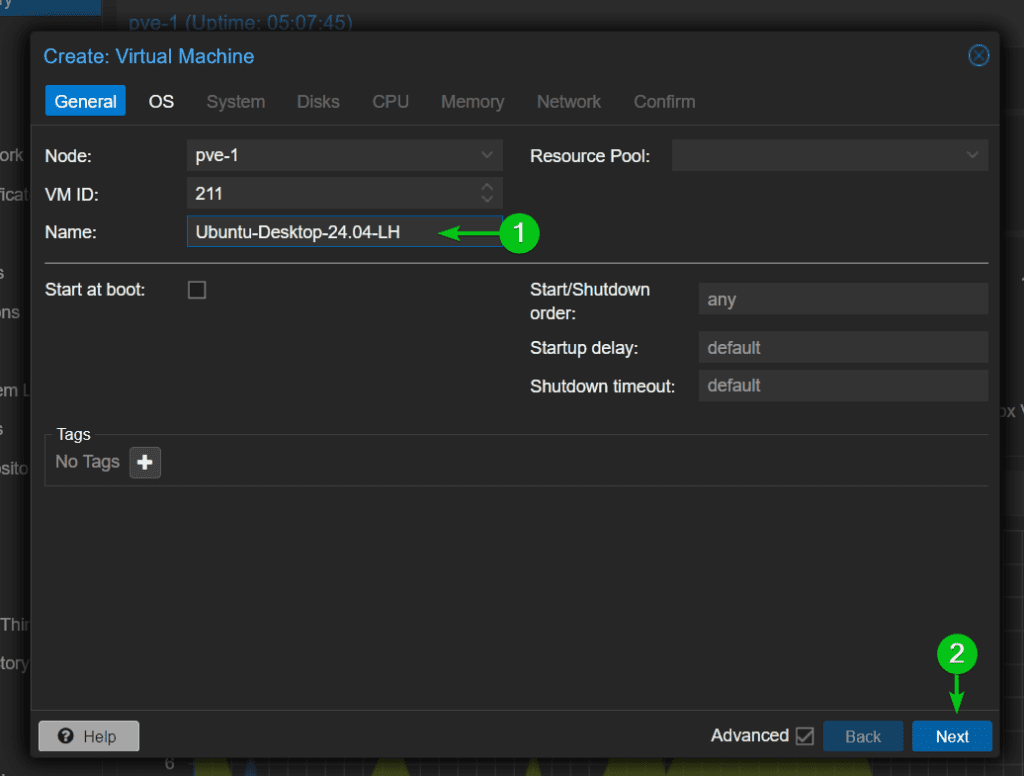
From the General tab:
- Type in a name for the VM.
- Click on Next to continue.
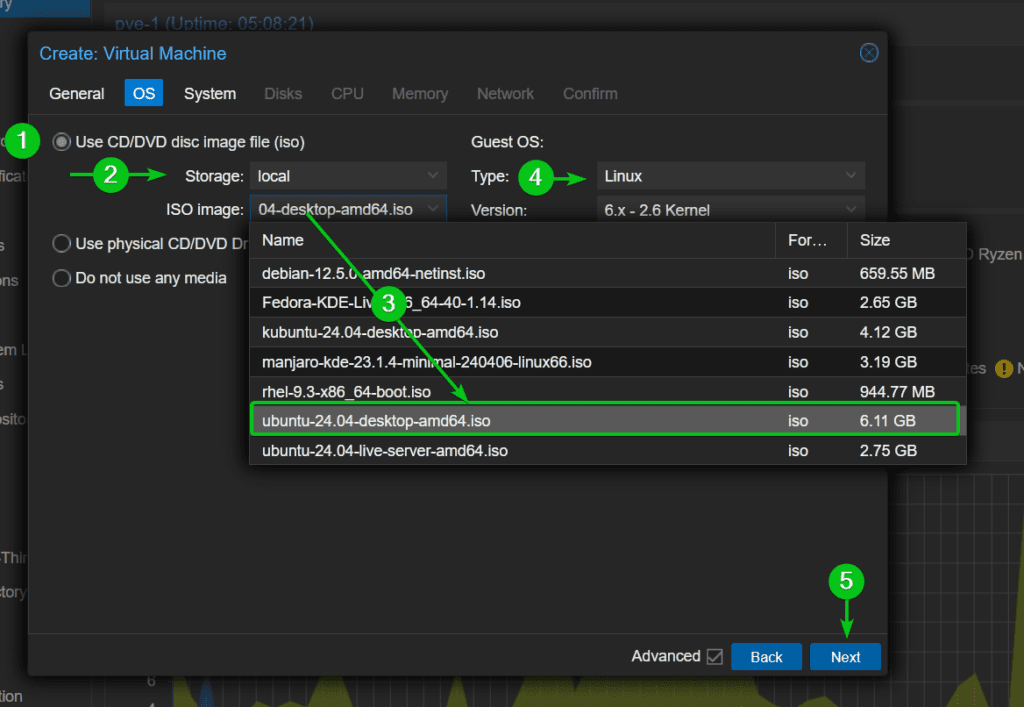
From the OS tab:
- Select Use CD/DVD disc image file (iso).
- From the Storage dropdown menu, select the storage where you’ve saved the Ubuntu 24.04 LTS ISO image.
- From the ISO image dropdown menu, select the Ubuntu 24.04 LTS ISO installation image
- Select Linux as the Guest OS type.
- Click on Next to continue.
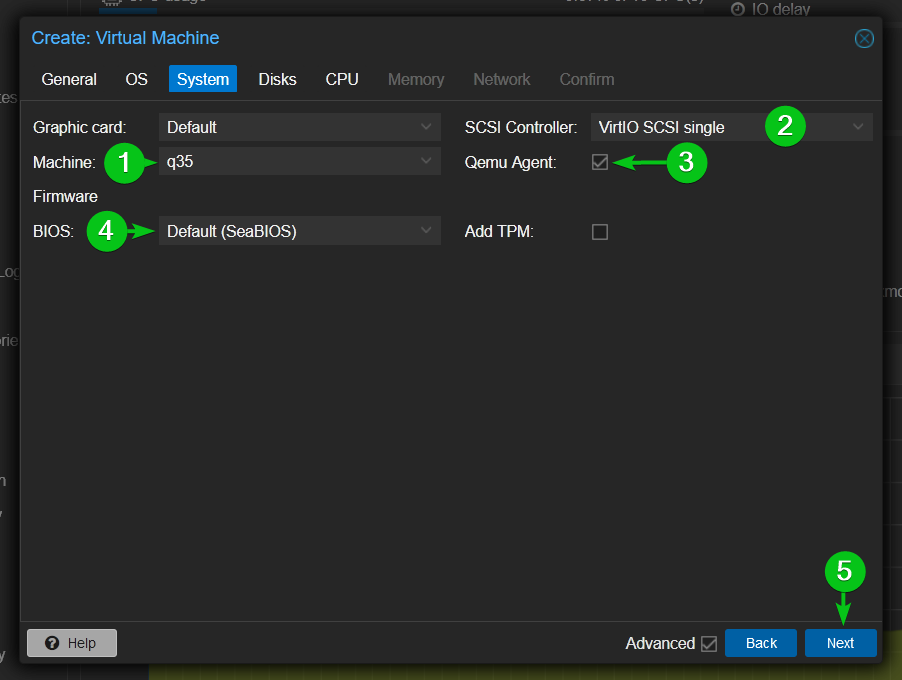
From the Systems tab:
-
Select q35 from the Machine dropdown menu.
-
select VirtIO SCSI single from the SCSI Controller dropdown menu.
-
Tick Qemu Agent.
-
To use the traditional BIOS firmware (not UEFI firmware), select Default (SeaBIOS) or SeaBIOS from the BIOS dropdown menu.
-
Click on Next to continue.
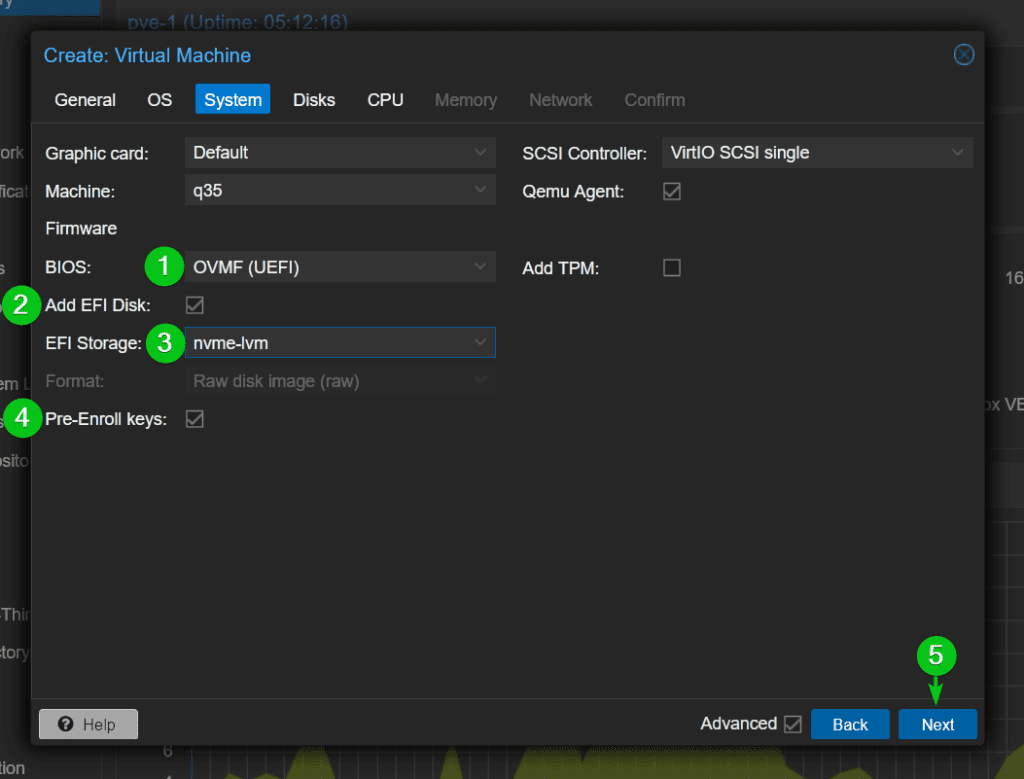
To use the UEFI BIOS firmware on the Ubuntu VM:
-
Select OVMF (UEFI) from the BIOS dropdown menu.
-
Check the Add EFI Disk checkbox.
-
Select a storage from the EFI Storage dropdown menu. The UEFI firmware disk image will be stored in this storage.
-
Check Pre-Enroll keys checkbox.
-
Click on Next to continue.
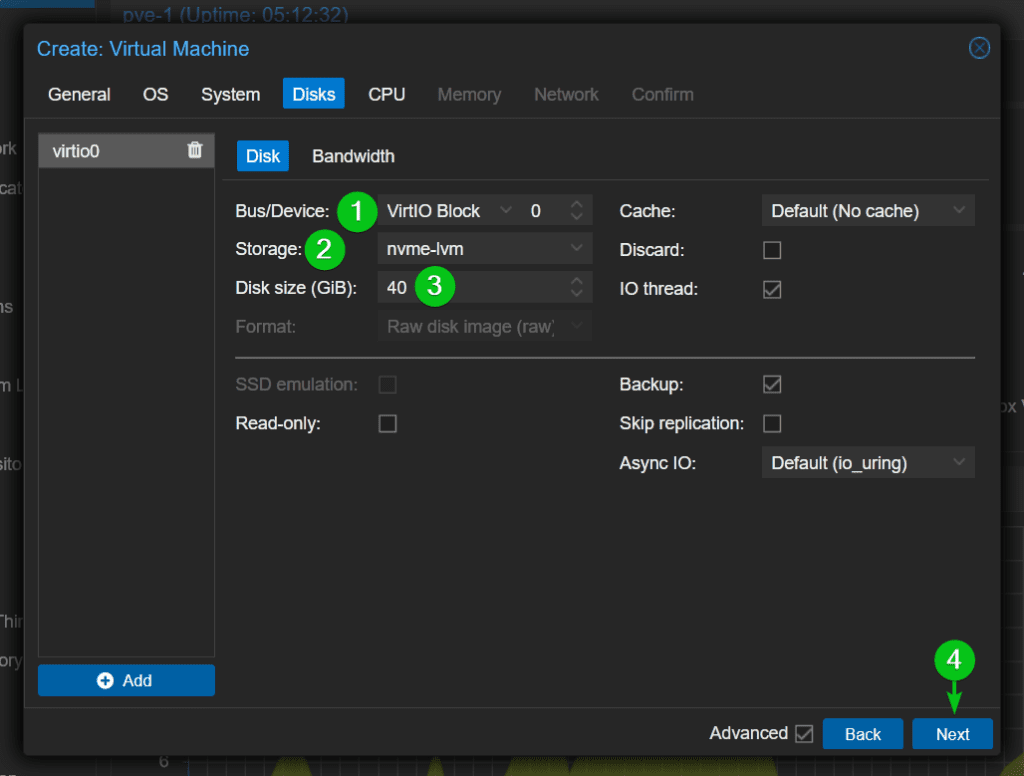
To add a virtual disk to the Ubuntu VM, configure the following options from the Disks tab:
-
Select VirtIO Block from the Bus/Device dropdown menu.
-
From the Storage dropdown menu, select a storage where you want to store the virtual disk of the VM.
-
In the Disk size (GiB) section, type in the desired amount of disk space (in GiB unit) to allocate for the VM.
-
Click on Next to continue.
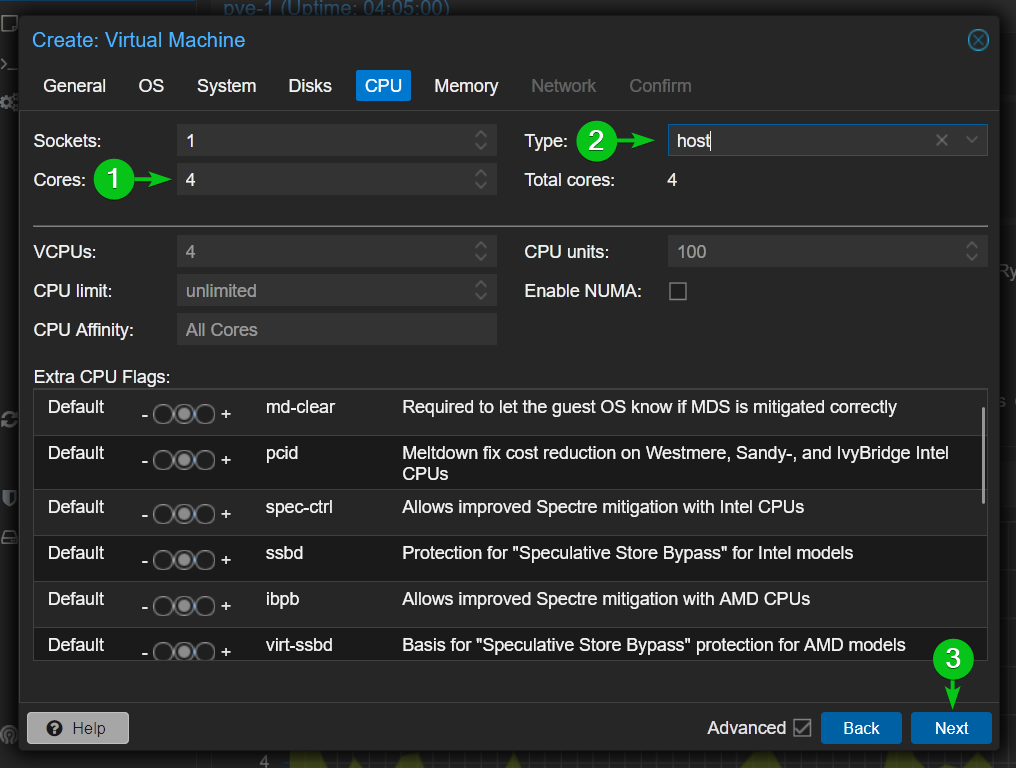
To configure the CPU of the Ubuntu VM:
-
From the Cores dropdown menu, select the number of CPU cores you want to assign to the Ubuntu VM.
-
From the Type dropdown menu, select host.
-
Click on Next to continue.
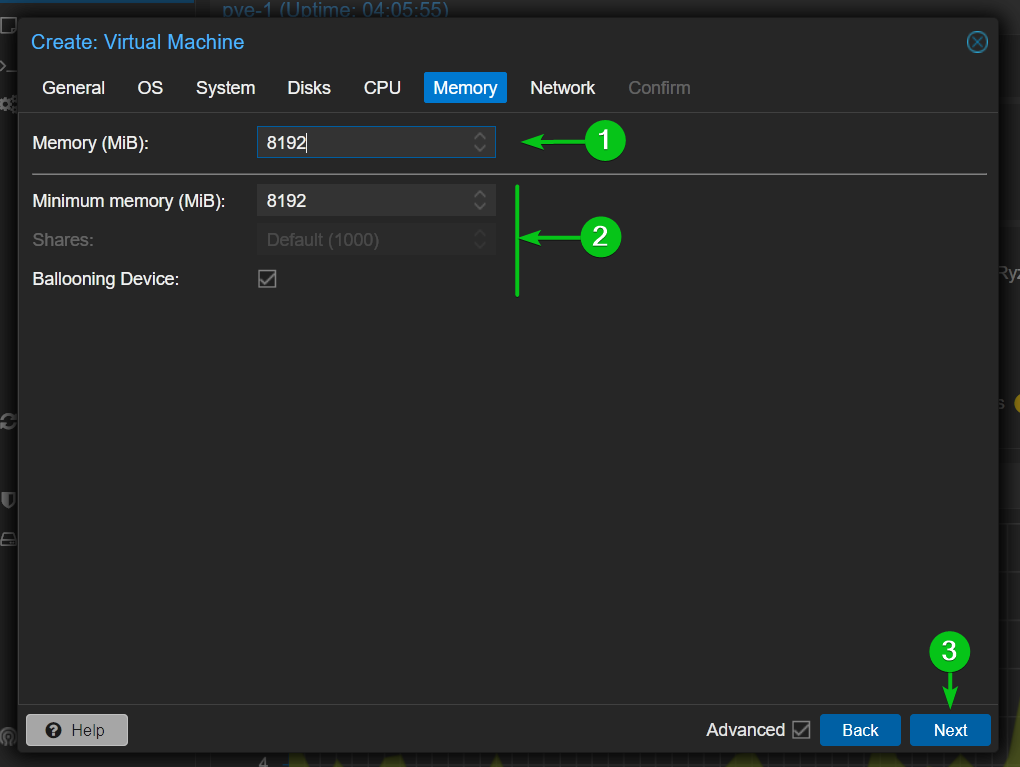
To configure the Memory of the Ubuntu VM:
-
In the Memory (MiB) section, type in the amount of memory/RAM you want to allocate to the VM.
-
To use memory ballooning on the Ubuntu VM:
-
-
Check the Ballooning Device checkbox.
-
Type in the minimum amount of memory you want to allocate to the Ubuntu VM in the Minimum memory (MiB) section.
-
The main purpose of memory ballooning:
-
-
To use physical memory more efficiently on the VM.
-
Free up unused physical memory of the VM.
-
Reuse the freed-up memory on other Proxmox VE VMs automatically.
-
-
Click on Next to continue.
NOTE: If you plan to passthrough a GPU or other PCI/PCIE devices to the VM, you must disable memory ballooning. Hardware passthrough will not work with memory ballooning enabled.
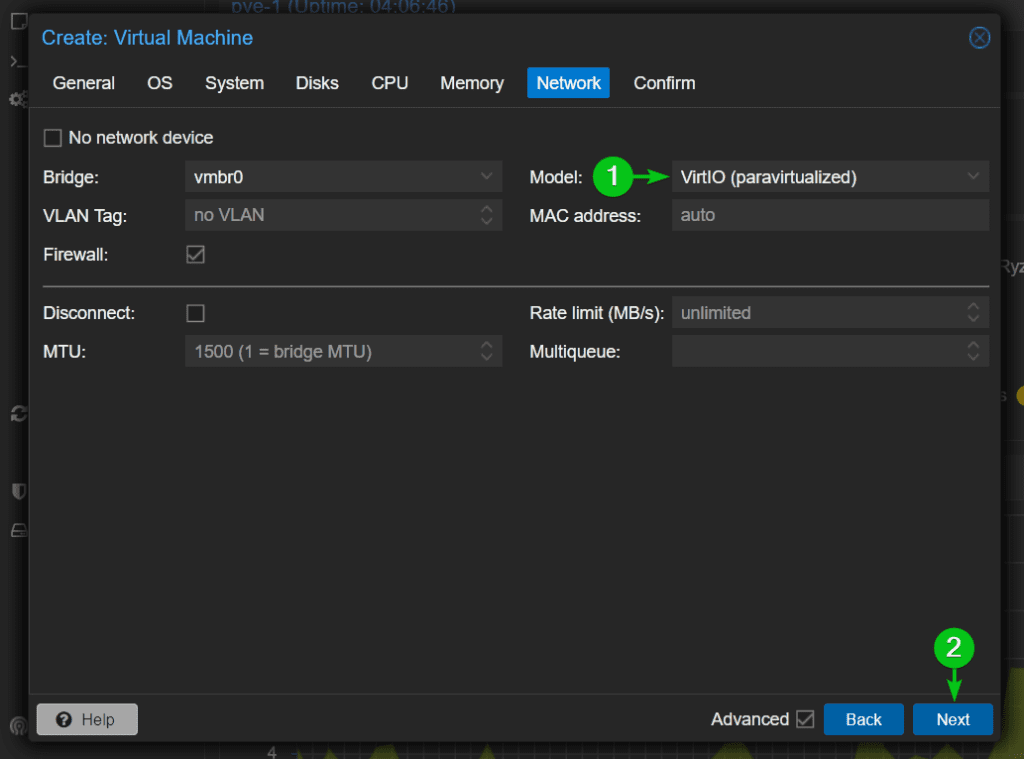
To configure the network of the Ubuntu VM:
-
Select VirtIO (paravirtualized) network adapter from the Model dropdown menu.
-
Click on Next to continue.
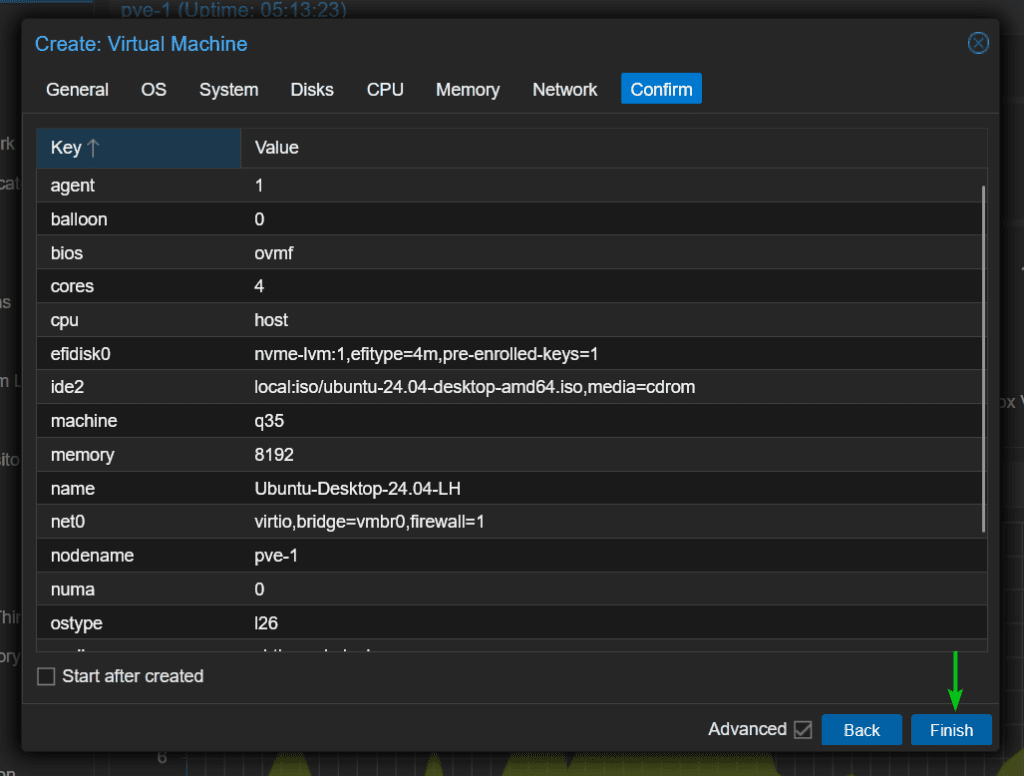
A summary of the configurations the Ubuntu VM will be created with should be displayed. Click on Finish to create the Ubuntu VM with those configurations.
Installing Ubuntu 24.04 LTS on the Proxmox VE VM
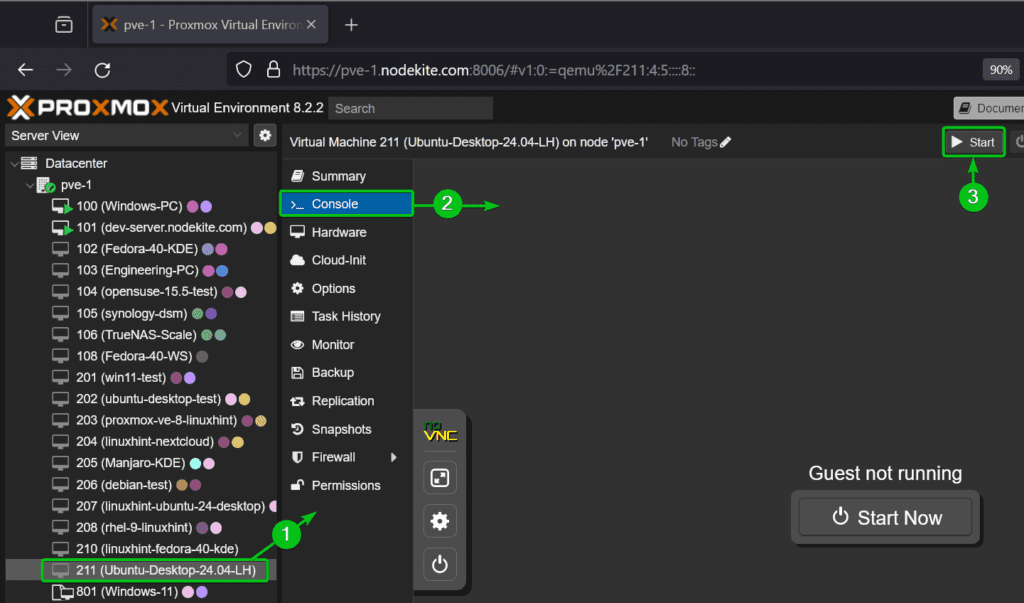
Once the Ubuntu Proxmox VE VM is created, do the following things to start the Ubuntu VM:
-
Click on the newly created Ubuntu VM from the VM list to open it on the Proxmox VE web management console.
-
Navigate to the Console section.
-
Click on Start.
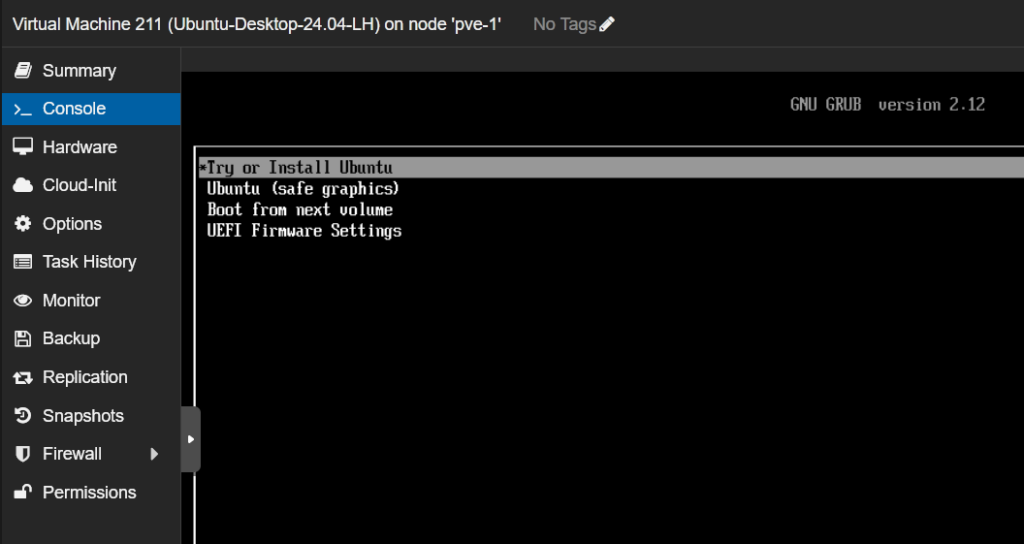
The Ubuntu VM should boot from the Ubuntu 24.04 LTS ISO image.
Select Try or Install Ubuntu from the GRUB boot menu and press <Enter>.
The Ubuntu installer should be displayed. You can install Ubuntu 24.04 LTS on the VM from here as usual.
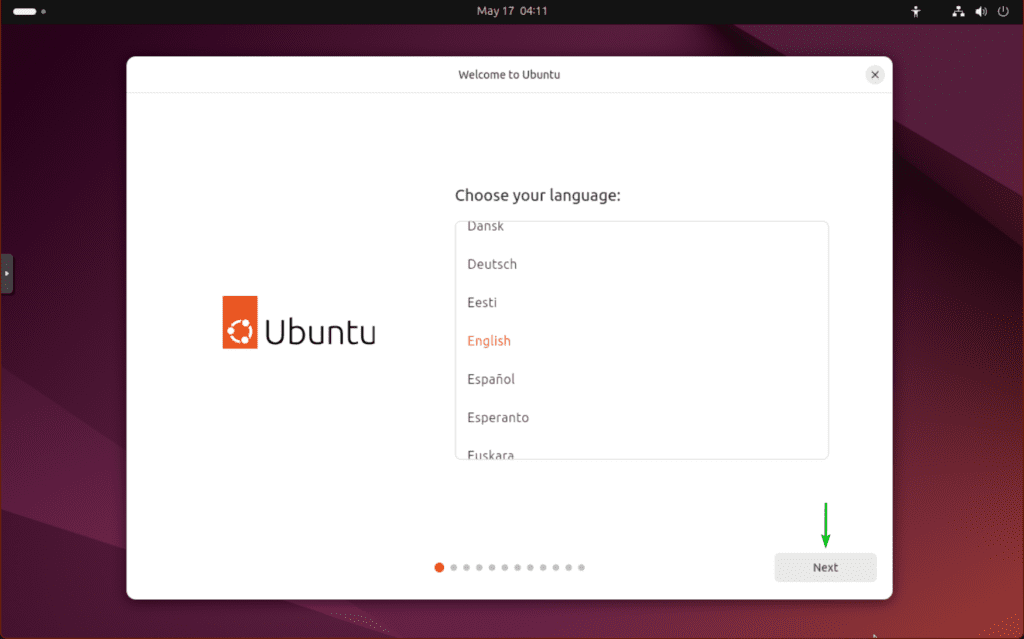
First, select your language and click on Next.
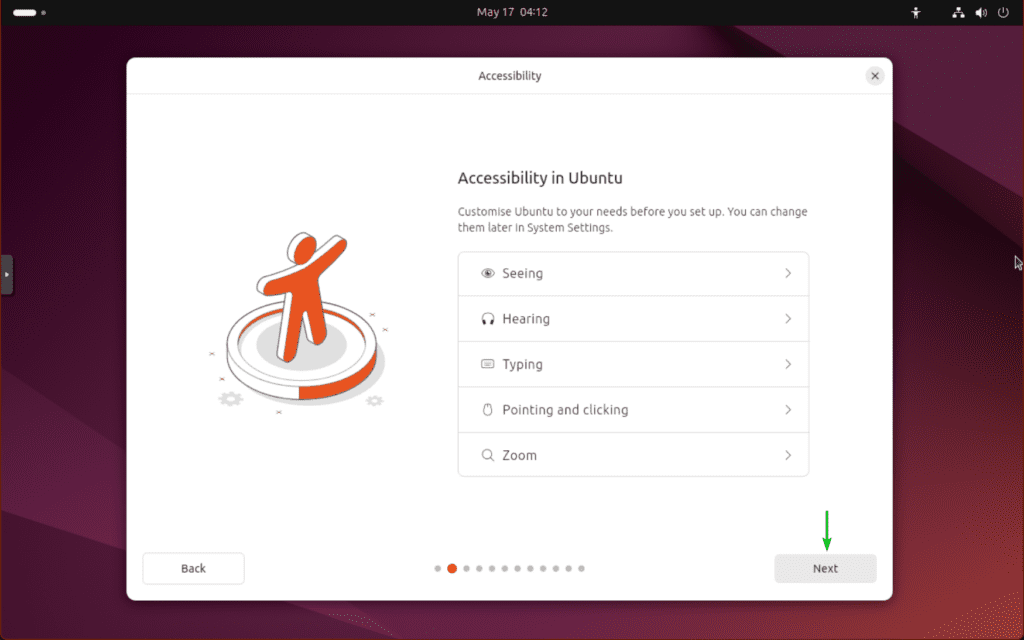
Some accessibility options will be displayed. You can configure them as required.
Once you’re done, click on Next.
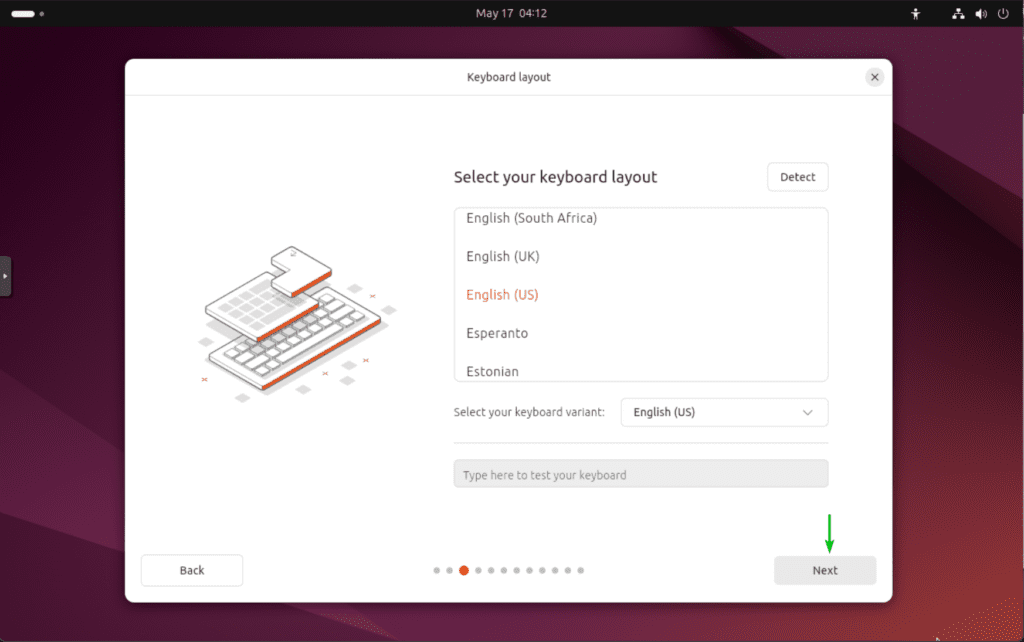
Select your keyboard layout and click on Next.
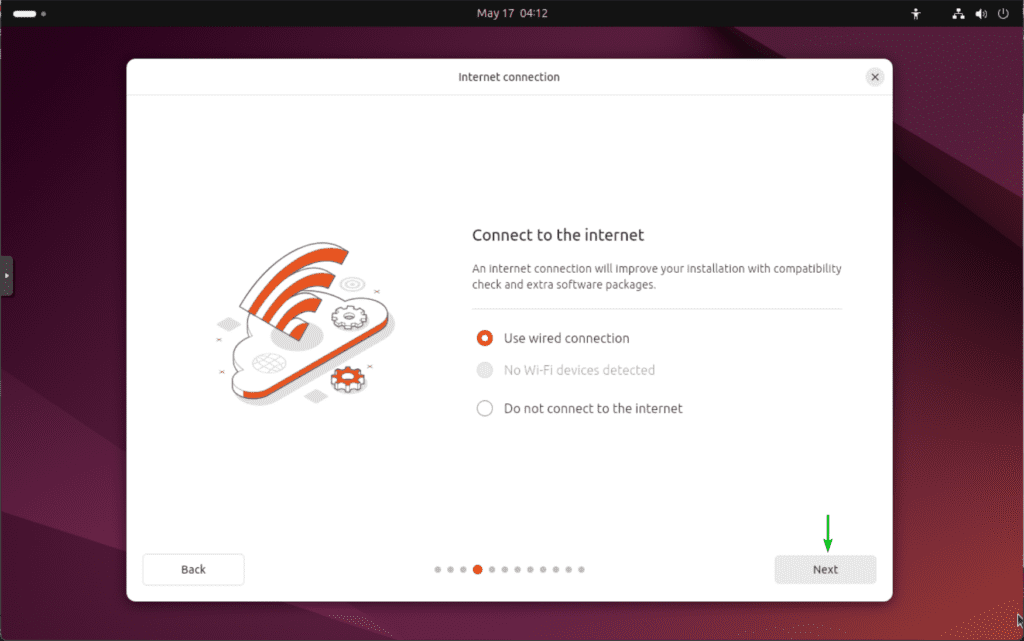
As you’re installing Ubuntu 24.04 LTS on a VM, the wired network connection will work just fine. You don’t need any complex configuration.
Click on Next.
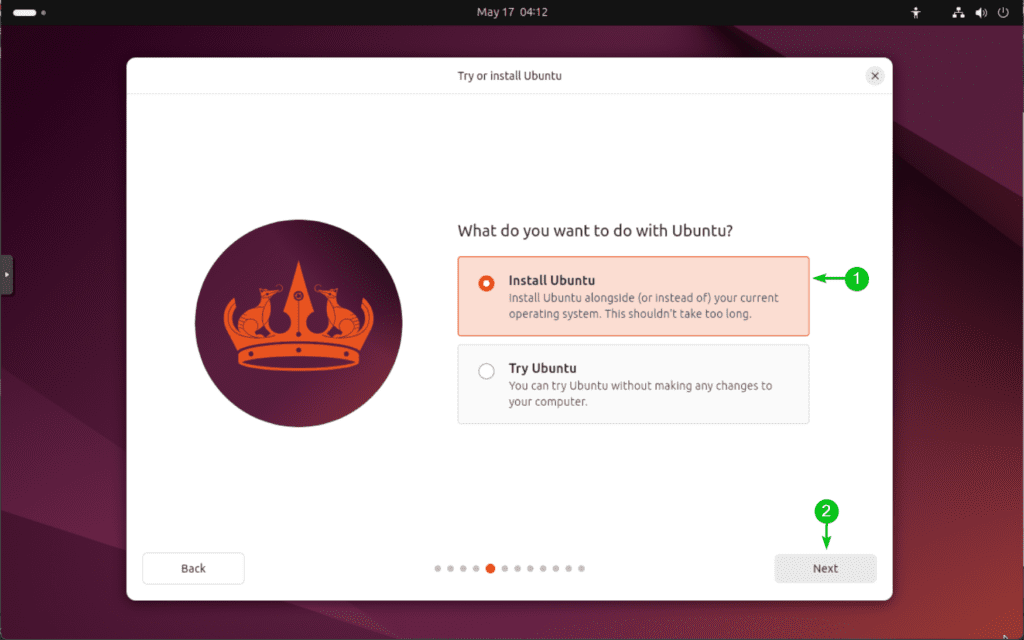
Select Install Ubuntu[1] and click on Next[2].
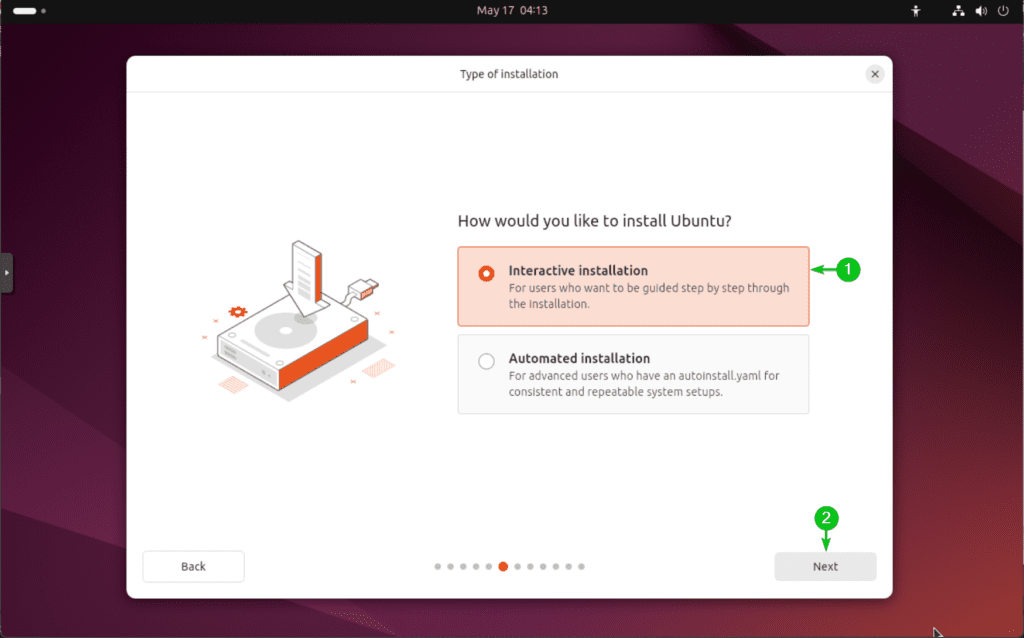
Select Interactive installation[1] and click on Next[2].
Select one of the apps selection options and click on Next[2].
-
Default selection: Ubuntu installer will install only the essential apps and utilities. This method will use up less disk space.
-
Extended selection: Ubuntu installer will install LibreOffice, more apps and utilities that the Default selection. This method will use more disk space.
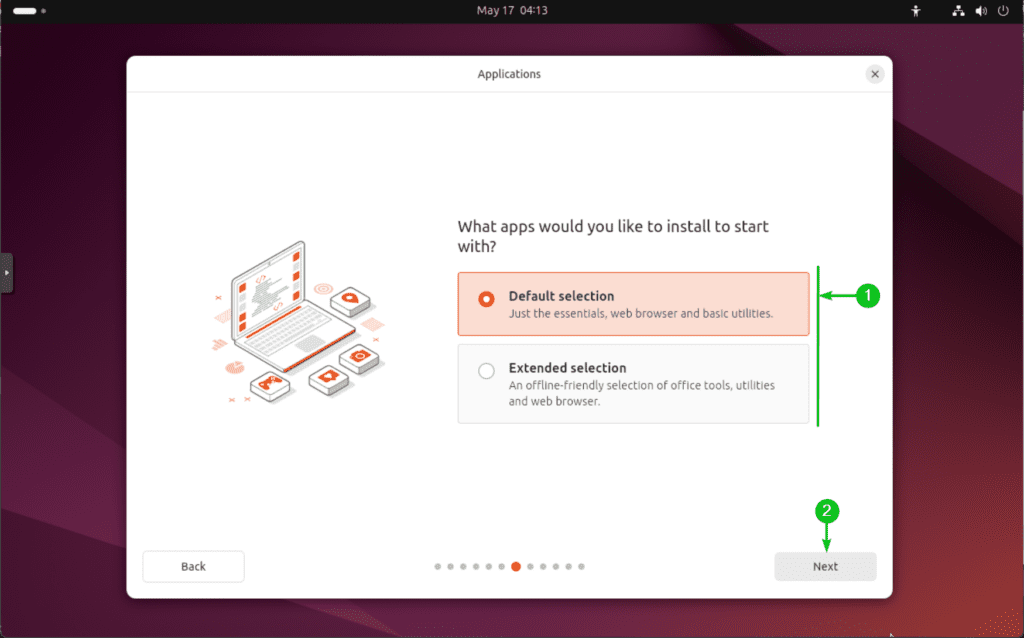
Click on Next.
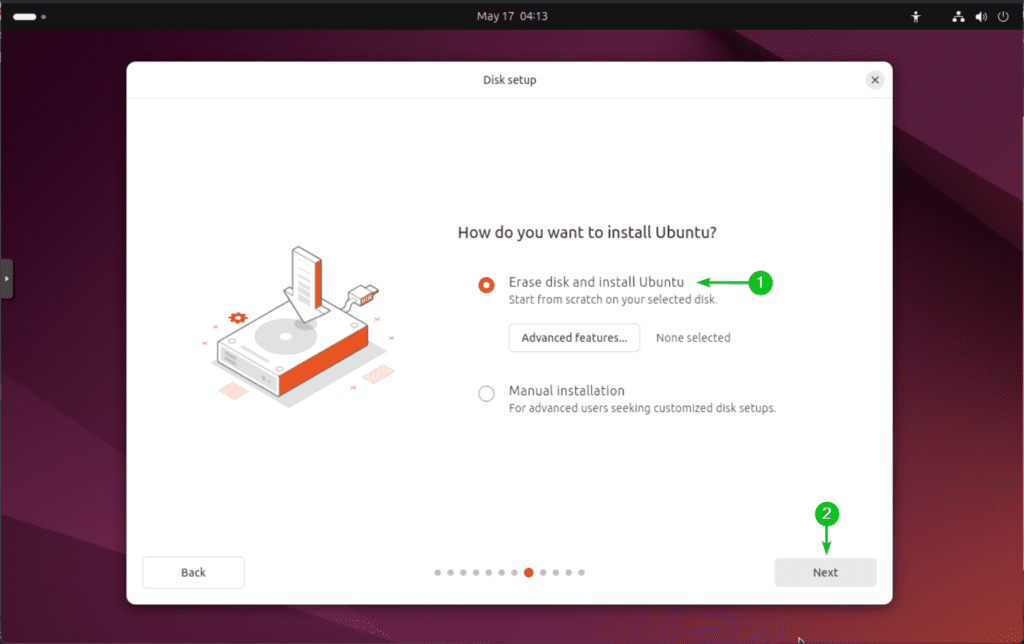
Select Erase disk and install Ubuntu[1]and click on Next[2].
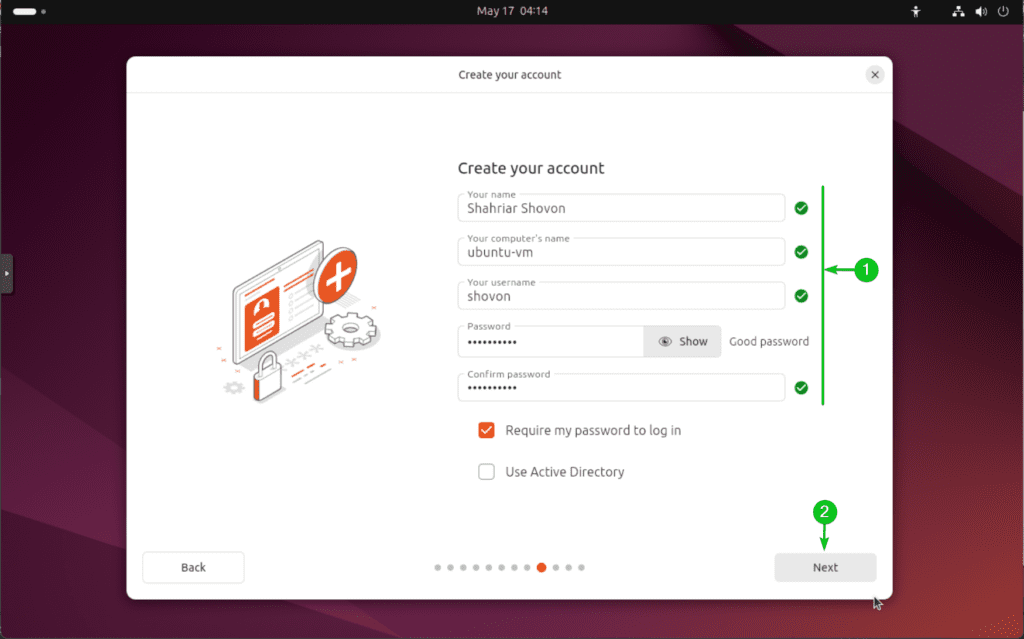
Type in the login user details[1] and click on Next[2].
Select your timezone and click on Next.

Click on Install.
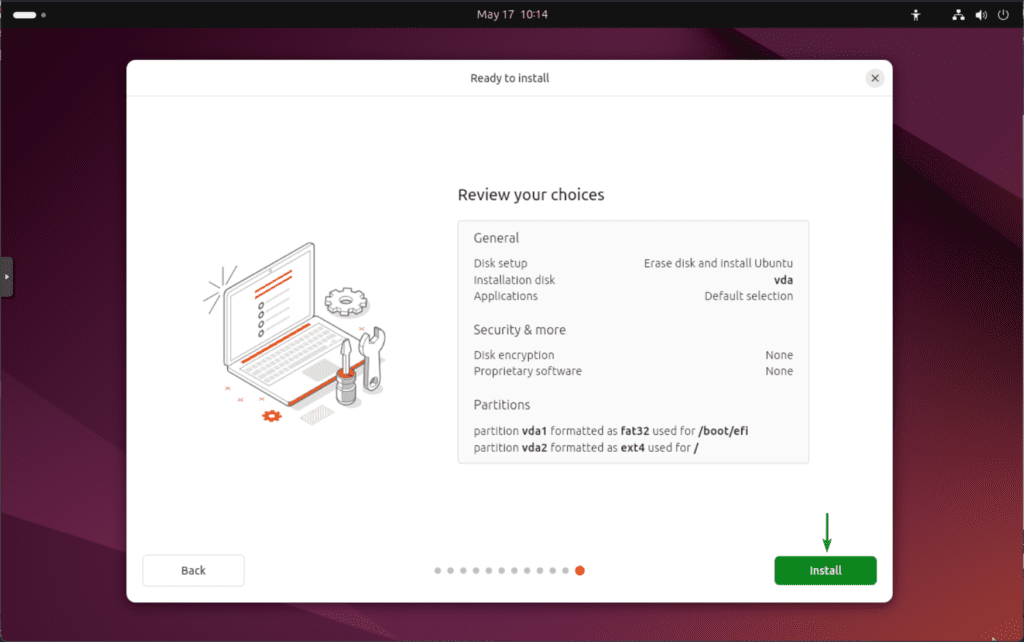
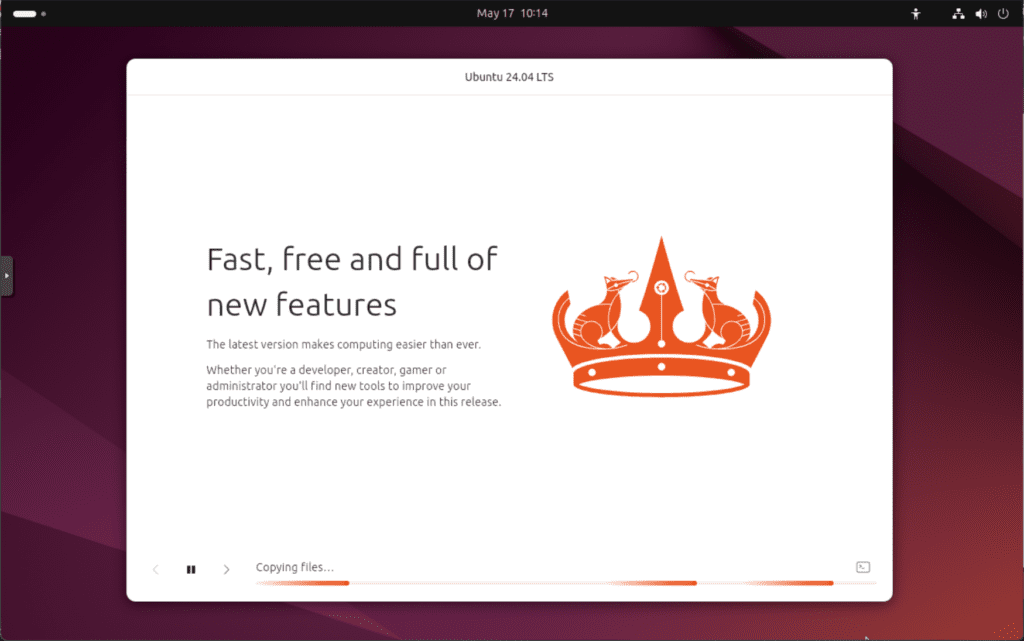
The Ubuntu installer should start installing Ubuntu 24.04 LTS on the VM. It will take a while to complete.
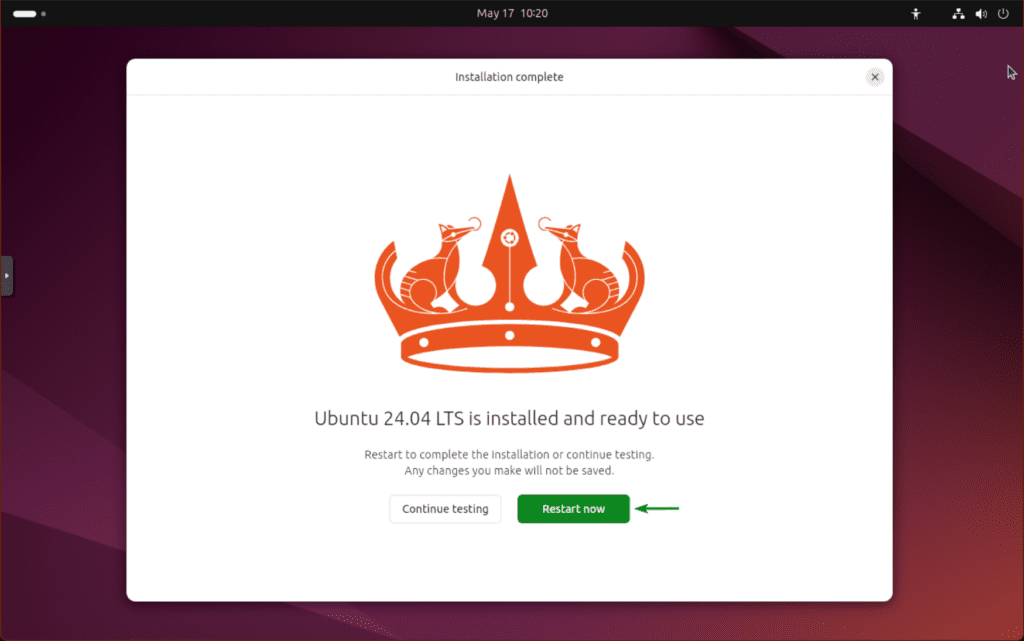
Once Ubuntu 24.04 LTS is installed on the Proxmox VE VM, click on Restart now.
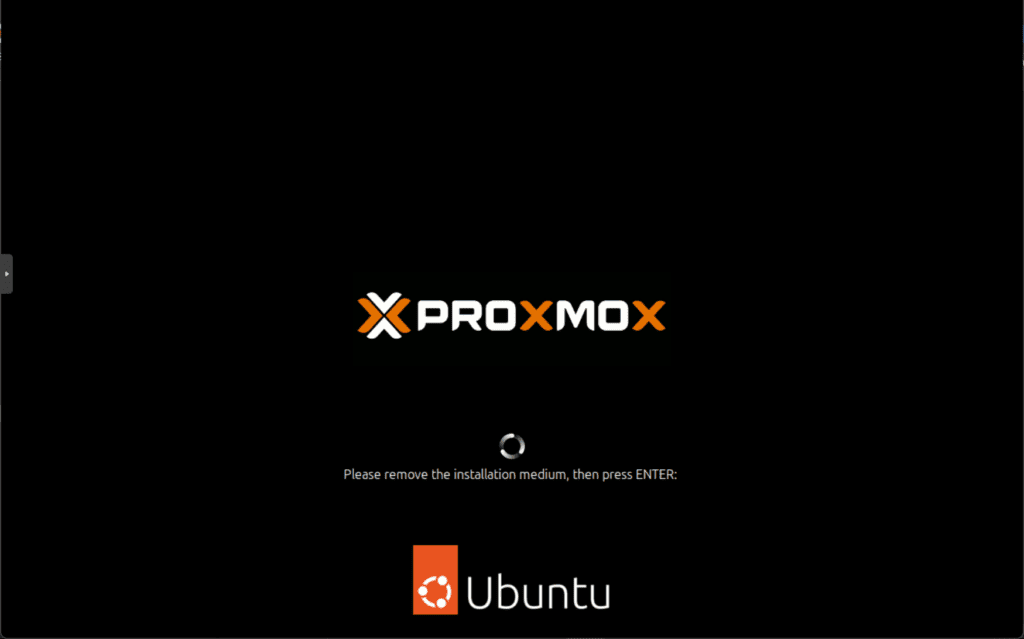
Once you see the following window, Press <Enter>.
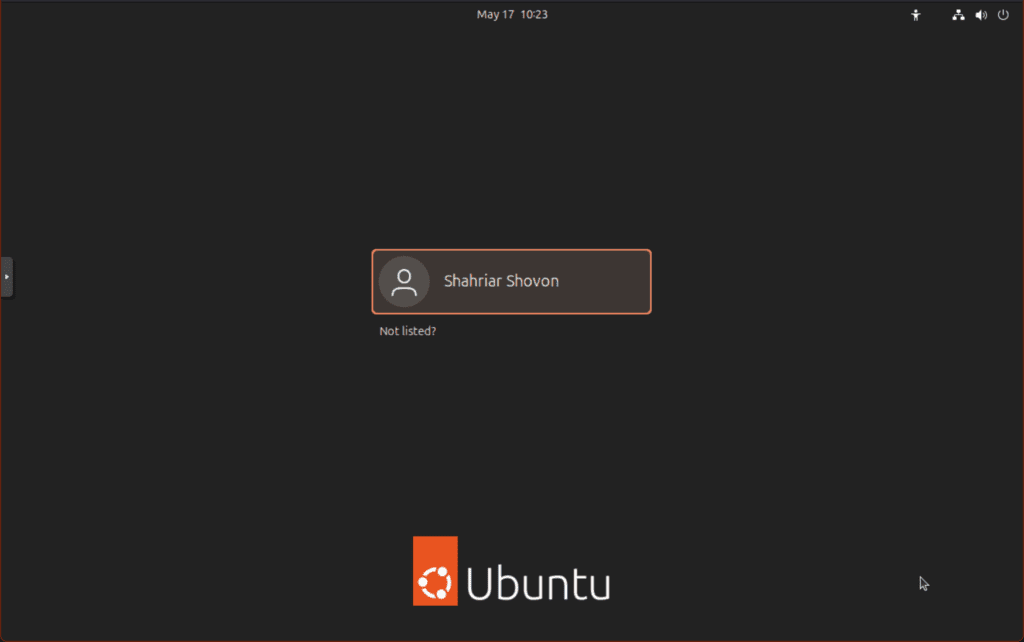
The Ubuntu VM should restart. Once the VM boots, you should see the Ubuntu 24.04 LTS login window. To log in to your Ubuntu 24.04 LTS VM, use the login password that you’ve set during the installation.
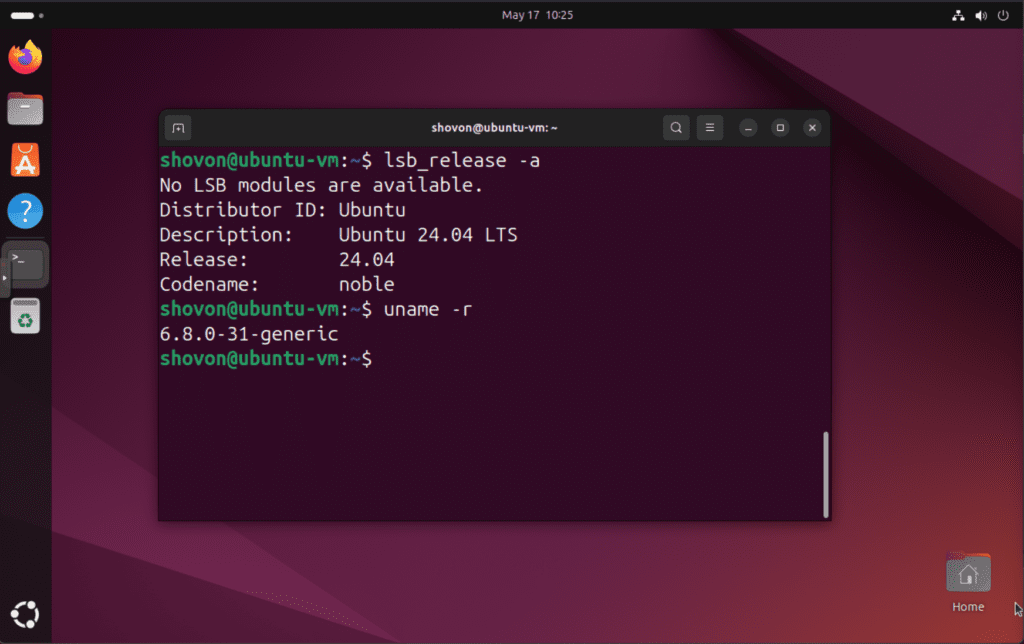
Once you’ve logged in to your Ubuntu 24.04 LTS VM, you can use it as you like.
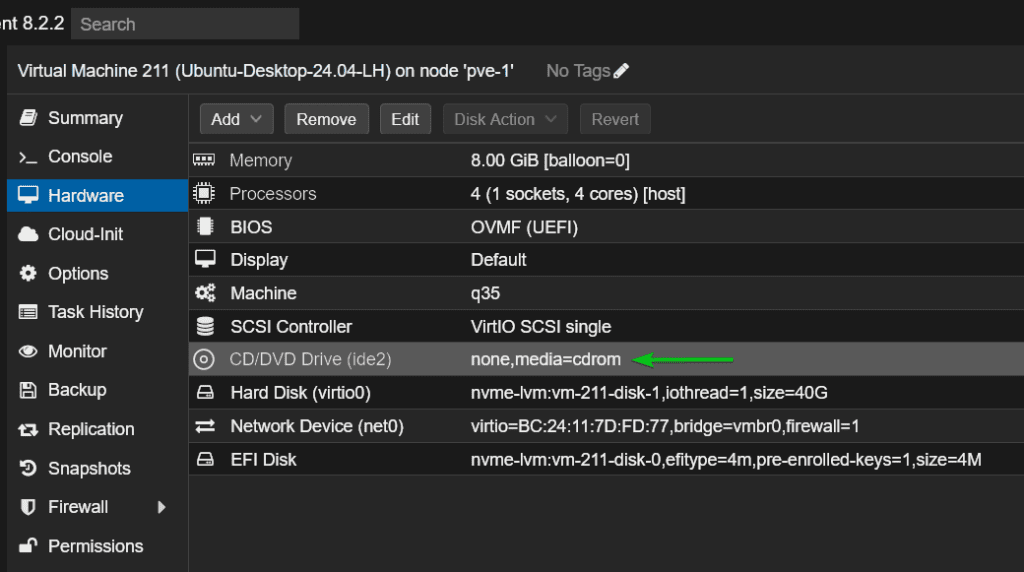
Removing the Ubuntu 24.04 LTS ISO Image from the Proxmox VE VM
Once Ubuntu 24.04 LTS is installed on the Proxmox VE VM, you can remove the Ubuntu 24.04 LTS ISO image from the VM.
To remove the ISO image from the Proxmox VE VM:
-
Navigate to the Hardware section of the Ubuntu VM.
-
Select the CD/DVD Drive and click on Edit.
-
Select Do not use any media.
-
Click on OK to save the changes.
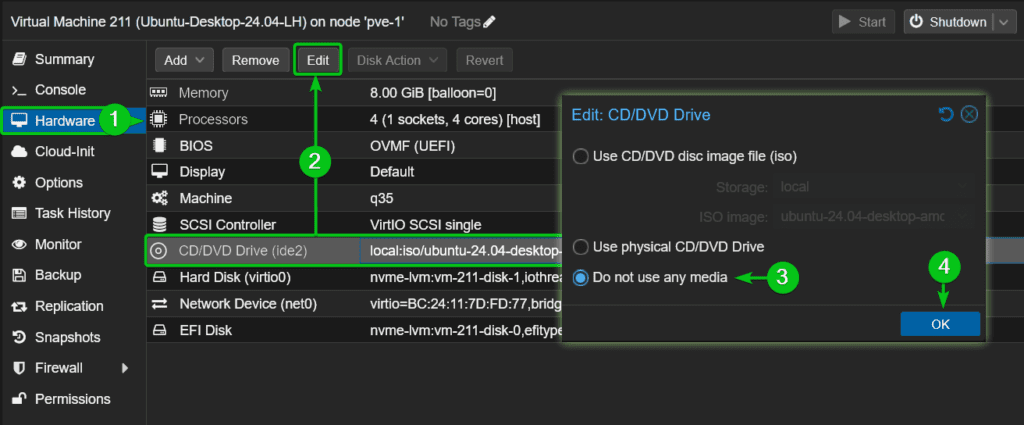
The Ubuntu 24.04 LTS ISO image should be removed from the Ubuntu VM.
Installing QEMU Guest Agent on the Ubuntu 24.04 LTS Proxmox VE VM
After Ubuntu 24.04 LTS is installed on the Proxmox VE VM, make sure to install the QEMU Guest Agent on the Ubuntu VM to enable Proxmox VE integration.
Passthrough an NVIDIA GPU to the Ubuntu 24.04 LTS Proxmox VE VM
You can passthrough an NVIDIA GPU to the Ubuntu 24.04 LTS VM and use the VM like a real computer (get near-native GPU performance and video output directly on the monitor connected to the GPU).
Conclusion
I have covered the following topics (linked to additional resources as required):
-
Downloading the Ubuntu 24.04 LTS ISO image
-
Downloading ISO images of different Ubuntu 24.04 LTS flavors (i.e. Kubuntu, Ubuntu MATE, Xubuntu)
-
Uploading the Ubuntu 24.04 LTS ISO image to Proxmox VE ISO storage
-
Creating an Ubuntu VM on Proxmox VE
-
Installing Ubuntu 24.04 LTS on the Proxmox VE Ubuntu VM
-
Removing the Ubuntu 24.04 LTS ISO image from the CD/DVD Drive of the Proxmox VE Ubuntu VM
-
Installing QEMU Guest Agent on Ubuntu 24.04 LTS
-
Passing through an NVIDIA GPU on the Proxmox VE Ubuntu 24.04 LTS VM