This guide will explain how to connect MySQL to an EC2 instance from Ubuntu.
How to Connect MySQL to EC2 Instance From Ubuntu?
For connecting MySQL on AWS EC2 from Ubuntu, check out the following demonstration.
Step 1: Connect to the EC2 Instance
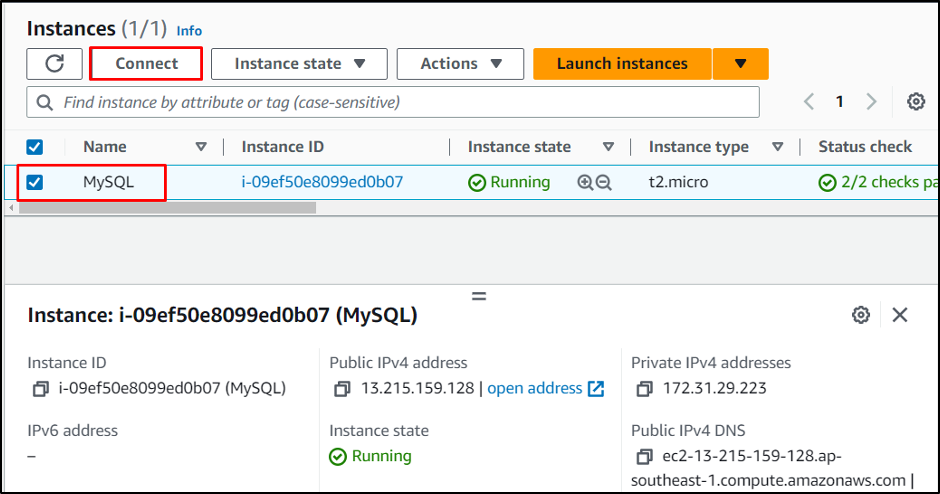
It is required to have an EC2 instance created to connect to it. Select the instance and click on the “Connect” button:
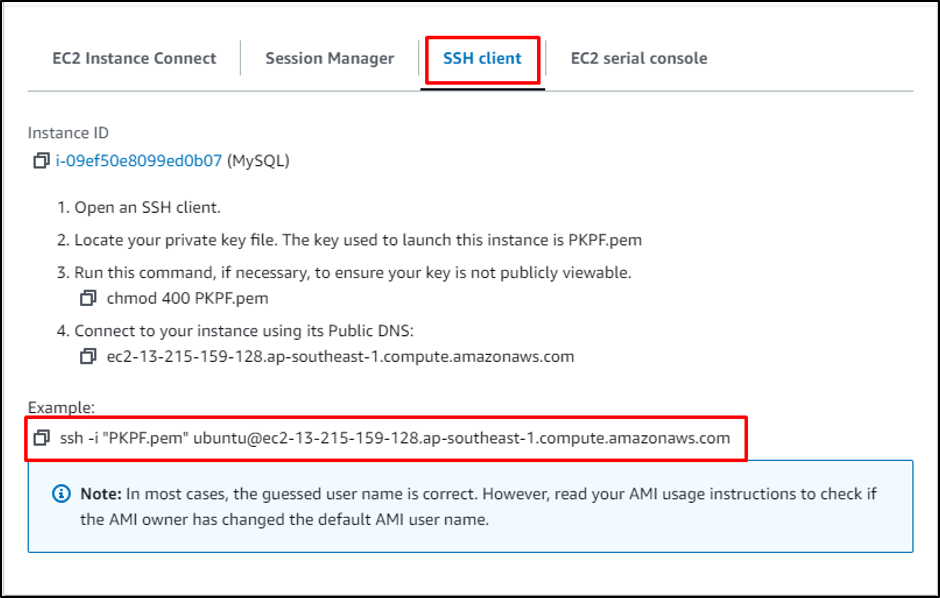
Select the “SSH client” section and copy the command provided by the platform:
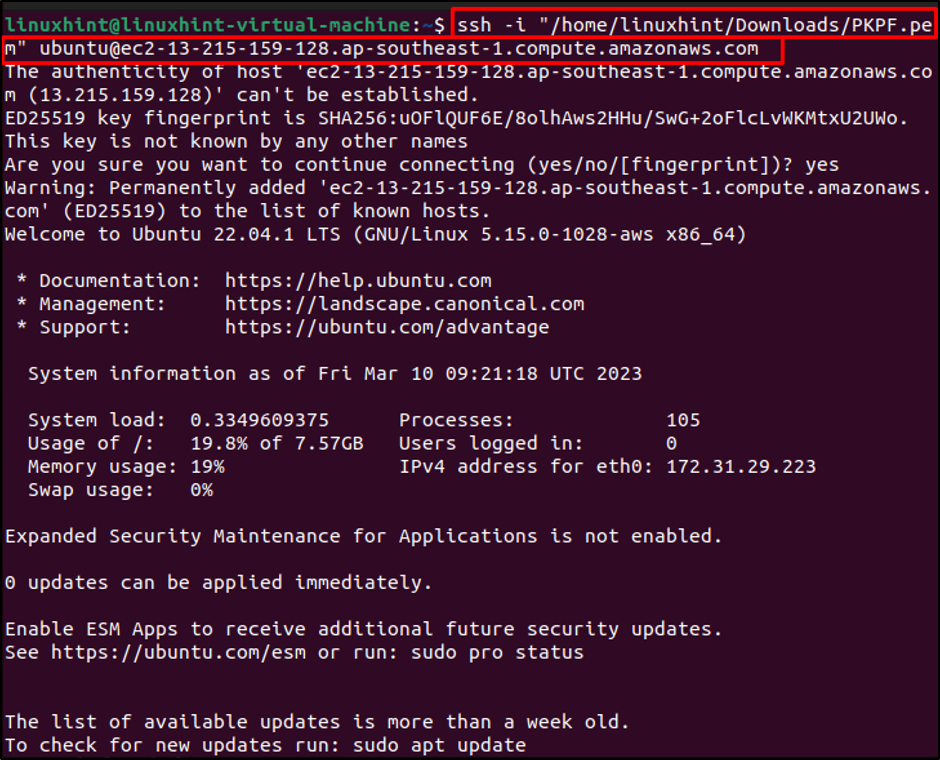
Open the terminal in the Ubuntu machine and paste the command on it. Before executing the command on the terminal, change the path of the private key pair file from the system:
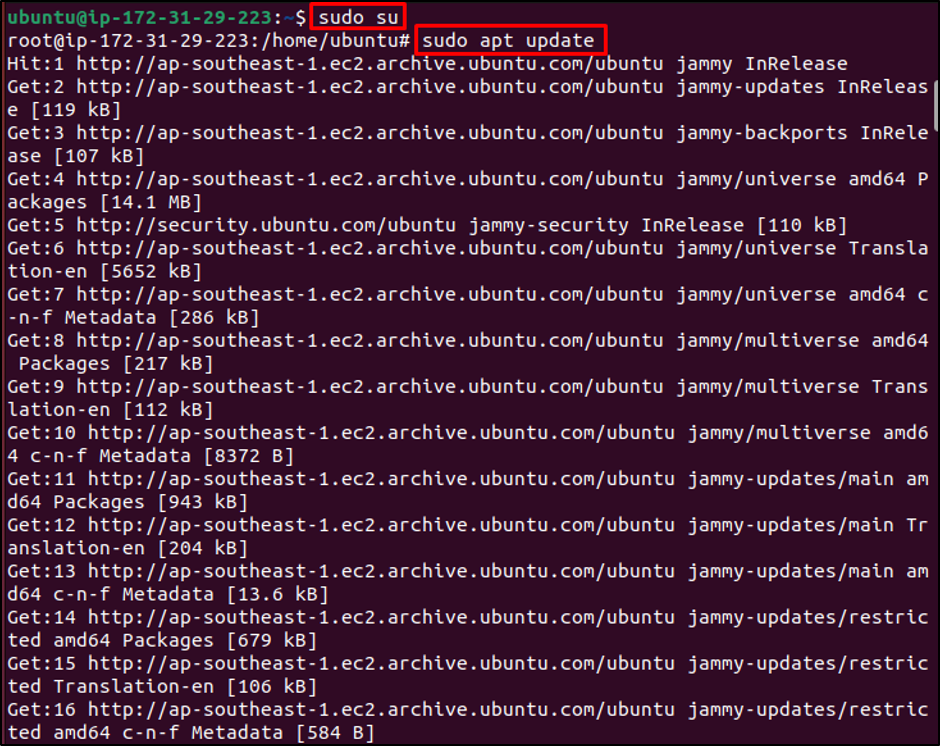
Type this command to provide access to the root user:
Update the apt packages:
Step 2: Install MySQL to the Instance
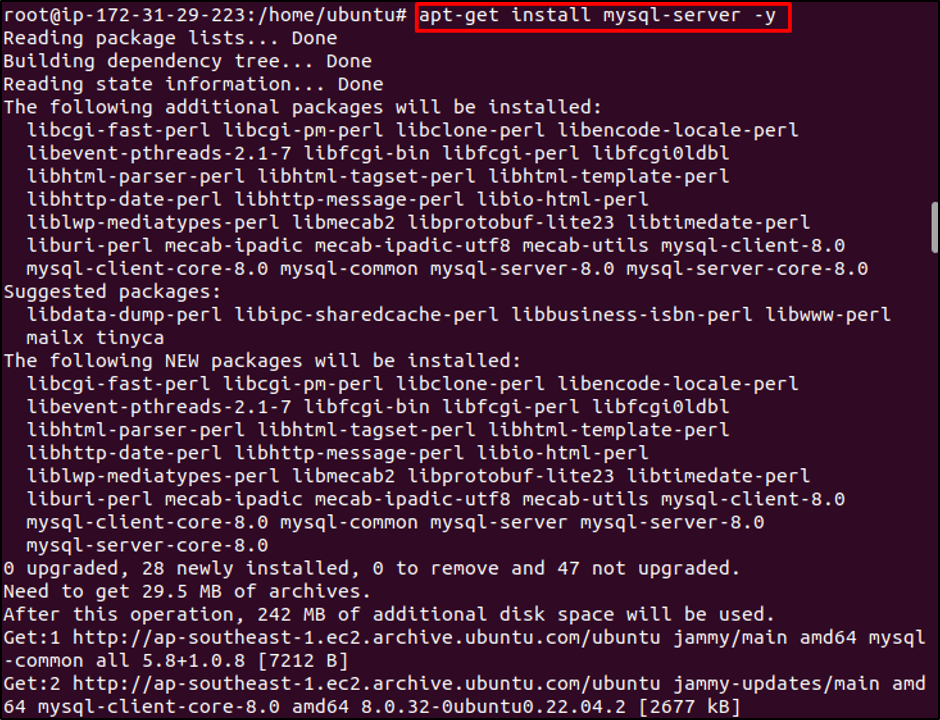
Use the following command to install the MySQL server:
After the MySQL server installation, check its version:
It can be observed that the MySQL version “8.0.32” has been installed successfully:
Step 3: Configure MySQL
Change the directory and head into the “mysql.conf.d” file:
Type “ls” to get the list of files available in the directory:
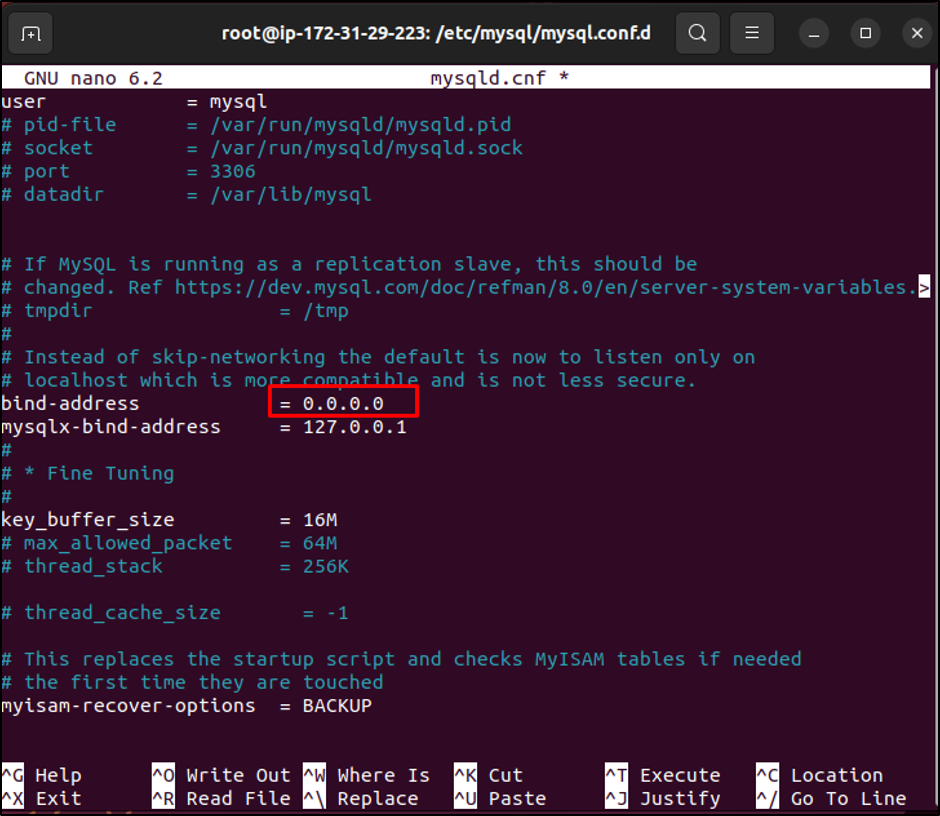
Edit the “mysqld.cnf” file:
Change the “bind-address” to “0.0.0.0” and save the file:
Step 4: Connect MySQL to the Instance
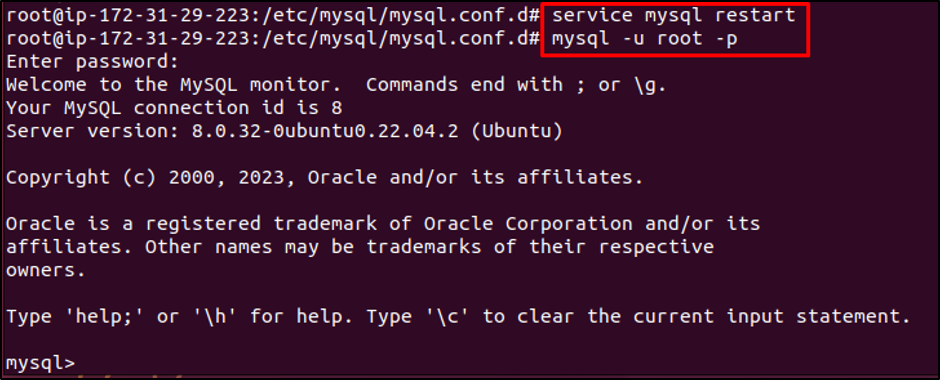
Restart the MySQL server:
Syntax to connect to MySQL is mentioned below:
Type the following command to connect to MySQL server:
Executing the above command will prompt the user to enter password:
As a result, MySQL will be connected to the EC2 instance from Ubuntu.
Conclusion
To connect MySQL to the EC2 instance from Ubuntu, create and connect to the EC2 instance from Ubuntu. After that, update apt packages and then install MySQL server on the instance. Edit the “mysqld.cnf” file and change the bind address to “0.0.0.0” within the file. Restart the MySQL services and connect to it. This guide has explained how to connect MySQL to an EC2 instance from Ubuntu.

