Create a Bootable within USB Flash Drive:
To boot via USB, you first need a simple USB flash drive. This flash drive must be greater in size as compared to the Linux image file you will be creating a boot. First, download the ISO image file of any Linux distribution you want to create a boot, i.e., Ubuntu 20.04, Linuxmint, or Kali Linux. This file might be less than 3 GB in size, so you will need more than 4 GB USB Drive. After the complete download, you need a software to create a bootable downloaded file on USB.
We suggest you use the balenaEtcher program, which you can get at the balenaEtcher website. Connect the USB flash drive to your system via its socket. Open the balenaEtcher program, select the flash drive to create a bootable, and then, select the ISO image file. It may take a little time to do that, but it will be useful. Now, the USB flash drive is ready to be used as a bootable drive.
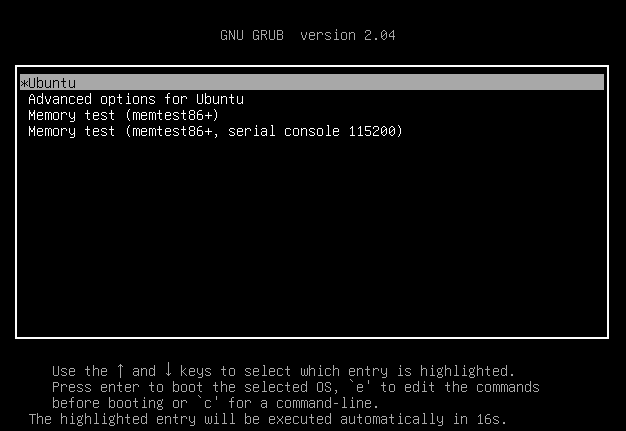
Open your Oracle Virtual Box, and click on the start button to reboot the Linux machine. Now, the machine will start, and on the start screen, you need to open the GRUB MENU of your Linux distros. You can either open it by pressing the “Right-shift” key from the keyboard while at the Linux screen. Or you can also make use of the f12 key from the keyword or simply press any key, i.e., Enter. The following displayed GNU GRUB menu will open as a black screen with a few options. This screen will last for 17 seconds.
You have to make a quick decision and decide what to do. It will show you some options like Ubuntu, Advanced options for Ubuntu, Memory test (memtest86+), and Memory test (memtest86+ and serial console 115200). You can select any of these options. If you simply want to start the already configured Ubuntu system, then go to the option of Ubuntu and click Enter from the keyboard without booting from USB. If you know that your system is not working, press “c” to open the GRUB command-line shell, as shown in the image output below, to execute some commands on it:
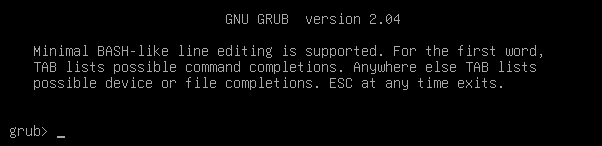
You can also open the GNU GRUB command-line console using the “Esc” key from the keyboard. You will get the following GNU GRUB version 20.04 command-line shell as a black screen. You can see it is ready to be used as a command to boot the Linux distribution via the USB drive. Make sure your USB flash drive is already attached and must not be removed until the end of the whole booting process. Let’s use some commands here:
Within the GNU GRUB console, we need to list all the available devices on your system, i.e., attached devices, including USB drives. So, we have to utilize the simple list “ls” command in the GNU GRUB console and press the Enter key to continue. The list command output is shown below in the image. It offers all the devices connected to our system, i.e., hardware devices. You have to check which one is your USB flash drive to be used. In our case, it’s “(hd0,msdos5)”, so we will use it in the following consecutive command:

Now, as you know about your device to use as a boot. This device must be taken as a root to boot the Linux distro in our system. So, we will be setting our USB drive to root using the “set root” command of GNU GRUB. The “=” sign indicates the setting of this device as root in the command below. Press Enter, and it’s done:
![]()
Following the rooting of the USB, the very next step is to find the bootloader on the Flash drive for chain loading. The OS doesn’t enable multi-booting for those unfamiliar with chain-loaders and does not accept GRUB. These OSs are coupled with other OSs using chain-loaders. We’ll provide our USB as a route to the bootloader to fix it all up through the chain load. As our USB is not bootable, it causes the error shown below:
![]()
When your bootloader is already located in the USB flash drive and chain loading has been done, it’s time to boot your device using the command displayed in the image:
![]()
Your Ubuntu system will start rebooting:

Conclusion:
Hence, this article is about booting the Ubuntu 20.04 system from the USB flash drive using the GNU GRUB Console Menu. We have discussed how to create a bootable Linux ISO image within the flash drive using a specific software in the system. Then, we discussed the way to open the GNU GRUB menu console, to set the USB bootable device as root, and boot the system with the bootable USB drive. It was all quite easy, and we hope you enjoyed the article. Check out other Linux Hint articles for more tips and information.