This post will demonstrate the process of accessing the S3 bucket with the help of the AWS CLI (Command Line Interface).
How to Access the S3 Bucket?
To access an S3 bucket, we must first create a new bucket and then store some files inside it. Only after that can it be accessed using the AWS CLI.
Create a new S3 Bucket
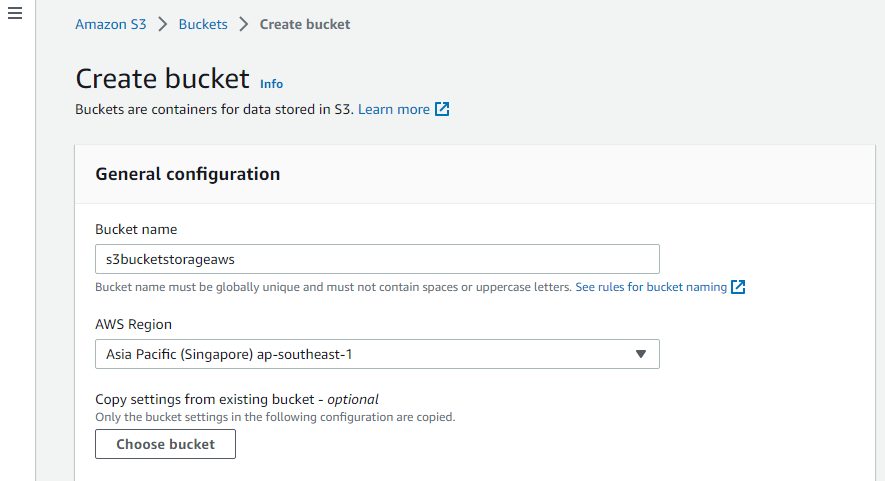
Go to the S3 service of AWS after logging in to the AWS console, and then click on the “Create bucket” option. To create the bucket, first, give a globally unique name to the bucket, select an AWS region in which the bucket should be created, and after configuring, select the “Create bucket” button:
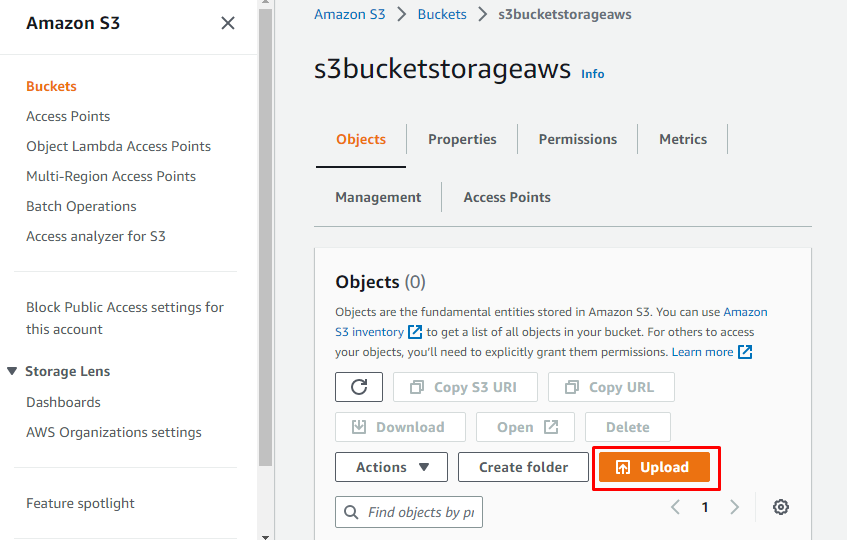
After creating the bucket, the user can add objects to it. Simply click on the “Upload” button for that. And browse and select files from the system that are supposed to be uploaded to the newly created S3 bucket:
After uploading, the object displays in details of the bucket:
In this way, an S3 bucket is created and files are uploaded to it. Now that the S3 bucket has some files inside it, the user can access it using the AWS CLI.
Access the Created S3 Bucket Using AWS CLI
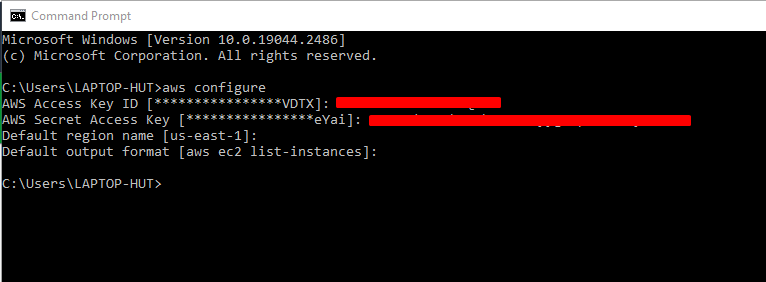
First, configure the AWS CLI using the AWS credentials (access and secret access key):
To view the list of all the S3 buckets created in the AWS account, simply type the command:
All the buckets created in the AWS account including the newly created bucket are displayed:
To view the files inside the S3 bucket that we have just created, type the “aws s3” command along with the name of the bucket:
In the screenshot above, the uploaded file is displayed as the item of the bucket.
In this way, the AWS S3 bucket and its objects can be accessed.
Conclusion
Accessing the S3 buckets requires the user to first create a new S3 bucket and have some files inside it. After that, the user needs to ensure the installation and configuration of the AWS CLI. Once, all of that is done, the user can access the S3 bucket by using the “aws s3” command and following it up with the name of the S3 bucket to be accessed.


