This write-up will explain the method to fix up a past commit in Git easily.
How to Easily Fix up a Past Commit in Git?
To easily fix up a past commit in Git, try out the below-listed steps:
- Redirect to the local repository.
- Make changes in an existing file and track them.
- Choose desired commit id.
- Create a fix up commit using the “git commit –fixup <commit-id>” command.
- Merge fixup commit by performing rebase operation.
- Verify changes by viewing the Git log history.
Step 1: Navigate to Local Directory
First, switch to the particular Git repository by typing out the given-below command:
Step 2: Update File
Then, utilize the “echo” command and update the content of the desired file:

Step 3: Track Changes
Next, add the new changes to the Git staging area:

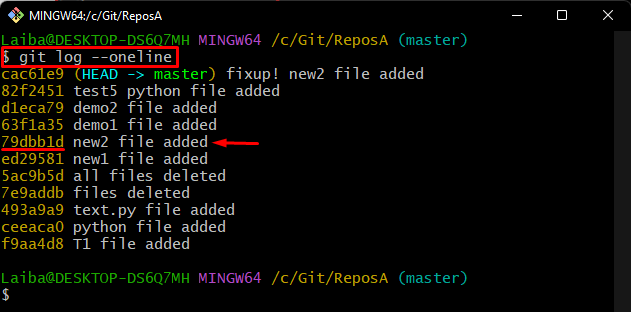
Step 4: Check Git Log
Now, check the commit history, and choose the commit id into which you want to add the new changes:
For the below output, we selected the “79dbb1d” commit id for further processing:
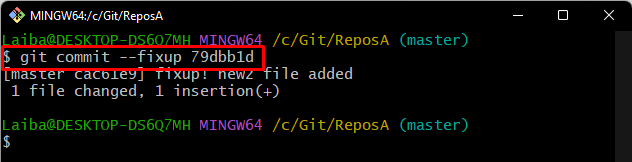
Step 5: Create Fix up Commit
Run the “git commit” command with the “–fixup” option and desired commit id to create a fix up for a particular commit:
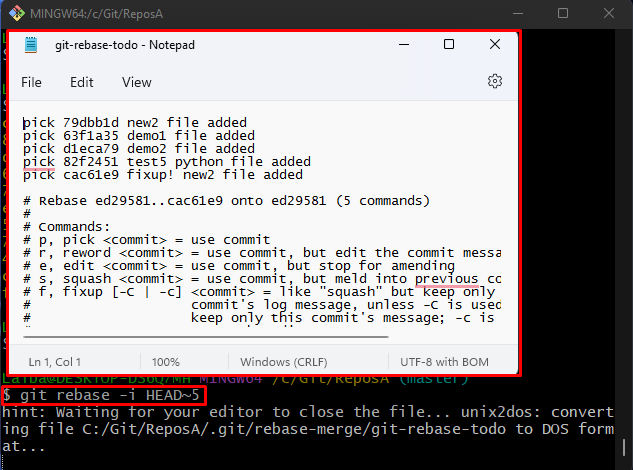
Step 6: Merge Fixup Commit
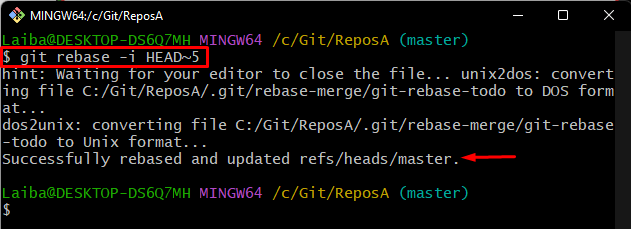
After that, perform the rebase option to merge the fix up commit into the last commit:
Here, the “-i” flag is used for an interactive mode that allows editing commits, and the “HEAD~5” option is used to edit the last five commits:
After executing the above-provided command, a default editor will open up with an interactive screen:
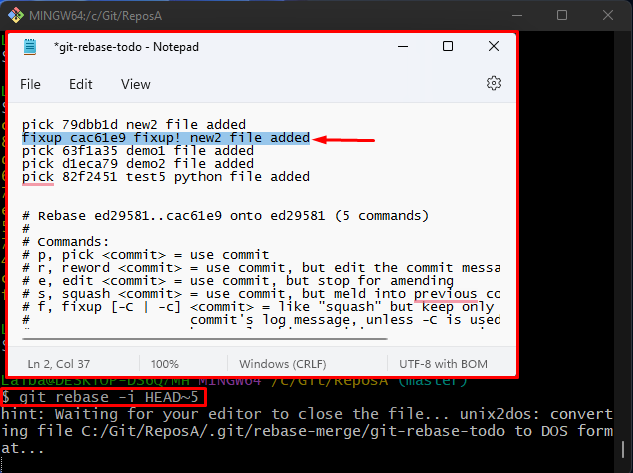
Now, change the position of the fix up commit by placing it after the target commit. Then, replace the “pick” keyword with the “fixup” beside the commit that needs to be fixed. After that, press the “CTRL + S” keys to save changes and close the opened file:
It can be observed that the rebase operation has been performed successfully for fixing up a past commit:
Step 7: Verify Past Commit Fixup Operation
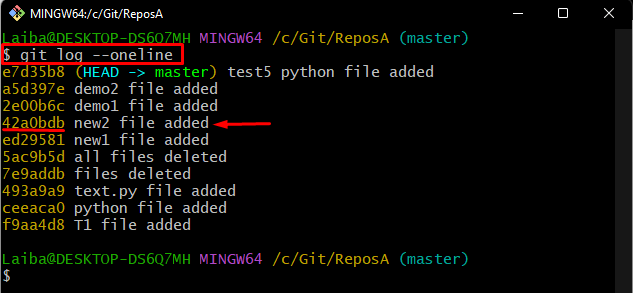
To ensure whether the fixup operation has been performed successfully or not, check the commit history:
According to the below-provided screenshot, the previously specified commit has been fixed and replaced with a new commit id:
Step 8: View New Commit Details
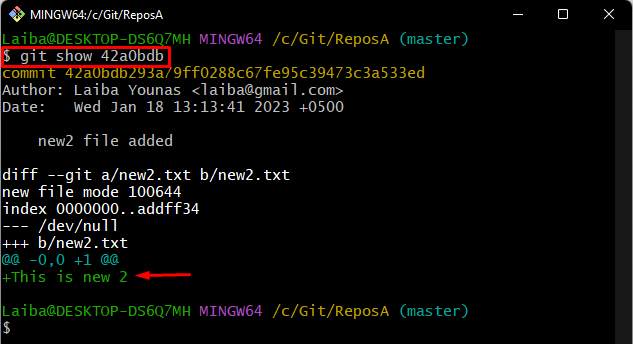
Lastly, execute the “git show” command along with the newly assigned commit id to view its updated content:
It can be seen that changes have been added to the newly assigned commit id:
We have efficiently explained the method of fixing up a past commit.
Conclusion
To fix up a past commit Git, first, move to the particular repository. Then, update a desired file and track it. Next, view the commit history and select the desired commit id that needs to be fixed. After that, create a fix up for the selected commit id using the “git commit –fixup <commit-id>” command. Then, perform the rebase operation to merge the fix up commit into the last commit. This write-up explained the method to fix up a past commit in Git.