Step 1: Create an Amazon Linux EC2
Head inside the AWS Console and then go over to the EC2 Dashboard to launch the new instance by clicking the Launch Button:

This will open up the launch wizard of the EC2 instance, where you need to provide the “Name” of the key pair and the AMI to be installed inside the EC2 instance:
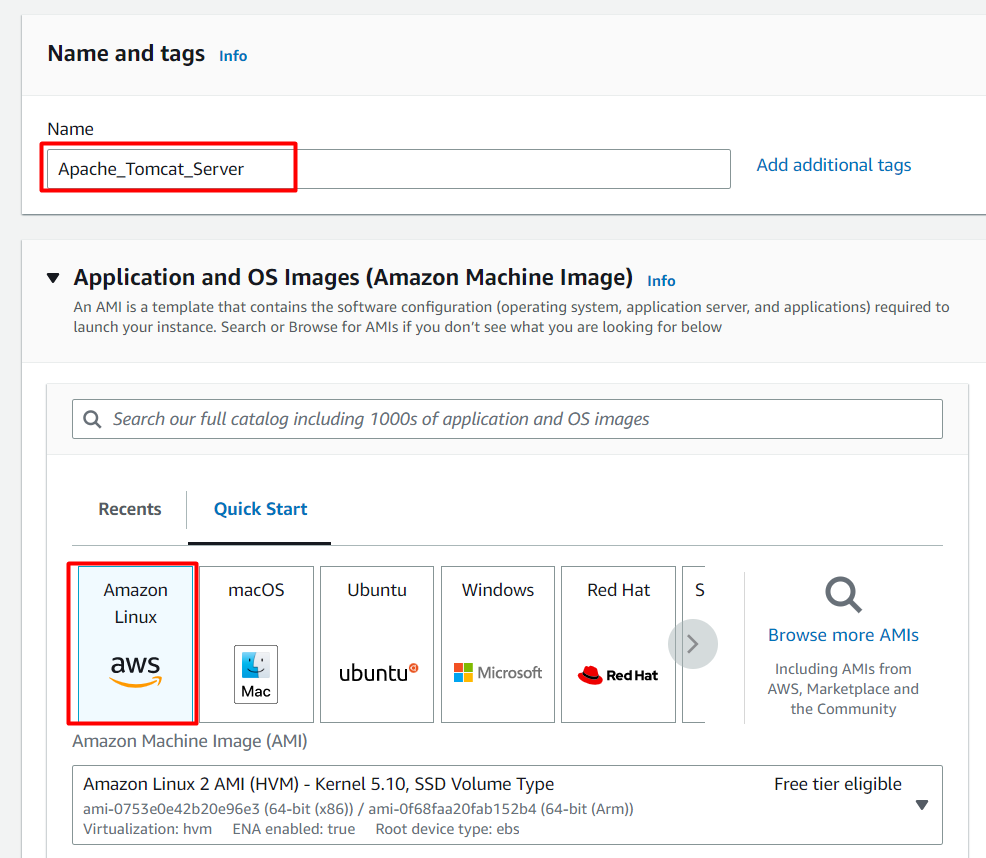
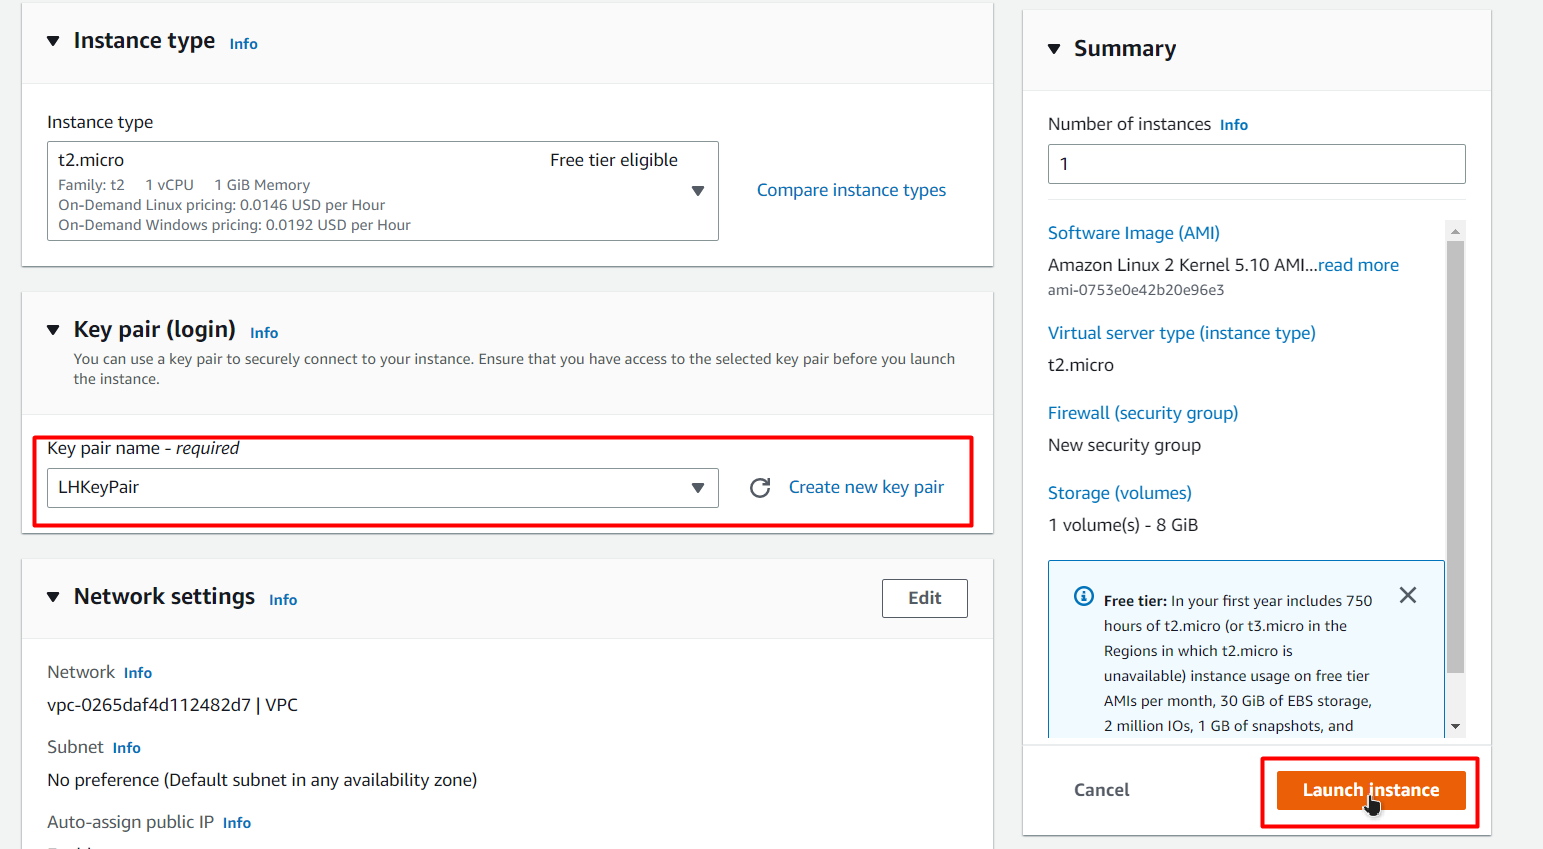
The selected AMI is the “Amazon Linux”. After that, choose a key pair and click on the Launch button from the right-hand side “Summary” window to create the EC2 instance:
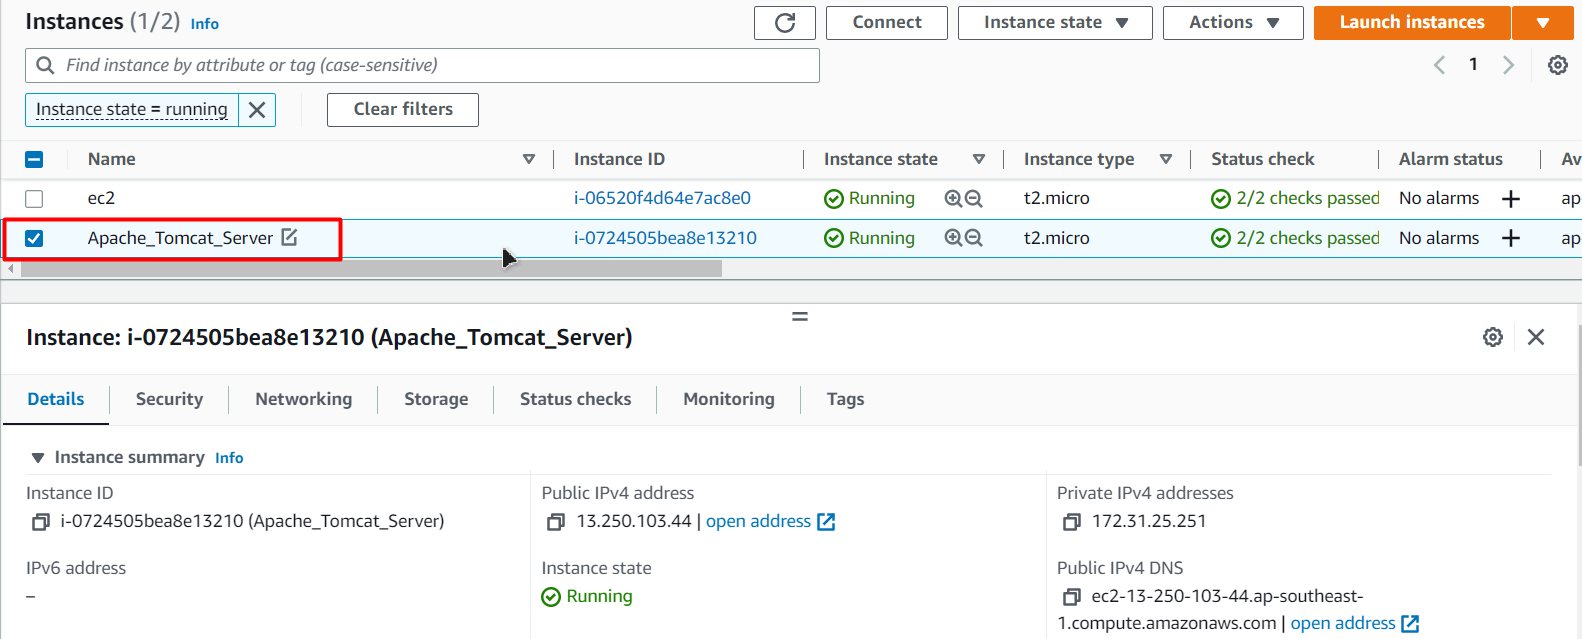
After the instance has been created, head back to the “Instance Dashboard” to see the list of all the Instances and click on the newly created instance to select it.
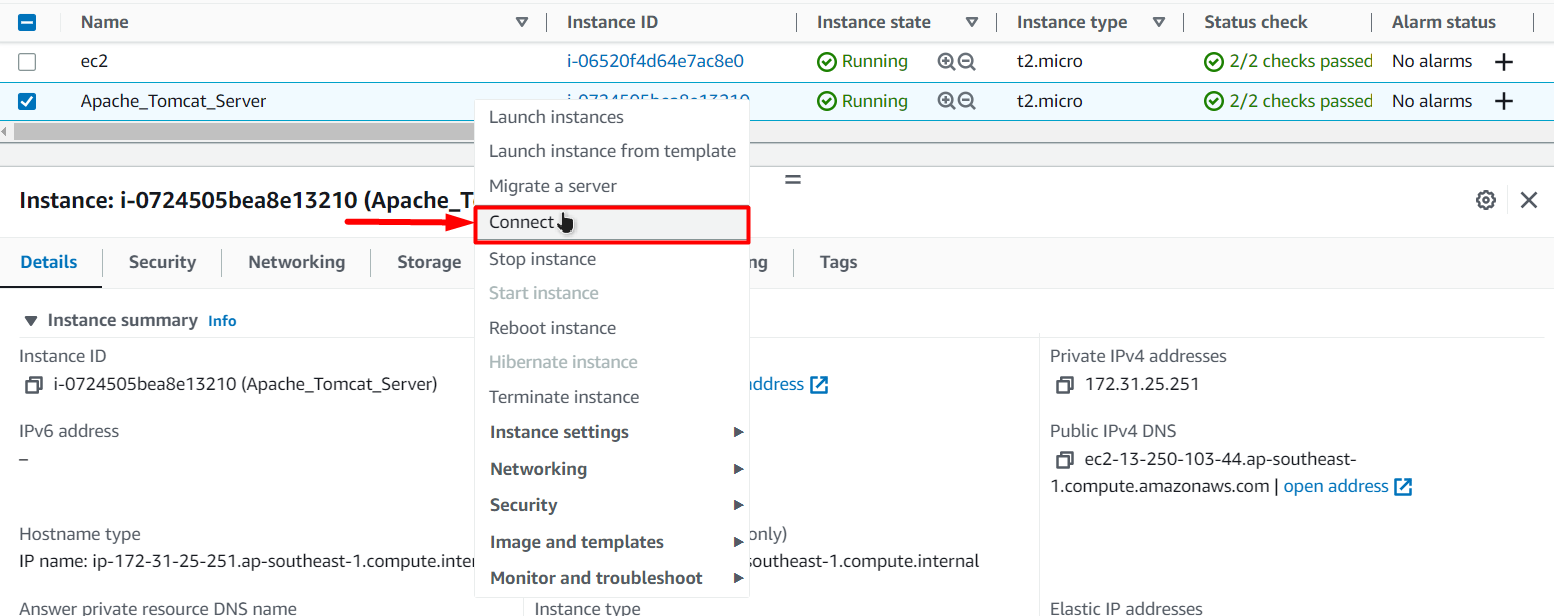
After that, right-click to open up the “Actions” menu for that particular EC2 instance and choose the connect option:
This will bring you to the connection page, from where simply copy the last command from the bottom of the page and then click on the icon next to it to copy the SSH command in the clipboard:
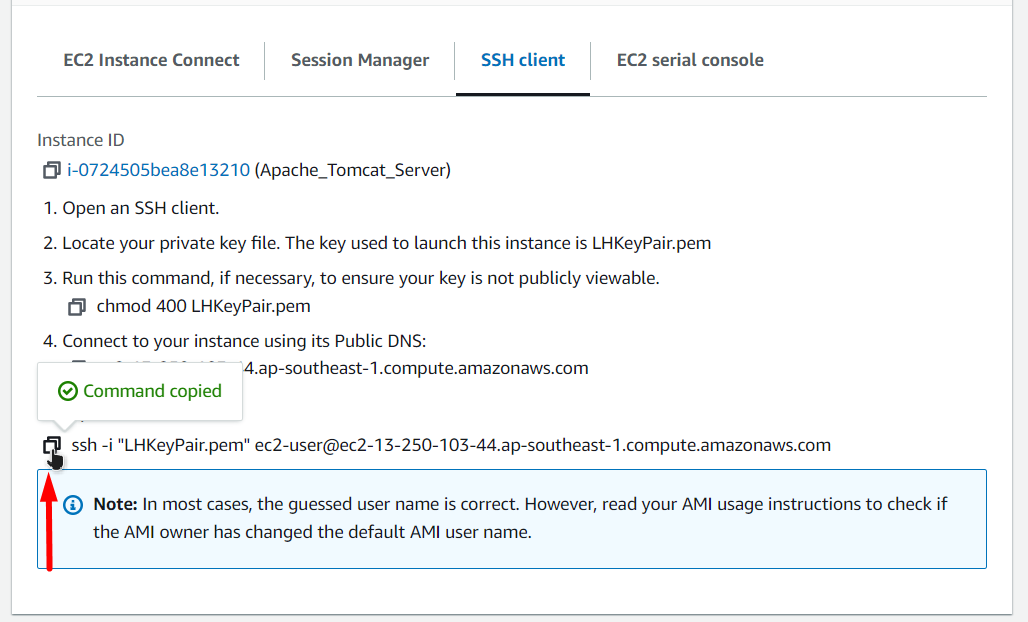
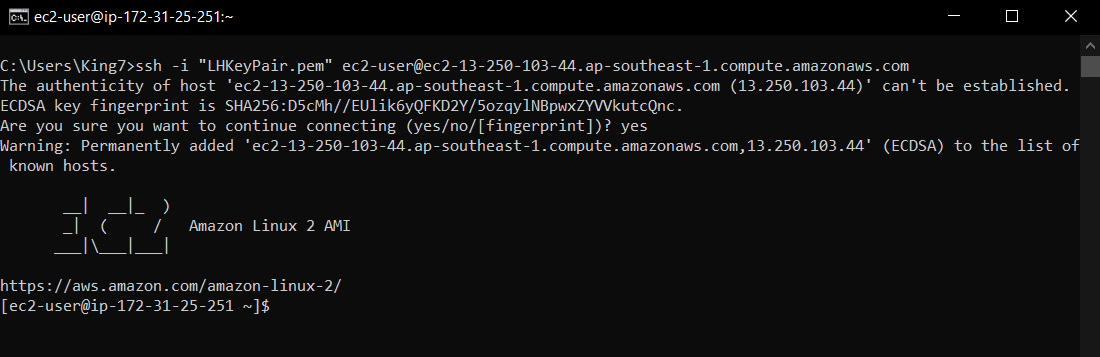
After the SSH command has been copied, simply open up a Command Prompt and paste in the command and replace the name of the key pair with the location of the security file on your PC and then press the Enter key:
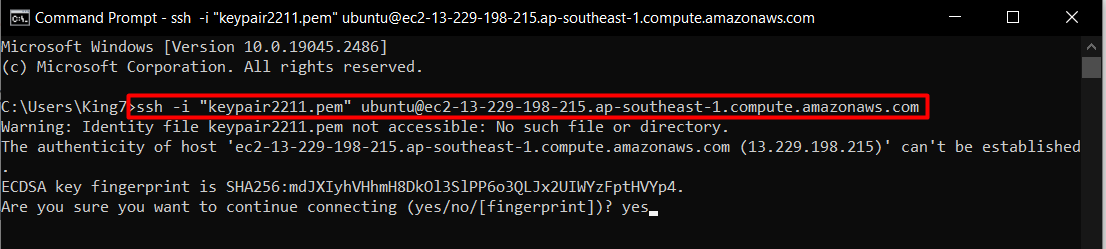
Note: For the connection warning to a new host, type “yes” and continue
Once you are connected to the EC2 instance, the command will convert into an SSH Terminal:
At this point, you can head on to the next step.
Step 2: Install and Configure Apache Tomcat
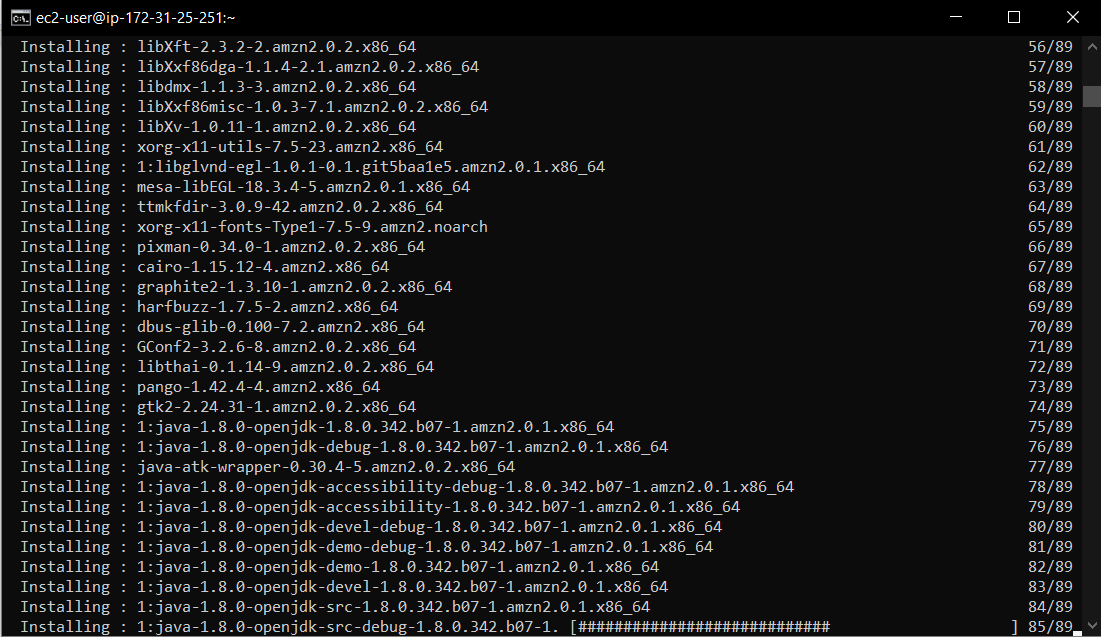
To install Apache Tomcat on Amazon Linux, you need first install the Java Environment on your EC2 using the following command:
This command will install Java 8 on your EC2 and will produce the following outcome on the SSH terminal when executed:
When the installation process is done, verify the existence of Java by running the following command:
This will return:

After that is done, switch over to the root user by using the following command:
Head inside the opt directory:
cd /opt
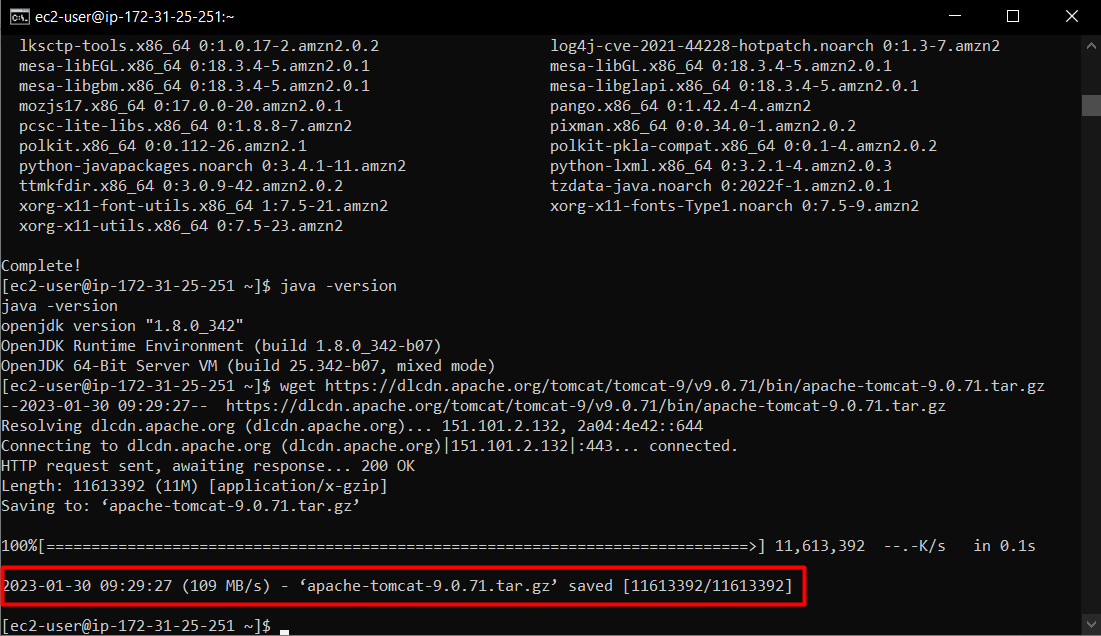
Then, to download the apache tomcat, run the following command:
Once the download has completed, the SSH terminal will show the following output:
As you can see from the result on the terminal that it is a tar zipped file, therefore, unzip it using the command:
After that type the “ls” command to get a list of all files inside the “opt” directory:

The name of the extracted folder is quite long, and it can cause confusion when configuring the Apache Tomcat server, therefore, run the following command to rename it:
After that, create a new user, change the ownership of the extracted folder using the following command:
chown -R tomcat:tomcat /opt/tomcat9
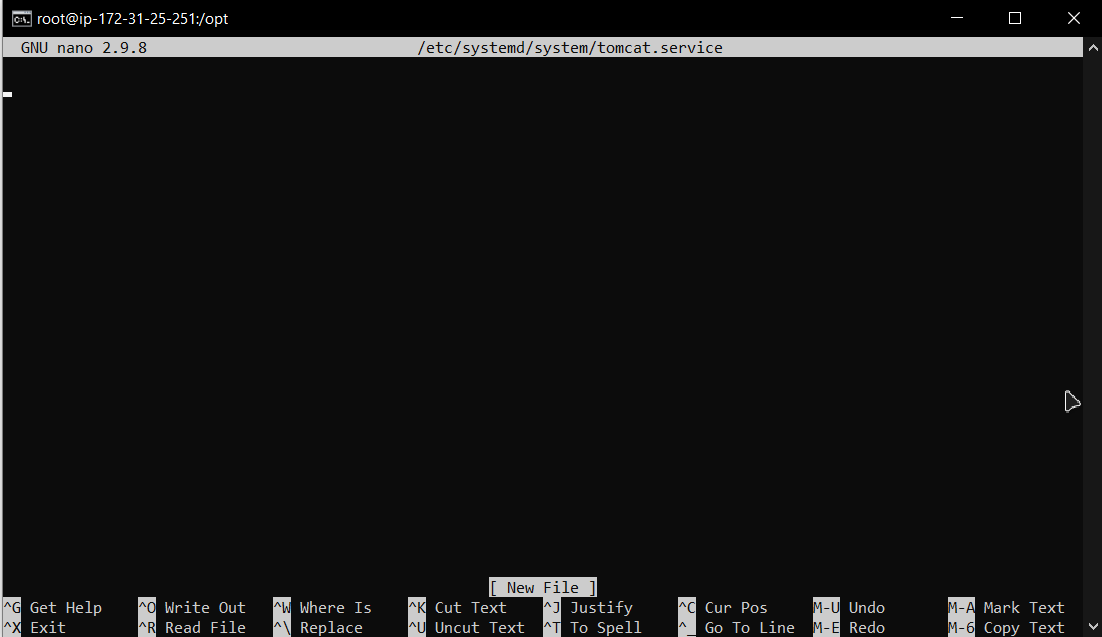
Once all of that is done, open up the service file of the tomcat, as new configurations are to be added to that particular file:
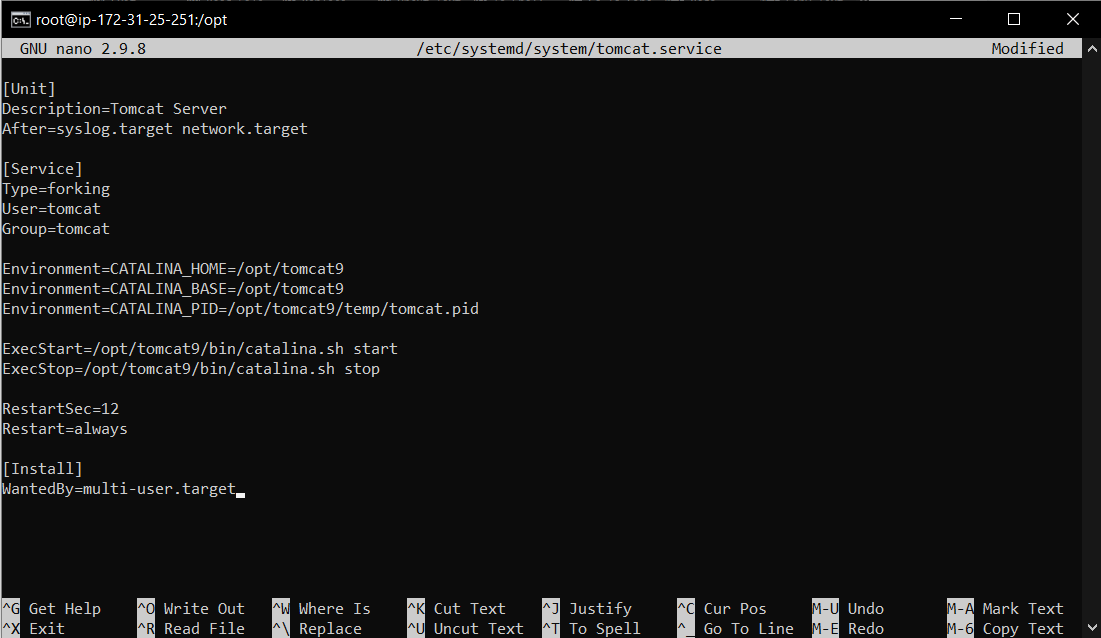
After that, simply copy and paste the following lines inside the file:
Description=Tomcat Server
After=syslog.target network.target
[Service]
Type=forking
User=tomcat
Group=tomcat
Environment=CATALINA_HOME=/opt/tomcat9
Environment=CATALINA_BASE=/opt/tomcat9
Environment=CATALINA_PID=/opt/tomcat9/temp/tomcat.pid
ExecStart=/opt/tomcat9/bin/catalina.sh start
ExecStop=/opt/tomcat9/bin/catalina.sh stop
RestartSec=12
Restart=always
[Install]
WantedBy=multi-user.target
After that, press “CTRL + O” and then “CTRL + X” to save and exit from the file and after that start, the service of Apache Tomcat using:
sudo systemctl start tomcat
Verify the status of Tomcat by using:
The terminal will show the following status for the tomcat service:
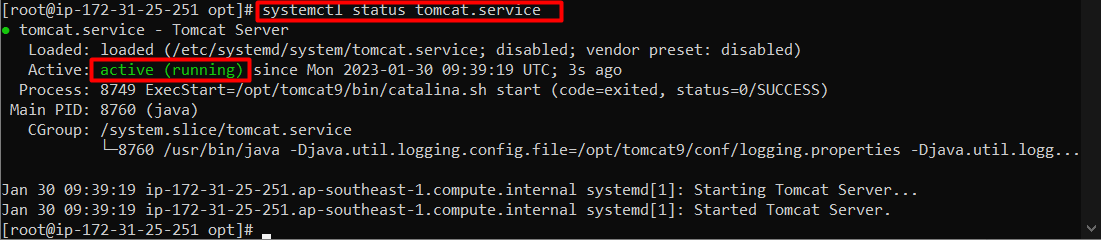
This means that you have successfully installed the Apache Tomcat.
Step 3: Edit Inbound Rules
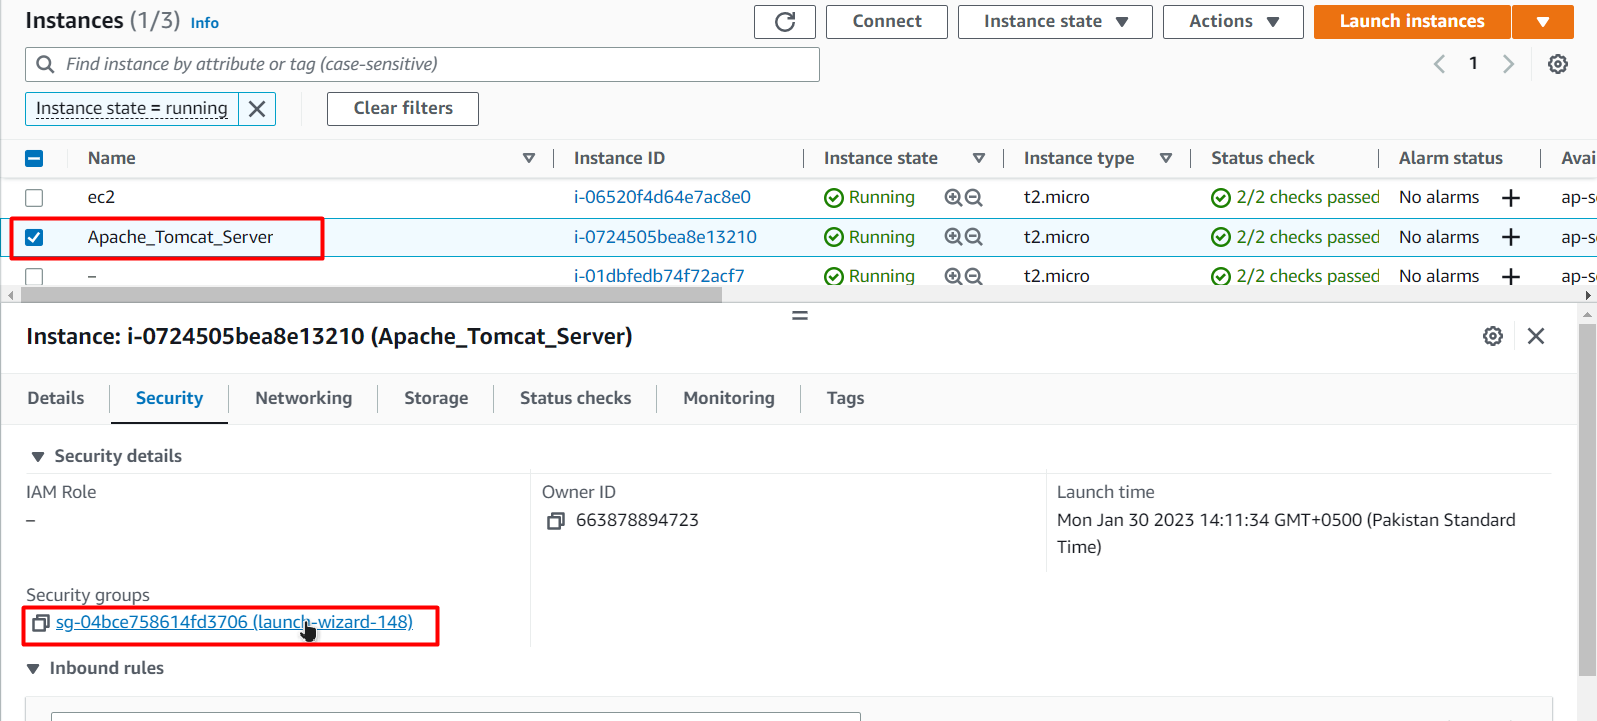
To be able to access the Apache Tomcat host from the internet, you need to change the inbound rules for the EC2 instance’s traffic. For this purpose, head to the EC2 instance console, select the instance from the details section, switch over to the “Security” tab and then click on the name of the “Security Group”:
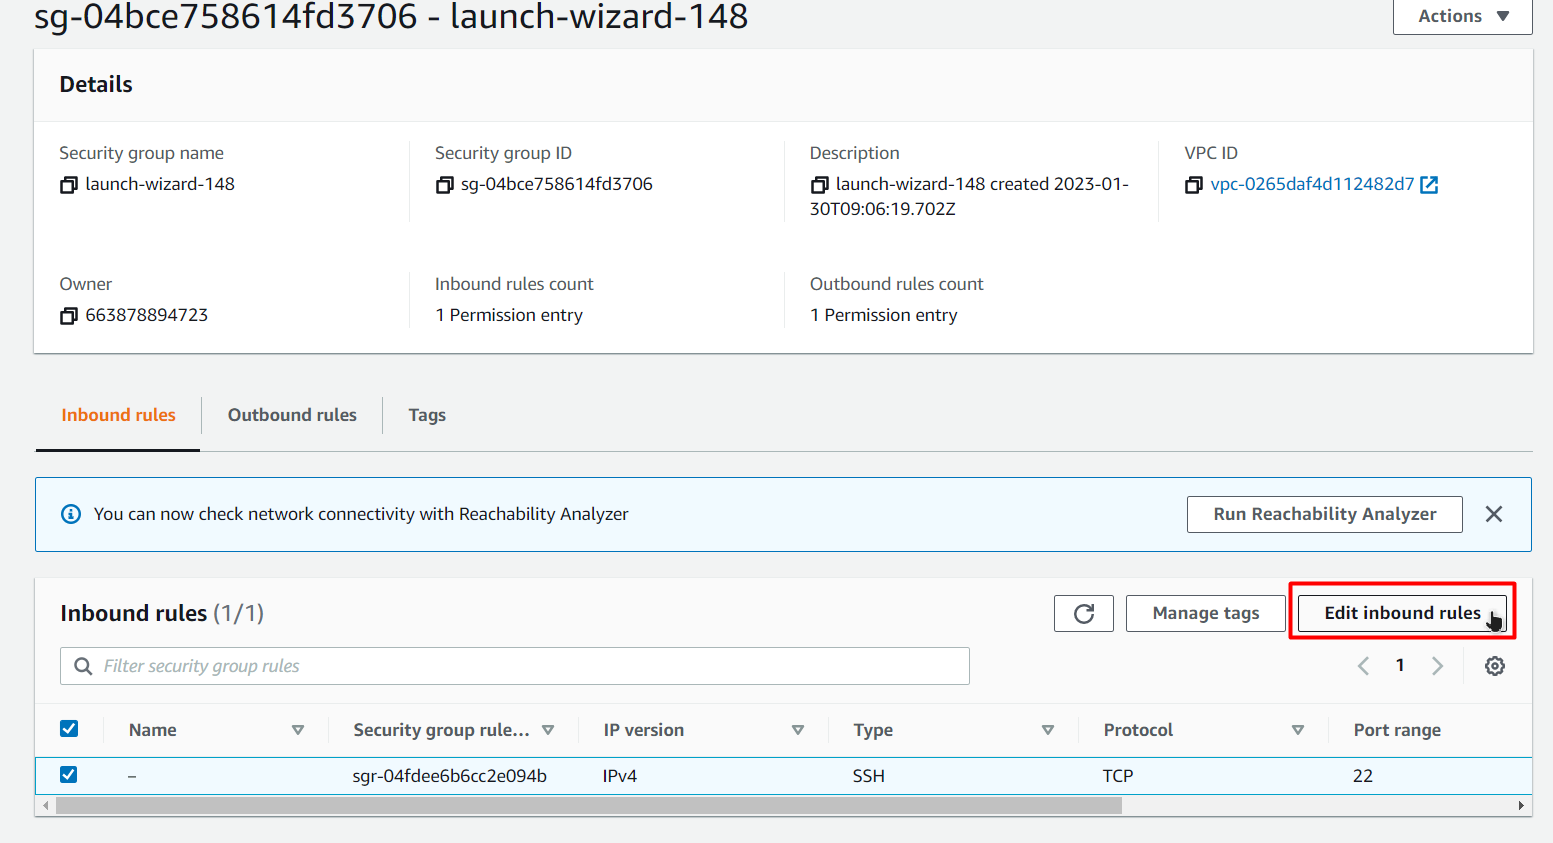
Click on the “Edit inbound rules” button:
Add a new rule that will allow traffic over port 8080 and press on the save button:
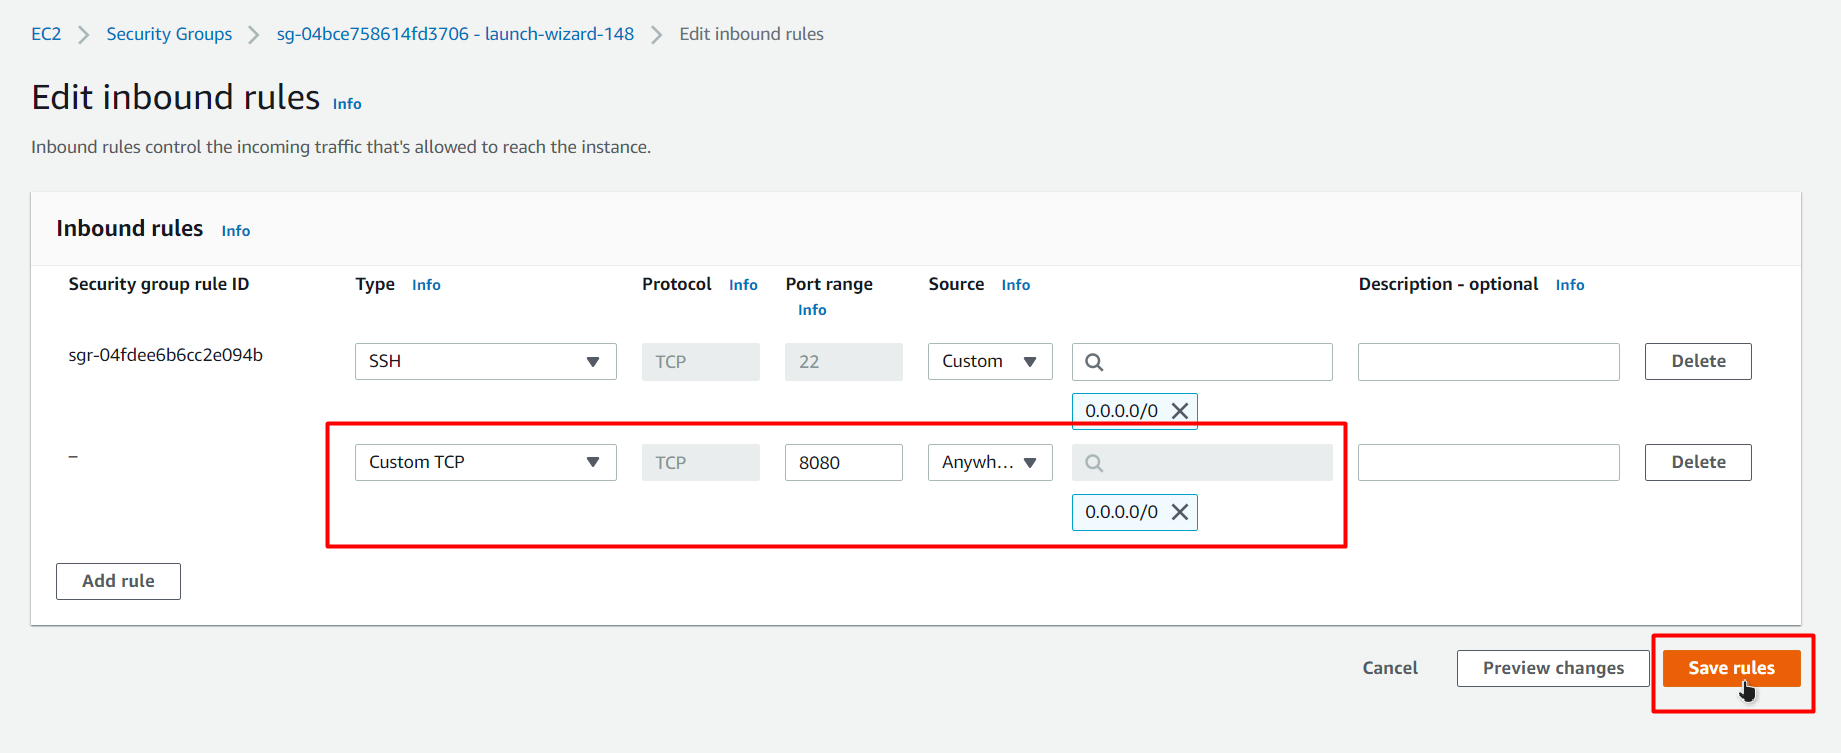
You can now access the Apache Tomcat server from the internet.
Step 4: Visiting the Hosted Apache Tomcat Server
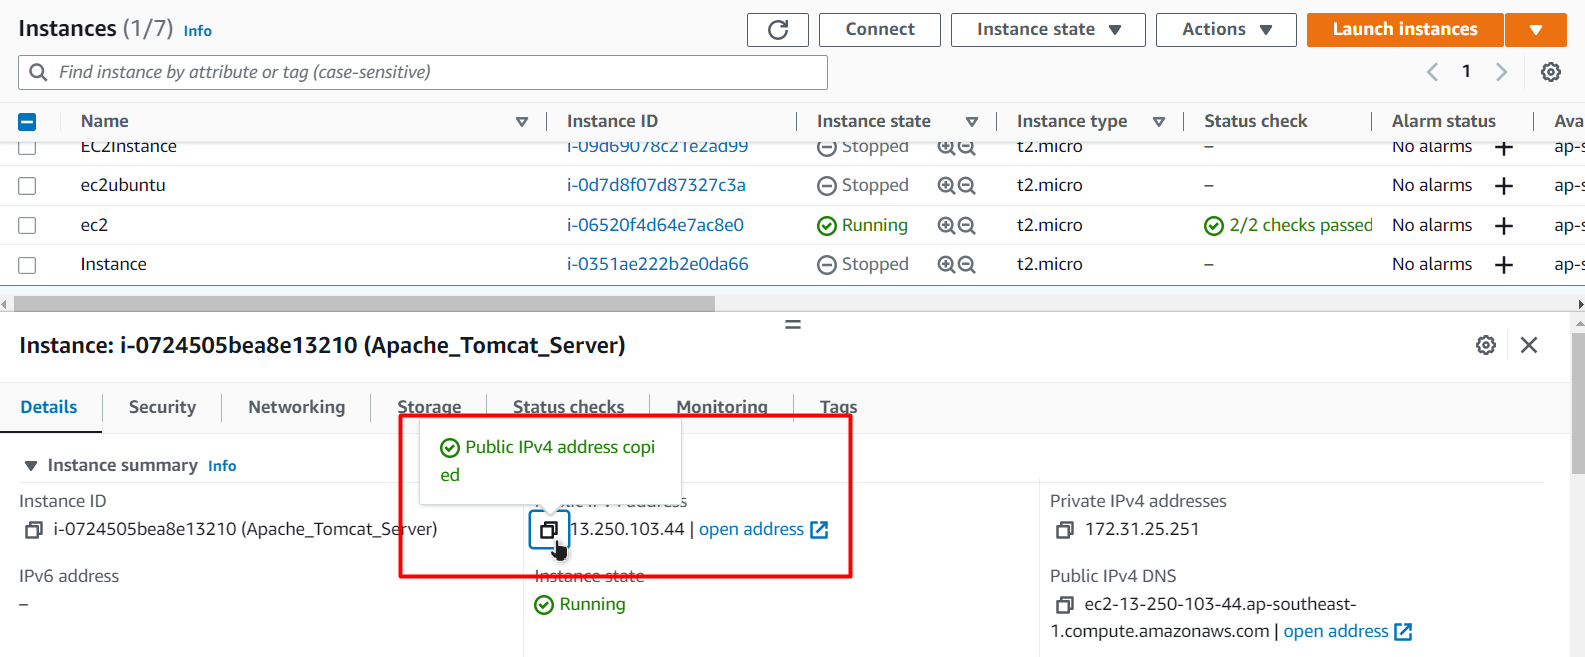
To visit the Apache Tomcat Server, head over to the EC2 instance console, select the instance, and copy the Public IP Address:
After that, Paste this IP Address in a browser and append the port “8080” at the end:
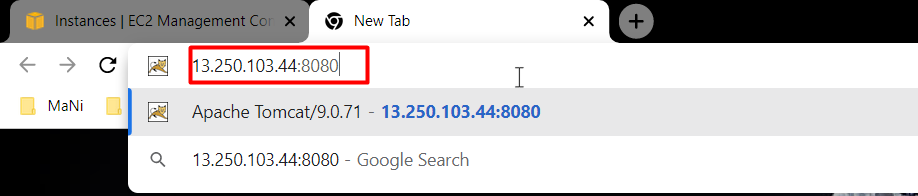
Press the Enter key to visit the link, and you will see the following result on the browser:

This confirms that you have successfully hosted your Apache Tomcat on an EC2 Instance.
Conclusion
To host an Apache Tomcat Web Server on an EC2 instance, connect to the instance and first install Java inside it. After that, download the Tomcat from the given command and extract it. Once extracted, edit the tomcat service configurations, and edit inbound rules for the EC2 instance. Lastly, take the Public IP of the EC2 instance, insert the port number and visit your hosted Apache Tomcat Server.