Vim marks are specific locations in a file that can be set with a name and later returned by calling them by their names. The letter m followed by another letter {a-z or A-Z} can be used to set the mark, and a single quote) ‘) with the mark name is used to return to that mark. Note that, the lowercase letters are used to set local marks while the uppercase letters are used to set the global marks.
- Understanding Vim Marks
- Set a Mark
- List Marks
- Jump to a Mark
- Global Marks
- Numbered Marks
- Deleting Marks
- Advanced Features
- Difference between Lowercase Marks and Uppercase Marks
- Vim Marks Cheat Sheet
- Conclusion
Understanding Vim Marks
Vim allows you to set specific positions in a file, especially if you are working on a large file where you need to move back and forth quickly. This feature makes navigating a file with hundreds of lines exceptionally simple. For example, if you are working on a Python code with 500 lines of code, then you may be required to scroll through the file to get to a specific line of code. But if you set marks at desired locations, then you can easily move by pressing a couple of keys.
Well, the Vim marks functionality is not confined to the navigation, you can use marks to execute other commands as well, which I will be discussing in later sections of this guide. Let’s explore how to set and use marks in Vim.
Note: I am using Linux distribution (Ubuntu 22.04) and Vim version 8.2 for the instructions in this guide.
Set a Mark
To set the mark in Vim, keep the cursor where you want to set the mark and press the m key, followed by any letter from a to z. For example, if I want to set a mark with the name of the letter z then I will type mz in the NORMAL mode.
There are multiple ways to set a mark in Vim, this procedure is the quickest.
While the above-mentioned procedure is widely used and very quick, however, you do not get any visual indication of whether the mark has been set or not unless you check it explicitly.
To list the marks in Vim, use the :marks command, which I will discuss in the List Marks section. However, you can enable the keystroke indication at the bottom of the window by using the :set showcmd.
You can also use the mark or the Mark commands to set the mark. For example, the z mark can also be set using the below-given command:
Each Vim file can have marks from a to z, but if you set a mark z for a position and use the same mark name for another position, the previously set mark will be removed (overwritten).
Note that the uppercase letters {A-Z} can also be employed to set a mark. Marks with the uppercase letters are global marks and based on files. I will discuss the global marks thoroughly in a separate section.
List Marks
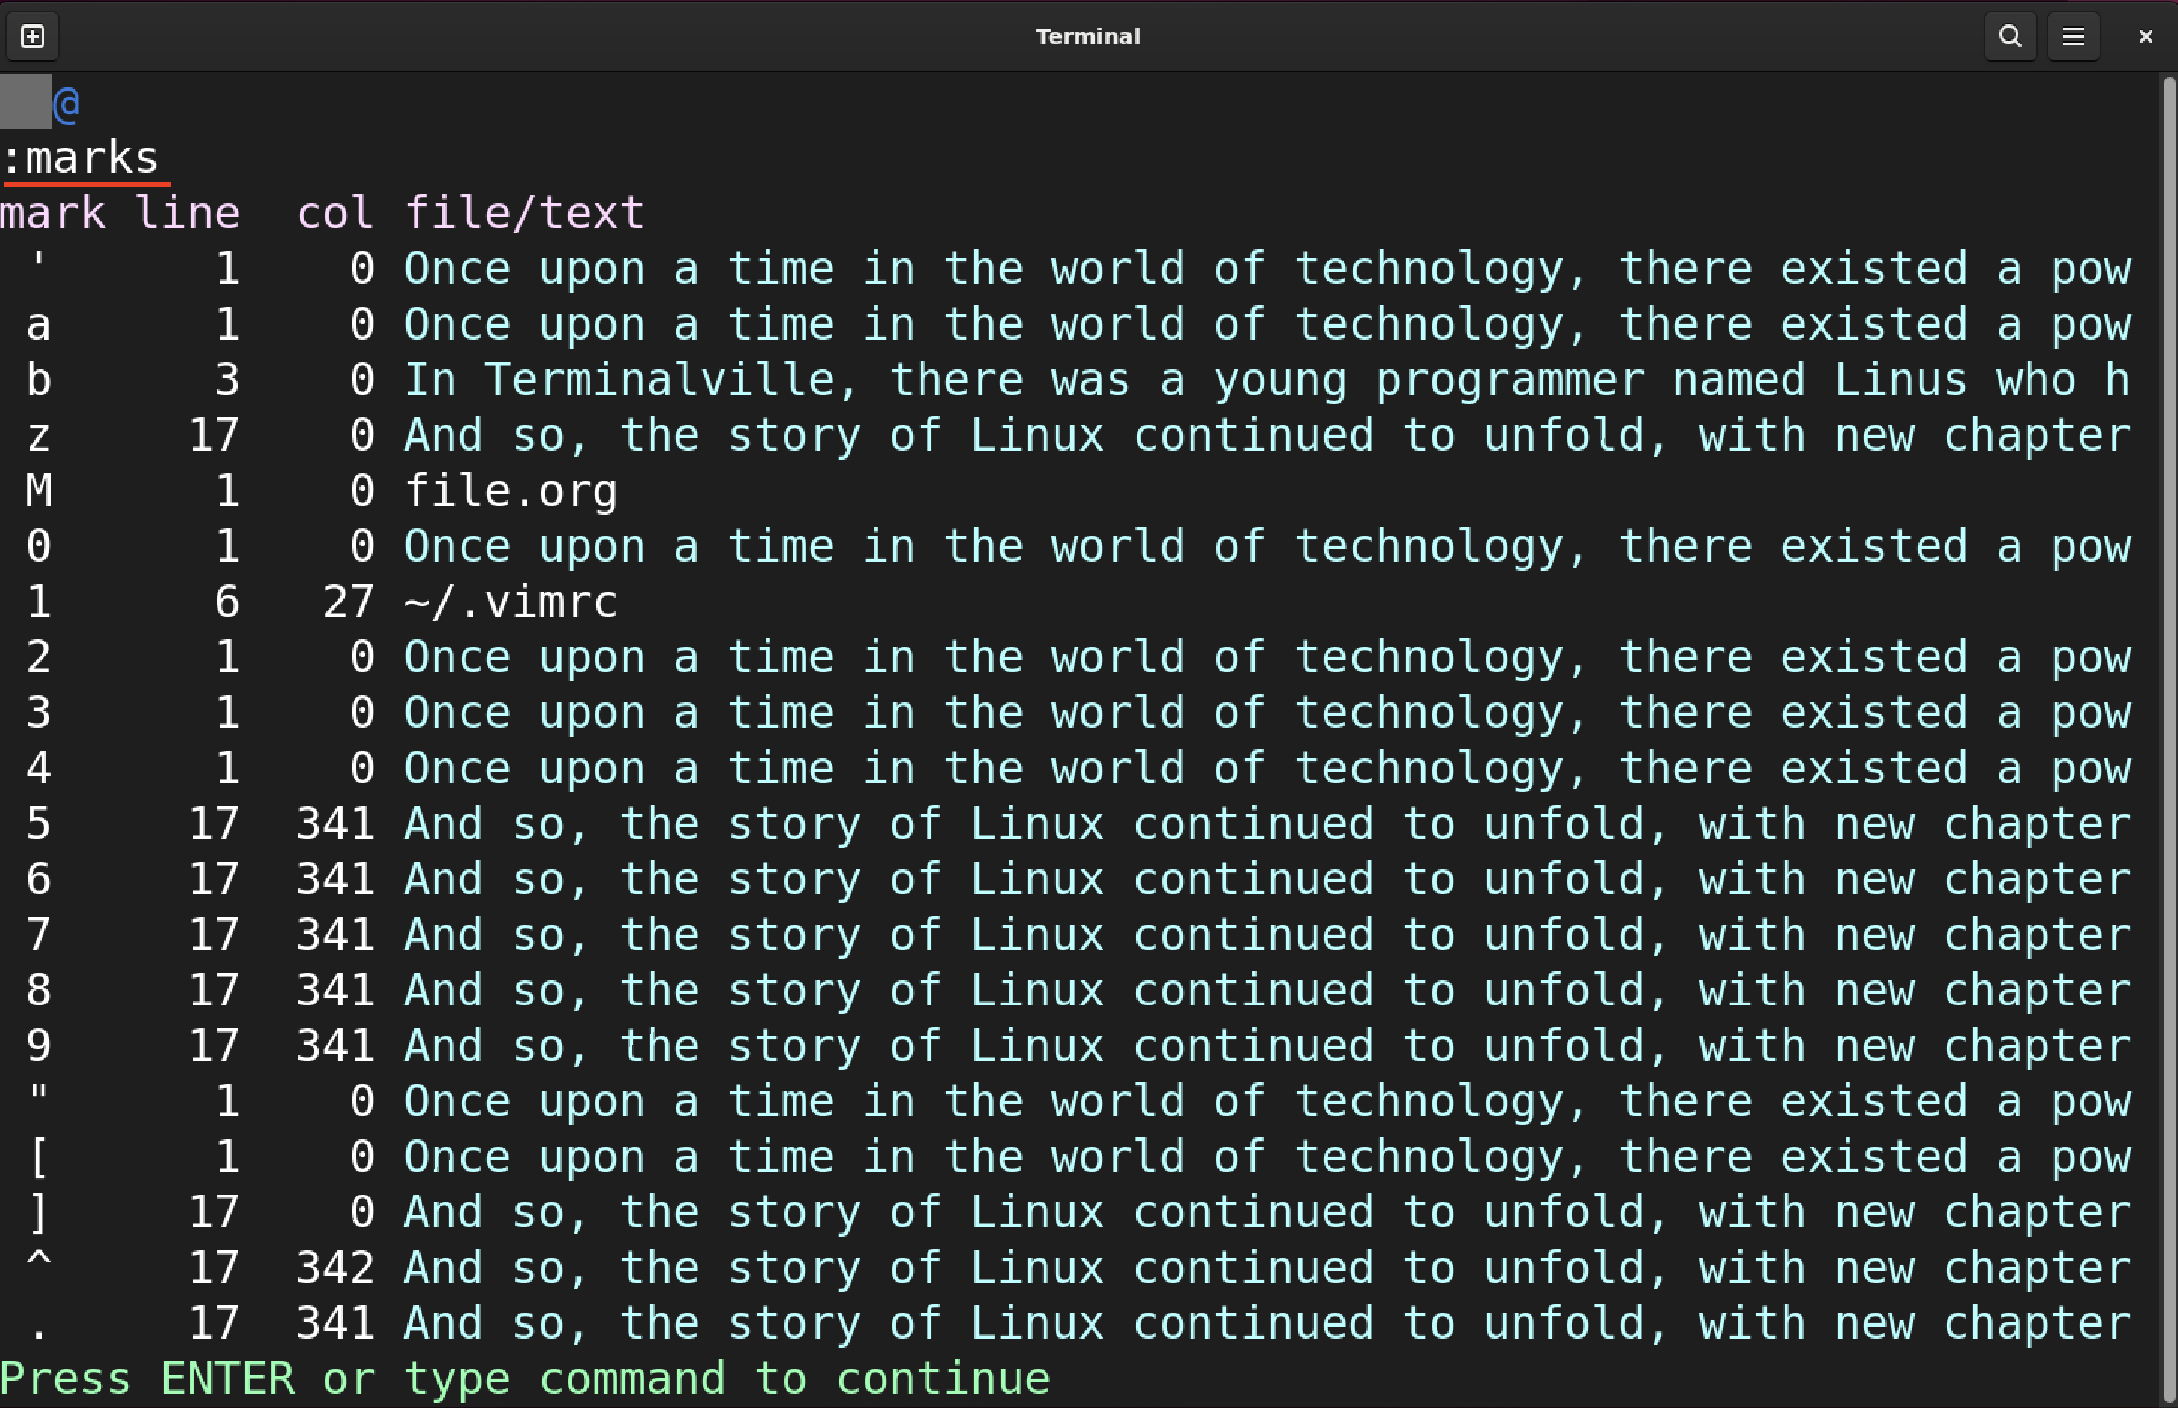
As discussed in the previous section, all the created marks can easily be listed
using the :marks command.
In the above output image, all the marks are listed; some are custom and some are default.
There are some other methods as well to list the marks. To list a specific mark, use the :marks command with the mark name. For example, to list the mark z, use the :marks <mark name> command:
Similarly, to list multiple marks, use the :marks <mark names>:
Where a, b, and z are different mark names.
The marks within the files are not visible by default and to view them graphically, there are various plugins. The well-known plugins that can display marks in Vim are ShowMarks and Vim Signature.
As ShowMarks plugin is full of errors and has not been updated for many years, I will install the Vim Signature plugin to view marks.
Upon installing the plugin, set the mark, and the plugin will explicitly show it with the name as illustrated in the following image.
Jump to a Mark
After setting the mark, the next step is navigating the marks. To jump to the beginning of the marked line in the current buffer, press the single quote (‘) with the mark name {a-z}.
To jump to the exact location (row/column) press the backtick (`) with the mark name {a-z}.
The single (‘) and backtick (`) can also be used to jump the global marks {A-Z}.
A table of navigating through the lowercase marks is mentioned below:
| ‘’ | Jump back to the line from where you jumped |
| “ | Jump back to the position from where you jumped |
| ‘. / `. | To jump to the last edited line / position |
| `[ \ `] | To jump to the start / end of the last yanked text |
| `< \ `> | To jump to the start / end of the last visual selection |
| [count]]‘ | To jump to the next line of [count] the number of marks from the current cursor position |
| [count]]` | To jump [count] the number of marks from current cursor position |
It is important to note that the navigational keys mentioned above are for lowercase marks.
Discussion on Vim marks is incomplete if we do not discuss the jumps and jumplist. The jumplist stores the jumps that are made within the file or across the files, whether they are marks or normal Vim default jumps.
To list all the jumps, use :jumps command, and to delete all the jumps, use the :clearjumps. To navigate the jumps, use ctrl+o and ctrl+i keys.
Note: Before deleting the jumps, be mindful that deleting the jumps can affect the navigation history.
I find using jumps more convenient to move through the marks. First, I clear all the jumps because if I do not do that, I may end up in other files. Then I register mark jumps in the jumplist file using the single quote or backtick. Once done, I use the ctrl+o and ctrl+i keys to jump through the marks quickly.
For more help about navigating the marks, use the :help marks and :help jumplist commands.
Global Marks
Global marks in Vim are set to jump between the files. Unlike local marks, global marks are set with capital letters and can be used across the files.
Let’s understand the importance of global marks with the help of an example. Assuming you are working on a code file and want to access a specific function in that file. So, instead of opening the file, simply type the set global mark, and the file will be opened with the specific location.
To set the global mark, use the mark command m followed by a capital letter {A-Z}.
Now, you can access this mark from any file. To jump to the global mark, use the same procedure mentioned in the Jump to a Mark section. The file containing the mark will be opened, closing the current one.
Similarly, to go to the exact location, use backtick with the mark name (`Z).
Numbered Marks
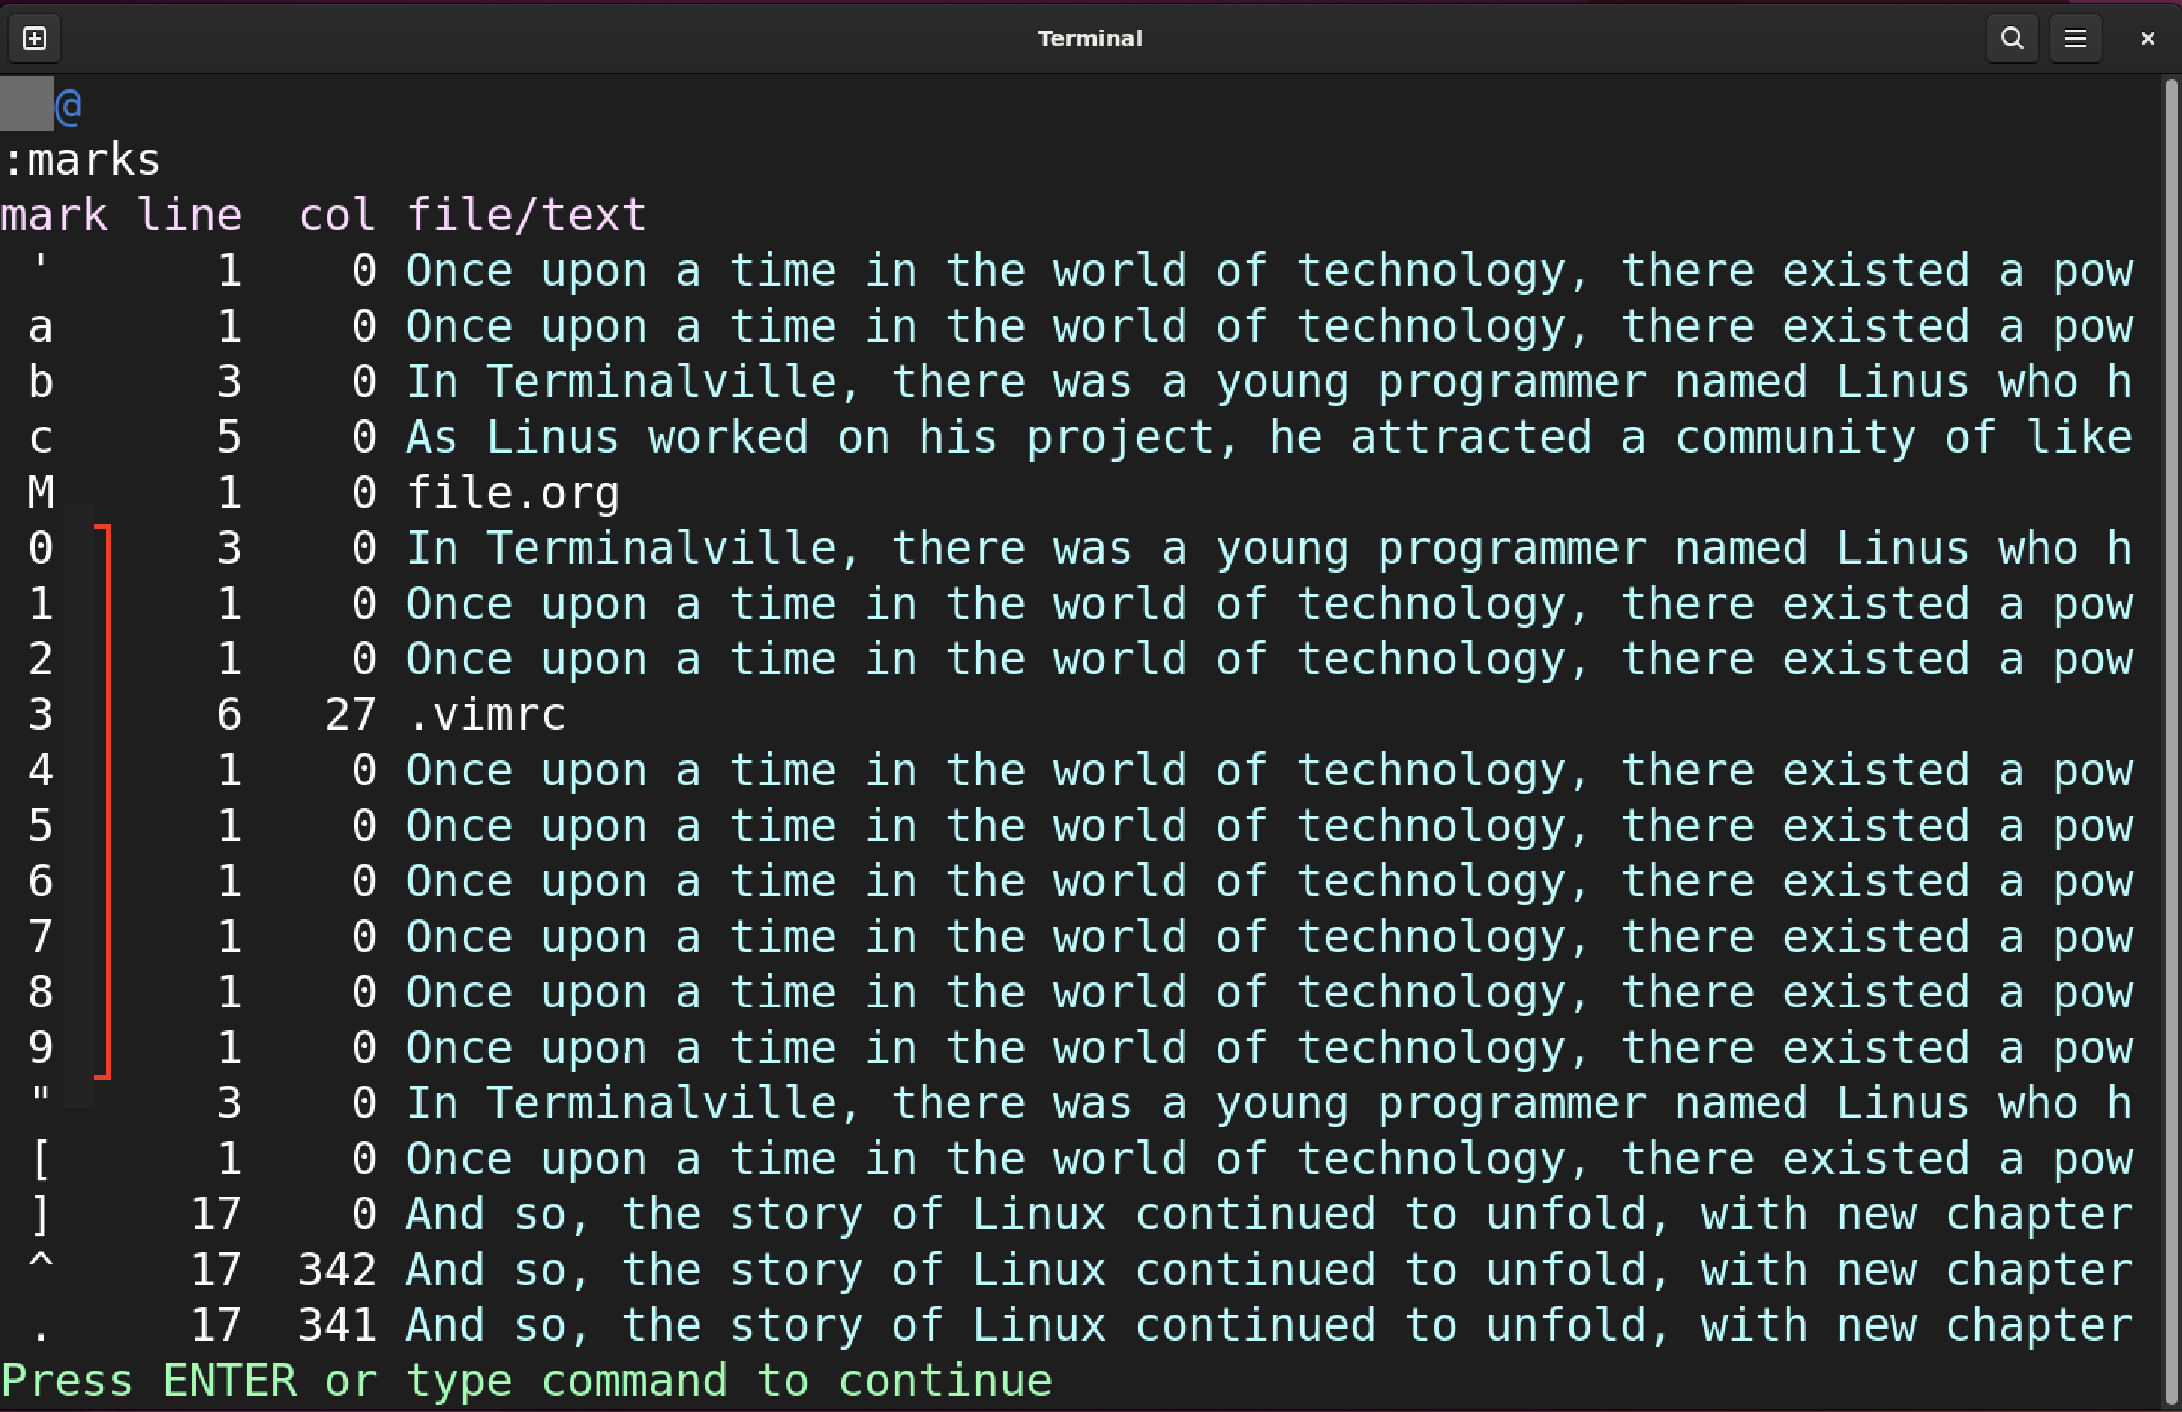
The numbered marks {0-9} are used to store the current cursor position in the viminfo file when you exit the file. The numbered marks are special and cannot be set directly. These marks are auto-generated in the viminfo file to keep track of the modifications in the file when you exit the file. For example, when you exit any file the viminfo file saves the last cursor position information in the numbered marks such as 0, 1, 2, and so on.
You can list the numbered marks using the :marks command.
For more information about the Vim numbered marks, use the :help viminfo-file-marks command.
Deleting Marks
There are various methods to delete all the marks, specific marks, or a range of marks.
To delete marks, the :delmarks or :delm commands can be used.
| :delmarks z | To delete a specific mark, e.g., z |
| :delmarks x-z | To delete marks from x to z such that deleting x, y, and z |
| :delmarks abxy | To delete a, b, x, and y marks |
| :delmarks zZ | To delete z and Z marks |
To clear all the lowercase {a-z} marks, use :delmarks! command. To clear uppercase marks and numbers marks, you need to use :delmarks A-Z and :delmarks 0-9 commands. If you want to clear uppercase {A-Z} marks, use :delmarks A-Z. Numbered marks can also be cleared using the same command.
Advanced Features
Since marks are locations, they can be used for editing the file as well in Vim. For example, to delete, copy, or change something from a specific mark to another mark you can use the respective command with the mention of the mark name.
In the following table, the z is used as the mark name.
| d‘z / d`z | Delete from the current line to the next marked line / Delete from the current position till the next exact marked position |
| c‘z / c`z | Change text from the current line to the next marked line / Change text from the current position till the next exact marked position |
| y‘z / y`z | Copy (yank) text from the current line to the next marked line / Copy text from the current position till the next exact marked position |
If you want to perform a linewise operation, then call the mark using the single quote (‘), and if you want to perform a characterwise operation, use backtick (`).
Similarly, if you want to delete, change, or yank anything between two marks then you can use the following command syntax.
For example, if you want to delete all the lines from mark ‘x to mark ‘y use the :‘x,‘y d command.
See the following file with marks b and c.
To remove all the lines from the mark b to the c (including), execute the command given below:
Difference between Lowercase Marks and Uppercase Marks
Both lowercase and uppercase marks have distinct functionalities.
The lowercase marks are used within the files and can be set from alphabet a to alphabet z in any file. They are unique to the files they have been created in. They can be accessed and managed within the files where they are created. On the other hand, the uppercase marks {A-Z} are global and cannot be set with the same name. These marks can be accessed from any file using the apostrophe (‘) or backtick (`).
The navigation and the process of deleting lowercase and uppercase marks are similar. But lowercase marks have more navigational commands because of their in-file settings.
Another important thing is that marks do not delete upon exiting the file or session. So, if you have set a mark then on reopening the file marks will remain intact.
Vim Marks Cheat Sheet
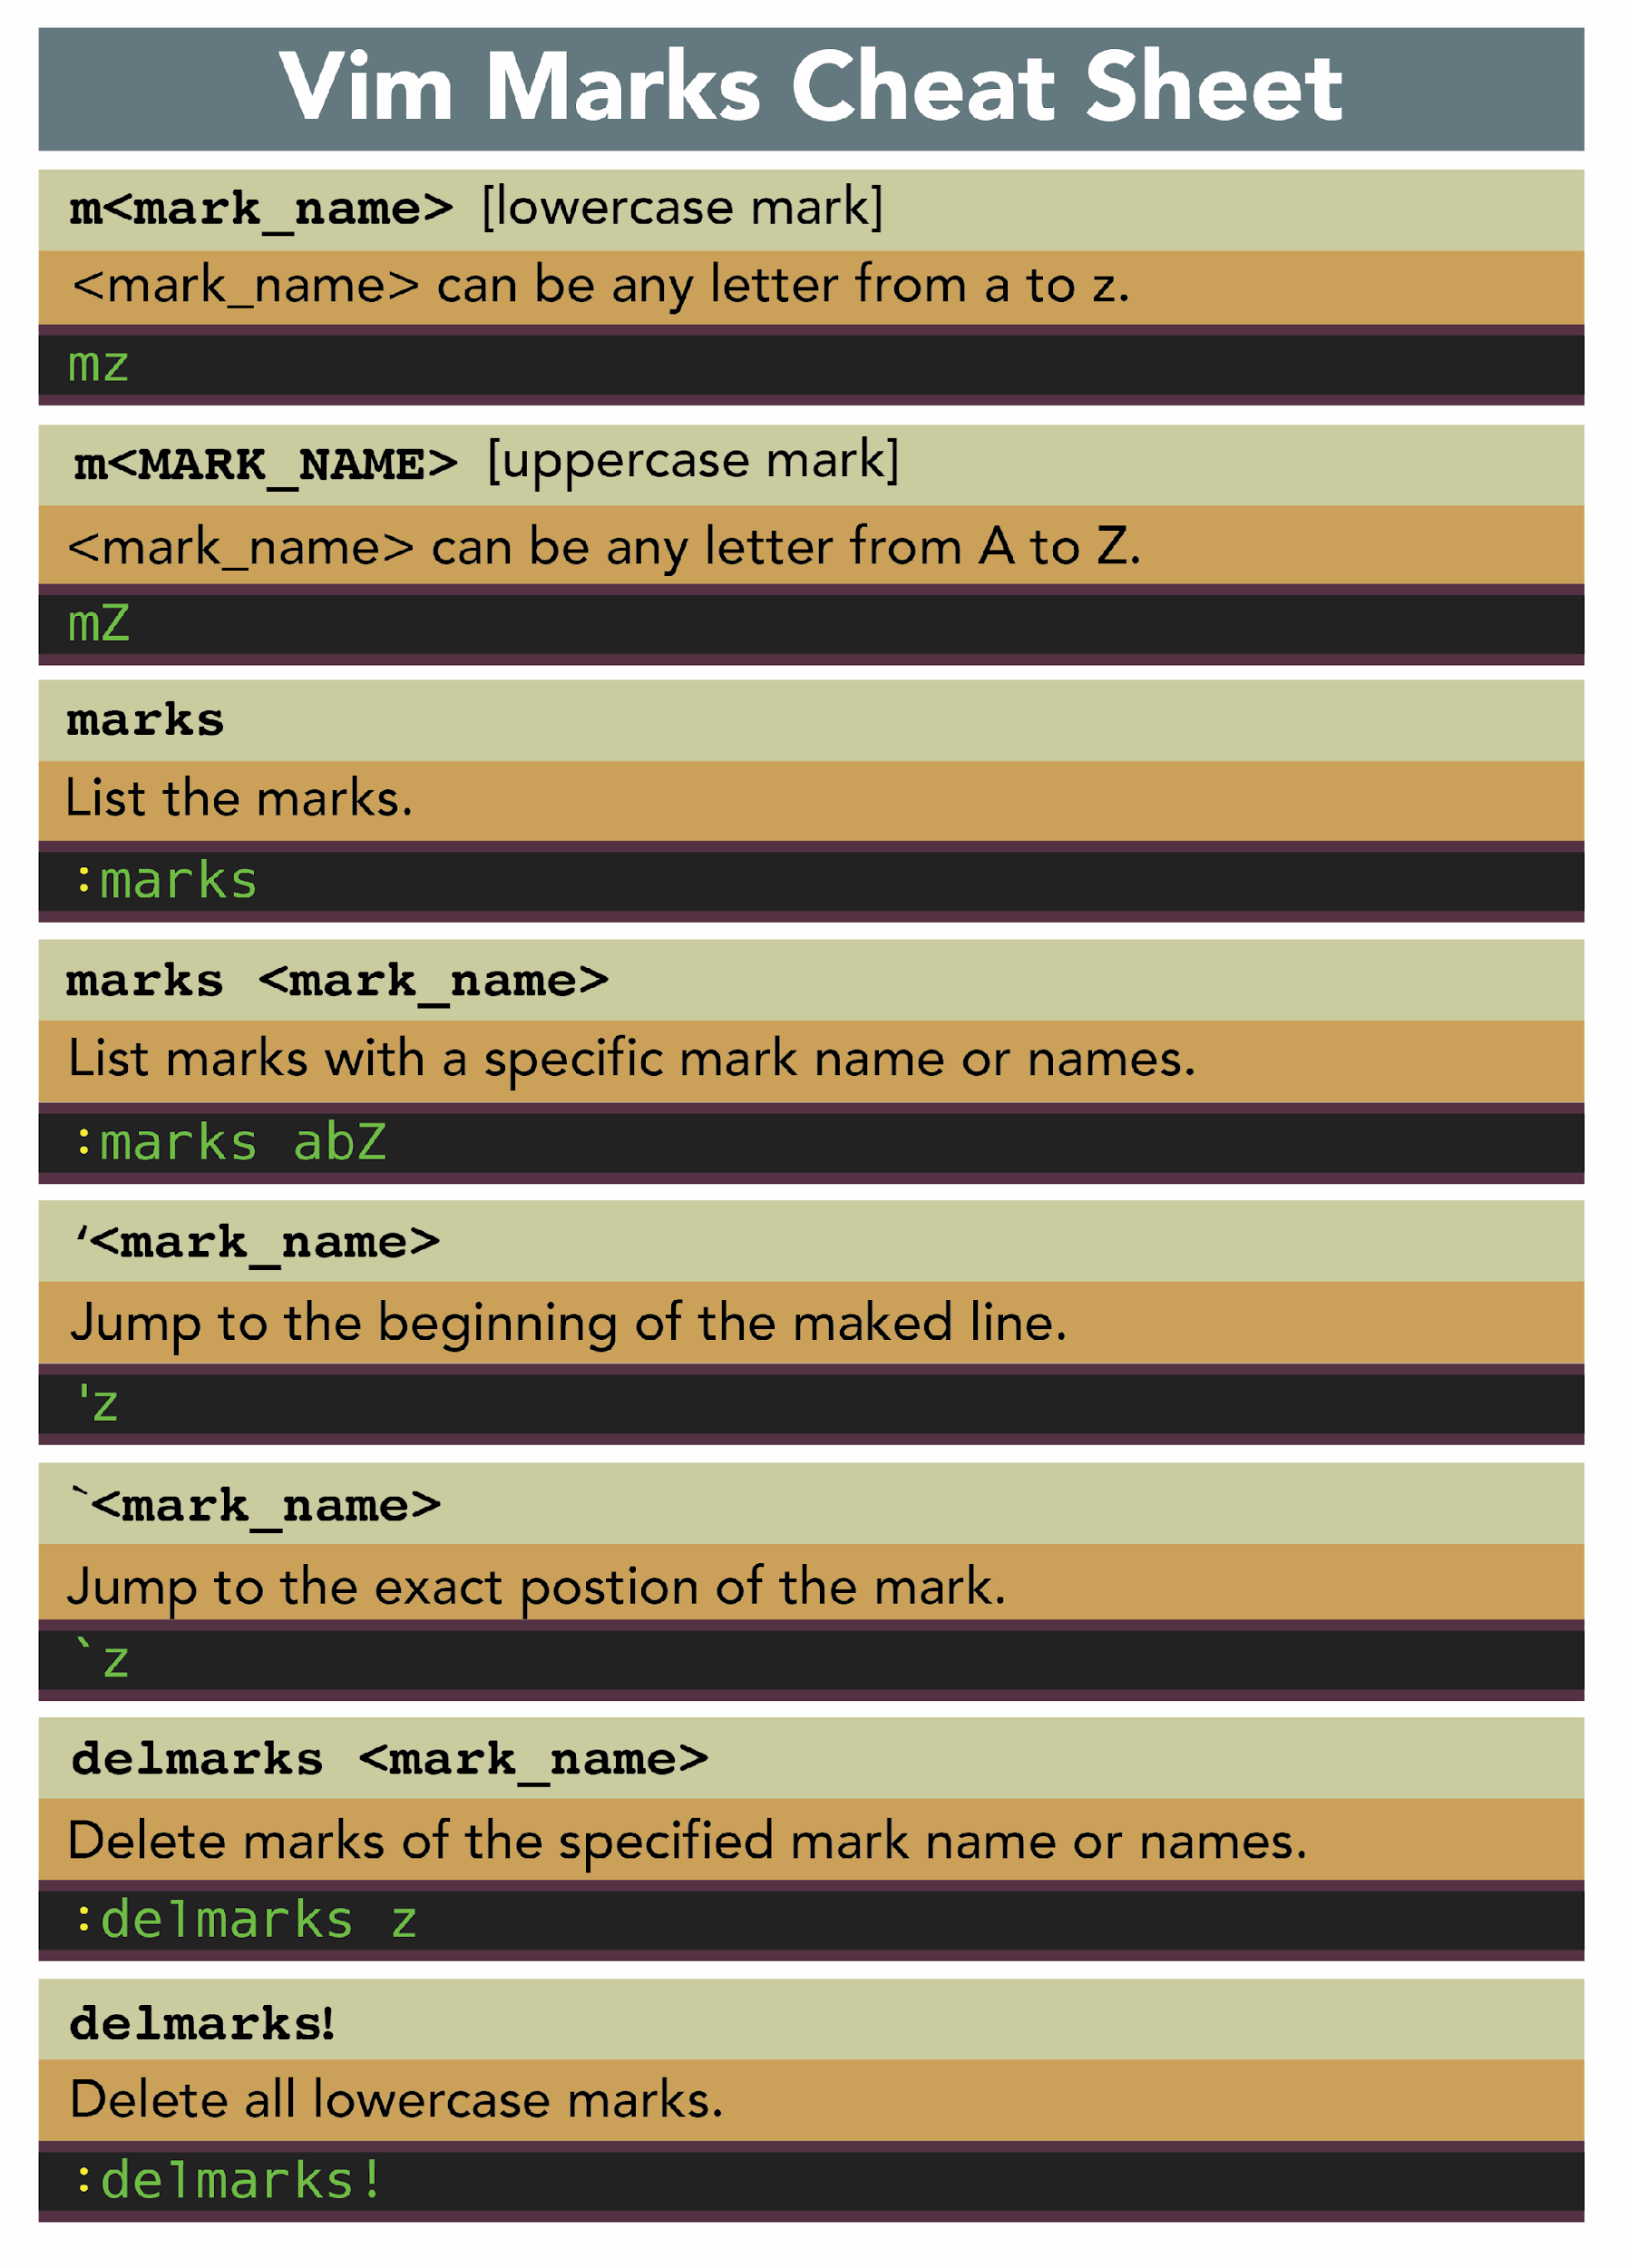
The key operations that you need to use the marks feature in the Vim editor are mentioned in the following image.
Conclusion
The marks in the Vim editor are custom-set positions to navigate a file with hundreds of lines. There are two types of marks, uppercase and lowercase marks. The lowercase marks are handy in navigating within the file. To navigate across the files, uppercase marks are used. To set the mark, the letter m is used with another lowercase or uppercase letter {a-z, A-Z}. Marks of any file can be listed using the :marks command. To delete a mark :delmarks or :delm commands with the mark name are used.


