
A Secure Shell, or SSH for short, is mainly used for secure network connections between two nodes, such as a client and a server. All communication is encrypted between the two systems, and users can connect their systems remotely and perform administrative jobs by enabling SSH access. Users can also securely transfer files using the SCP and SFTP protocols. This article shows you how to enable SSH access to a user in an Ubuntu system.
Enable SSH Access in Ubuntu
When Ubuntu is first installed, the user cannot use the remote SSH access by default. So, enable SSH in Ubuntu using the following simple method.
Install open-ssh Package
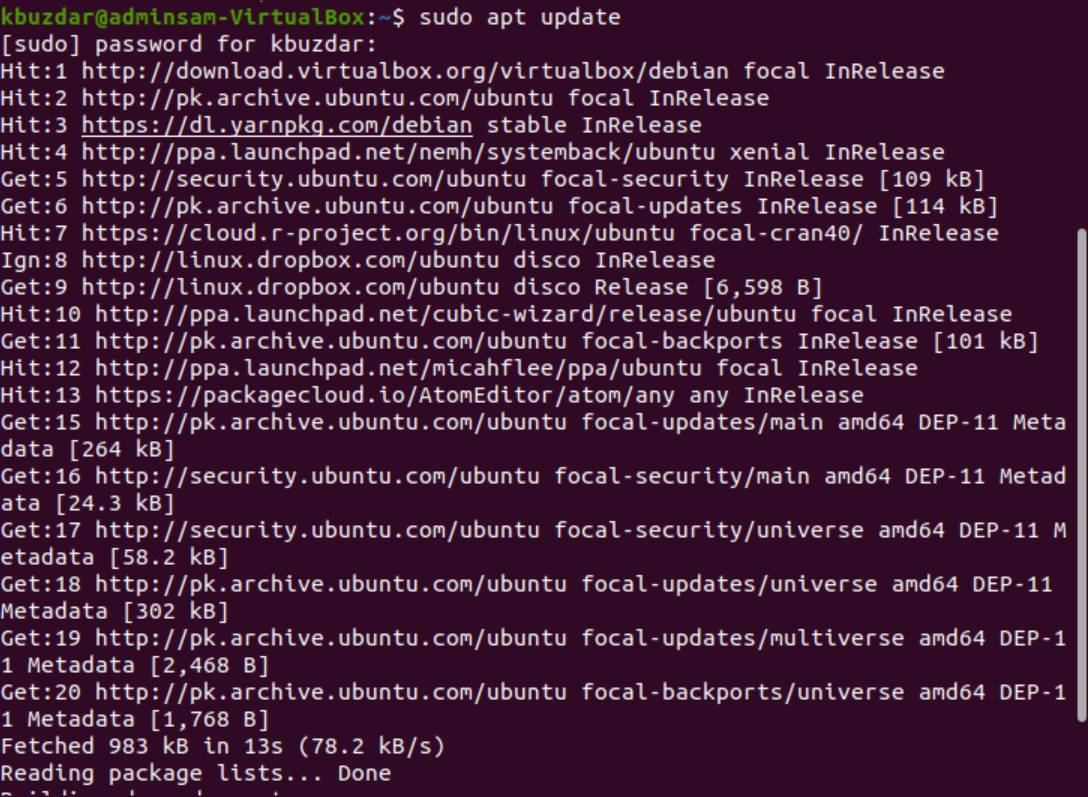
Open the terminal by pressing ‘Ctrl+Alt+T’ and update the packages list. Next, install the following open-ssh package on your Ubuntu 20.04 system:
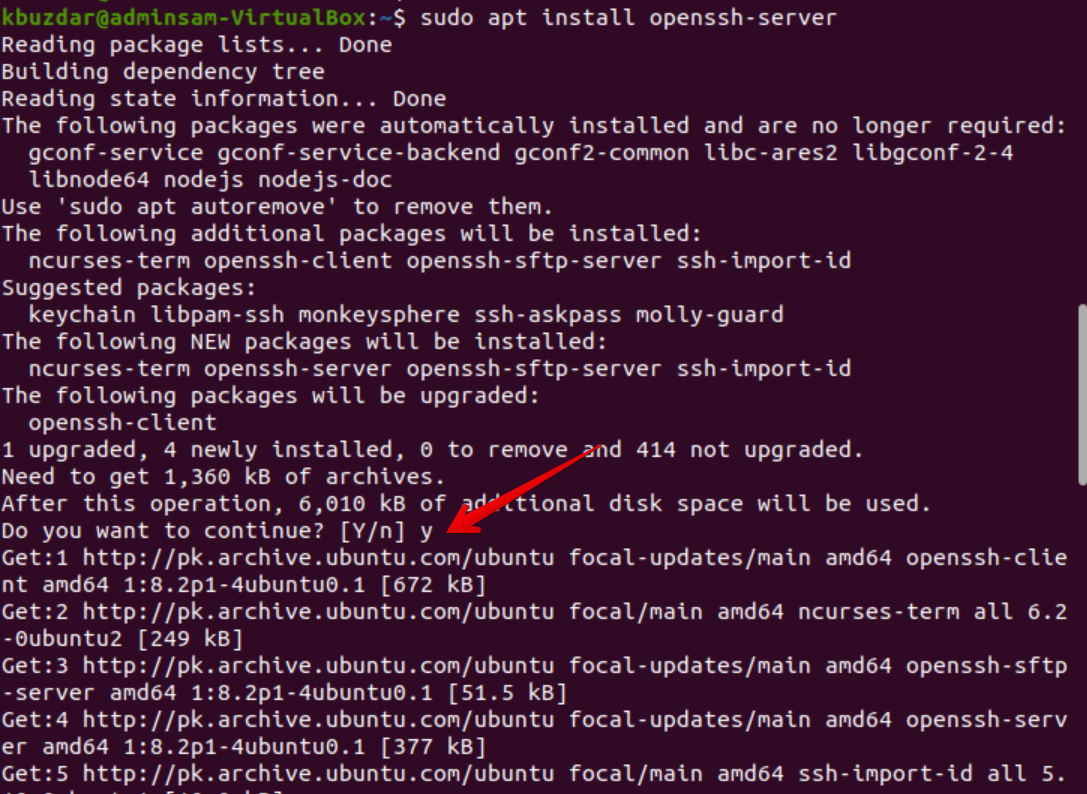
During the installation process, a dialog will prompt you in the terminal. Enter ‘y’ to proceed with the installation.
Once the installation of the open-ssh package is completed, the SSH service will automatically start on your system. You can also verify that the service is active by entering the following command:
If the following output is received in the terminal, the SSH service is running and enabled.
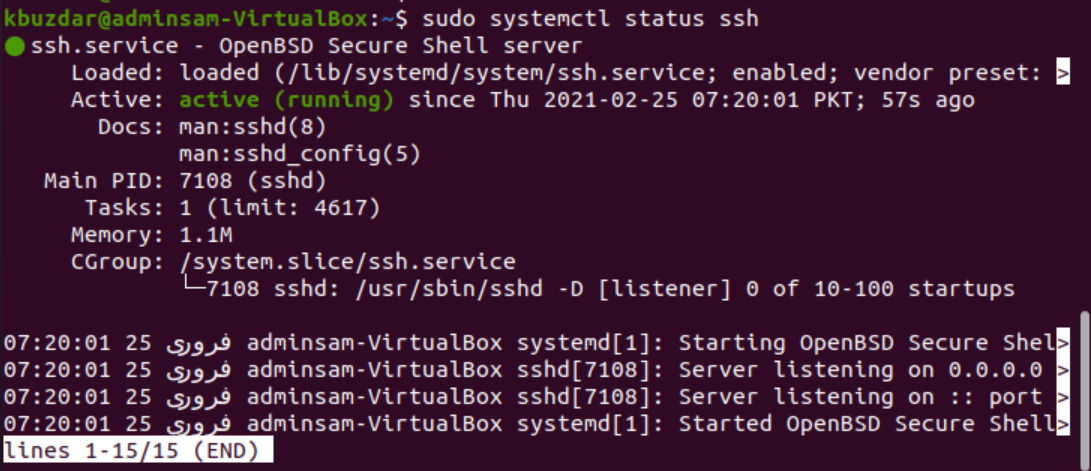
Move to the command-line shell and press ‘q.’ This will return you to the normal shell.
You can disable the SSH service on your system with the following command:
To re-enable the SSH service, use the following command:
Enable Firewall Configurations for SSH
Using the UFW firewall configuration tool, you can enable it on your system. If you have already enabled the firewall on your system, then make sure that all SSH ports are open by issuing the following command:

Now that all the configurations have been completed, you can connect your Ubuntu system with any remote system via the SSH. In Linux and macOS distributions, SSH clients are installed by default.
Connect to the SSH Server
The following ‘ssh’ command can be used, along with the username and IP address, to connect your Ubuntu system over the LAN. Use the command provided below to do so:
If you do not know your IP address, then use the following command to access it:
Replace the username and IP address with your information, as follows:
The following result will appear in the terminal:

Type ‘yes’ to connect your Ubuntu system over the LAN.

Enter the password. The following output will be shown in the terminal:
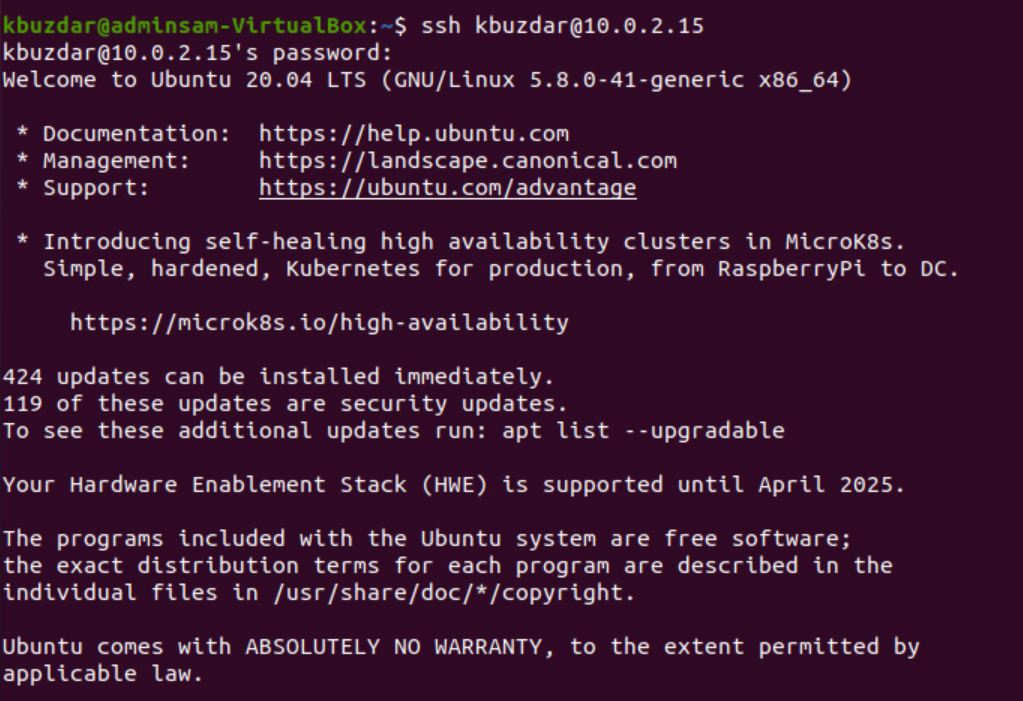
Now, you are signed in on your Ubuntu system.
Connect SSH to A Remote Server
SSH accepts data by default on port 22. Find your public IP address and issue the following command to connect the SSH server to a remote system:
Configure your router to accept the SSH traffic on port 22.
Conclusion
This article showed you how to enable SSH access in Ubuntu 20.04. Now, you can log in to your system and perform everyday administrative tasks through the command-line. In case of any query related to this article then let us know through your comments.