This article will explain the procedure of pulling from the master into the Git development branch. Let’s start!
How to “git pull” From Master Into the Git Development Branch?
To “git pull” from the Git local master branch into the Git local development branch, first, navigate to the local repository and display the list of all existing Git local branches. Next, check out the development branch and run the “$ git pull origin master” command with the “–allow-unrelated-histories“ option.
Now, move ahead and implement the previously discussed scenario for better understanding!
Step 1: Move to Local Repository
Navigate to the local repository by utilizing the “cd” command:
Step 2: View List of Local Branches
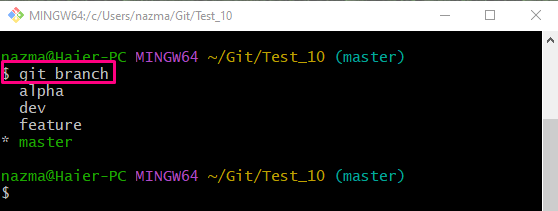
Execute the “git branch” command to view the list of existing Git local branches:
Step 3: Checkout to dev Branch
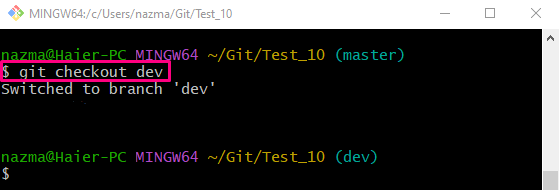
Next, switch to the development branch using the “git checkout” command:
Step 4: Git Pull Master to Development Branch
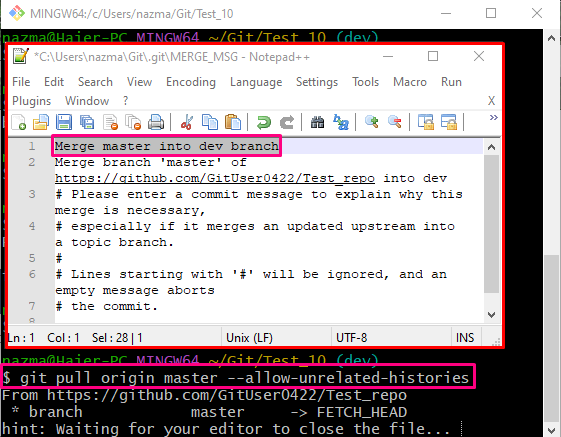
Execute the “git pull origin” command with the “–allow-unrelated-histories” option to pull the master into the development branch:
After executing the above-provided command, you will be asked to add the comment to the default text editor:
After adding the comment, close the text editor. It will pull the master into the development branch:
That’s it! We have explained the method to pull the master into the Git development branch.
Conclusion
To “git pull” from the master into the development branch, firstly, move to the Git local repository and view the list of Git local branches. Then, switch to the development branch and execute the “$ git pull origin master” command with the “–allow-unrelated-histories“ option. This article illustrated the procedure to pull the master into the development branch.


