This tutorial discusses the procedure to fetch the remote branch in Git.
How to git fetch Remote Branch?
To fetch the remote branch in Git, firstly, switch to the desired Git repository and initialize the Git repository. Clone the Git remote repository to the local repository and run the “$ git fetch origin” command to fetch the remote branches. Lastly, list the remote branches for verification.
Let’s implement the above-discussed procedure!
Step 1: Move to Directory
Move to the Git local directory by utilizing the “cd” command:
Step 2: Initialize Git Directory
Now, run the “git init” command to initialize the Git empty repository:
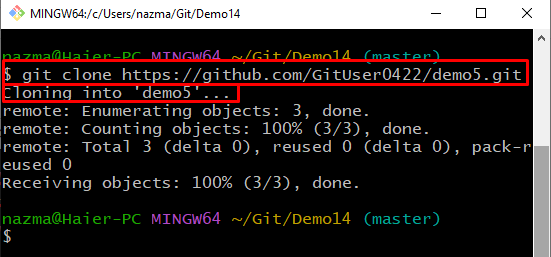
Step 3: Git Clone Remote Repository
Clone the Git remote repository to the local repository by specifying its URL in the following command:
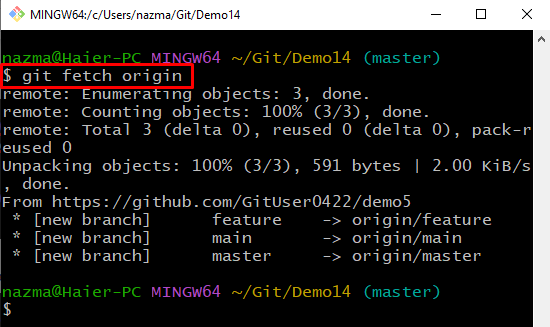
Step 4: Git fetch Remote Branch
To fetch all remote server branches, execute the “git fetch” command with the remote repository name:
As you can see in the below-provided output, all remote branches are fetched:
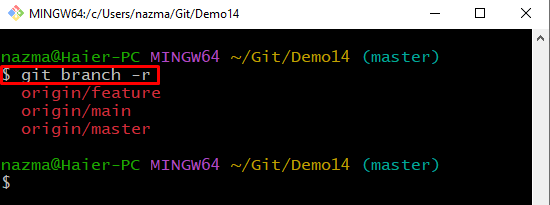
Step 5: List Remote Branches
Lastly, list the fetched remote branches by executing the “git branch” with the “-r” option:
It can be observed that we have successfully fetched the remote branches:
We have offered the process to fetch the remote branch in Git.
Conclusion
To fetch a remote branch in Git, firstly, move to the desired Git repository and initialize the Git repository. Then, clone the Git remote repository to the local repository and run the “$ git fetch origin” command to fetch the remote branches. Moreover, list the fetched remote branches for verification. This tutorial demonstrated the procedure to fetch the remote branch in Git.


