Forking refers to the process of creating a new repository that starts as a copy of an existing repository. The forked repository contains a link to the original which is known as an upstream. This enables the synchronization and collaboration between the original and the fork.
Once you make changes to the forked repo, you can send a pull request for the changes to be merged into the original repo. It creates a foundation for collaborative development.Top of Form
However, once you are working on the repo, you need to remove the fork from your account. This varies depending on the hosting service. For this tutorial, we will focus on GitHub.
Forking a Repo
Let us start with the basics and cover how to fork a repo. We use a publicly available repo for demonstration purposes.
Start by logging in to your GitHub account and navigate to the repo that you wish to fork.
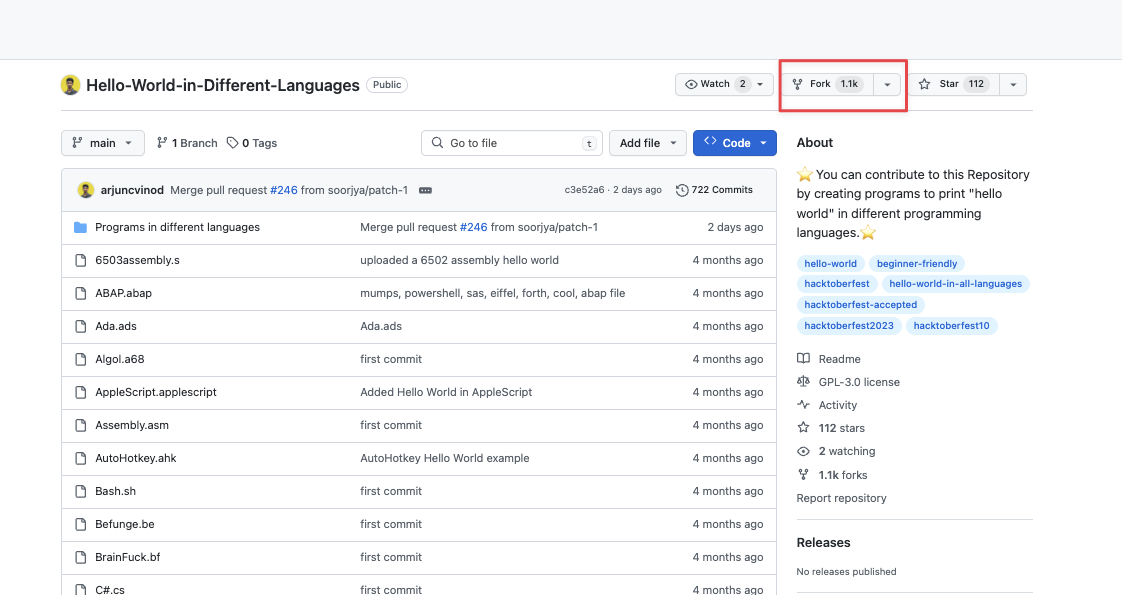
In our example, we use this repo that contains programs that prints the “hello world” string in all programming languages.
https://github.com/arjuncvinod/Hello-World-in-Different-Languages
Locate the fork button in the repository homepage.
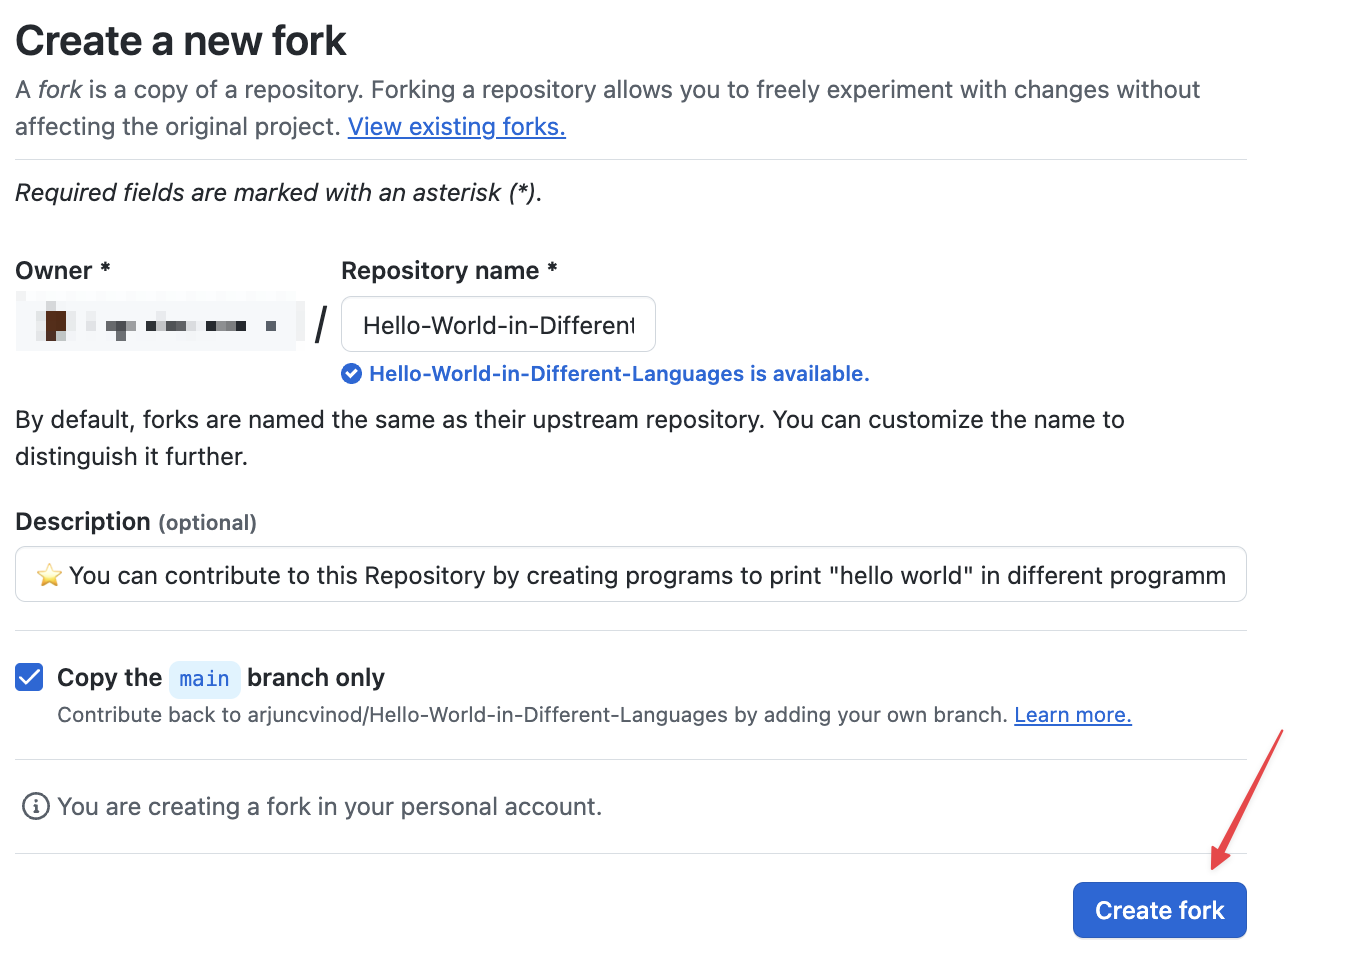
This should take you to the “Create a New Fork” page. Ensure the details that you wish to use and click on “Create Fork”.
Once the fork is complete, you will find the repository under your account. It allows you to make contributions to the repo.
Deleting a Fork
Once you are done with the fork, you can delete it by heading to the repository (your fork) “Settings” page.
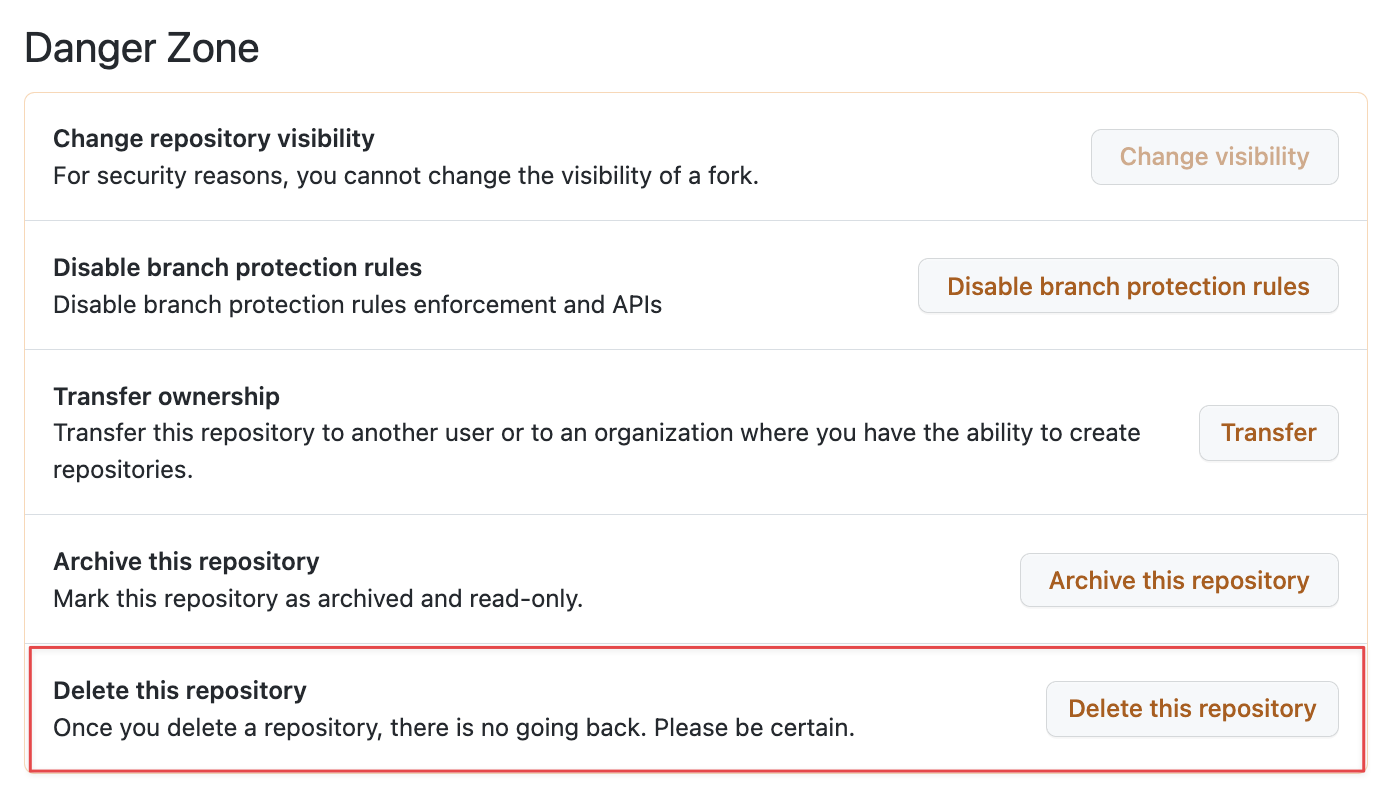
Under the repo “Settings” section, scroll down to the “Danger Zone” section. This is where you will be able to carry out the potentially destructive operations such as deleting the repo.
Locate the “delete this repository” option.
Confirm the deletion and follow the requested steps to delete the repo. You may be prompted to provide your GitHub password.
Conclusion
This tutorial walked you through the steps that you can use to delete a forked repository from your GitHub account.


