The outcomes from this guide are:
What is Commit Hash in Git?
In Git, the commit hash is the unique commit id or value that is automatically generated and assigned to commits whenever a new commit is made in the Git repository. A hash is used while checking out commits, merging commits, creating branches, restoring commits, and many more.
How to Retrieve Commit Hash in Git?
Follow the provided steps to retrieve the commit hash in Git:
- Redirect to the Git local repository.
- Create and edit text files simultaneously.
- Push the file from the Git working area to the tracking index.
- Commit changes for saving into the Git repository.
- Check the Git log history by running the “git log –oneline” command.
Step 1: Move to the Local Repository
Initially, use the “cd” command along with the local repository path:
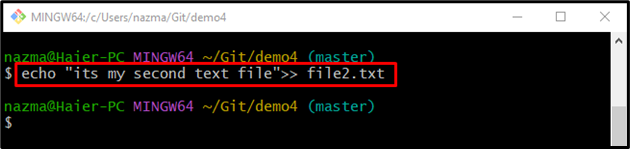
Step 2: Create and Edit File
Next, execute the “echo” command along with the file name and content:
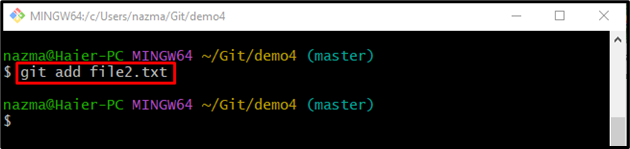
Step 3: Track File
Now, add the newly created file to the staging index by running the provided command:
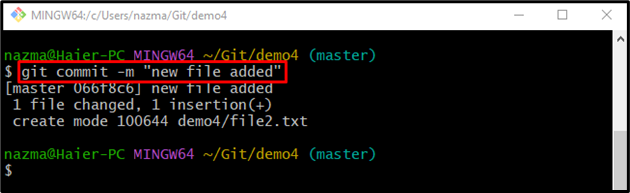
Step 4: Save Changes
Then, save changes into the repository by using the provided command along with the commit message:
Here, the “-m” option indicates the commit message. According to the below-given output, we have successfully added a file to the repository:
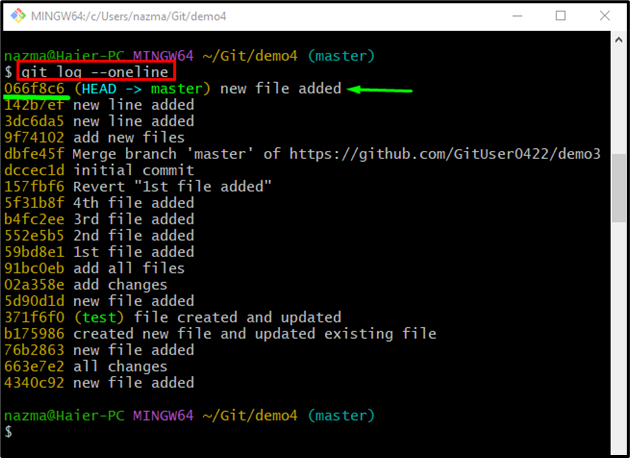
Step 5: Get Commit Hash
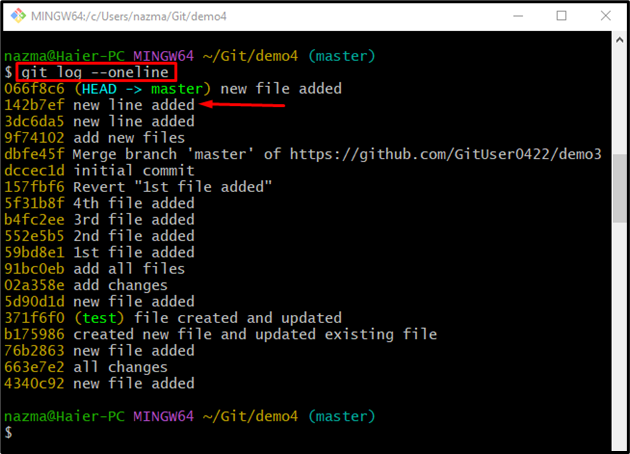
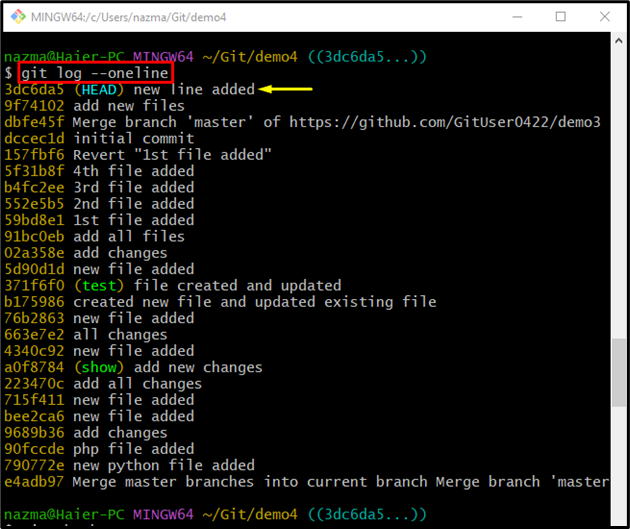
Finally, run the “git log –oneline” command to retrieve the commit hash:
As you can see, all the commit hash has been displayed successfully and currently HEAD pointing to the below-highlighted SHA-hash:
How to Use Commit Hash in Git?
The commit hash can be used for several purposes, such as:
- For reverting changes.
- For checking out the particular commit.
- For creating branches.
Revert Changes using Git Commit Hash
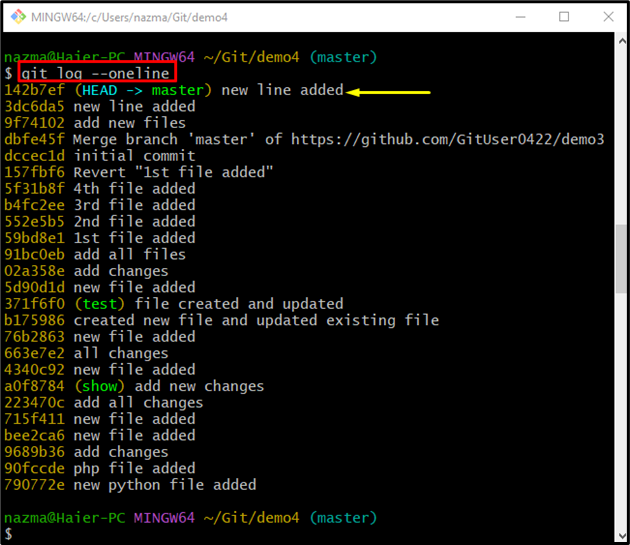
To revert changes, first, gets the particular commit hash by running the provided command:
From the below-given output, we have selected the “142b7ef” commit hash for reverting the most committed changes:
Then, execute the “git reset” command along with the copied commit hash:

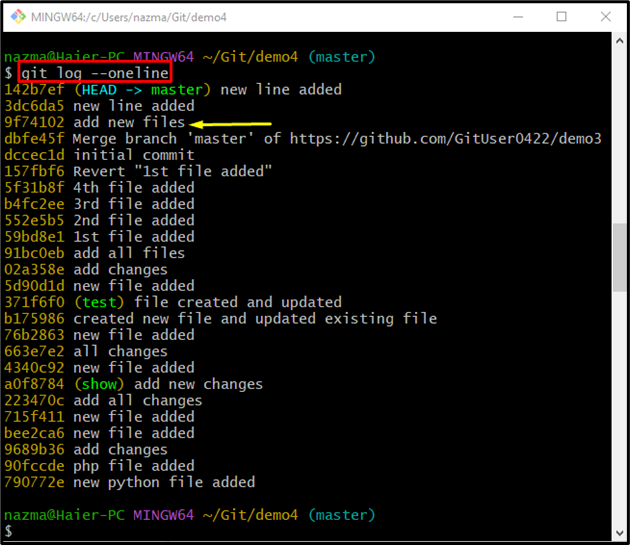
Now, display the Git log history by using the following command:
According to the below-given output, the most recent changes have been reverted and HEAD pointing to the specified commit hash:
Checkout to the Particular Commit
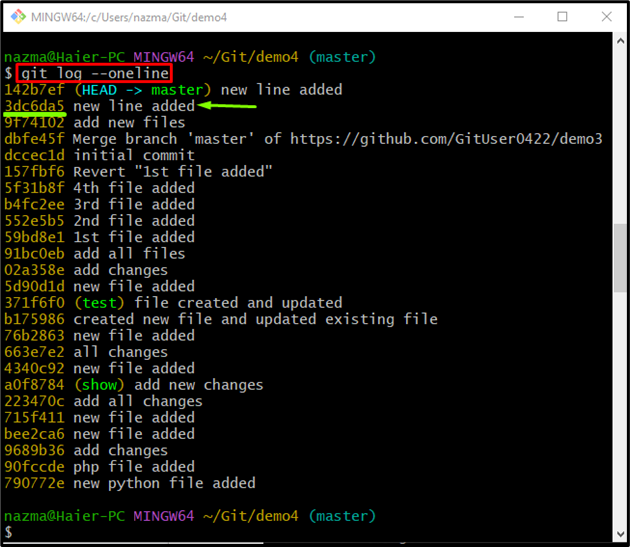
Sometimes users want to know detailed information about a particular commit, such as which file or changes have been added through this commit and many more. For that purpose, first, viewed the Git log history by running the given command:
Here, we have selected the “3dc6da5” commit hash for further process:
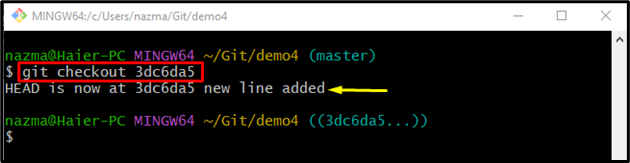
Now, run the git checkout“ command along with the copied commit SHA-hash:
According to the below-given output, currently HEAD pointing to the specified commit hash:
For verification, view the Git log history by running the following command:
Create Branches
The Git commit command can also be used for creating new branches in the Git root directory. For that purpose, first, get the commit hash by running the “git log –oneline” command:
Now, select the desired commit hash from the given output. For instance, we have chosen the below-highlighted commit hash:
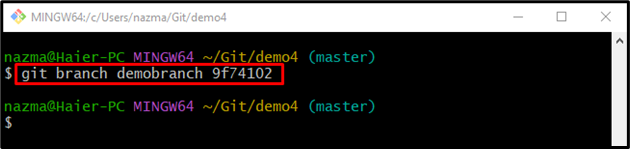
After that, execute the “git branch” command with the new branch name and preferred commit hash:
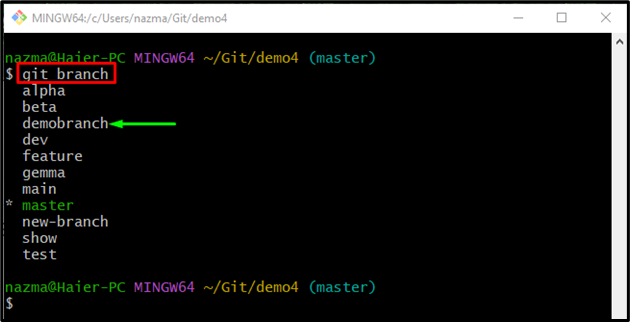
Now, use the provided command to display all local branches:
It can be seen that the “demobranch” has been created successfully using the Git commit hash:
That’s all! We have described the Git commit hash and its usage.
Conclusion
The commit hash is the unique commit id that is automatically generated and assigned to commits whenever a new change has been saved in the Git repository. The commit hash is used for checking out, merging commits, creating branches, and restoring commits. In this guide, we have demonstrated the Git hash.