On the Git local machine, a developer creates multiple branches for each module. Moreover, they can switch from one branch to another branch whenever it is required to switch and add changes. Git enables users to checkout the specific commit SHA hash for changes. Sometimes, some lines are modified in the files through the SHA hash, and you may need to switch back to the HEAD. The “$ git checkout <branch-name>” command can be utilized.
This guide discusses the method to switch back to the HEAD.
How to Switch Back to HEAD in Git?
To switch back to HEAD, first, navigate to the desired Git local repository and create a new text file. Then, add it to the staging area and commit the added changes. After that, check out the current repository reference log history. Next, “checkout” to the existing commit and execute the “$ git checkout <branch-name>” to switch back to the HEAD.
Step 1: Navigate to Git Repository
First, execute the “cd” command in order to move to the particular Git local repository:

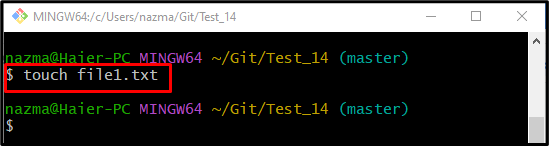
Step 2: Create Text File
Create a new text file using the “touch” command:
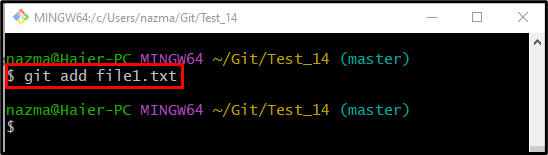
Step 3: Track Newly Created File Into Staging Area
Now, track the newly created file into the staging area through the “git add” command:
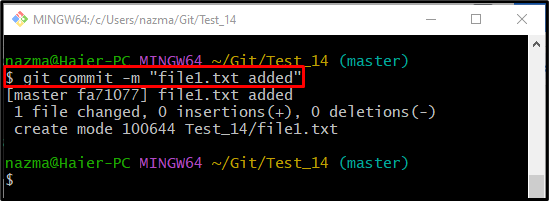
Step 4: Update Repository
Next, add the make changes into the Git repository by executing the “git commit” command along commit message with the “-m” option:
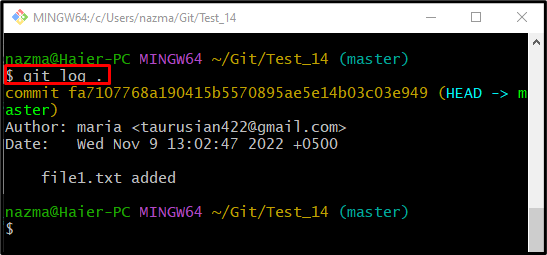
Step 5: View Git Log Reference History
After updating the Git repository, run the “git log .” command to show the log history:
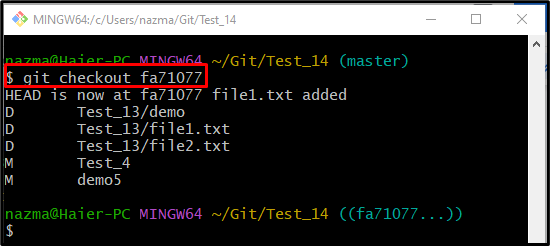
Step 6: Checkout With SHA (Commit Id)
Execute the “git checkout” command with the commit id and switch to it:
According to the below output, currently, HEAD is pointing the specified SHA hash and showing all added changes in the previous branch:
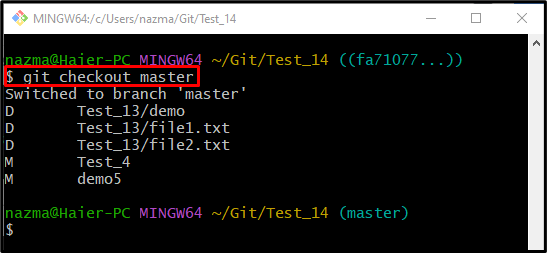
Step 7: Switch Back To HEAD
Lastly, switch back to the particular branch and point the HEAD on it using the “git switch” command:
It can be seen that now the HEAD pointer switches back from the SHA hash to the branch:
That’s all! We have described the method to switch back to HEAD.
Conclusion
To switch back to HEAD, firstly, move to the particular Git local repository and create a new file. Then, track it to the staging area from the working directory and commit the added changes. Next, view the Git reference log history. Now, check out the existing commit, and lastly, run the “$ git checkout <branch-name>” to switch back to the HEAD. This guide described the procedure to switch back to HEAD.