The “git checkout” command enables developers to checkout to the desired commit SHA-hash to move the HEAD position. However, if developer’s checkout a commit SHA-hash directly, it puts them into a “detached head” state, which means that the current SHA-hash that developer’s copy has checked out and doesn’t branch pointing at it. You can switch back to the Git local branch to come out from the detached head state.
This article will discuss the method to tackle and resolve the “git checkout <commit id>” changing branch to “no branch” issue.
How to Fix “git checkout <commit id>” is Changing Branch to “no branch” Issue?
To tackle the “no branch” issue, follow the series of steps:
- Move to the required Git repository
- View the Git reference log history.
- Copy the desired commit id from the log history
- Run the “git checkout <commit-id>” command.
- To resolve this issue, execute the “git checkout <branch-name>” command.
Step 1: Switch to Git Repository
First, navigate to the Git repository by running the “cd” command:

Step 2: Git Log Reference History
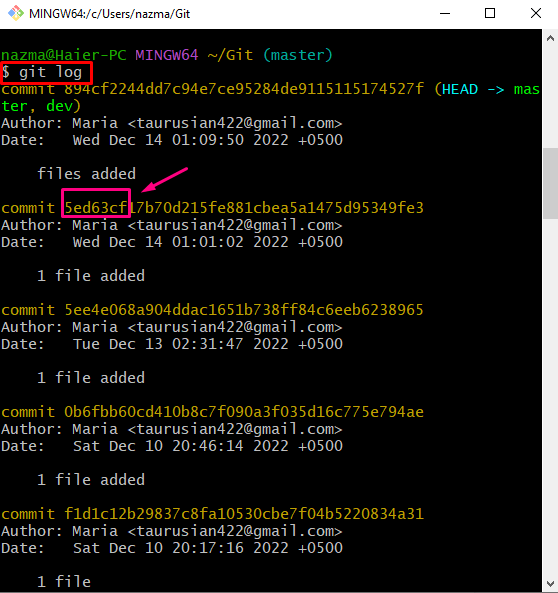
Then, use the provided command to check the Git reference log history:
Here, the list of the current repository commits will be displayed. Now, select desired commit:

Step 3: Checkout to Commit
Now, checkout to the desired commit by executing the “git checkout” command along with the SHA-hash:
It can be observed that HEAD points to a specific commit id:
Step 4: Verify Commit Checkout
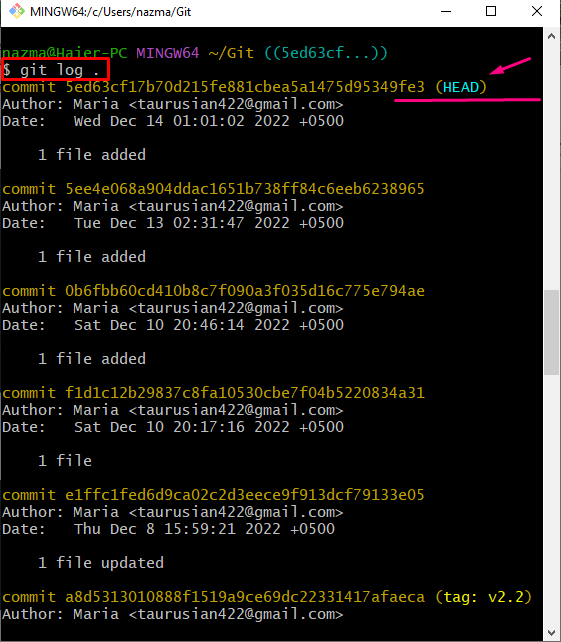
After that, verify the HEAD pointer moving to the specified commit SHA-hash through the “git log” command:
According to the below-given output, the HEAD points to the specific commit Id, and it changed into “no branch”:
Step 5: Switch to Local Branch
Now, execute the “git checkout” command and switch to the local branch:
Here, the HEAD pointer moves to the specified “master” branch:
We have effectively discussed the process to tackle and resolve the “git checkout <commit id>” changing branch to “no branch” issue.
Conclusion
To tackle the “git checkout <commit id>” is changing the branch to “no branch” issue, first, move to the required Git repository and view the Git reference log history. Copy the desired commit id from the log history and run the “git checkout <commit-id>” command. To resolve this issue, run the “git checkout <branch-name>” command. This article illustrated the method to tackle and resolve the “git checkout <commit id>” changing branch to “no branch” issue.


