The Git utility is specifically designed to reduce the problem that a developer faces while working on a Git project. For this purpose, users need to define some rules that help avoid problems in the workflow. Additionally, ensure that the entire team uses Git effectively and consistently.
This post will elaborate on the Git branching strategies.
What is Branching Strategy in Git and GitHub?
A Git branching strategy permits the Git user to take part and interact with each other on a project while tracking modifications. Furthermore, it also allows various versions of the code. Multiple Git branching strategies exist having some advantages as well as disadvantages. These branching strategies are listed below:
Feature Branching Strategy
Feature branching in Git is the most commonly used workflow that involves making a new branch for a specific feature or modification in the codebase. It permits Git users to work on the specific feature independently without involving the parent branch. When it is completed, it can be merged back into the parent/base branch. Users can also make a pull request that will permit all team members to review and suggest changes or improvements before merging the feature into the main branch.
For a better understanding, check out the below-stated feature branch workflow:
-
- Redirect to the Git local repository.
- List all branches and select a feature branch for further use.
- Switch to the feature branch.
- Generate a file with a name and add it to the staging area.
- Commit it by using the “git commit” command.
- Lastly, merge the changes of the feature branch with the main branch using the “git merge” command.
Step 1: Move to Git Root Directory
First, run the “cd” command along with the path of the repository:
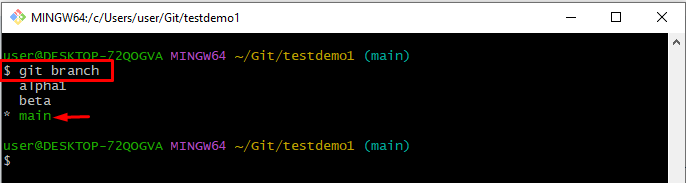
Step 2: List All Branches
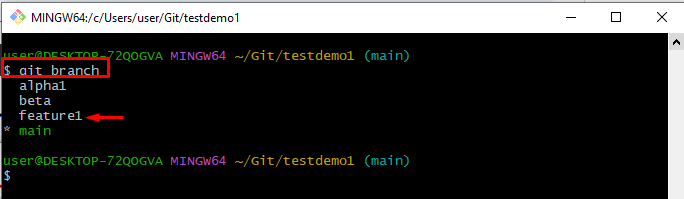
To list all branches, execute the “git branch” command:
The below-stated output indicates that all existing branches have been listed successfully and the “feature1” branch has been selected for further process:
Step 3: Switch to Feature Branch
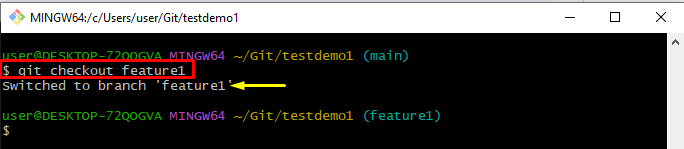
Now, switch the branch by running the “git checkout” command:
The resultant output shows that we have successfully switched to the “feature1” branch:
Step 4: Make a File
To create a new file in the current working branch, execute the “touch” command with the file name:

Step 5: Add File in Staging Area
To track the newly generated file from the working area to the staging area, run the “git add” command:

Step 6: Commit Changes
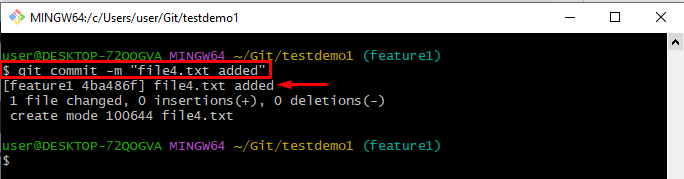
Next, commit all changes with the help of the “git commit” command and add a message along with it using the “-m” option:
It can be noticed that all the changes have been committed successfully:
Step 7: Switch to the Main Branch
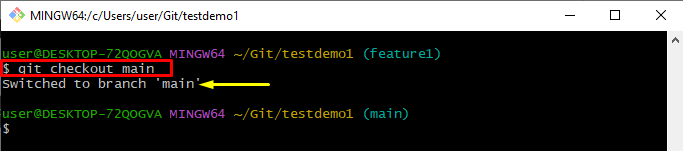
Execute the “git checkout” command and switch to the other branch:
It can be observed that we have successfully switched to the “main” branch:
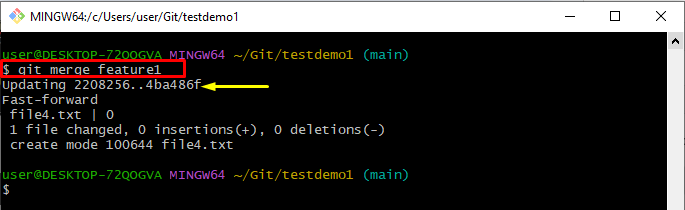
Step 8: Merge Feature Branch With Main Branch
Apply the “git merge” command and add the branch name which you want to merge:
The below-provided output determines that the “feature1” branch has been merged with the “main” branch successfully:
Trunk-Based Development
The “Trunk-Based Development” branching strategy in a Git repository has a main branch. When a Git local repository is generated, the trunk exists automatically as the first branch. In trunk-based development, the trunk is the central branch to which all developers send their code changes. For practicality, follow the given instructions:
-
- Move to the Git local directory.
- List all local Git branches.
- Modify the file in the truck/main branch.
- Add changes in the staging area.
- Commit changes.
Step 1: Go to Git Local Repository
Run the “cd” command, add the path of your preferred repository, and navigate to it:
Step 2: List Local Git Branches
To list all local Git branches, use the “git branch” command:
As a result, all local branches of the stated repository have been listed successfully:
Step 3: Launch a File
Use the “start” command along with the file name to open it in the specified editor:

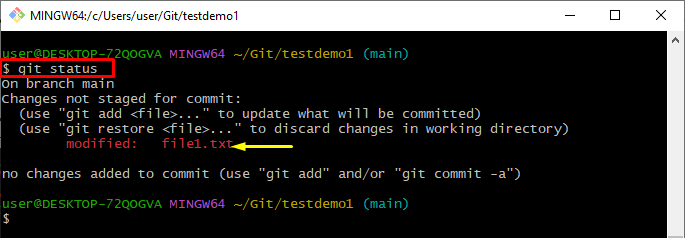
Step 4: View Git Status
Check the current working repository status by using the below-given command:
The resultant image indicates that the file has been modified successfully and is available in the Git working area:
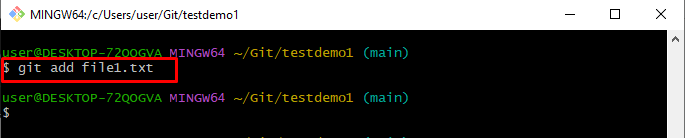
Step 5: Add Files in Staging Area
Run the “git add” command along with the file name to track it:
Step 6: Commit Changes
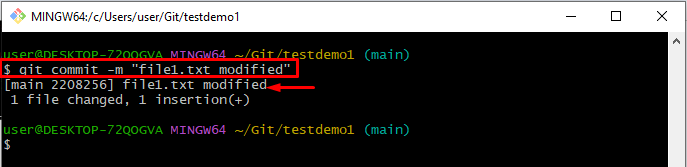
After tracking the changes, run the “git commit” command and set a message using the “-m” option:
The below-provided output shows that all the changes have been committed successfully:
Git Flow
There are only two main branches in the “Git flow”. One is the “master” branch as the parent branch and the other is the child branch, such as the “feature” or “develop” branch. The developer started working on the child branch. When the work is done on the child branch, it is merged with the parent branch. It exactly works like a feature branching strategy discussed in the above section.
That’s all about the Git branching strategies.
Conclusion
A Git branching strategy permits the Git users/developers to take part and interact with each other on a project while tracking modifications. There are multiple Git branching strategies, including “Feature Branching Strategy”, “Trunk-Based Development”, and “Git Flow”. This tutorial has explained Git branching strategies in detail.