This tutorial explains how to boot into a terminal (TTY) by editing the Grub boot loader and disabling the display manager. Then the user can start the X environment manually.
After reading this tutorial, you’ll know both how to boot into a TTY session permanently and how to boot into a TTY one time for troubleshooting purposes.
Editing GRUB to get a terminal after boot:
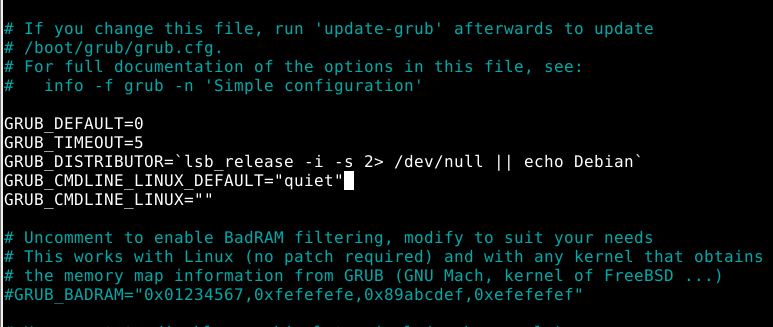
Edit grub with privileges using any text editor as shown below.

Find the following line
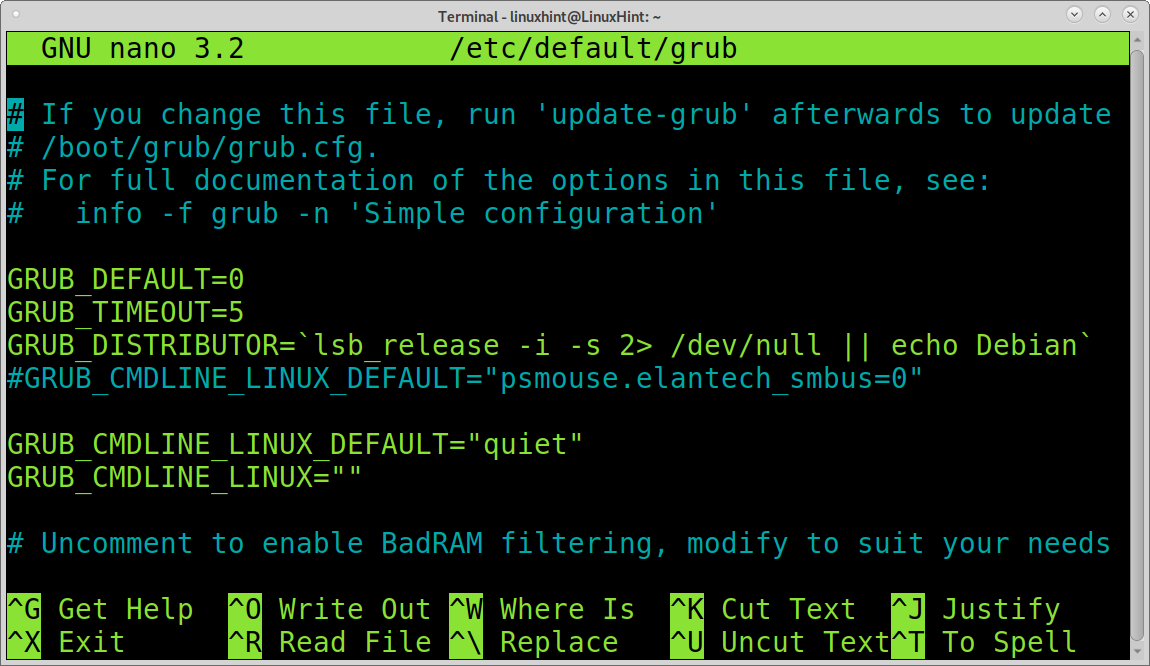
Replace “quiet” with “text”
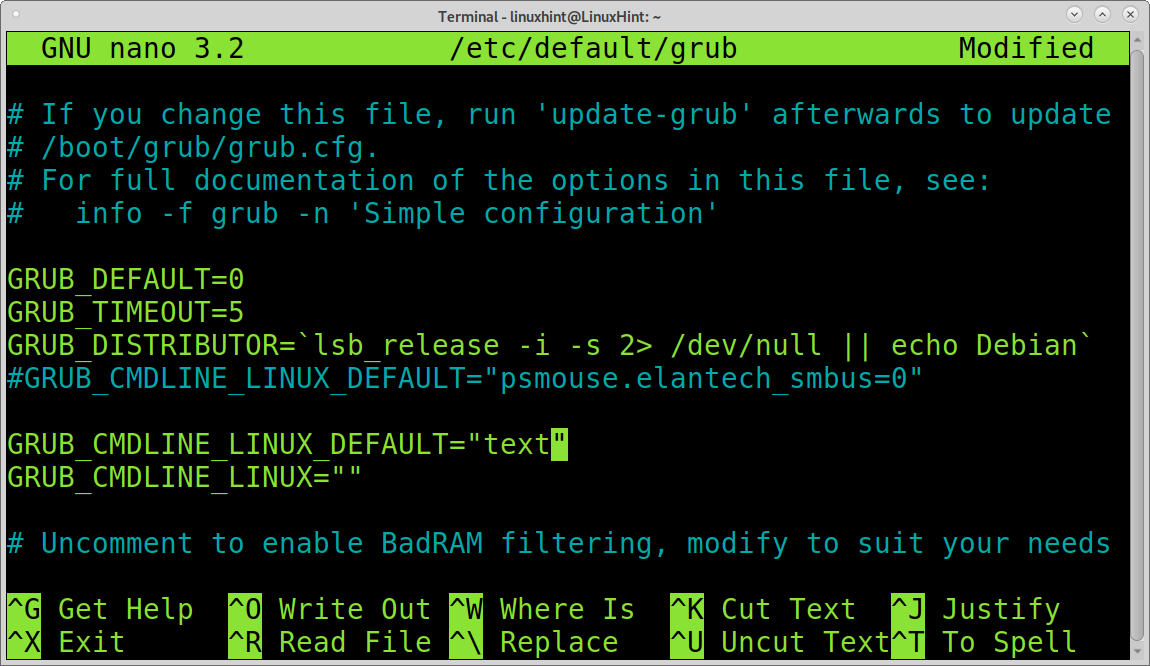
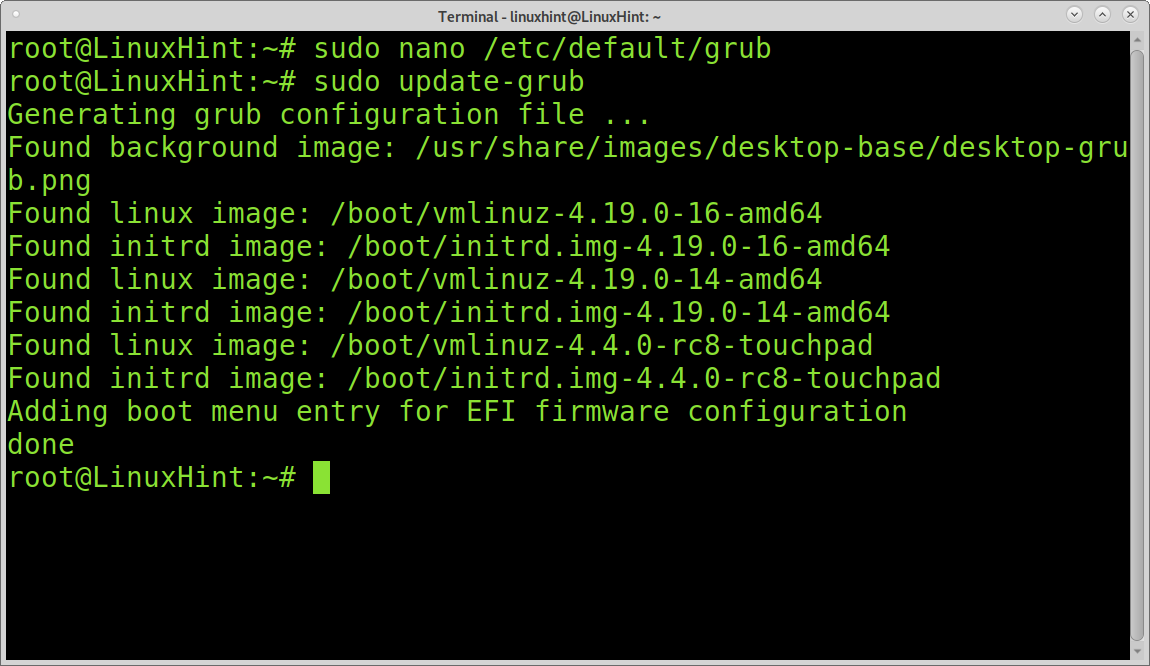
Update grub to save changes by running the command update-grub.
Disabling the display manager:
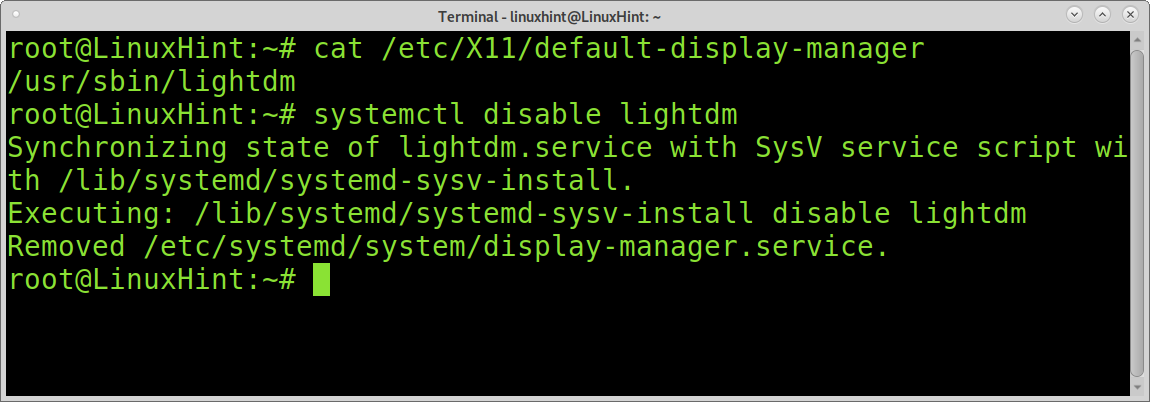
To learn your display manager, execute the following command.

My display manager is lightdm, so I disable it using systemctl, as shown in the following screenshot.
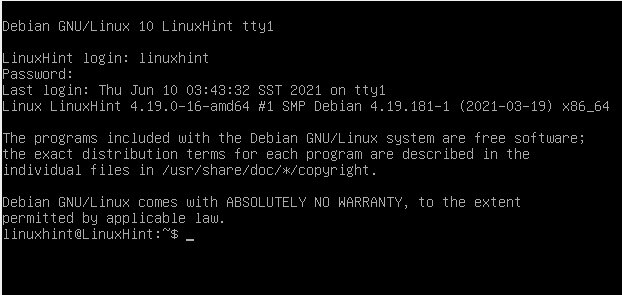
Now you can reboot your device, and you will get a terminal, as shown below.

You can log in with your username; if you launch your X environment manually, be sure to get a privileged user.
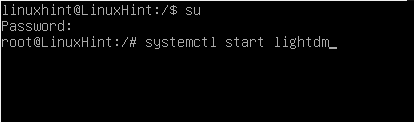
As said previously, since I have Lightdm as display manager, I run a systemctl start, as shown below.
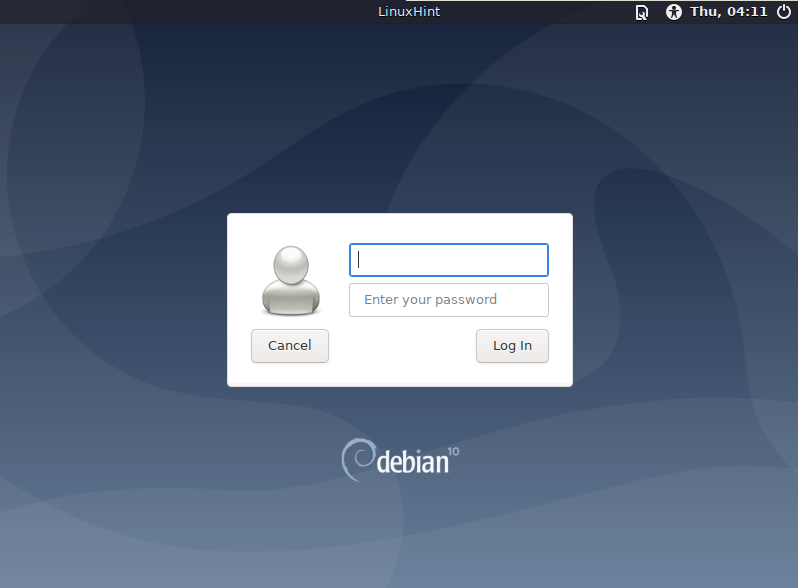
Lightdm will show up.
Reversing and booting back to the display manager
You can reverse changes and boot to your display manager by editing back GRUB, replacing back “text” with “quiet”.
Update grub again executing the command below:

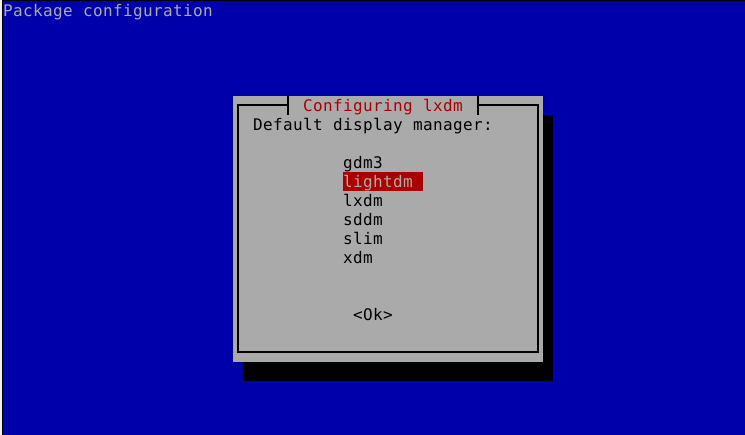
Then, you need to enable your display manager back. To do it, you can run the command below:

Run dpkg-reconfigure followed by an installed display manager like in the screenshot below.

Press OK to continue.

Select the display manager you want to boot into and press ENTER.
Reboot your device, and you will see a normal boot.

How to boot from the terminal from the grub menu at boot (one time)
If you only want to get a terminal at boot once, you can do it without changing your system from the grub boot menu. This may be the best option for you if your system doesn’t boot properly because of problems with your graphical environment.
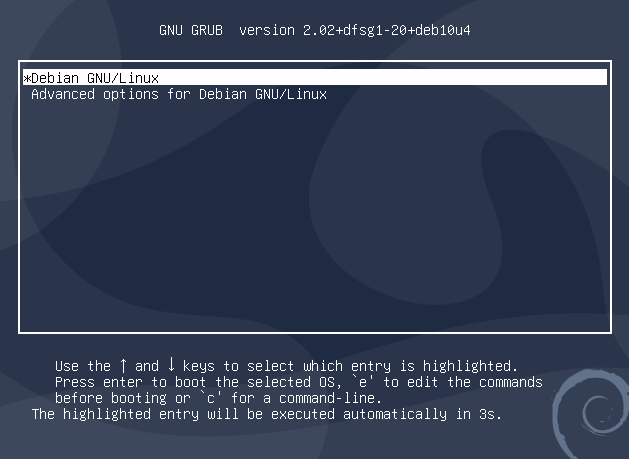
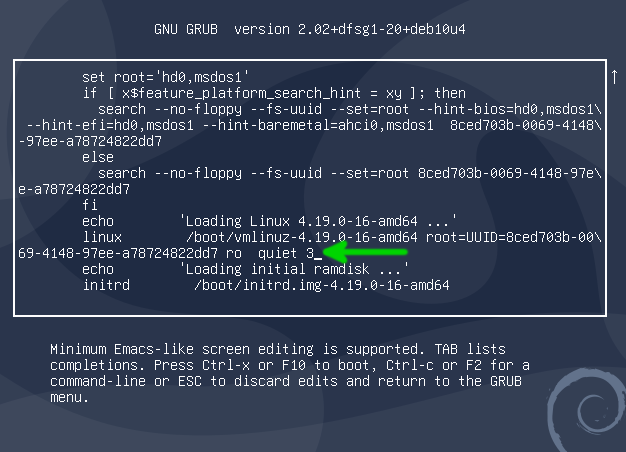
When the grub menu shown in the image below appears, press the E key to enter the edition mode.
Find the line pointed with the green arrow starting with Linux. As you can see in my case, the line continues below and ends with ro quiet
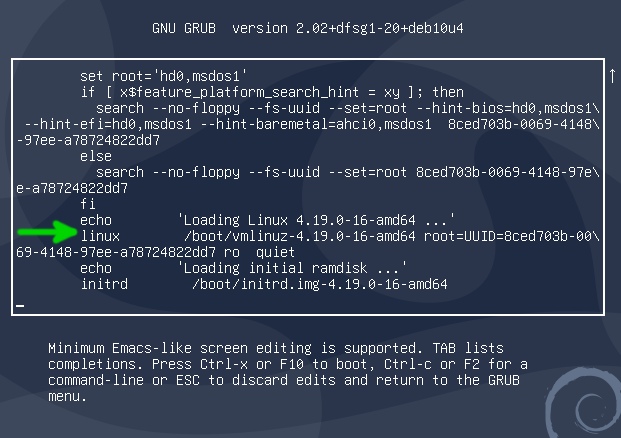
After ro quiet, add a space and the number 3 as shown in the image below. Then press CTRL+X or F10 to boot.
Defining runlevel 3 will boot in multi-user.target mode, with normal system operation except no graphical login (see the Runlevel table below)
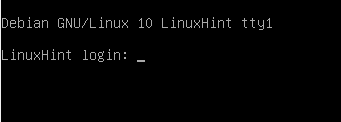
Now you will get a terminal at boot.
Like in previous examples, you can launch the graphical environment manually by running:
Runlevel table:
Runlevels define the system boot type. For example, 7 runlevels are ranging from 0 to 6, described in the table below. The computer halts when it reaches runlevel 0 and reboots under runlevel 6. Runlevels from 1 to 5 have different functionalities depending on the computer state the user needs after the system boots.
| RUNLEVEL | DESCRIPTION |
|---|---|
| 0 | System halt. Turn off the computer |
| 1 | Single user mode. For troubleshooting, start with basic functions |
| 2 | Multi-user mode without Network File System |
| 3 | Multi-user mode. Normal operation except for graphical login, boots to a terminal |
| 4 | Single user mode with GUI |
| 5 | Multi-user mode with enabled X, boots to display manager |
| 6 | Reboot. Restart the computer |
That’s all about booting permanently or temporarily into a console.
Conclusion:
Booting into a terminal or console may be useful when your graphical environment crashes, especially the grub boot menu’s one-time technique. However, there are also associated security risks to display managers because of which some users prefer to boot in text mode. Also, this is the optimal configuration for servers, even when a graphical environment is available or for devices that need to save resources. After all, users can always launch X manually once logged in in text mode using systemctl or startx.
When troubleshooting, you can also consider using the single-mode (Runlevel 2) with basic functionalities. This will allow you to access configuration files to fix your problem; the process is the same; just replace the 3 with a 2 when editing grub at boot. In this mode, you’ll get a superuser shell for maintenance purposes. This mode is also useful if you want to use the computer to disable connections for security purposes. Finally, this mode can also be used to change the root password.
As shown in this tutorial, any Linux user level can easily edit the boot loader and disable X to boot in text mode in a few steps. All processes described in this tutorial are useful for Debian Linux and Debian-based Linux distributions like Ubuntu and Linux Mint and other Linux versions using grub and systemctl. It is important to clarify that if you are already in your graphical environment and want to change to a TTY, you can do it by pressing CTRL+ALT+<FX> (Where FX is a function key). This tutorial assumes you want to boot in text mode and not simply switch to a TTY.
I hope this tutorial was useful. Keep following Linux Hint for more Linux tips and tutorials.