This write-up will demonstrate the method to generate a Git patch for a specific commit.
How to Generate Patch for a Specific Git Commit?
Git patch is frequently used for sharing and reviewing Git commits in the form of a Git patch file. Users can generate the patch of commits using the below-listed methods:
- Method 1: Generate a Git Patch of a Recent Commit
- Method 2: Generate a Git Patch of a Specific Commit
Method 1: Generate a Git Patch of a Recent Commit
To generate a Git patch of a recent commit, first, open the Git repository. Then, use the “git format-patch -1” command to generate the patch file of a recent commit. For this purpose, follow the below-listed steps.
Step 1: Launch Git Terminal
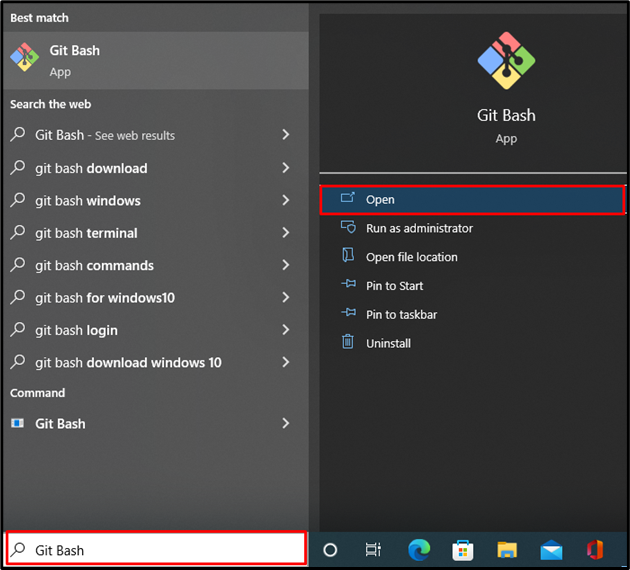
First, launch the “Git Bash” Git terminal from the “Startup” menu:
Step 2: Go to Git Repository
Go to the Git repository through the “cd” command:
Step 3: Make New File
Next, make a new file by using the “touch” command:
Step 4: Add Untracked Changes to Tracking area
Next, add the untracked file to the staging area by utilizing the provided command:
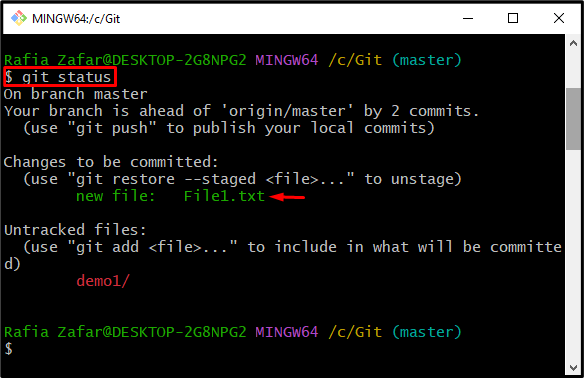
Next, check the Git repository state to view the tracked changes:
Here, you can see the new file is successfully added to the tracking index:
Step 5: Commit Tracked Changes
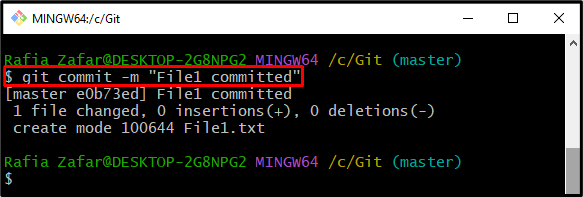
Next, commit the tracked changes using the “git commit” command:
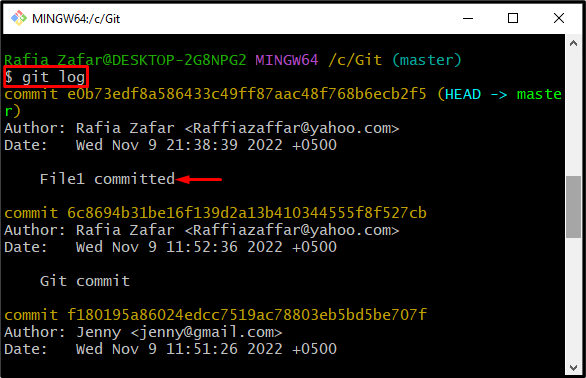
After committing the changes, check the Git repository logs to verify whether the changes are committed or not:
Step 6: Generate Patch of Recent Commit
Generate the patch of a recent commit using the “git format-patch” command. Here, the “-1” option is utilized to specify the number of commits included in the patch file:
Verify whether the patch file is generated by viewing the list of files and folders:
The below output indicates that we have successfully generated a Git patch for a recent commit:
Method 2: Generate a Git Patch of a Specific Commit
To generate the patch of a specific commit, utilize the commit id along with the “$ git format-patch -1” command. Follow up on the provided steps to generate the patch file of a specific commit.
Step 1: Check Log
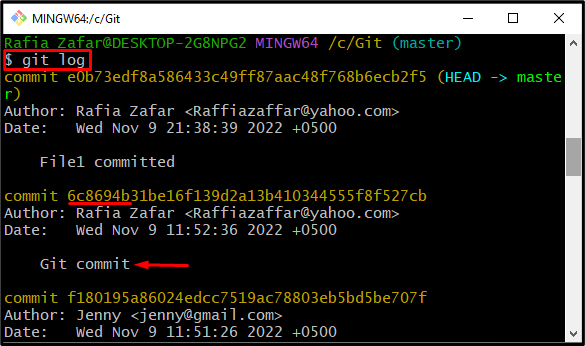
Firstly, check the Git log through the “git log” command. Then, write down the commit id of which you are required to create the patch file:
Step 2: Generate Patch of Specific Commit
Next, utilize the “git format-patch” command along with Git commit id to generate the patch of the specific commit:
The output indicates that the patch of specific committed is generated:
You have learned how to generate the patch of Git commits.
Conclusion
Users of Git can create patches for both recent and specific commits. To generate a patch for the latest Git commit, utilize the Git “git format” command. However, run the “git format-patch -1 <commit id>” to generate a patch for a specific commit. This write-up has elaborated on the methods for generating patches of Git commits.

