In this tutorial, we will discuss the method of generating AI images with SwiftKey using Android.
How to Generate AI Images with SwiftKey Using Android?
To generate AI images with SwiftKey Using Android, check out the provided steps:
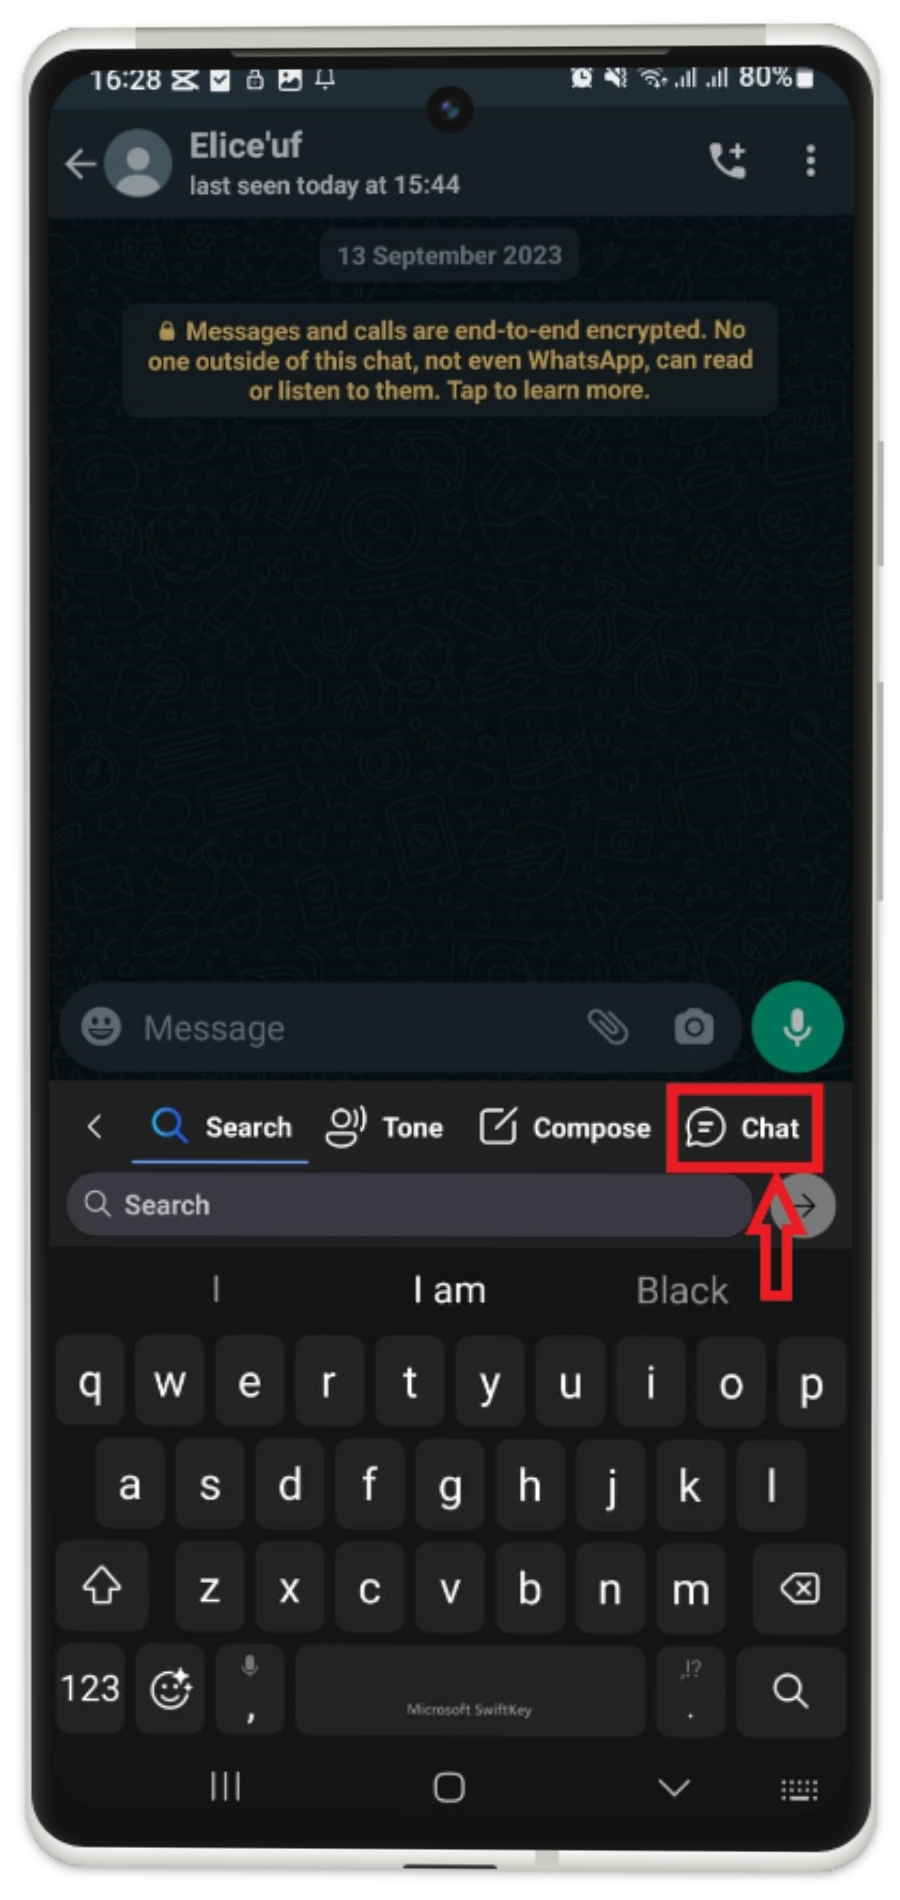
- Open any desired communication application and move to the chat section.
- Next, access the SwiftKey keyboard and choose the “Chat” option.
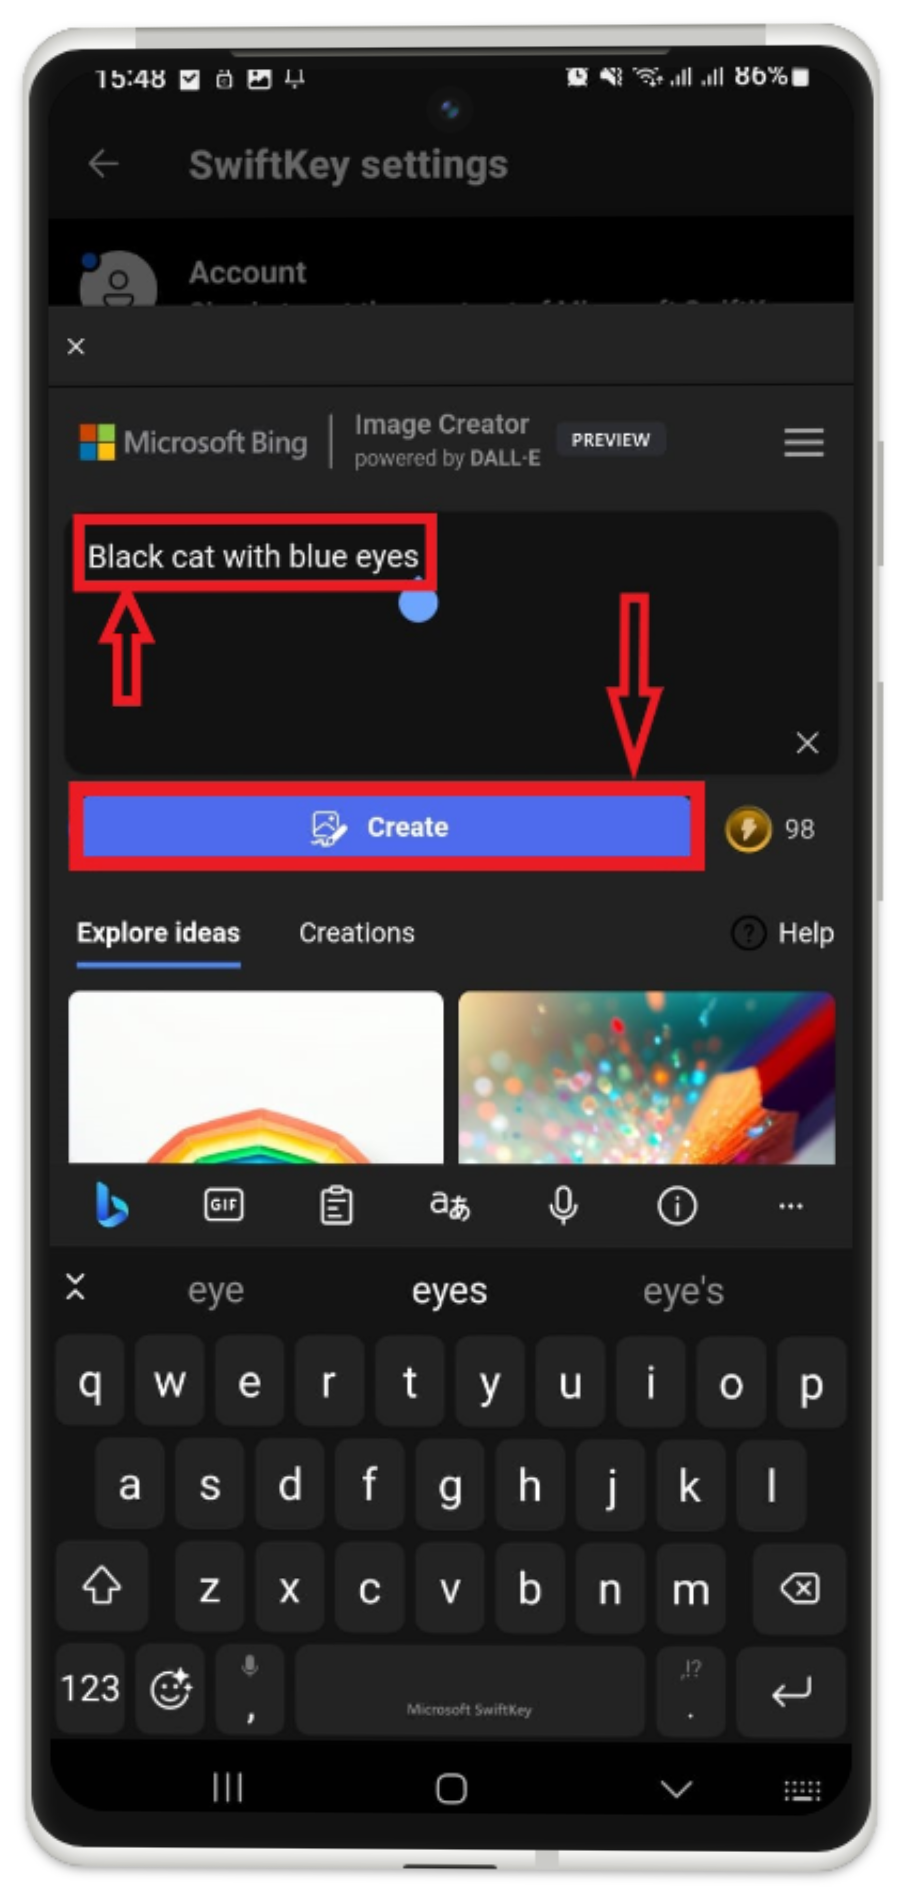
- Afterward, type the desired query and press the “Create” button.
Note: To generate AI images with SwiftKey using Android, it is necessary for users to download and install the “Microsoft SwiftKey Keyboard” on their mobile first.
Step 1: Access Bing Chat
Initially, move to your desired conversational application, and open any person’s chat. Then, tap on the “Chat” option from the Microsoft SwiftKey keyboard. As follows:
Step 2: Type “Query”
Next, type your desired query for generating an AI image in the text area then hit the “Create” button:
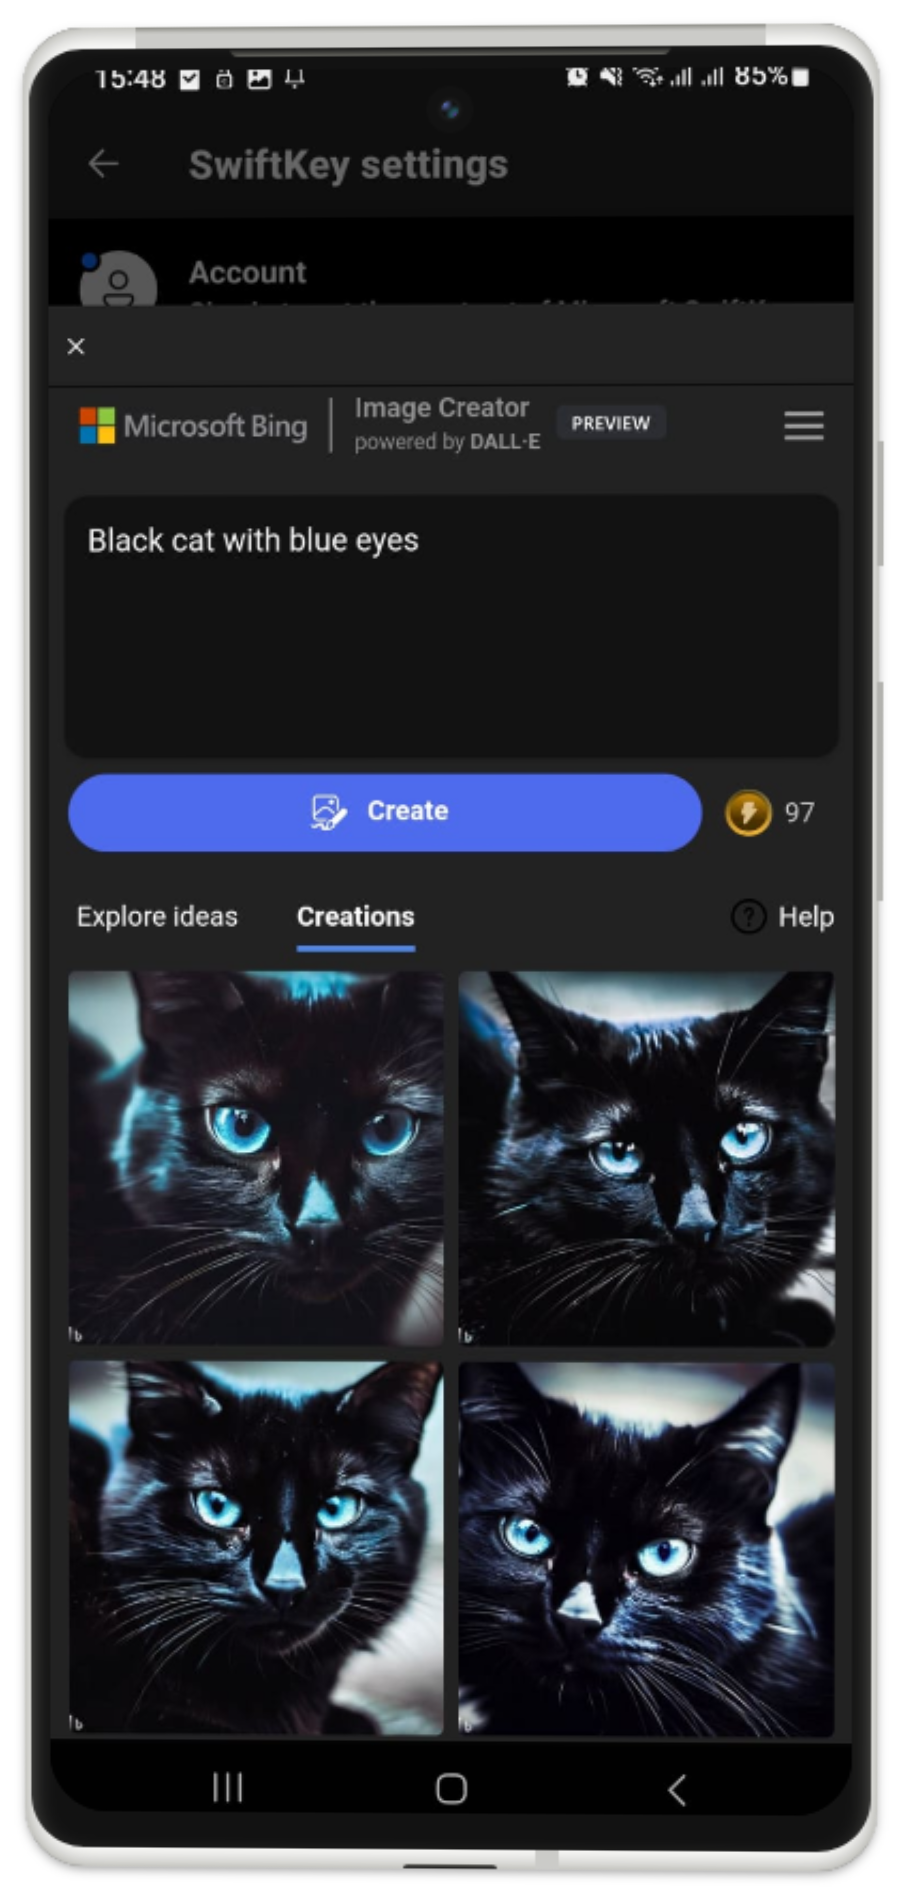
As you can see, the image has been created according to our provided query. Now, you can tap and open any image:
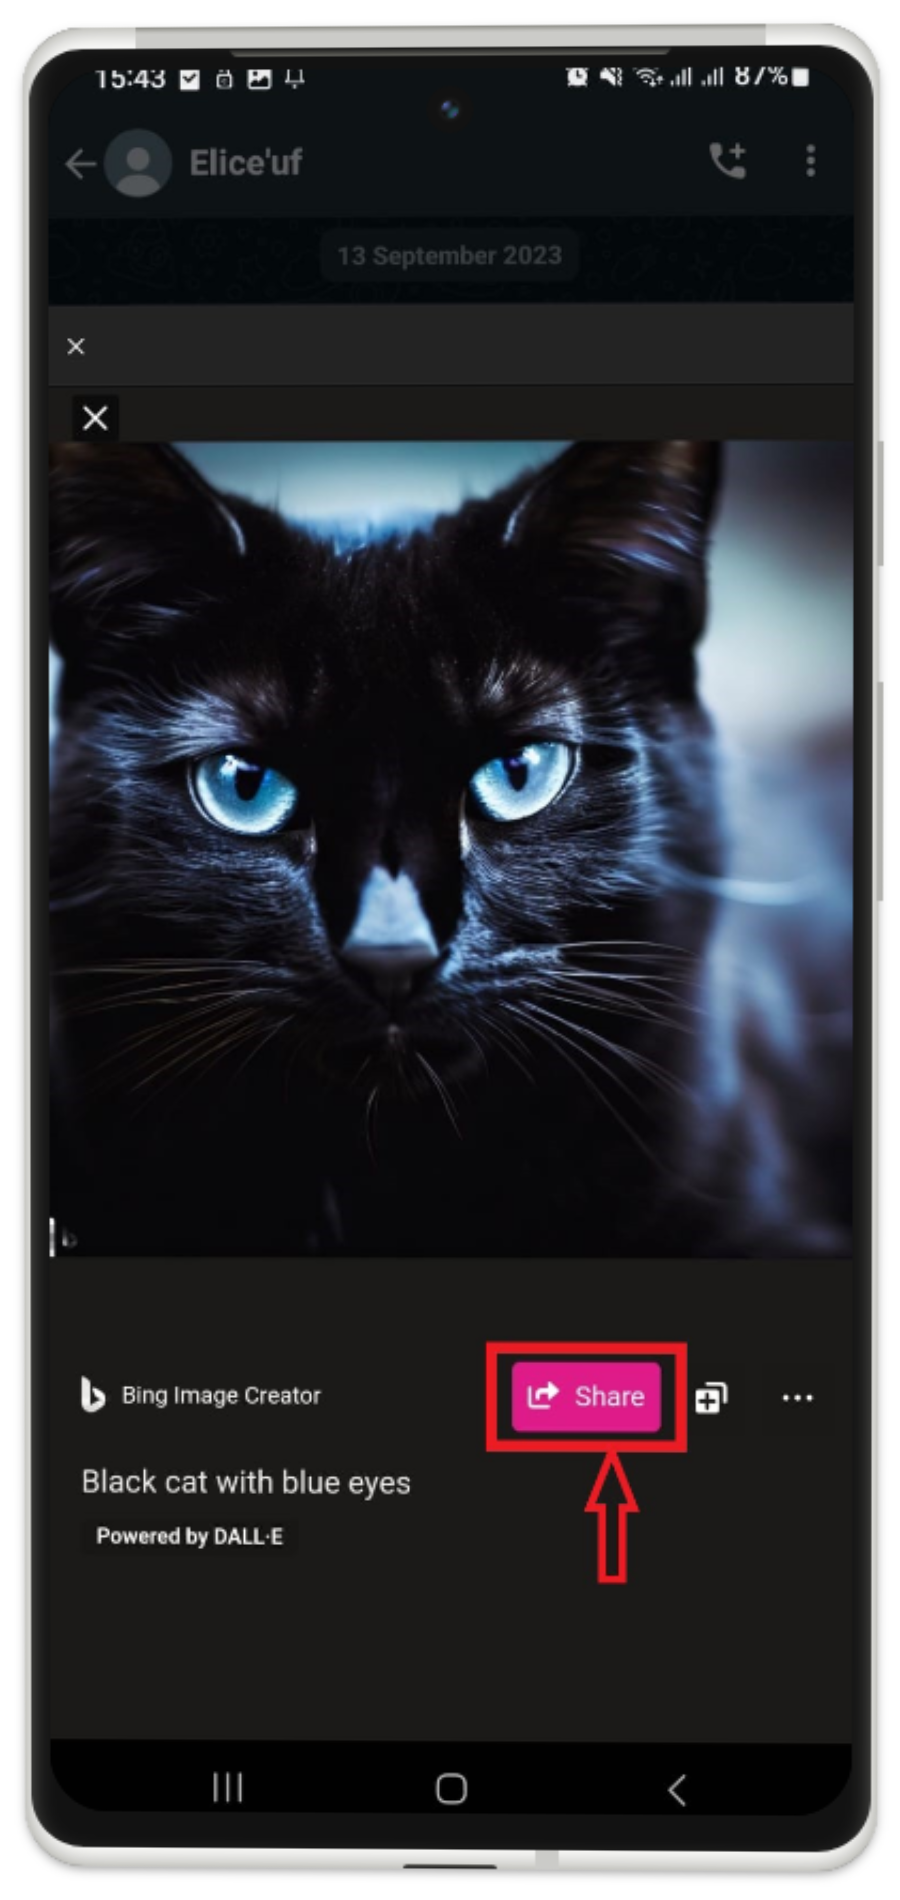
Step 3: Share AI Generated Image
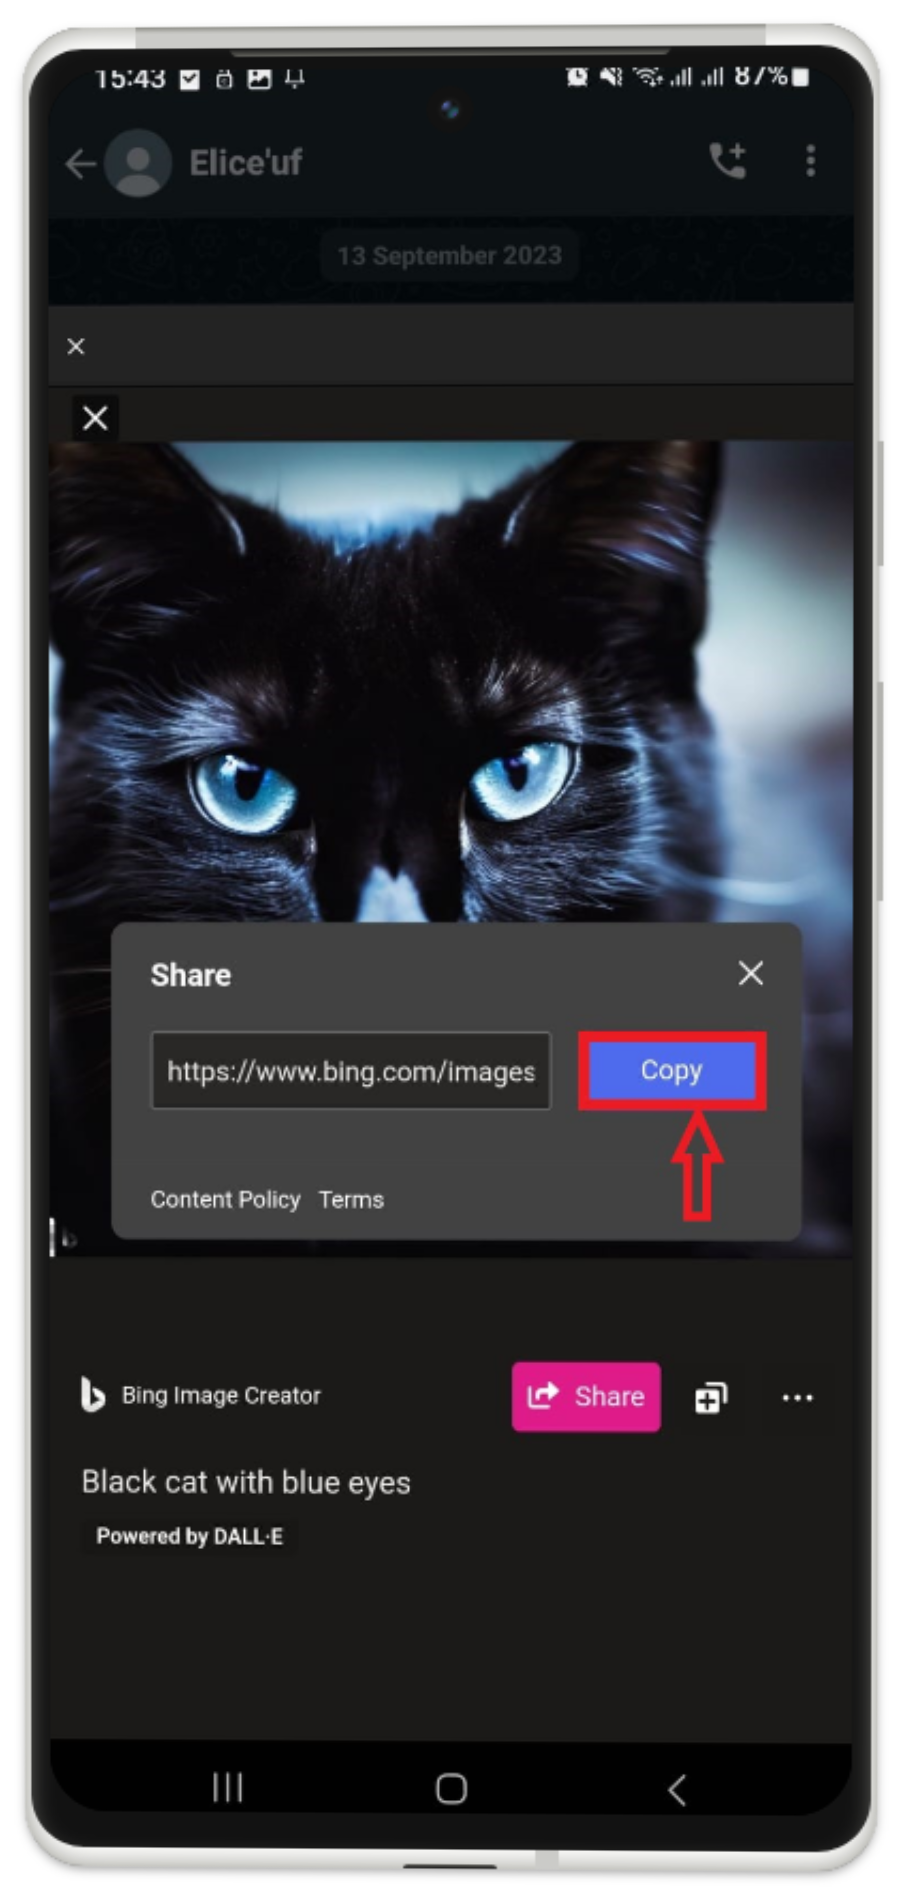
If you want to share the AI-generated image, then tap on the “Share” button:
Step 4: Copy URL
Next, tap on the “Copy” button to copy the AI-generated image URL to the clipboard:
Step 5: Send Copied URL
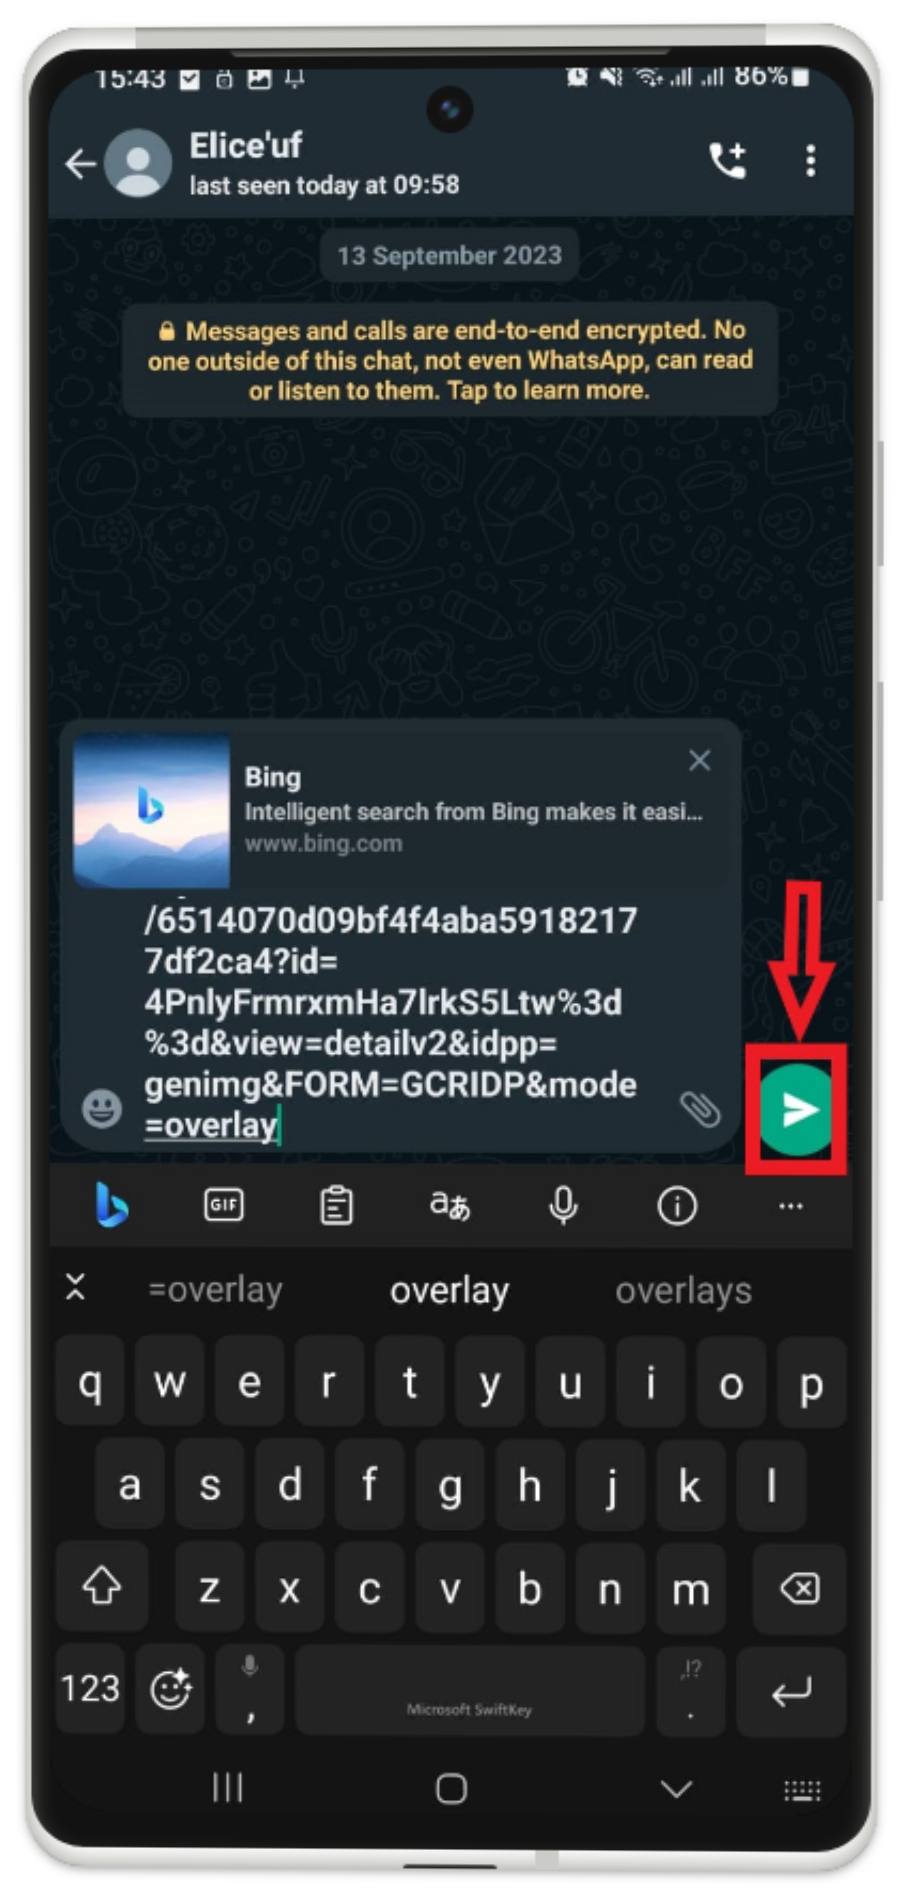
Lastly, navigate to the chat area, paste the copied link, and tap on the below-highlighted button:
That’s it! We have provided a way to generate AI images with SwiftKey using Android.
Conclusion
To generate AI images with SwiftKey using Android, users are required to download and install the “Microsoft SwiftKey Keyboard” on their mobile. Then, open any desired communication application and move to the chat section. Afterward, open the keyboard and choose the “Chat” option. Next, type the desired query and press the “Create” button. Users can also share the AI-generated image by copying its URL. This tutorial demonstrated how to generate AI images with SwiftKey using Android.

