
Mostly, this is done using the GUI with new directories and folders created instantly with a few clicks of the mouse. However, there are a few people who like to do the same using the CLI. They attempt to make new directories and attach file systems to their existing ones using commands typed in a command window.
While this may sound interesting, the probability of getting errors and running into different problems is much higher than doing it through the GUI. One of the common errors that users can come across is the “mount point does not exist” error.
The mount point is an accessible directory of the previously existing file system with which you attach the new file system. The mount point is the root directory of the new file system, and the original content of that directory becomes inaccessible till the new file system is unmounted.
The system itself generally designates the mount points. These directories are already listed in the /etc/fstab directory. Users can also designate mount points themselves by using one of the directories listed in /etc/fstab. The names of these directories can also be edited using text editor software.
Now, the “mount point does not exist” multiple reasons can cause an error. You make even the tiniest of mistakes, and you can’t mount new file systems on your computer. It is important that you perform each and every step of the process diligently. There are many things that are to be considered while attempting to mount a new file system.
If you are a Linux user and you want to mount a new file system on your computer, this article will help you achieve that as we will be going through the steps, one can do that. Not only that, but we will also discuss how to mount USBs on your computer.
Listing Mounted Files on Your Linux System
For both mounting and unmounting, there are inbuilt commands in Linux that you can use. For mounting and to perform tasks related to mounting, you use the $mount command, and for unmounting, the $unmount command can be used.
Before learning how to mount file systems, let’s look at how you can get to know the already mounted file systems on our computer. This can be done using the $mount command. Just simply open your command terminal and type in the following command.
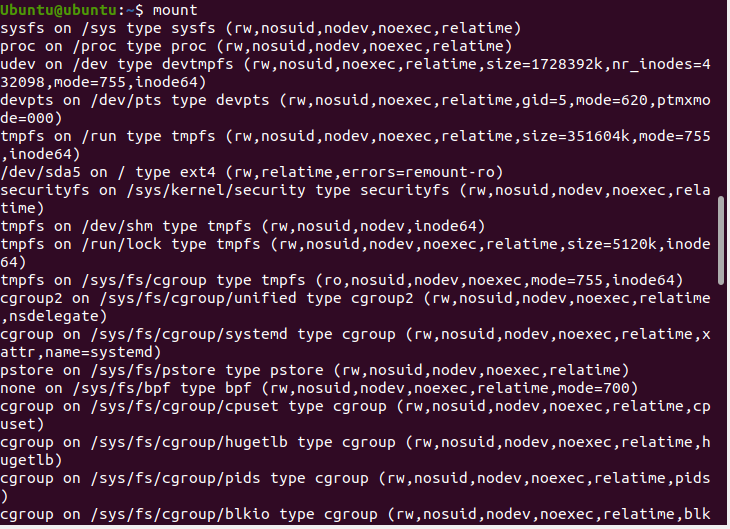
You can see all the default file systems mounted on your computer in your output. The output should look something similar to this.
In case you want to look at specific file systems mounted on your computer, it is possible to utilize the -t operator with $mount and specify the file system.
The above command will display all the files of ext4 type.
![]()
Mounting Files on Your Linux System
The $mount command is to be executed to mount files on your computer, as shown below.
There is the provision of different operators that you can use with $mount, such as -t mentioned before. The operators are to be added in the syntax, as shown below.
For example, use the following command if you want to mount a device named /dev/sdb1 on the directory /mnt/media.
![]()
Upon successful execution of the command, /mnt/media will be the root directory of /dev/sdb1.
$mount is programmed to detect the common file systems, and the mounting process is completed without specifying file systems such as “xfs” or “ext4”. The user needs to specify other file systems in order to effectively mount the new file system or device. This is done using the -t operator.
Mounting Files Using the /etc/fstb Directory
As discussed before, the /etc/fstb directory handles the file system mounting operation by checking whether the file system mentioned in the command is compatible or not. If a user chooses to mention either the device name or directory, /etc/fstb comes in to verify the file systems. If the mentioned system is in its list, mounting is successful.
Mounting a USB to Your Computer
Usually, a USB is mounted directly without any need for typing commands. You stick it in the port, and you are able to access its contents. If you want to do it manually by typing commands, follow these steps.
Open the command terminal.
Once opened, the first thing you need to do is to make a directory.
You can select an arbitrary directory name for your USB.
After creating the directory, use the following command to know the USB device’s name and its file system type.
Once you know the name, use the following command as a template.
These are the steps you need to follow to successfully mount a USB on your computer.
Conclusion
This was a guide on how to successfully mount a new device or a file system on your computer and so that you can correct any mistakes you made while typing commands for mounting a system of your choice. We discussed the $mount command and how to accurately use it to perform the tasks successfully. We hope that we were able to help you out and if we were, please let us know in the comments.