With FileZilla, you don’t have to archive the files as it supports sftp connections. That way, you easily transfer your files with minimal traffic. Let’s check the installation steps for Ubuntu 22.04 and how to use it to transfer the files.
Getting Started with FileZilla in Ubuntu 22.04
There are various ways to install FileZilla in Ubuntu. This guide offers the steps for the command line and a graphical way of installing FileZilla in Ubuntu 22.04.
1. Installing FileZilla via Command Line
Using the command line is the quickest way to install FileZilla. Open your terminal and start by updating your Ubuntu packages.
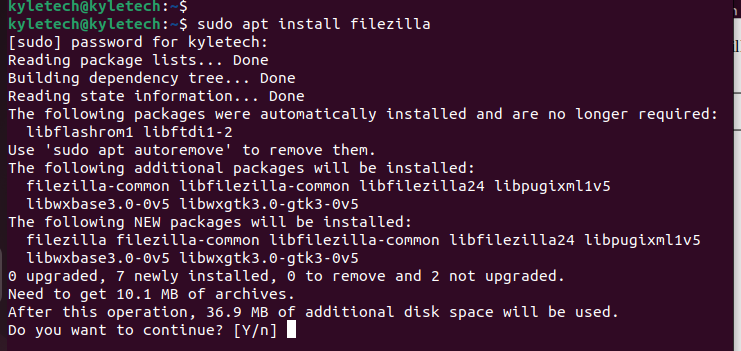
Ubuntu 22.04 comes with the needed repository to support the installation of FileZilla. Therefore, install FileZilla using the apt command from the system’s default repository.
When prompted to confirm the installation of FileZilla, press Y to continue with the installation. This method of installing FileZilla doesn’t install the latest version.
Go ahead and confirm the installation by checking the currently installed FileZilla version.
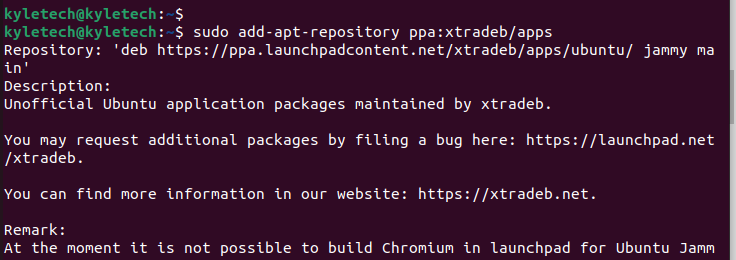
To get the latest FileZilla version, we must add the XtraDeb third-party PPA using the following command:
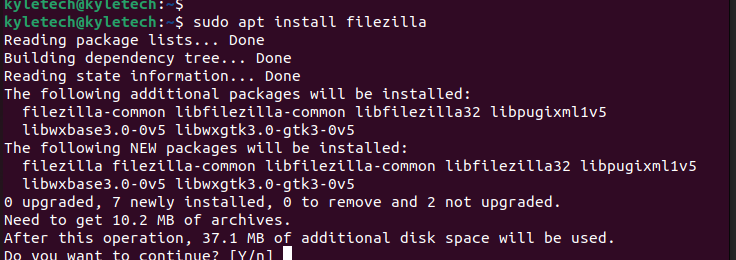
Once the PPA is added, update the packages and install FileZilla using the apt command.
Go ahead and check the version. Adding the PPA helps you get the latest FileZilla version.
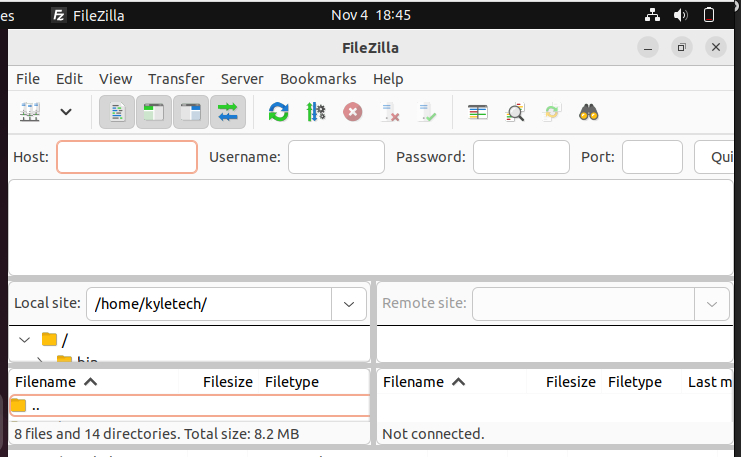
You can now open the FileZilla from the terminal or the applications.
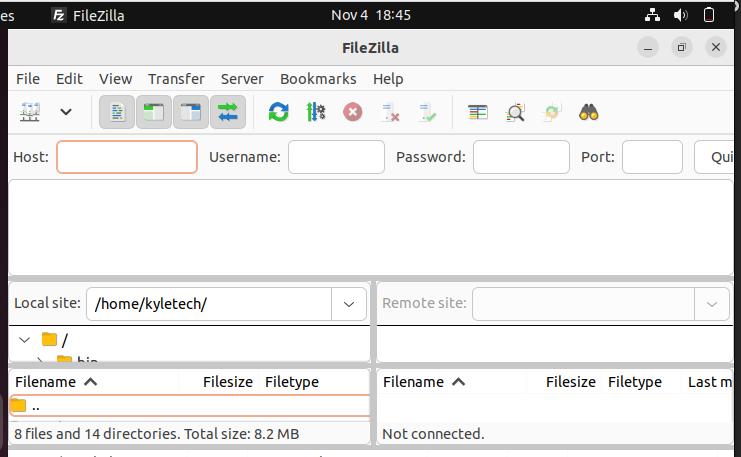
FileZilla is now open, as shown in the following image. You can now start sharing your server.
With this method of installing FileZilla, you can run the following command to remove FileZilla from your system and all its dependencies.
Also, remove the PPA that we added earlier.
2. Installing FileZilla via Ubuntu Software Center
FileZilla is also available in Ubuntu Software Center. Start by opening the Software Center from your applications to install it using this method.
Click the search icon at the top and search for FileZilla. Click on it to open more details, then click the Install button on the right.
Once the installation completes, search for FileZilla from your applications and open it. You will get the same window that we got after installing it via the command line.
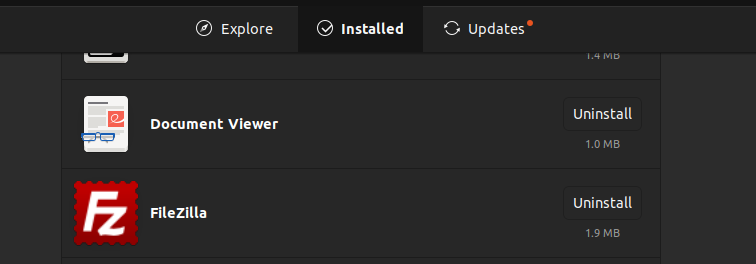
With this method, updating and upgrading your Ubuntu packages automatically updates FileZilla. If you need to uninstall FileZilla, open the Software Center and check the installed tab for FileZilla.
Once you find it, click the Uninstall button.
Authenticate the uninstall process by entering your password.
How to Use FileZilla
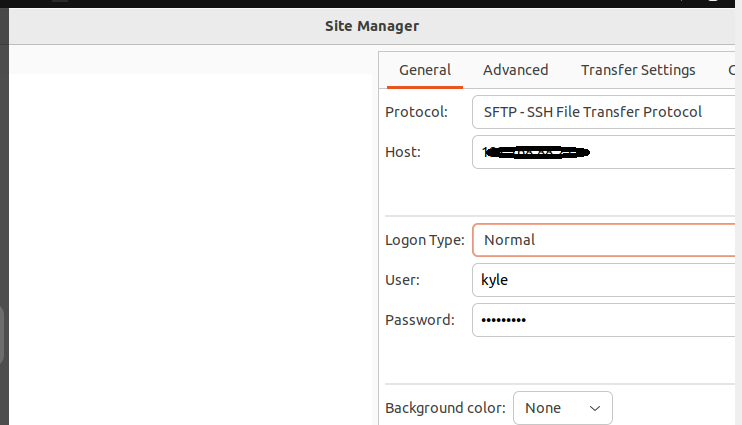
To use FileZilla, you must have the IP address of your remote server, its username, and its password. Open FileZilla and click the site manager icon at the top left.
Create a new site and add the remote server details, as shown in the following image. Select your preferred file transfer protocol using the drop-down button.
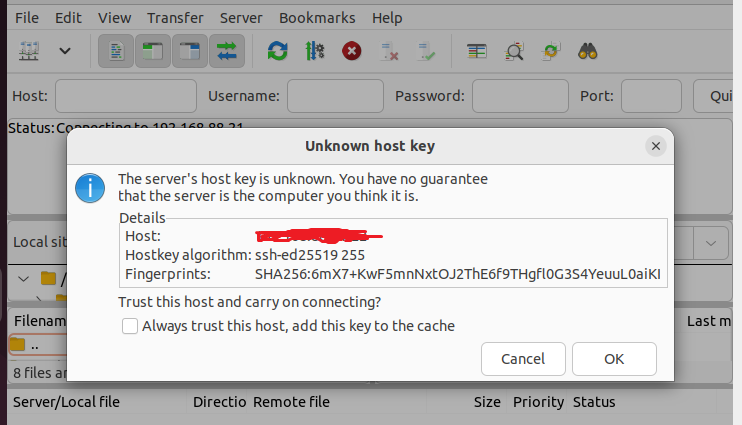
After adding the details, click the connect button. You will be prompted to verify the server’s host key.
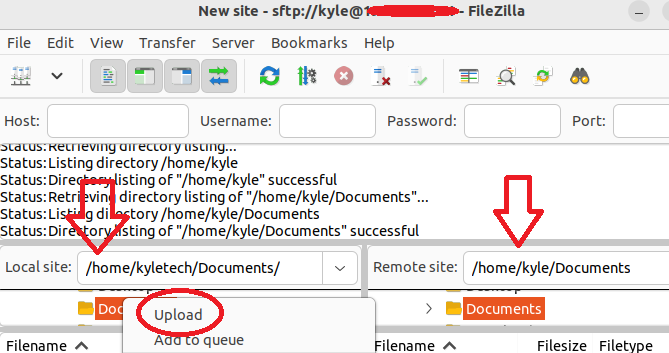
Once connected, note the local and remote sites that are displayed on the FileZilla window. At this point, navigate to the source directory on the local site if you want to upload the files to the remote server. For the remote server, navigate to the destination directory.
Locate the file that you want to upload on the source site, right-click on it, then click the upload button.
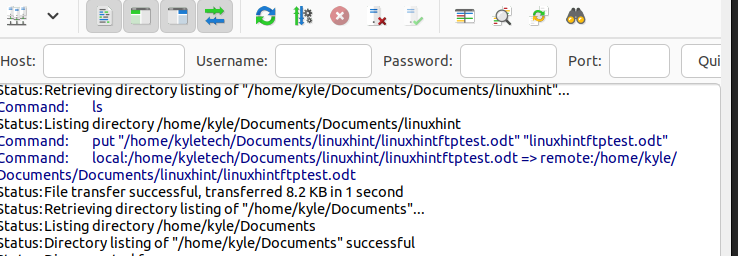
Note the transfer message which is displayed on your screen to confirm that FileZilla has successfully transferred the files from one site to the other.
That’s how you use FileZilla in Ubuntu 22.04.
Conclusion
We covered the steps on how to install FileZilla in Ubuntu 22.04 using two ways. Furthermore, we learned the steps to use FileZilla to connect the local and remote sites, then transfer the files. With this guide, you can start transferring the files via FTP or other supported protocols.


