This write will discuss the method to:
So, let’s begin!
Method 1: Fetch Local Git Branches
The local Git branches exist on the local repository of the system, and only the current user can access them. Git allows you to fetch all local branches at once. To do so, check out the given instructions.
Step 1: Open Git Bash Terminal
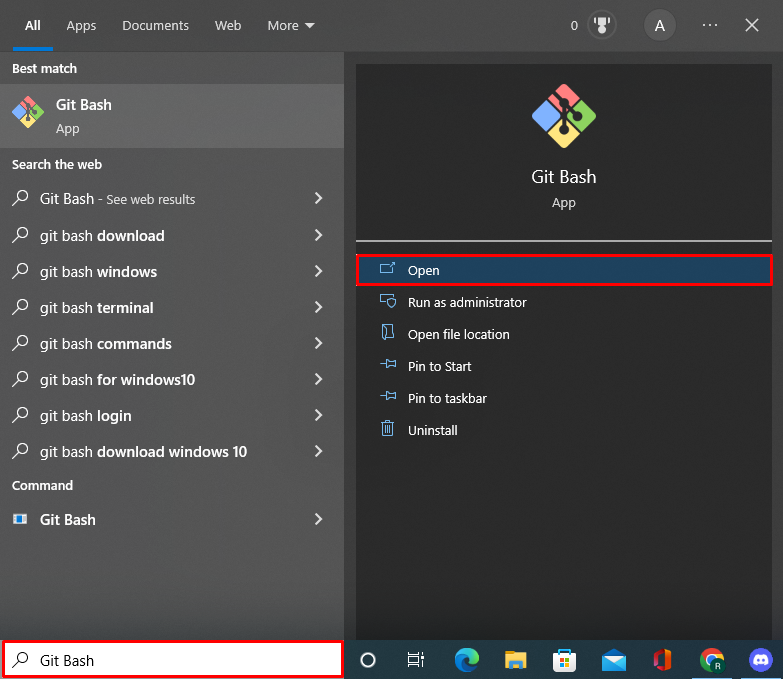
First, open the Git Bash terminal from the Start menu:
Step 2: Move to Local Repository
Utilize the “cd” command to navigate to the Git local repository:
Step 3: Initialize Repository
In order to initialize the Git repository, utilize the “git init” command:
Step 4: Fetch All Local Branches
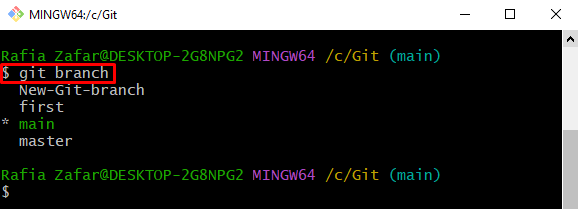
To fetch all local branches of the repository, execute the simple “git branch” command:
Here, you can see that all local branches of the current working repository are listed:
Method 2: Fetch Remote Git Branches
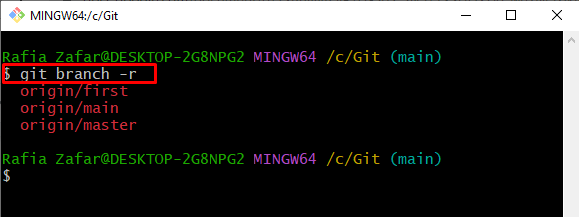
Remote branches are usually placed in a remote location, such as “Origin”. To fetch all remote branches, use the same “git branch” command along with the “-r” flag:
Method 3: Fetch All Git Branches
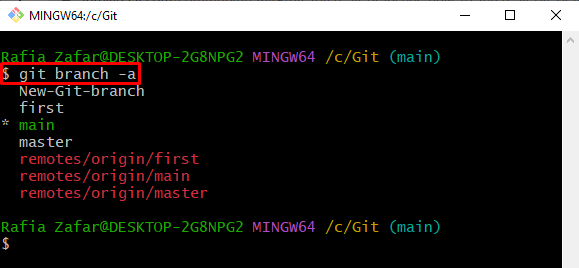
In order to fetch all branches of the Git repository, including remote and local, write out the “git branch” command with the “-a” option representing “all”:
It can be seen that we have successfully enlisted all local and remote branches and “*” refers to the current working branch:
We have taught you how to fetch all Git branches.
Conclusion
Git users can fetch local and remote branches separately as well as collectively. In order to fetch local branches only, use the “$ git branch” command. To fetch all remote branches, utilize the “$ git branch -r” command. However, to fetch all Git branches comprising local and remote, run the “$ git branch -a” command in the Git bash terminal. In this write-up, we have illustrated how to fetch Git branches.


