Network Manager comprises various tools that are specifically designed to manage the network configuration on almost all Linux distributions. This tool is also the default tool on the Ubuntu system for network service management.
This tutorial is intended to provide information on how to expertly use the Ubuntu network manager. Moreover, we will discuss the network management tools that come with some more useful features.
Some network services running at the backend cannot be visible to a user. To manage all those network configurations and services, the Network Manager provides the following different tools:
Nmcli – A command-line tool of the network manager that is used when the user is unable to access the graphical environment and is useful within scripts to do network configuration changes.
Nmtui – A text-based user interface network manager tool that manages the NetworkManager tasks that can be run in a Linux-based terminal window. Using the nmtui tool, changes are to be performed by entering data and menu selections. This tool only performs some basic tasks and many features are missing in nmtui, which are provided by the nmcli tool.
nm-connection-editor – A graphical management tool that provides access to NetworkManager configuration options.
Gnome Setting – By using the Gnome desktop application, the basic network management task can perform easily.
Now, in the following section, we will explain how you can access the network interfaces and connections through these tools. Ensure that NetworkManager is installed and running on your Ubuntu system.
Use the following command to verify the running service of Network Manager on your system:
Network Configurations Management Using “nmcli”
The nmcli utility is installed by default on Ubuntu or most of the other Linux distributions. This utility helps you in network configuration management.
List Network Connection
Using the nmcli command, the user can easily list the network connections details by using the following command:
Display active connection
If the user wants to show only the active or up connections then use the above command along with the “—active” flag as follows:
To get more details about the active connection, type the following command:
Add Network Connections
Using the nmcli command, you add a new network connection by using the following command syntax:
Modify Existing Connections
The nmcli utility also facilitates users in modifying an existing network connection. So, if the user wants to use manual IP addressing instead of automatic DHCP configuration, then they can easily modify the existing network connection’s parameters by running the below-given command:
For example, here, we are using the following parameters:
It is noted that when you modify the network connection, then also change the subnet mask (e.g /24), otherwise, it will assign the default mask that can cause the problem further.
To apply the above changes, restart the network connection or up/down actions to modify the connection using the following commands:
$ nmcli connection up <interface-name>
Once changes are done, use the following command to check the changed IP address:
Manage Devices Using nmcli
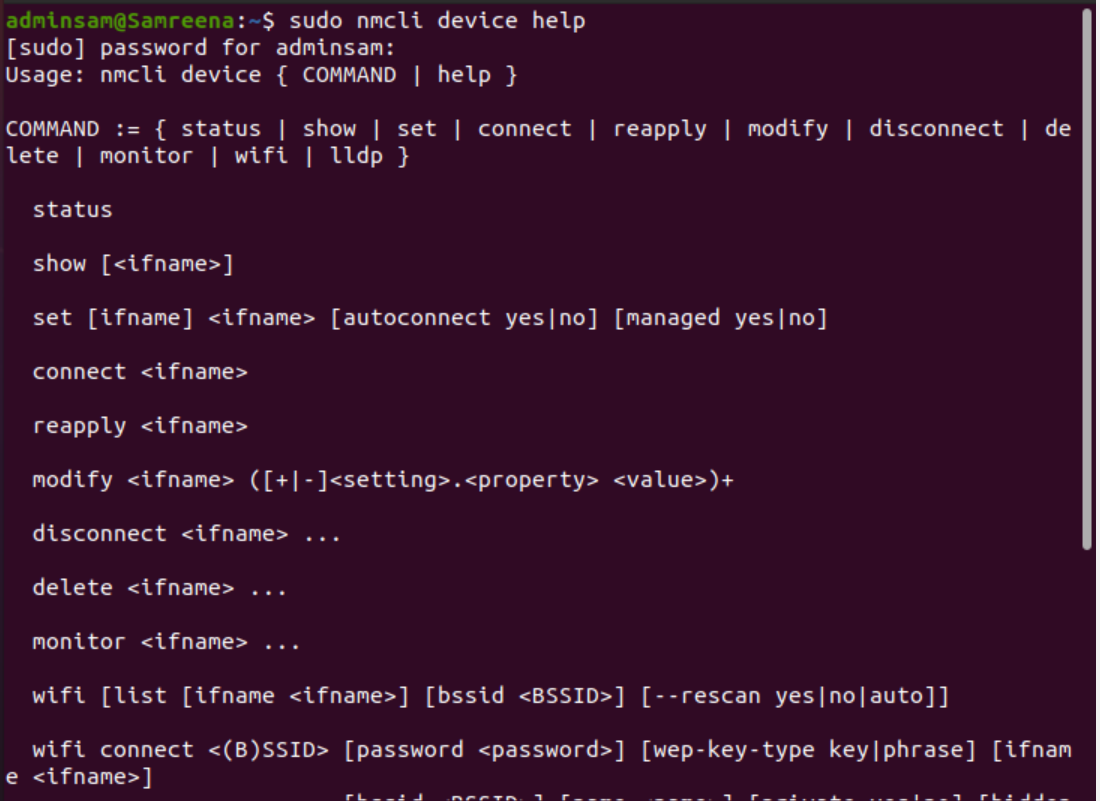
The nmcli utility is helpful for managing the network adapter on a host. To display the help related to the device or network adapter, use the following command:
Display Device Status
To show the status of the network adapter that is installed on a system, use the following command:
To display the output in more human-friendly or -p (pretty) format, run the below-mentioned command:
Conversely, using the -t option output can display in more automated processing terse format by using the following command:
Modify the Device Configuration
To change the network adapter or device configuration, first, check the device information by running the following command:
Now, modify the device configuration.
$ sudo nmcli dev mod <interface-name> <parameter> <value>
The above changes are temporary. If you run the reapply parameters command, then all changes will be lost and set to the previous default settings.
Network Connection Management Using the nmtui Utility
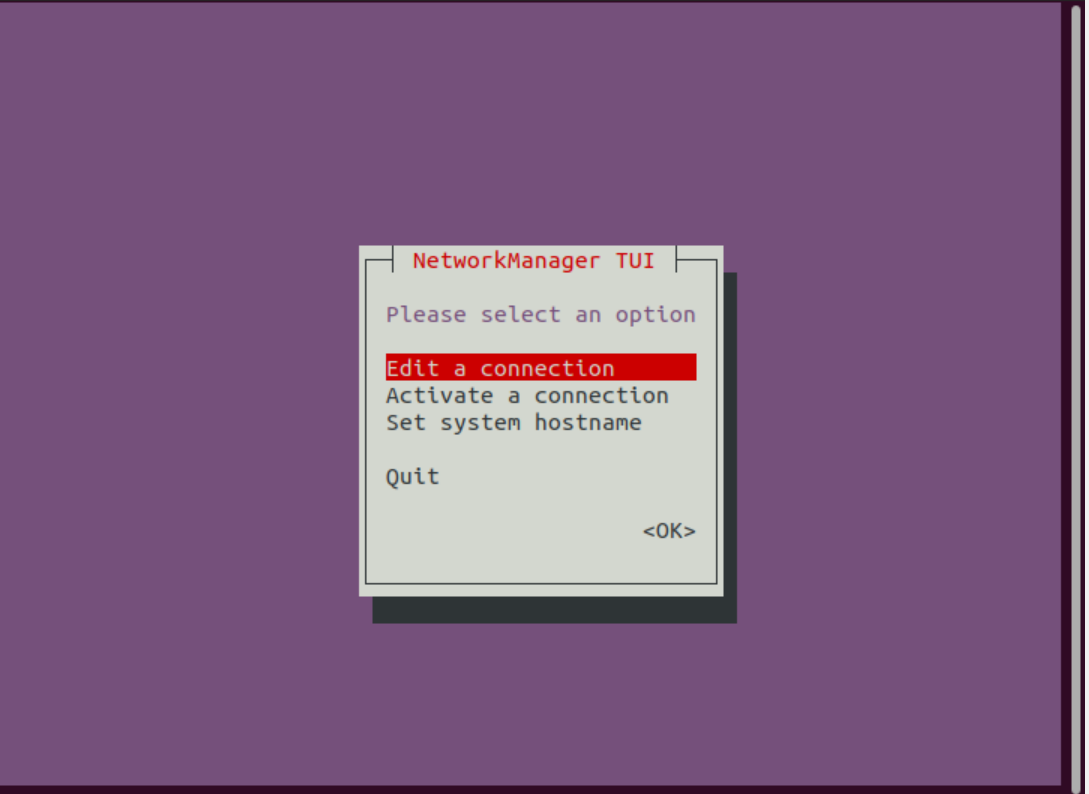
The nmtui utility is also installed by default on the Ubuntu system. This is a text-based graphical utility that can be launched on the Ubuntu system by running the “nmtui” command on the terminal.
The following window displays inside the terminal, after executing the “nmtui” command.
The three different options display on the nmtui interface:
- Edit a connection
- Activate a connection
- Set system hostname
Using the above options, you can easily modify, enable or disable a network connection, and can also set the hostname using the set hostname option.
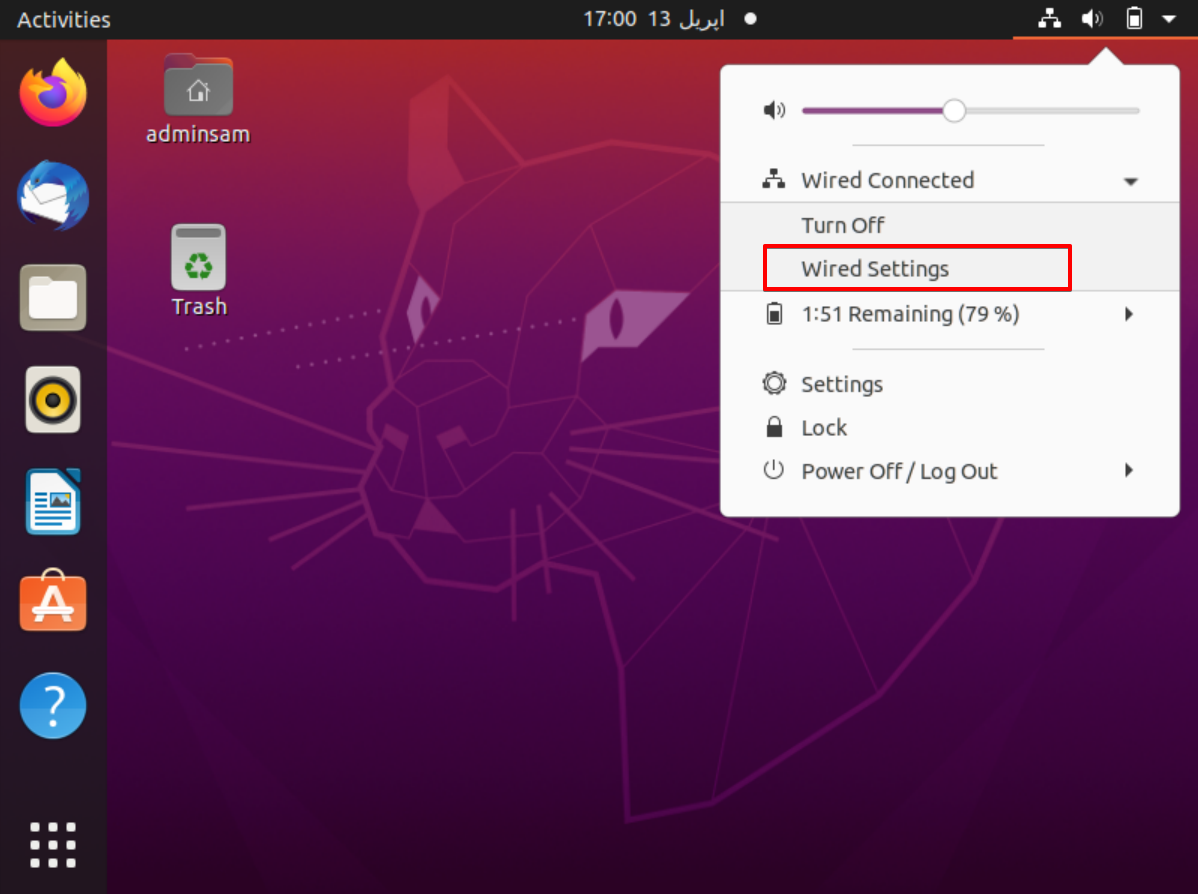
Network Configuration Management Using the nm-applet on Gnome
The nm-applet is also an application of network manager that is available at the top right corner of the Ubuntu desktop. Click on the wired settings option that is also shown in the below-given screenshot:
Now, move into the wired connection setting and the following window display on the desktop:
Using the above window, you can easily modify or manage the network configuration.
Conclusion:
Using the NetworkManager service, you can handle the network management activities easily. It displays the complete network information along with network interface connections and devices. The network adapter can be a Wi-Fi device or physical ethernet cable or a virtual device that is used by the virtual machine guest. We have seen in this article, how the network manager administers all the network configurations expertly using the different network managing tools. However, we have also noticed among all of these that nmcli offers more flexibility and features.


