Etcher is an image writer application available for all major Operating systems. It is used for flashing OS images on USB drives or SD Cards. It is also used to burn ISO images directly on Raspberry Pi; it ensures that data is written correctly and protects the accidental hard drive data writing. This post contains the step-by-step guide from downloading and installing Etcher to burn an image on the USB drive in any Linux-based operating system using the Etcher Image Writer Application by Balena.
Step 1: Download the Balena Etcher AppImage File
The first step for getting started with the Etcher is to download the AppImage file from the official website of Balena.io. Visit the provided link below
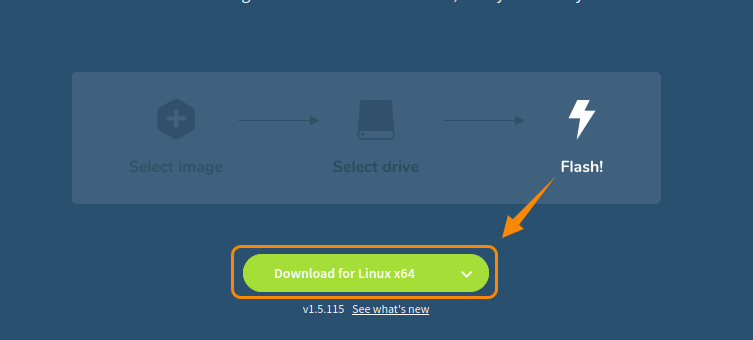
Click on the green-colored “Download for Linux x64” button, as shown in the picture below.
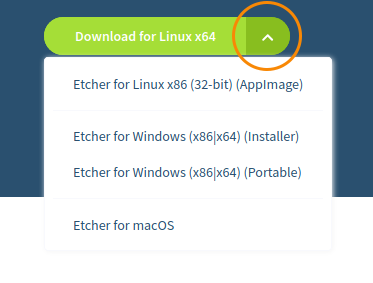
Or you can also download different Etcher installation files based on your Operating system by clicking on the arrow on the right side of the “Download for Linux x64” button.
For installing it on Linux operating system, The default recommended File is perfectly fine.
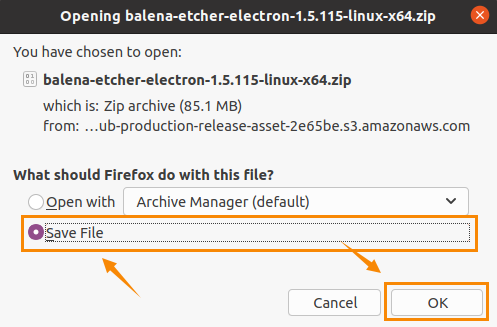
Click on the “Save File” and hit “OK” in the bottom right corner.
The Downloading of the Balena Etcher zipped file will start and complete in a while.
Once the Zipped file of Etcher is downloaded, open the Downloads folder or where the Balena Etcher zip file for Linux is downloaded.
Step 2: Extract the downloaded Zipped file of Etcher
Extract the Etcher file by right-clicking on the zipped file and selecting the “Extract here” option.
Once it is extracted, you will have an extracted folder like this.
Open the extracted folder of Etcher, in which you will see an AppImage file of Etcher.
But, you first have to make this AppImage file executable.
Step 3: Make the AppImage file of Etcher executable
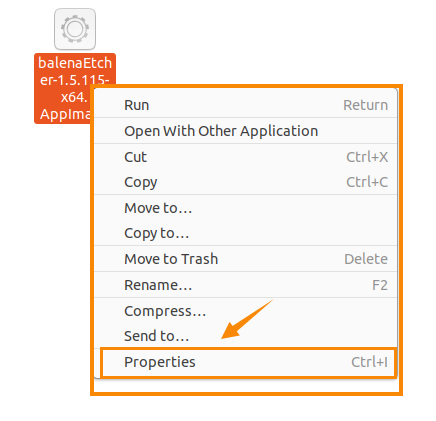
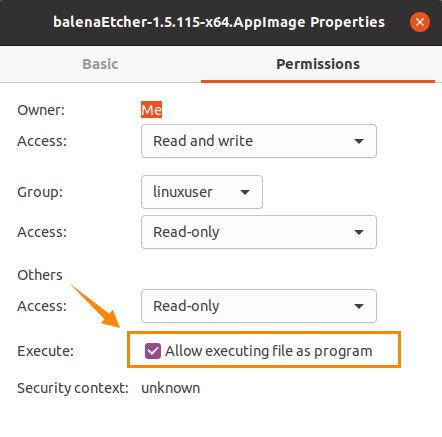
To make this file executable, right-click on it.
Open up the “Properties”.
Go to the “Permissions” tab.
And check the highlighted checkbox if it is not already checked, as shown in the picture above.
Once you have followed this procedure, The Appimage file of Etcher is ready for use. Close the pop-up box and run the Etcher application.
Step 4: Run the Etcher Application
Double click on the AppImage file of Etcehr to run it on your Ubuntu 20.04 LTS system.
Here you can have a fresh look at the Etcher Application.
Step 5: Select the Image file
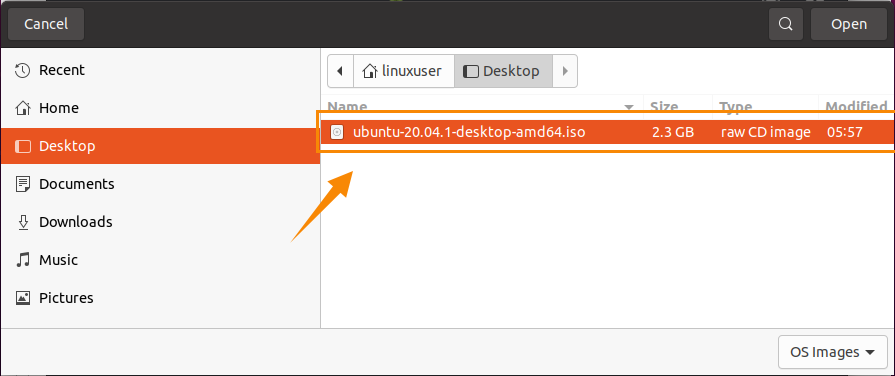
First, select the file picker’s image file by clicking on the “Flash from file” button. From the file picker, navigate to the directory where the image file is placed to which you want to burn on a USB Drive, select the image, and click on the “open” button in the top right corner, as shown in the picture below.
Step 6: Select the Target Device
Once the image is selected, Select the target like a USB Drive on which you want to write the selected image by clicking on the “Select Target button”, as shown in the picture below.
A dialog box will appear for selecting the USB Drive or SD Cards. Select the USB Drive on which you want to write the image file.
Note: You can also select multiple Targets for writing the same image on all the selected targets.
After selecting the USB Drive or SD card, click on the “Select” button at the bottom of the dialog box, as shown in the picture below.
After selecting the Image file and target device, the USB Drive is ready to Flash.
Step 7: Flash the Drive
Click on the Flash button, and it will ask you to enter the password, so enter the password to authenticate the process.
After entering the password, click on the Authenticate button, and it starts flashing your USB Drive or SD Card.
The Etcher will take some time based on the image file’s size to finish the flashing process. Once Etcher is done with the flashing process, you are ready to eject the device and use it where it is needed.
Conclusion
Etcher is a very useful application available in Linux for writing images on SD cards and USB Drives. This post contains a very easy and step-by-step guide to install and use the Etcher Application on Ubuntu 20.04 LST system by Balena.


