Before we start interfacing ESP32 with PIR sensor we must know how interrupts work and how to read and handle them in ESP32. Let’s discuss the working of PIR with ESP32 in detail.
Here is the content for this article:
2: Calling an Interrupt in ESP32 – MicroPython
3: Interfacing PIR Sensor with ESP32 – MicroPython
3.1: PIR Motion Sensor (HC-SR501)
1: What Are Interrupts
Most of the events that happen in ESP32 programming run sequentially which means line by line execution of code. To handle and control the events that don’t need to run during sequential execution of code an Interrupts are used.
For example, if we want to execute a certain task when any special event occurs, or a trigger signal is given to digital pins of the microcontroller we use interrupt.
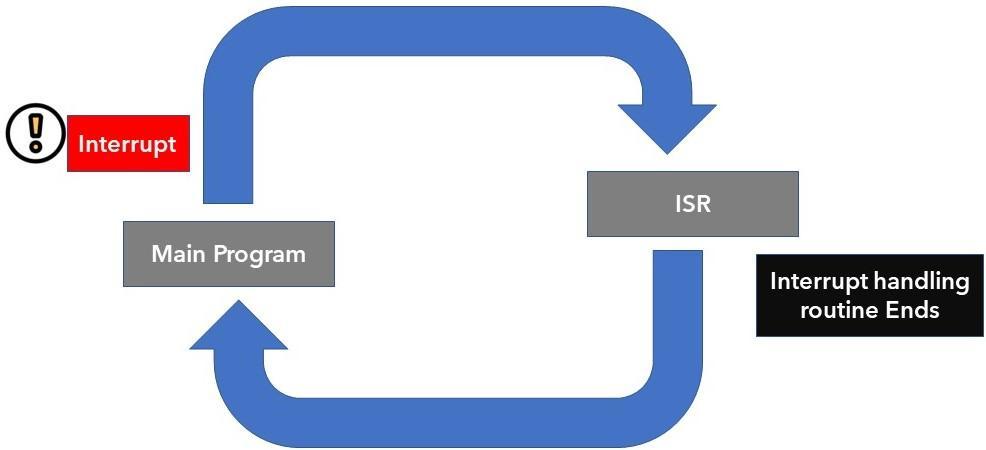
With interruption we don’t need to continuously check the digital state of the ESP32 input pin. When an interrupt occurs the processor halts the main program, and a new function is called which is known as ISR (Interrupt Service Routine). This ISR function handles the interrupt caused after that return back to the main program and start executing it. One of the examples of ISR is PIR motion sensor which generates an interrupt once motion is detected.
1.1: Interrupts Pins in ESP32
An external or hardware interrupt can be caused by any hardware module such as touch sensor or push button. Touch interrupts happen when a touch is detected at ESP32 pins or GPIO interrupt can also be used when a key or push button is pressed.
In this article we will trigger an interrupt when the motion is detected using the PIR sensor with ESP32.
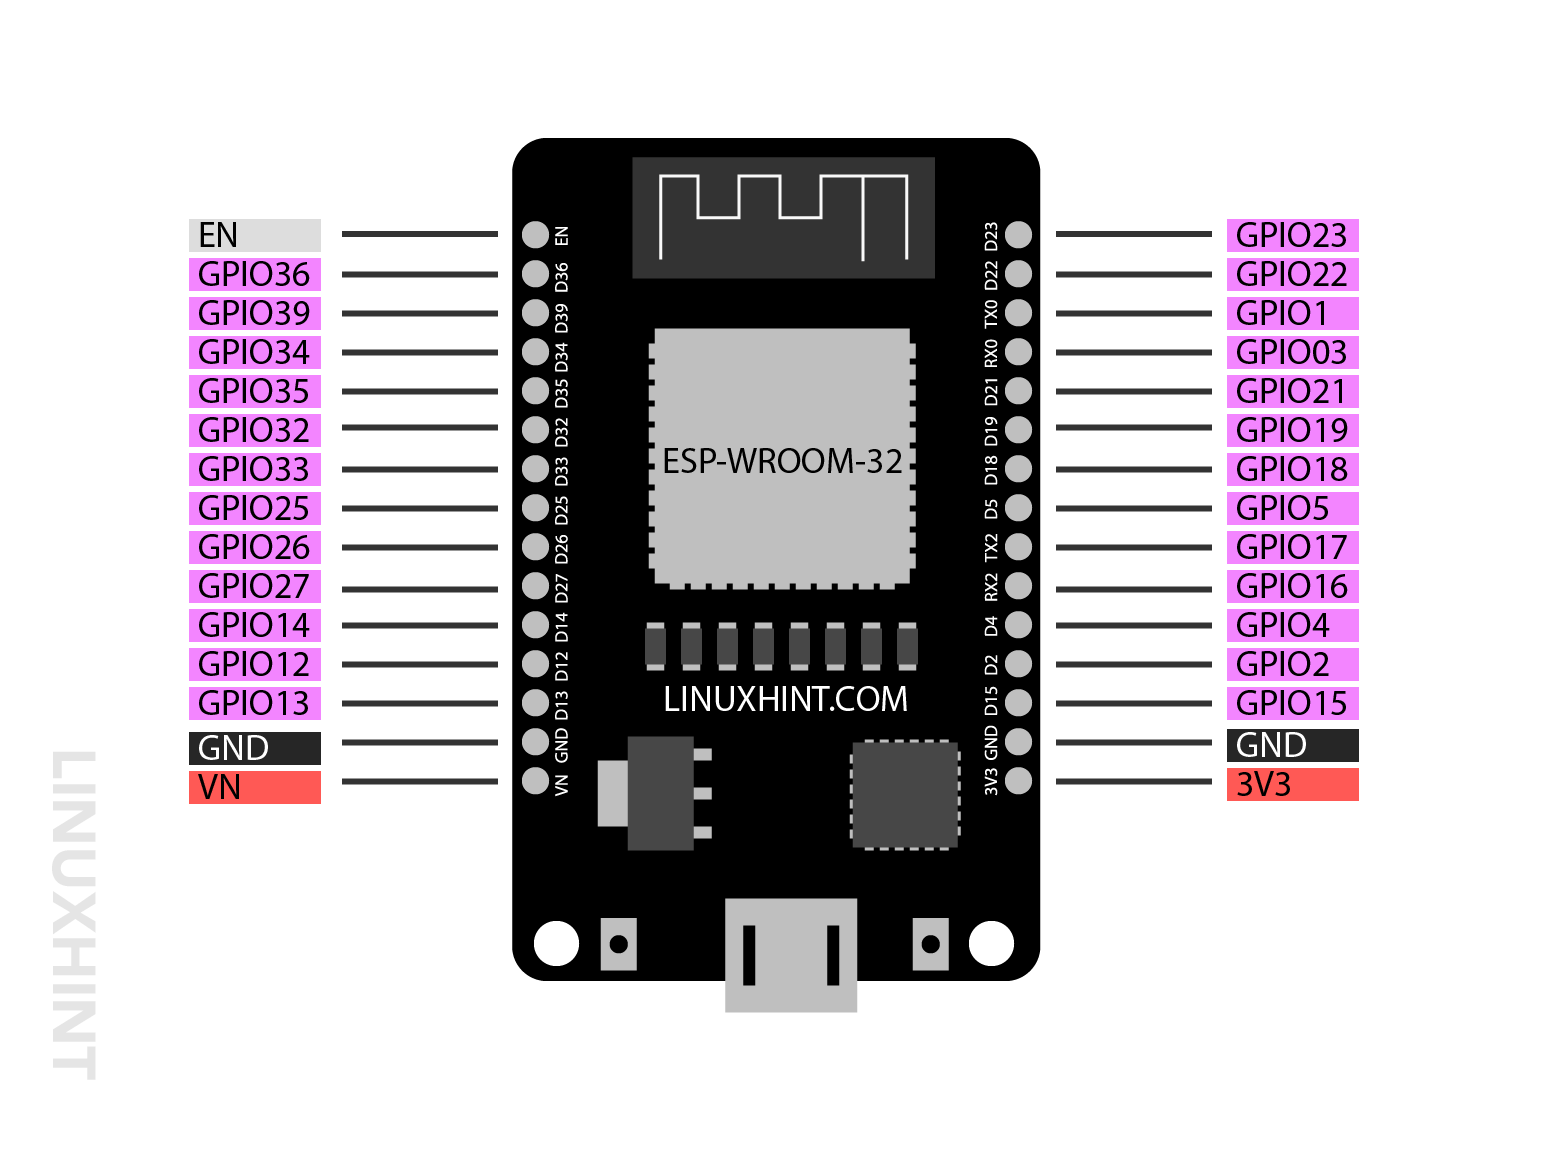
Almost all of the GPIO pins except 6 SPI integrated pins which usually come in the 36 pin version of ESP32 board cannot be used for the purpose of interrupt calling. So, to receive the external interrupt following are the pins one can use in ESP32:
2: Calling an Interrupt in ESP32 Using MicroPython
To program an ESP32 board with PIR sensor using MicroPython code. We have to define an interrupt function. Following are some simple steps that assist in defining an interrupt for ESP32 board.
Step 1: Initialize interrupt handling function: Interrupt handling function should be defined in an easy way so that it can execute swiftly and return back to the main program as quickly as possible. This can be done by defining a global variable so it can be accessed anywhere inside the code if called.
Here in case of PIR sensor we will be using GPIO pin as a global variable. The interrupt function will take a pin as an argument and describe the GPIO pin which causes the interrupt function to occur.
Step 2: Setup the GPIO pin for an interrupt: To get the value of GPIO pin we need to create an object that will take input from it using the Pin.IN as the second argument inside our pin class. We can rename this with any other.
Step 3: Attach interrupt to GPIO pin for PIR sensor using irq() method:
Using the below command, we can set the interrupt to a pin we defined earlier.
The irq() method is used to attach the interrupt to the pin. irq() accepts two different arguments:
- Trigger
- Handler
trigger: This argument explains the mode of trigger. Following are three modes:
- Pin.IRQ_FALLING: When a pin transitions from HIGH to LOW, an interrupt is started.
- Pin.IRQ_RISING: Upon the pin’s transition from LOW to HIGH, an interrupt is started.
- Pin.IRQ_FALLING|Pin.IRQ_RISING: Trigger the interrupt whenever a pin changes its state. Either pin goes to HIGH or LOW.
handler: This function will be called once an interrupt is triggered.
3: Interfacing PIR Sensor with ESP32
As now we have covered the concepts of interrupt with ESP32 using MicroPython now we will interface the PIR sensor with ESP32. Here we will be using Pin.IRQ_RISING mode in MicroPython code for PIR sensor because we want to trigger a LED every time the PIR sensor detects some movement. This LED will remain ON for a set time then it turns OFF.
Following components will be required:
- ESP32 development board
- PIR motion sensor (HC-SR501)
- 220 Ohm resistor
- Jumper wires
- Breadboard
- LED
Schematic for PIR sensor with ESP32:
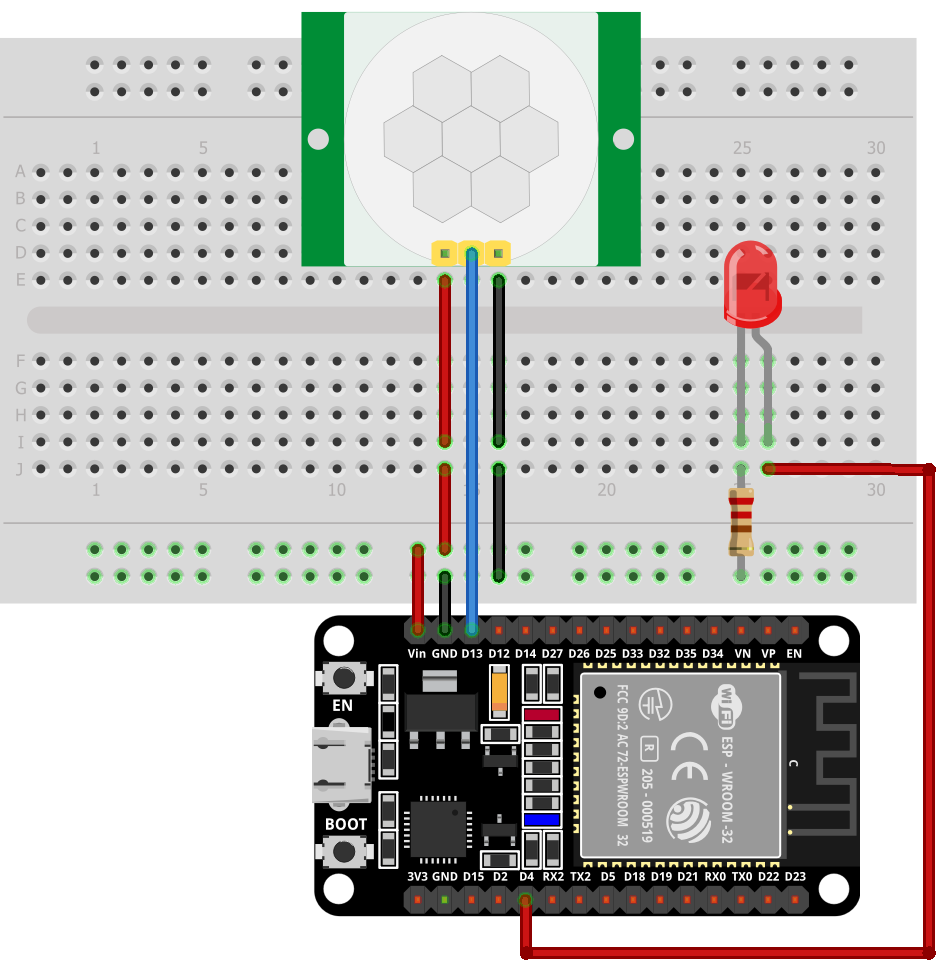
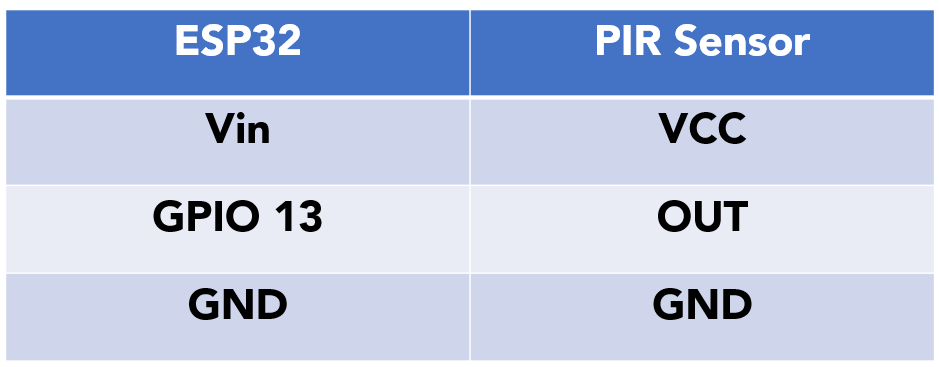
Pin configuration of ESP32 with PIR sensor is:
3.1: PIR Motion Sensor (HC-SR501)
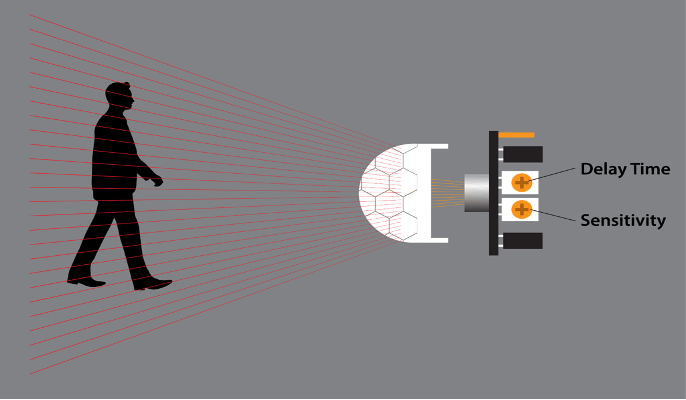
PIR is an acronym for Passive Infrared sensors. Two pyroelectric sensors used together that will detect the amount of heat around its surroundings. Both these pyroelectric sensors lie one after another and when an object comes inside their range a change in heat energy or the signal difference between both these sensors causes the PIR sensor output to be LOW. Once PIR out pin goes LOW, we can set a specific instruction to execute (LED blink).
Following is the characteristics of PIR sensor:
- Sensitivity can be set depending upon the location of project (such as sensing mouse or leaf movement)
- PIR sensor can be set for how long it detects an object
- Widely used in home security alarms and other thermal based movement detection applications.
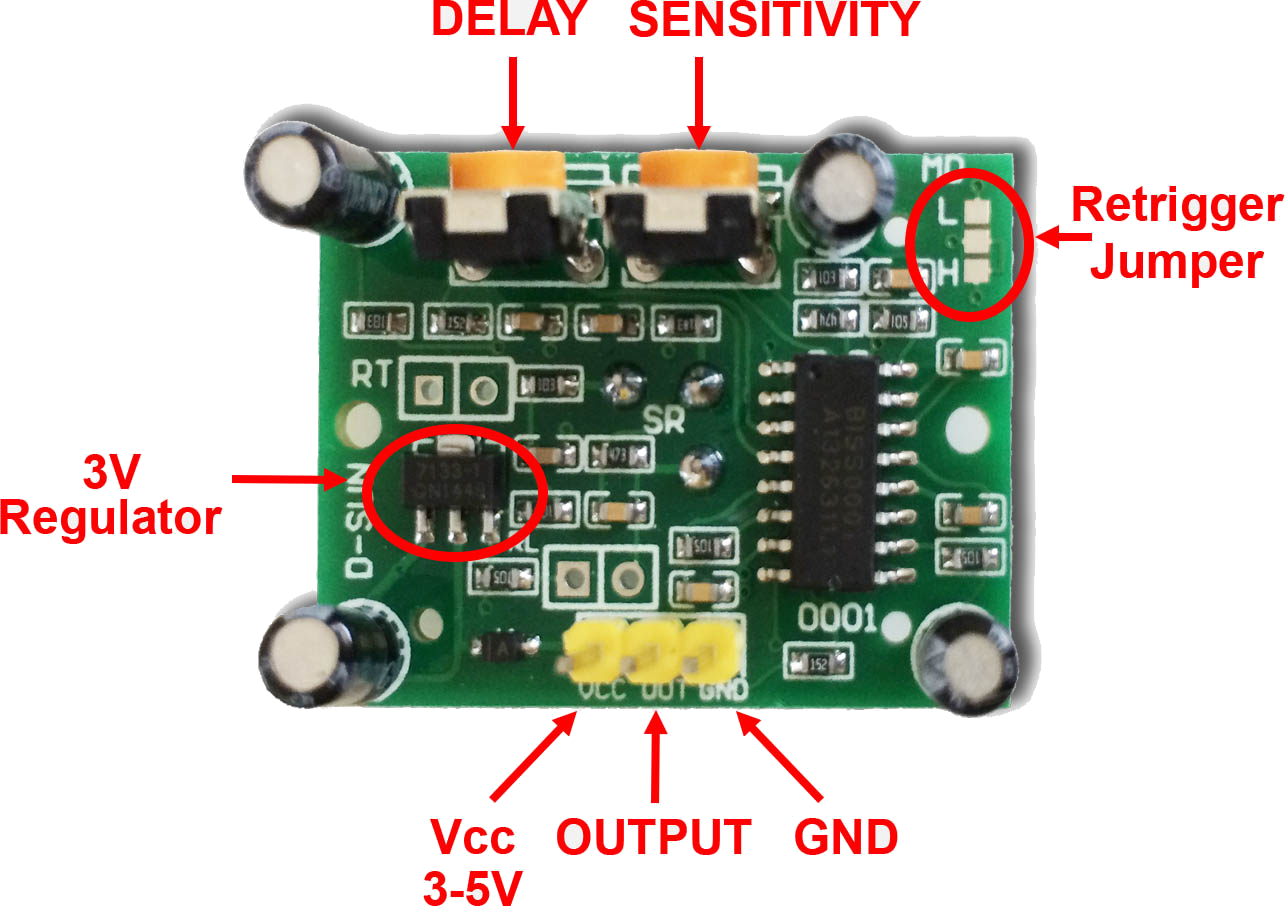
3.2: Pinout HC-SR501
PIR HC-SR501 comes with three pins. Two of them are power pins for Vcc and GND and one is the output pin for the trigger signal.
Following is the description of PIR sensor pins:
| Pin | Name | Description |
| 1 | Vcc | Input pin for sensor Connect to ESP32 Vin Pin |
| 2 | OUT | Sensor Output |
| 3 | GND | Sensor GND |
Now to program ESP32 write the given code in Thonny IDE editor or any other MicroPython IDE and upload it to ESP32.
from time import sleep
motion = False
def handle_interrupt(pin):
global motion
motion = True
global interrupt_pin
interrupt_pin = pin
led = Pin(4, Pin.OUT)
pir = Pin(13, Pin.IN)
pir.irq(trigger=Pin.IRQ_RISING, handler=handle_interrupt)
while True:
if motion:
print('MOTION DETECTED')
led.value(1)
sleep(5)
led.value(0)
print('MOTION STOPPED')
motion = False
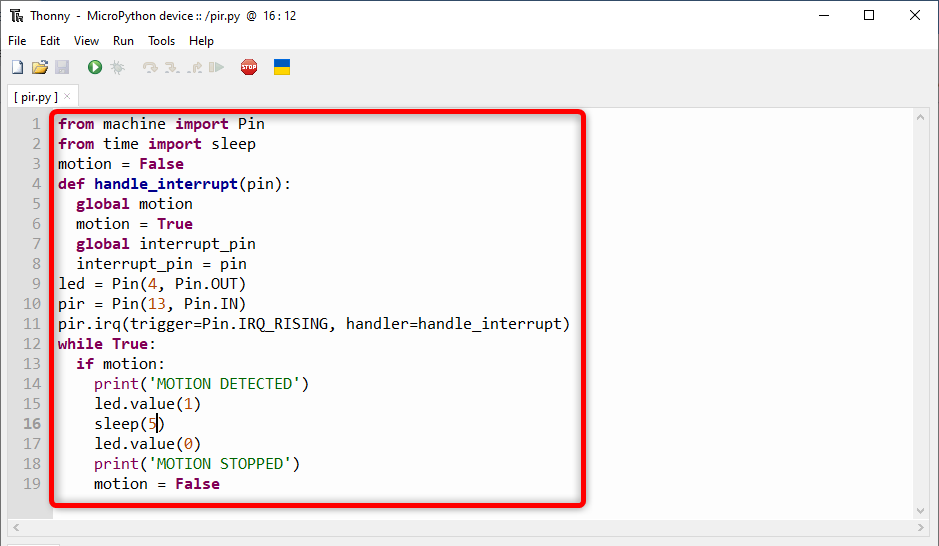
First, we imported the pin class from the machine module and sleep method to add delay. Next a variable is created with name motion. This variable will detect whether a motion is detected or not.
Then we created a function handle_interrupt. Every time the PIR sensor detects motion, this function will be activated. It takes a pin as an input parameter and indicates the pin which causes the interrupt to happen.
In simple words every time PIR detects motion, handle_interrupt will set the motion variable to true and store the pin which causes the interrupt to happen. One thing to remember is always declaring the motion variable as global because it is needed throughout the code.
Moving forward we created two pin objects, one to store LED pins and the second one will take PIR sensor output at GPIO pin 13. Further we declared the trigger pin in RISING mode.
In the loop part of the code, it will check for the value of the motion variable once it becomes true LED will turn on connected at pin 4 of ESP32. If the motion stopped LED will turn OFF after 5 sec.
3.4: Output
In the output section we can see the object is out of range of the PIR sensor, so the LED is turned OFF.
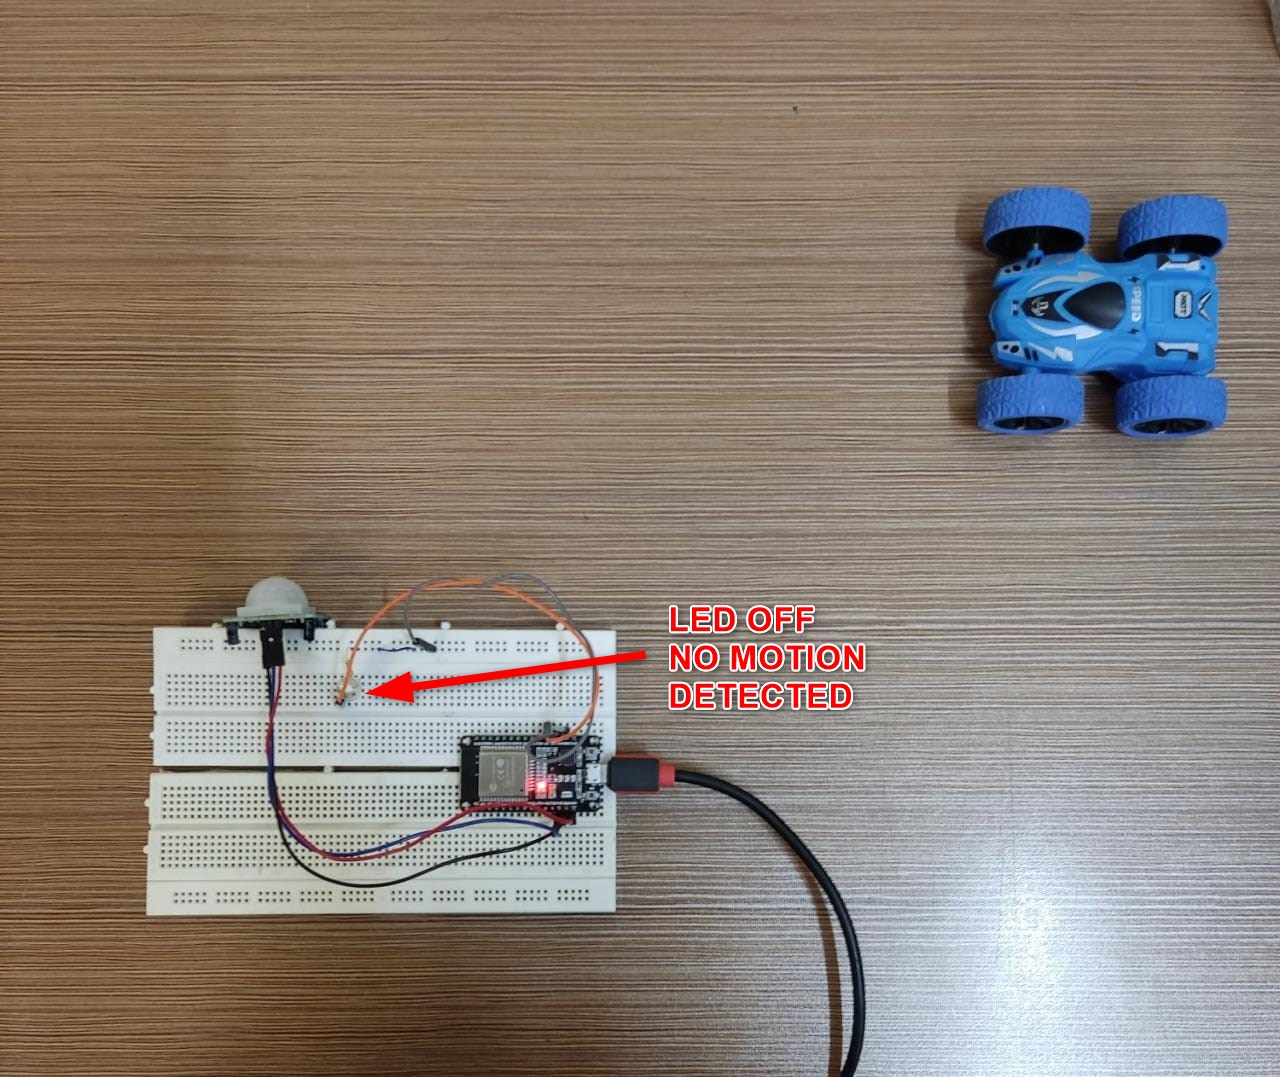
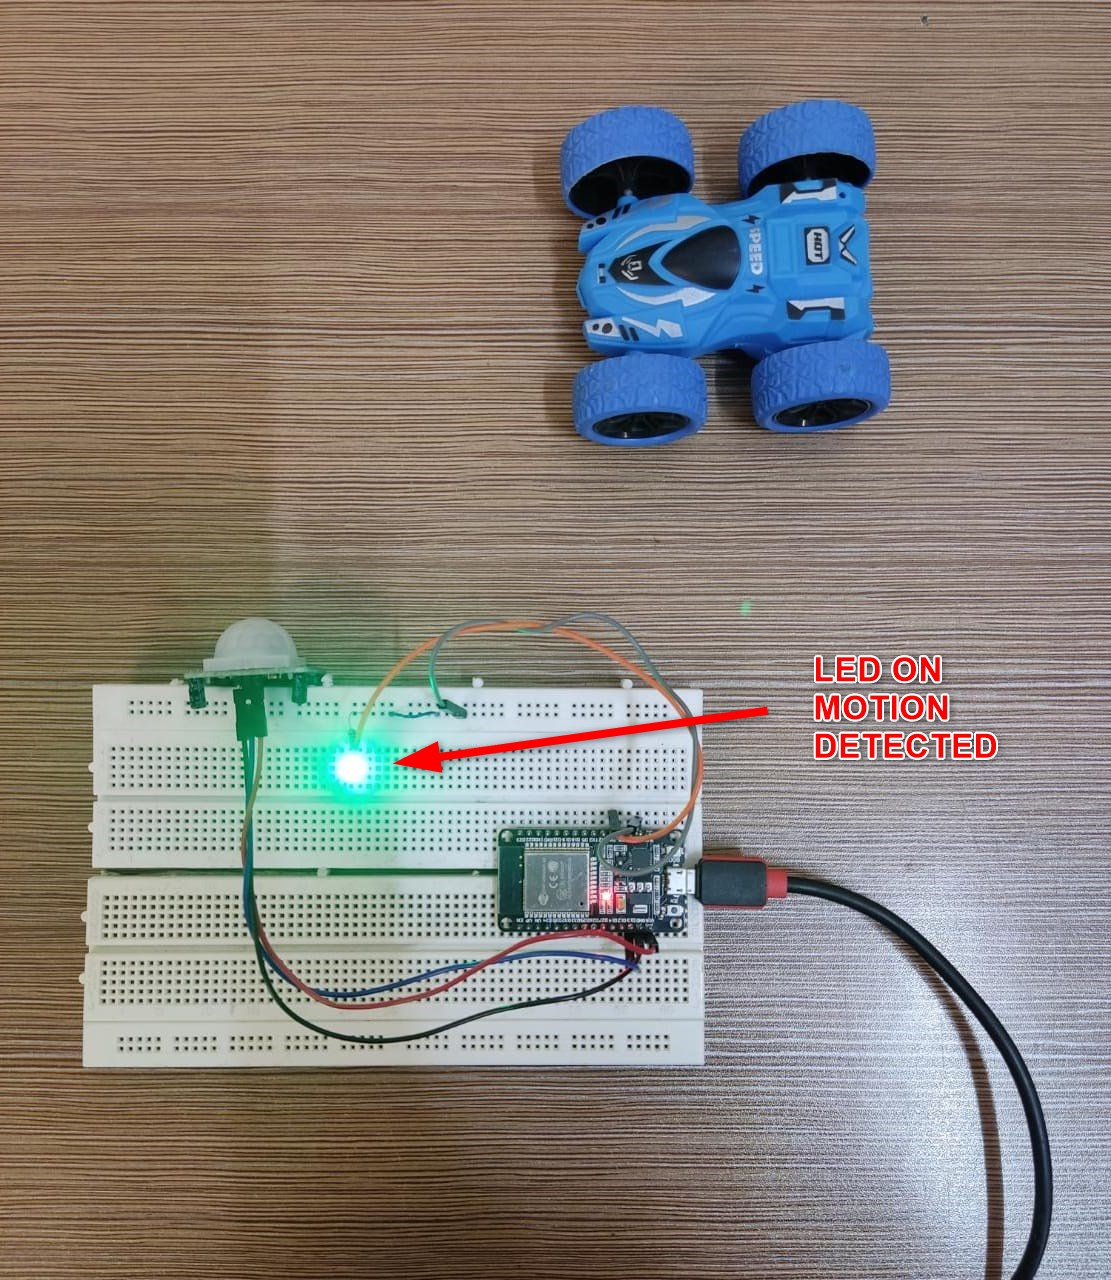
Now the motion detected by the PIR sensor LED will turn ON for 5 sec after that if no motion is detected it will remain OFF until the next trigger is received.
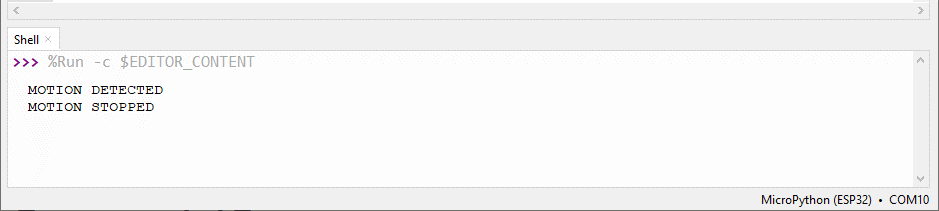
Following output is shown by the shell/terminal in Thonny IDE.
Conclusion
A PIR sensor with ESP32 can help to detect motion of different things. Using the interrupt function in MicroPython with ESP32 we can trigger a response at some specific GPIO pin. When change is detected the interrupt function will be triggered and a LED will turn ON.