Let’s use Mu Editor to program ESP32 board.
Following is the contents we will discuss in this article:
2: Installing Mu Editor in Windows
3: Downloading MicroPython Firmware for ESP32
4: Flashing MicroPython Firmware
5: Running First Script in Mu Editor
1: MicroPython Introduction
MicroPython is a lean and easy to write programming language which is a subset of Python 3. It is designed to work on microcontrollers and incorporates Python 3 standard libraries.
MicroPython gives us a platform of low-level python operating systems to control microcontrollers and other electronics boards. MicroPython comes with the aim to increase code compatibility between Python 3 and MicroPython, so code can be transferred from desktop to microcontroller with ease.
2: Installing Mu Editor in Windows
For the Mu Editor installation, we need to download it first then using the MicroPython firmware file we will flash ESP32 with MicroPython.
Installing the Mu Editor can be done using the steps below.
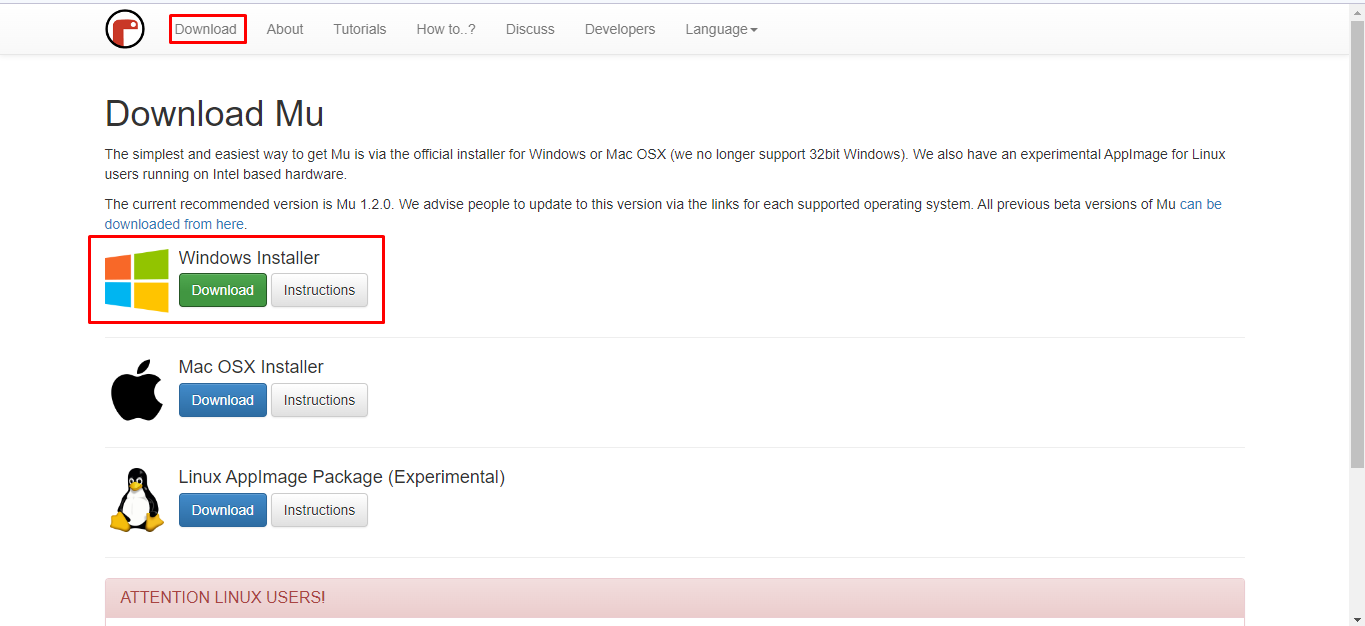
Step 1: To download the latest and updated version of Mu Editor go to Mu Editor Download Page.
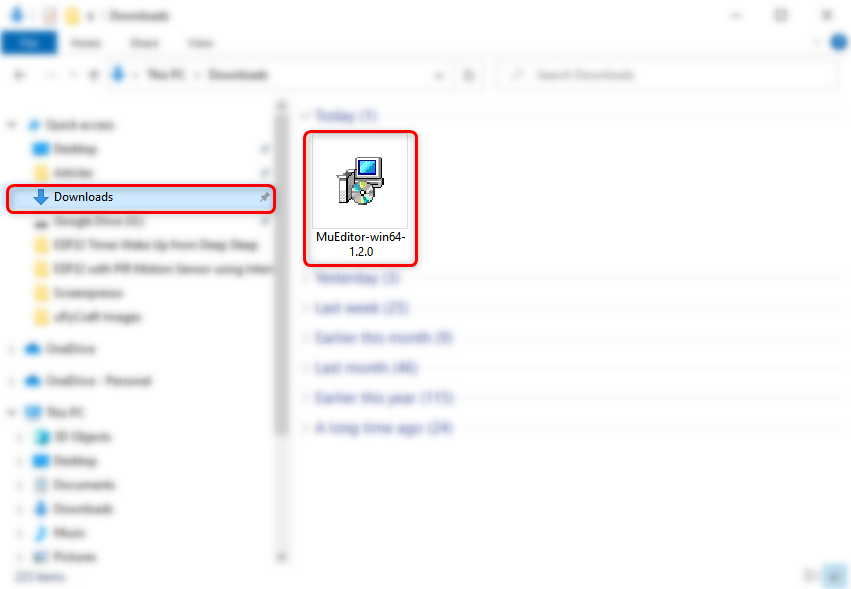
Step 2: Once the file is downloaded, we can see it in the Downloads directory. Double click to start Mu Editor installation.
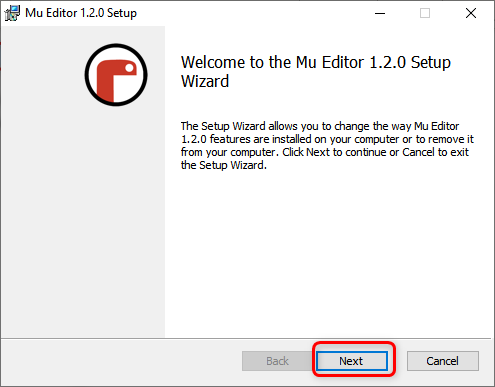
Step 3: Following setup window will open click Next to continue.
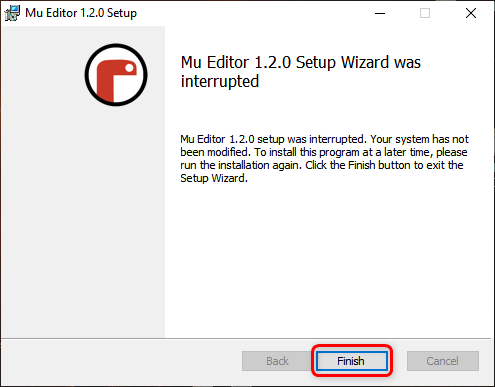
Step 4: Click Finish after the installation is complete.
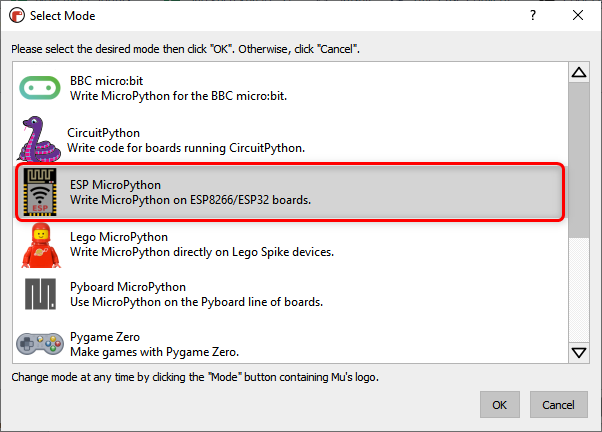
Step 5: Now open the Mu Editor application, below given window will appear here we can select the mode for different MicroPython supported boards. Select ESP MicroPython.
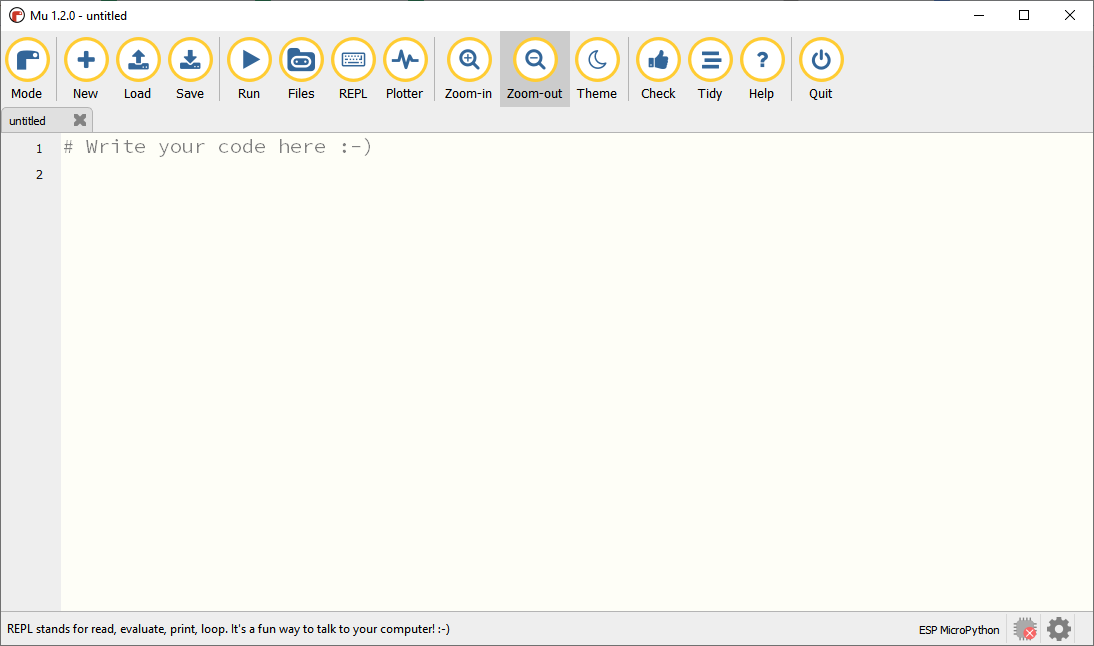
Step 6: Following interface of Mu Editor will appear.
3: Downloading MicroPython Firmware for ESP32
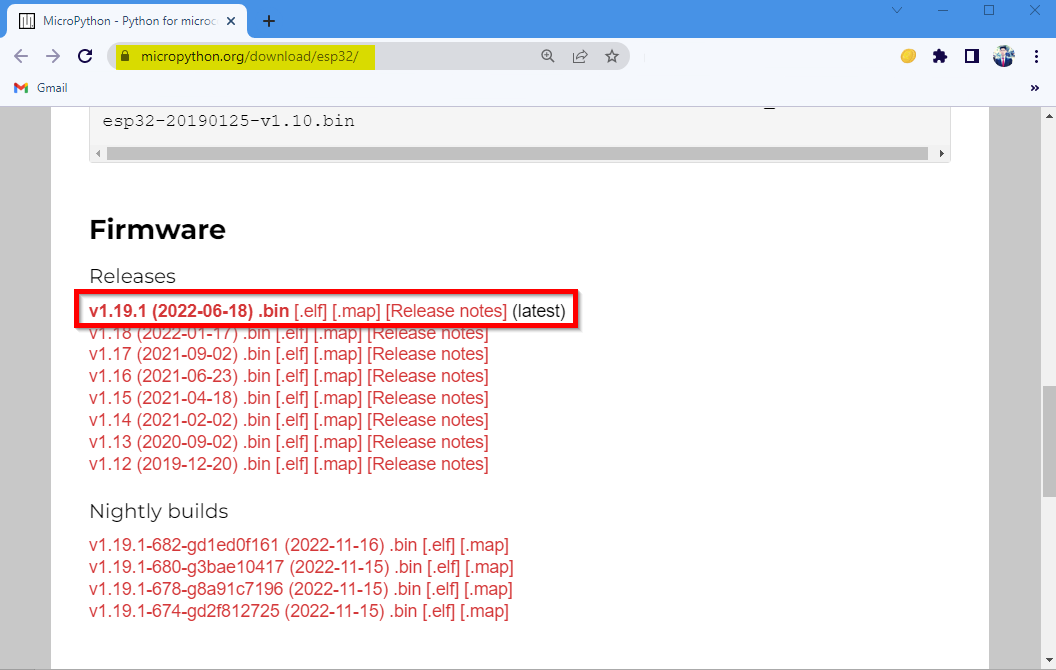
Before we can program an ESP32 board with MicroPython we need to flash ESP32 with MicroPython firmware first. To download MicroPython firmware for ESP32 visit the official MicroPython Firmware Download Page.
4: Flashing MicroPython Firmware
Once you have downloaded the firmware file it’s time to upload it to the ESP32 board.
Follow along the below given steps.
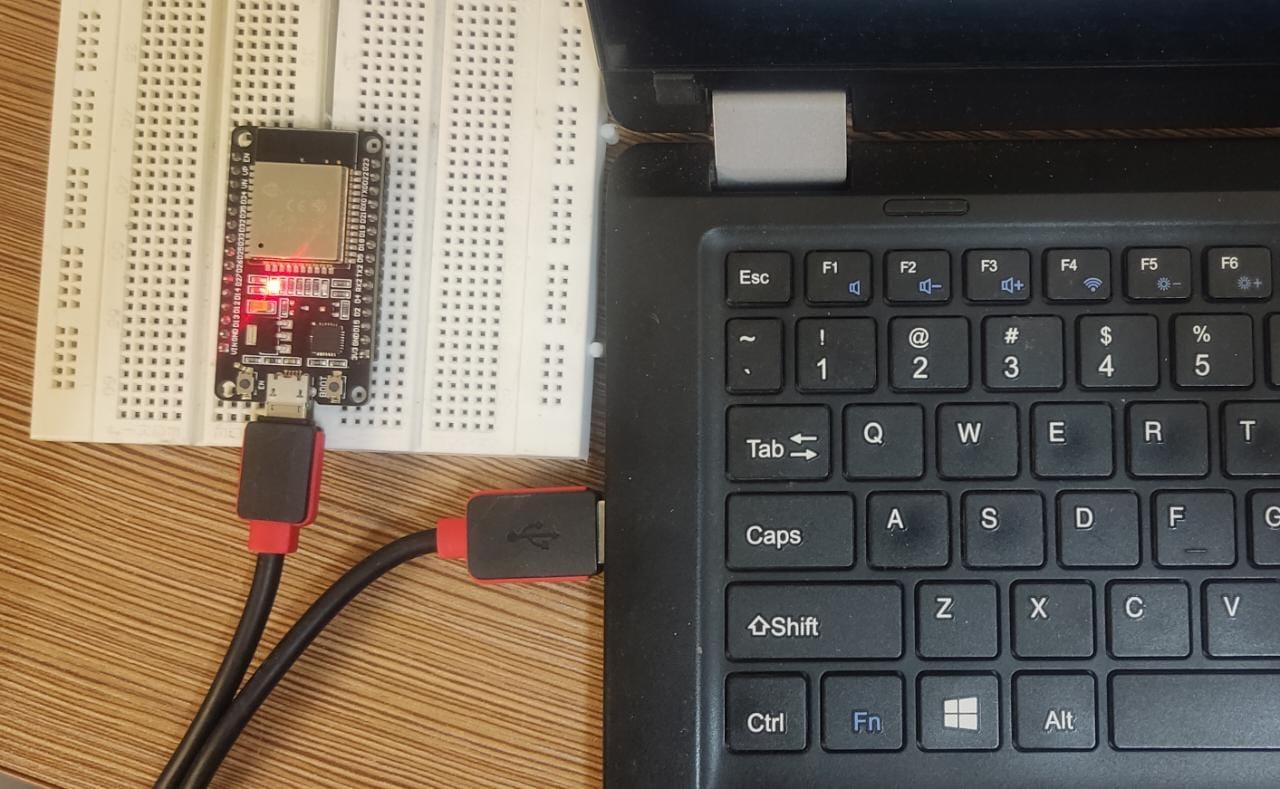
Step 1: Before moving forward first connect the ESP32 board with the PC. After connecting make sure to check the ESP32 board in device manager.
Note: If ESP32 is not recognized by the computer then you have to install the ESP32 chip CP210 driver first, Download CP210x_Universal_Windows_Driver.
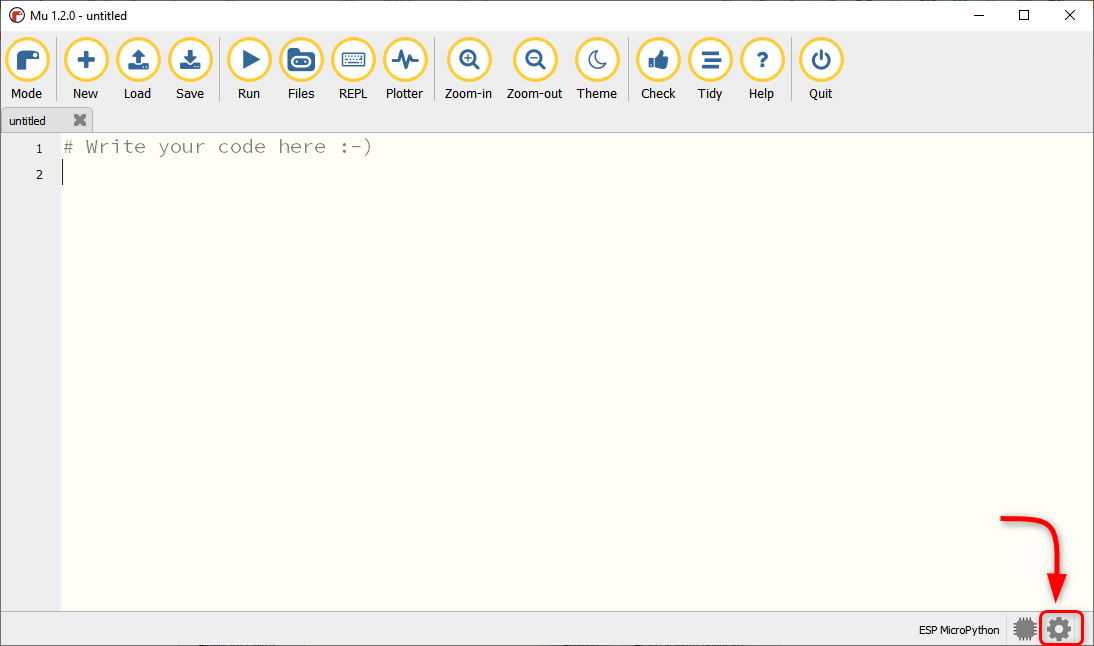
Step 2: Now open Mu Editor and click the setting button in the bottom right menu.
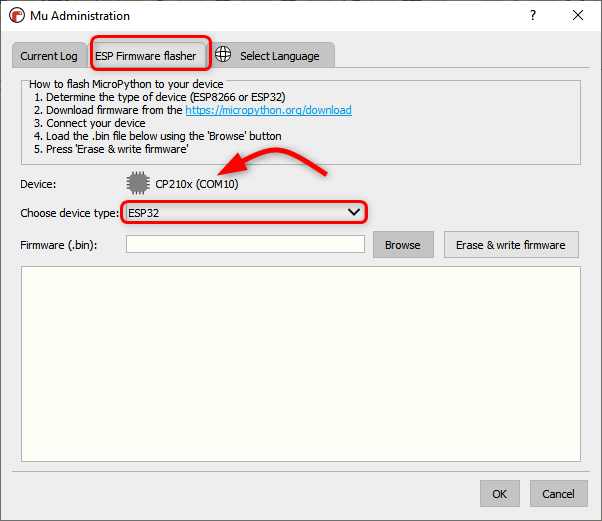
Step 3: Select ESP Firmware flasher and make sure device COM port is selected. After that select the board type.
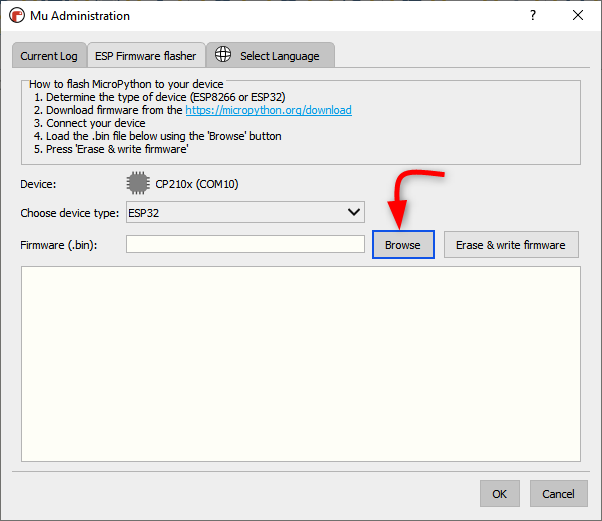
Step 4: Now click browse to select the ESP32 MicroPython firmware.
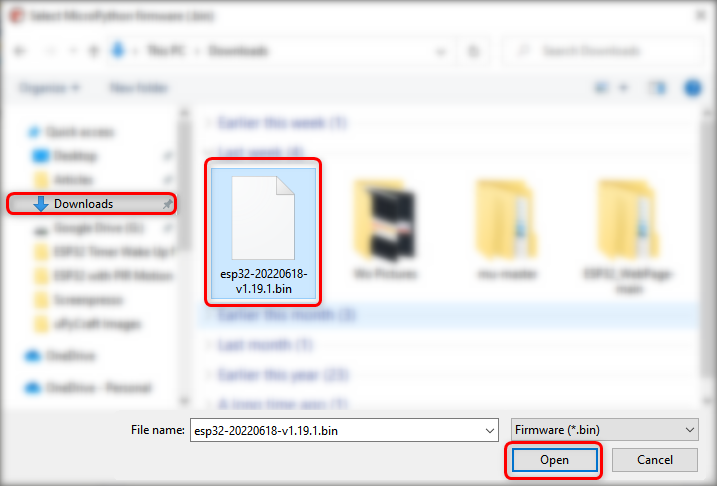
Step 5: Select the .bin file and click Open.
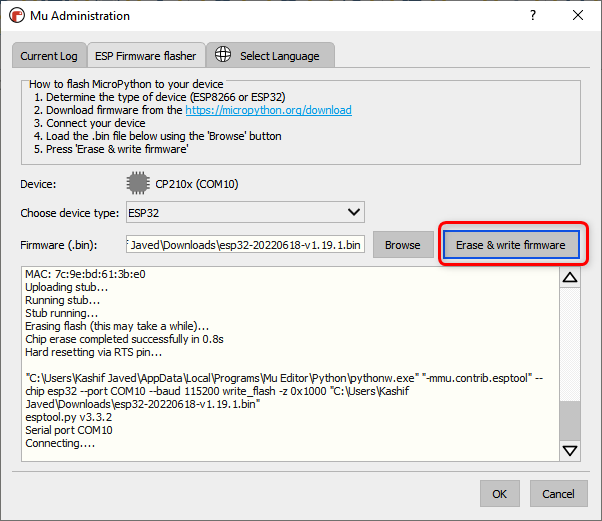
Step 6: Once the file is selected click Erase & write firmware.
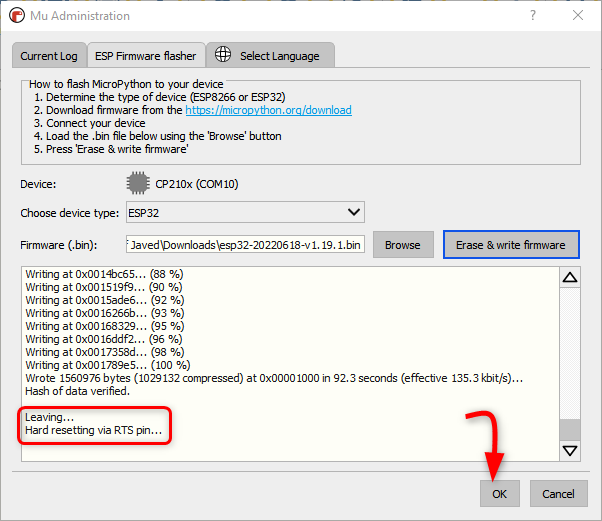
Step 7: Wait until firmware flashes completely in ESP32, click OK.
Now we have successfully installed MicroPython firmware inside ESP32 board. It is time to write and upload our very first MicroPython code in ESP32 using Mu Editor.
5: Running First Script in Mu Editor
To test the installation and working of ESP32 with Mu Editor we will write a simple LED blink code. Following steps will assist in uploading MicroPython code.
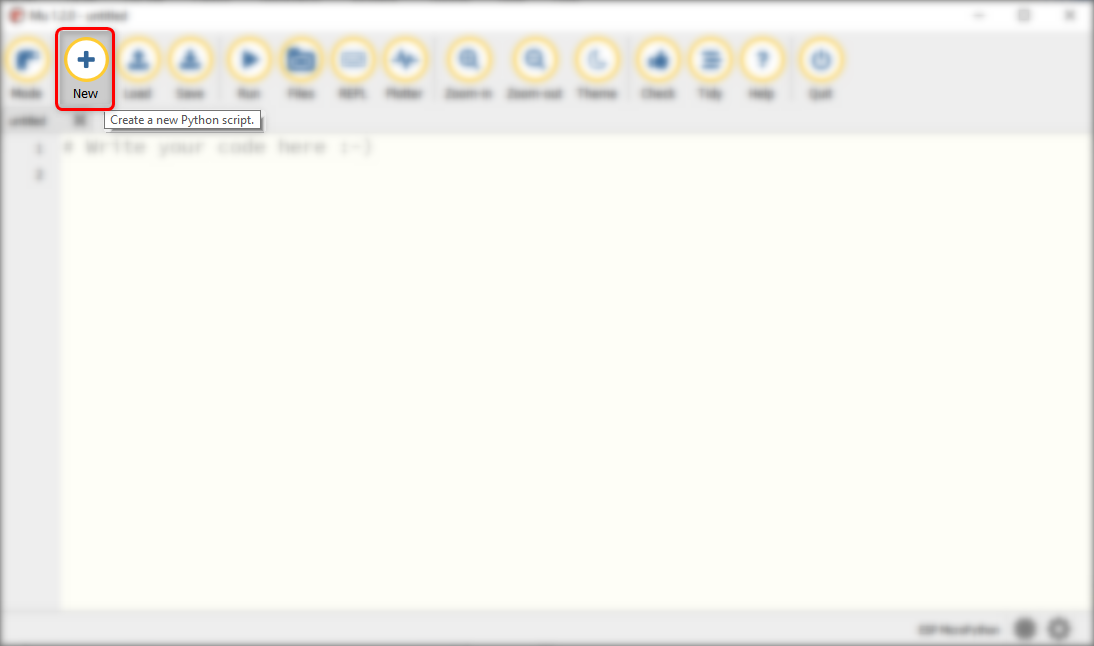
Step 1: Open Mu Editor and click New button or press Ctrl + N.
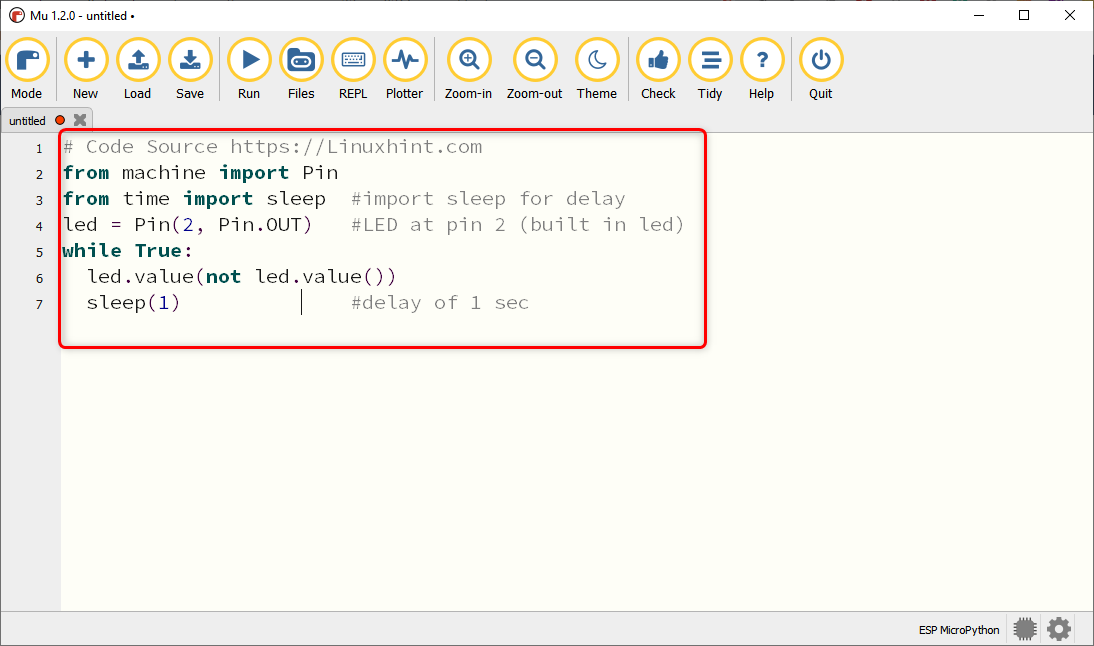
Step 2: Now copy and paste the below given code in the Mu Editor window.
from machine import Pin
from time import sleep #import sleep for delay
led = Pin(2, Pin.OUT) #LED at pin 2 (built in led)
while True:
led.value(not led.value())
sleep(1) #delay of 1 sec
After copying code, the editor will look like this.
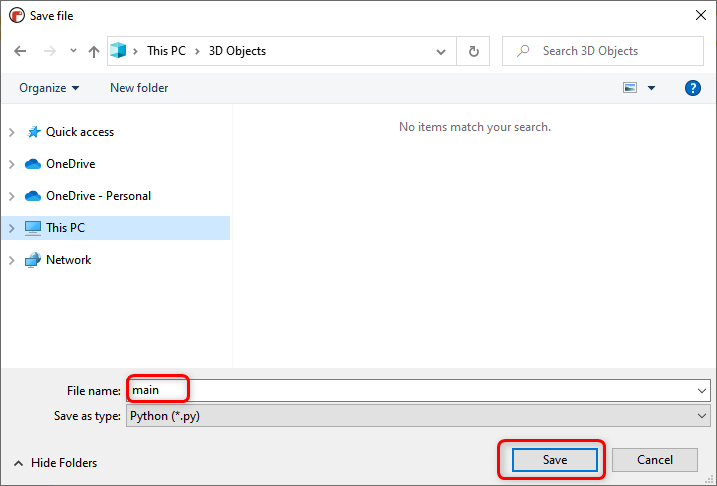
Step 3: To save the current MicroPython script inside the PC click Save.
Step 4: Select the directory or create a new folder and save the file with name main.py.
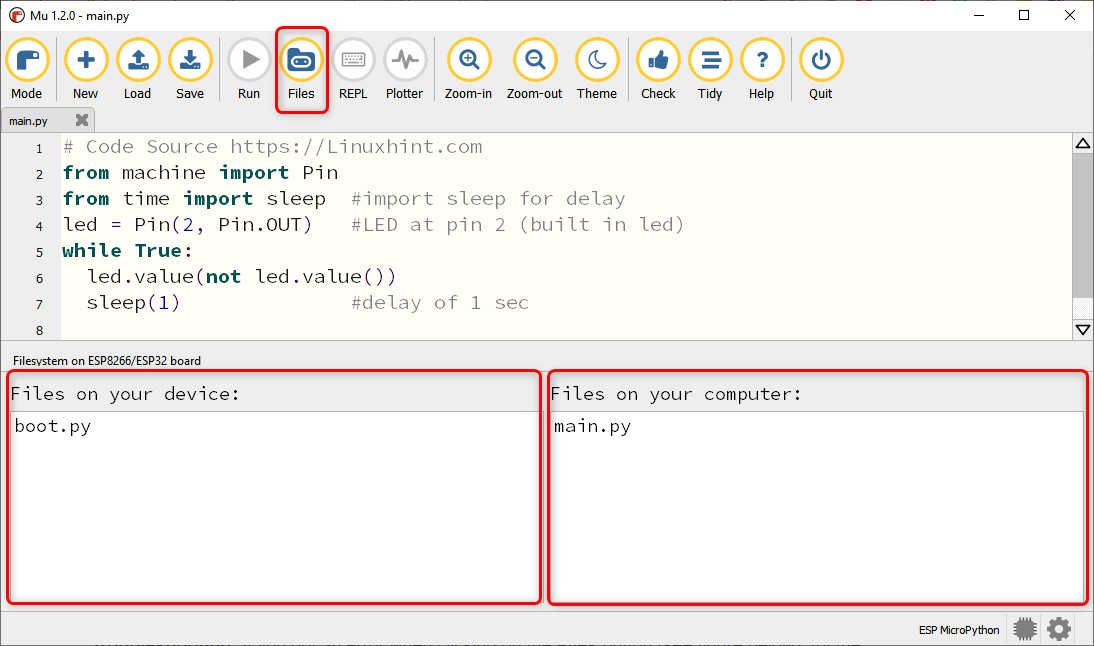
Step 5: To check all the files saved inside the MicroPython device and on your computer click Files.
Note: You may encounter this type of error in Mu Editor while displaying files so close Mu Editor disconnect ESP32 board and re-open the Mu Editor.
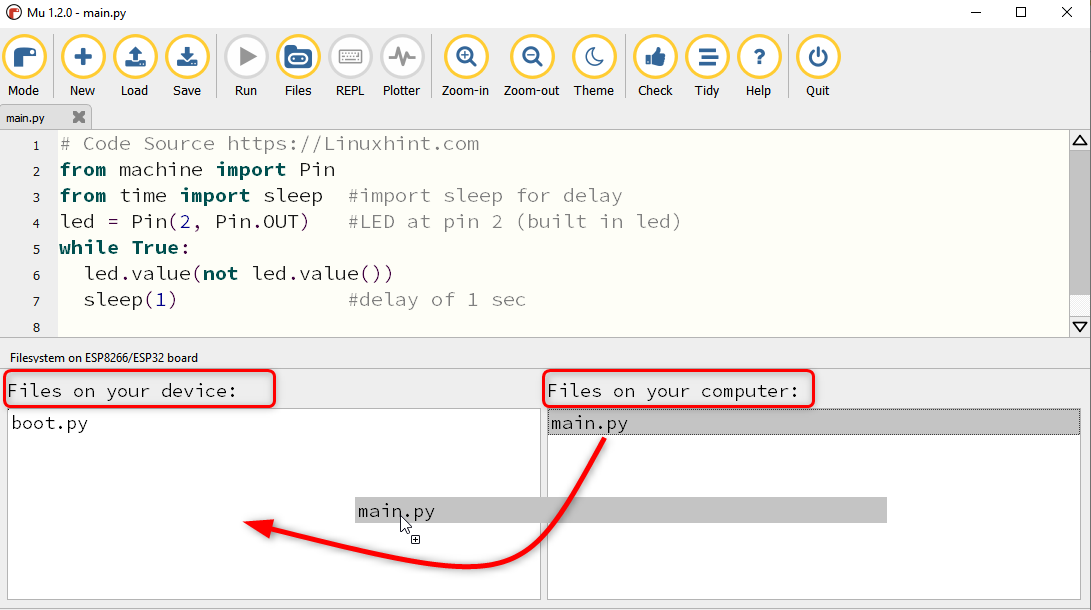
Step 6: To upload a file to ESP32 board drag that file from Computer window to device window.
Step 7: Once the file is uploaded successfully the following message will appear.
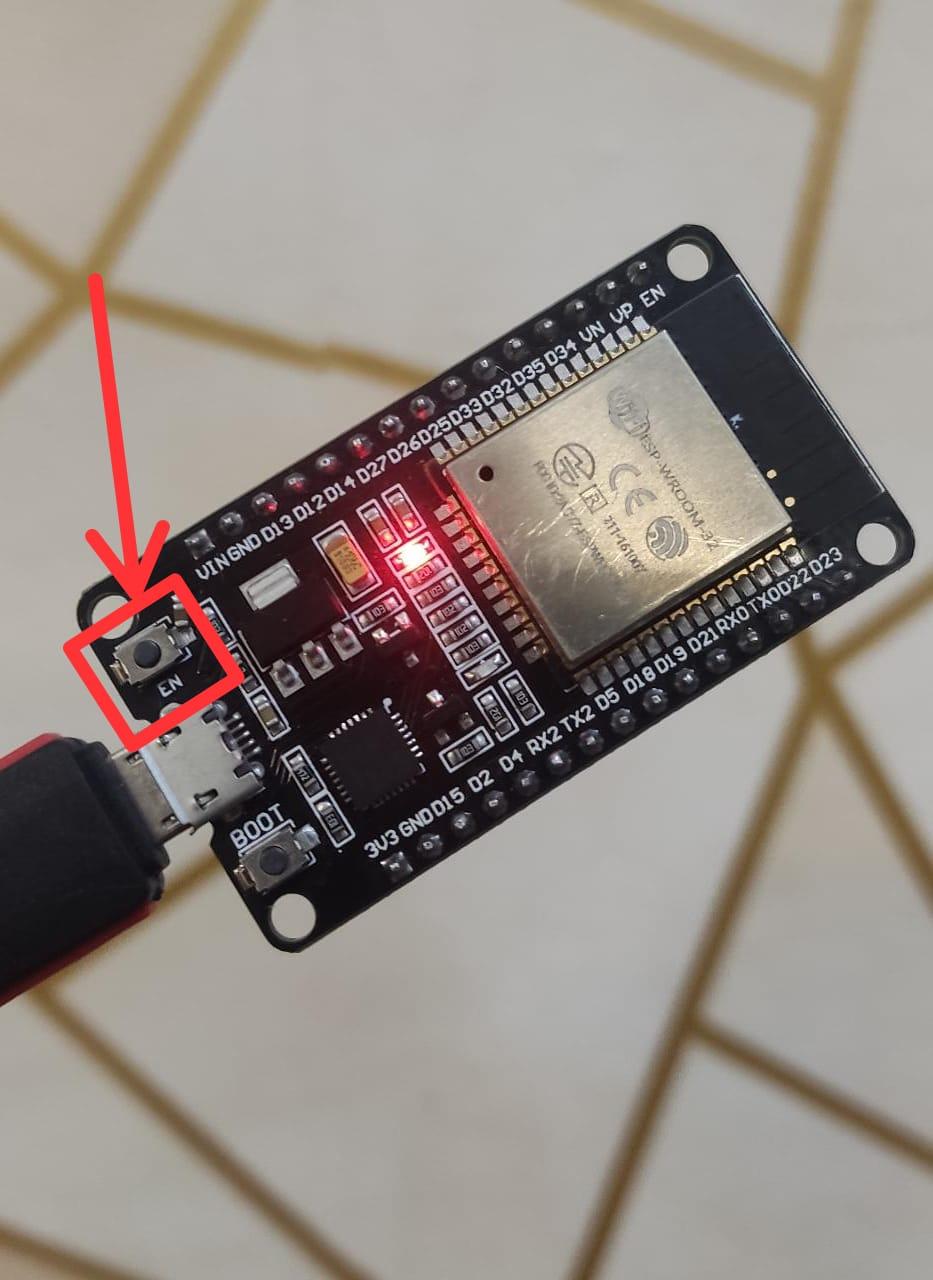
Now press the Reset/EN button on the ESP32 board to start running the uploaded sketch.
Output
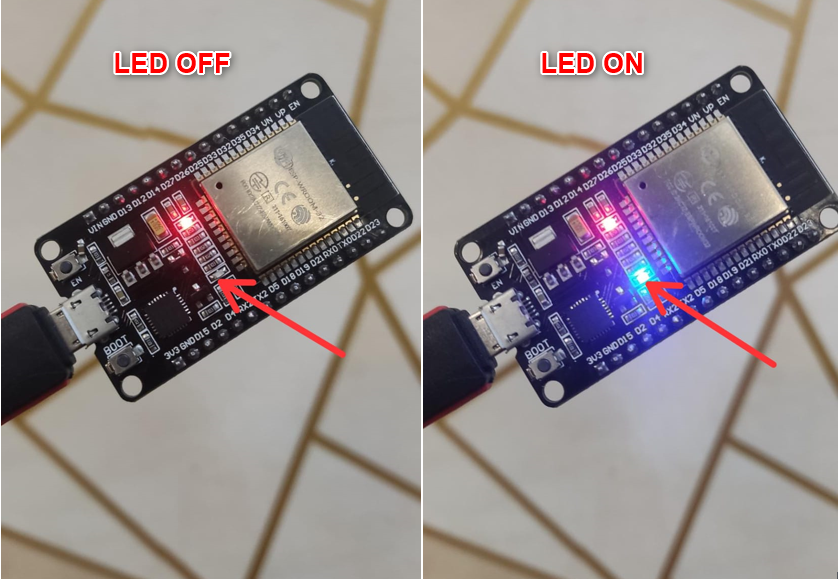
In output we can see the on board ESP32 blue LED will start blinking.
We have completed ESP32 installation with Mu Editor and successfully uploaded the first MicroPython sketch.
Conclusion
Mu Editor is on the list of easy-to-use MicroPython compilers. Here in this article, we interface ESP32 with Mu Editor and cover all the steps needed to program ESP32 board with MicroPython. Using this guide not only ESP but all MicroPython supported boards can be interfaced with Mu Editor.

