In this article, we will show you how to encrypt specific partitions from the Debian 12 installer and install Debian 12 on the encrypted partitions. We will also show you how to install Debian 12 on a fully encrypted disk as well.
Topic of Contents:
- Things to Know Before Encrypting the Partitions for Debian 12 Installation
- Encrypt Specific Partitions from the Debian 12 Installer
- Partition the Disks to Install Debian 12 on Fully Encrypted Disks
- Save the Changes and Continue the Debian 12 Installation
- Boot the Installed Debian 12 on Encrypted Partitions
- Conclusion
Things to Know Before Encrypting the Partitions for Debian 12 Installation
As of this writing, Debian 12 can’t boot from an encrypted ROOT (/) partition if you don’t have a separate unencrypted /boot and EFI partition. If you’re thinking about installing Debian 12 on a fully encrypted disk, you should create an unencrypted /boot partition, an unencrypted EFI boot partition, and must create an encrypted SWAP partition.
Encrypt Specific Partitions from the Debian 12 Installer
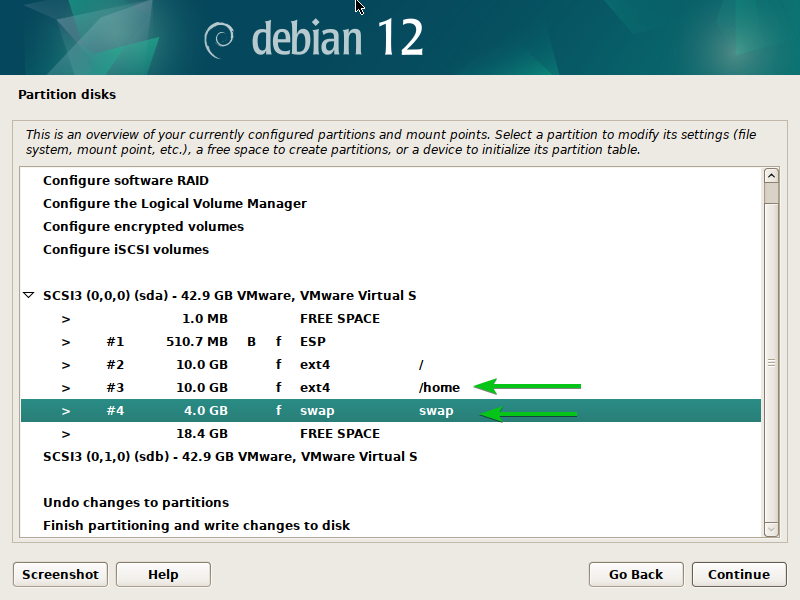
We create a typical disk partitioning layout for Debian 12 installation. For more information on ordinary (MBR/GPT) disk partitioning, read this article.
Let’s say, you want to encrypt the /home (sda disk partition #3) and swap (sda disk partition #4) the partitions.
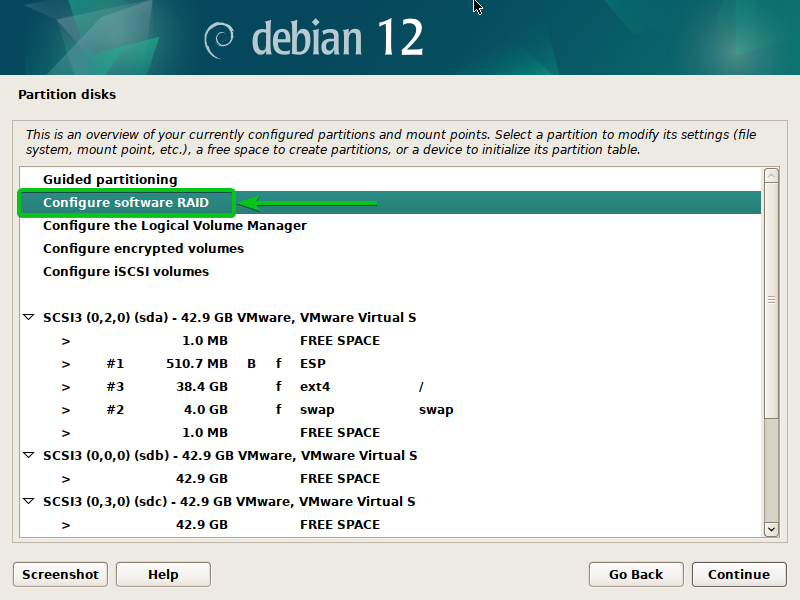
To configure the encrypted volumes from the Debian 12 installer, select “Configure encrypted volumes” from the Manual disk partitioning window.
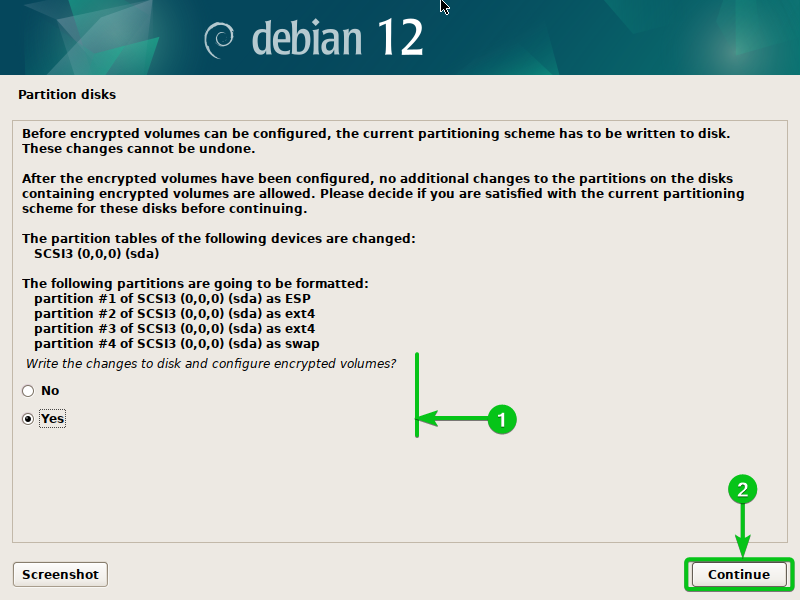
Select “Yes”[1] and click on “Continue”[2].
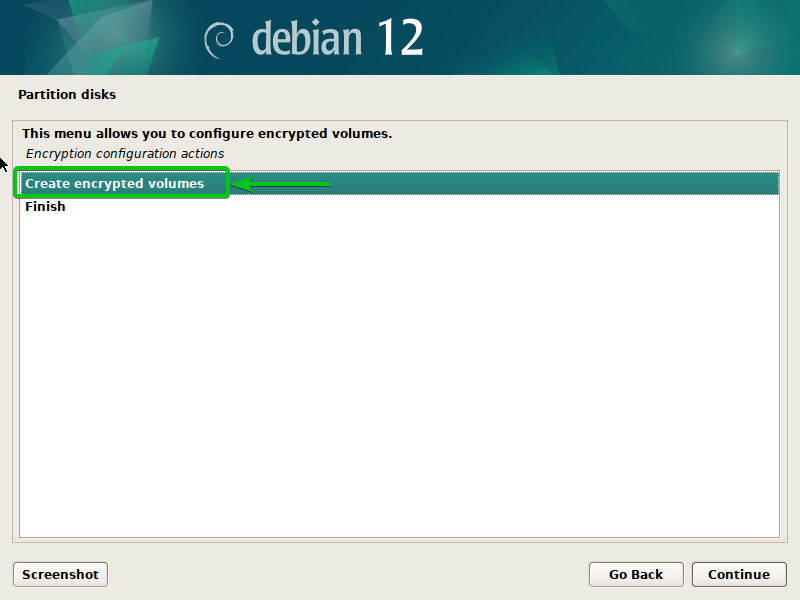
Select “Create encrypted volumes” and press <Enter>.
Select the partitions that you want to encrypt (sda3 and sda4 in this case)[1] and click on “Continue”[2].
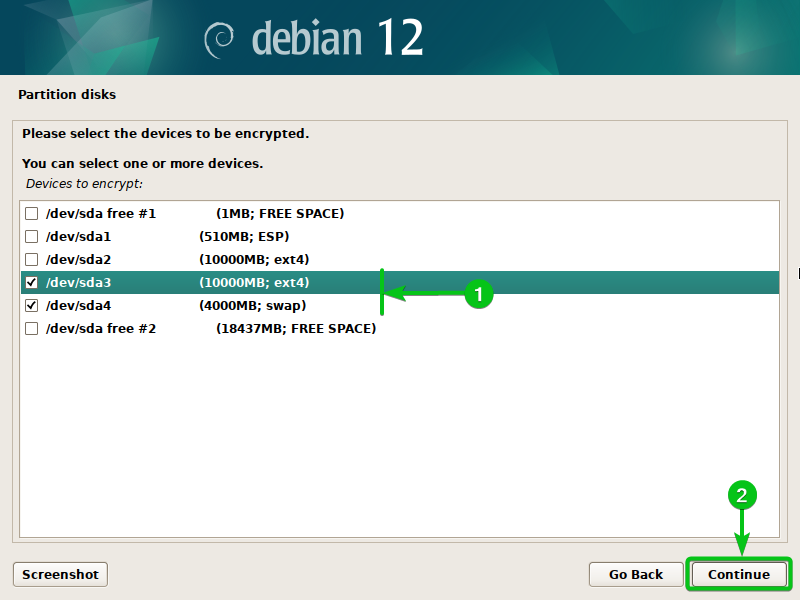
You will have to configure the encryption for each of the partitions that you selected earlier one by one.
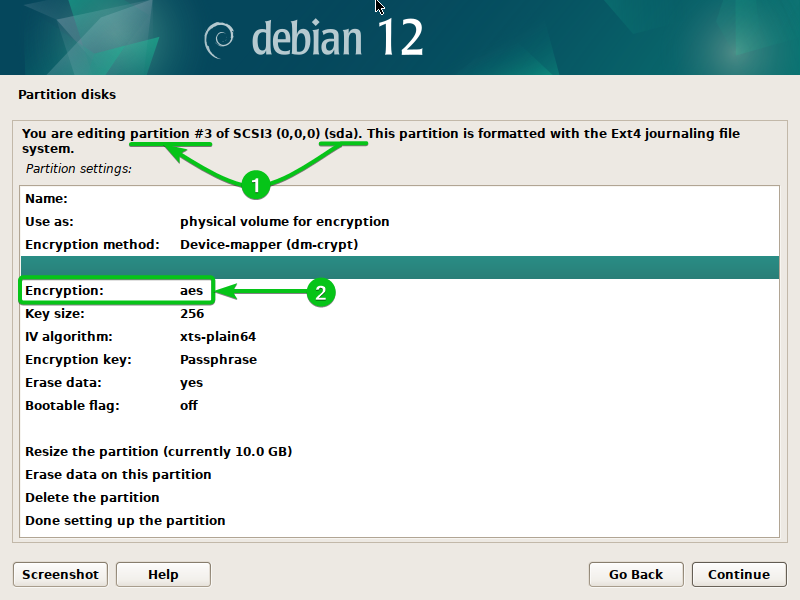
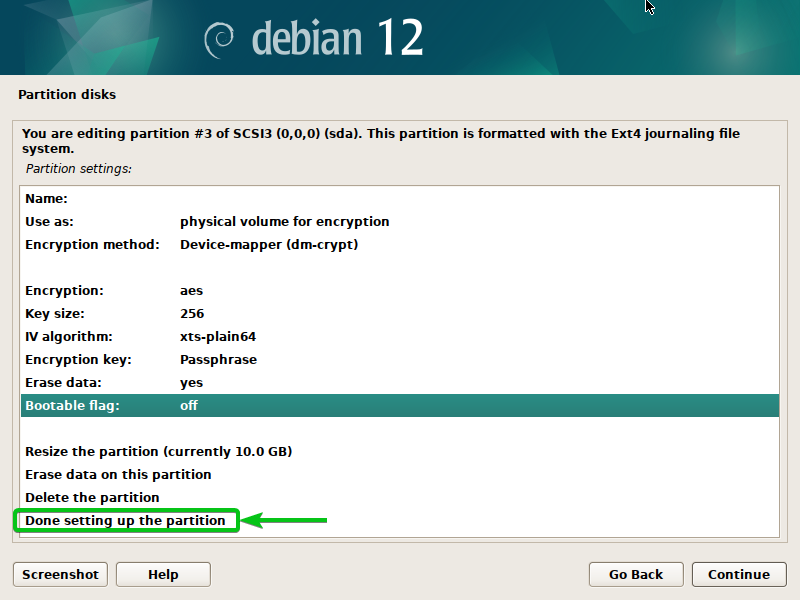
The disk (sda disk in this case) and partition number (partition #3 in this case) that you’re encrypting should be displayed at the top[1].
To pick an encryption method for the partition, select “Encryption” and press <Enter>[2].
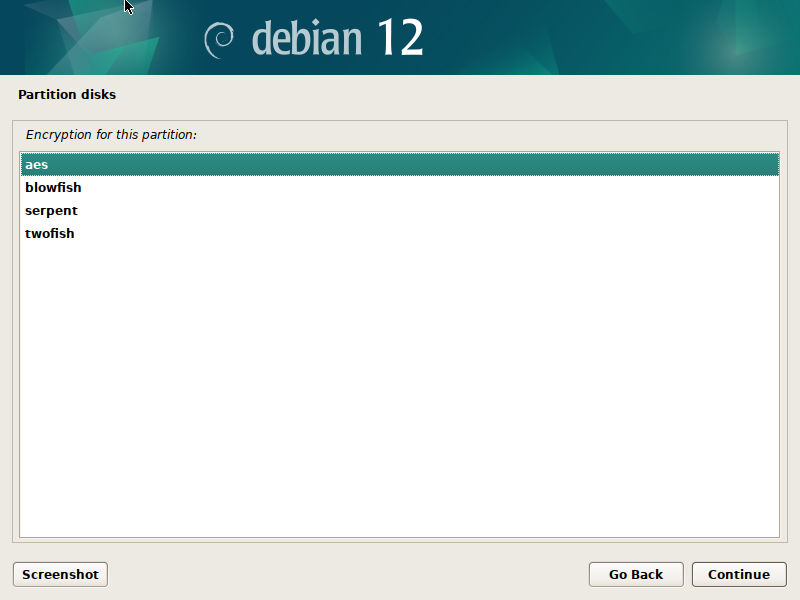
Select the encryption algorithm that you want to use for this partition and press <Enter>. The currently supported encryption algorithms are AES (Advanced Encryption Standard), Blowfish, Serpent, and Twofish.
To select a key size for the encrypted partition, select the “Key size” and press <Enter>.
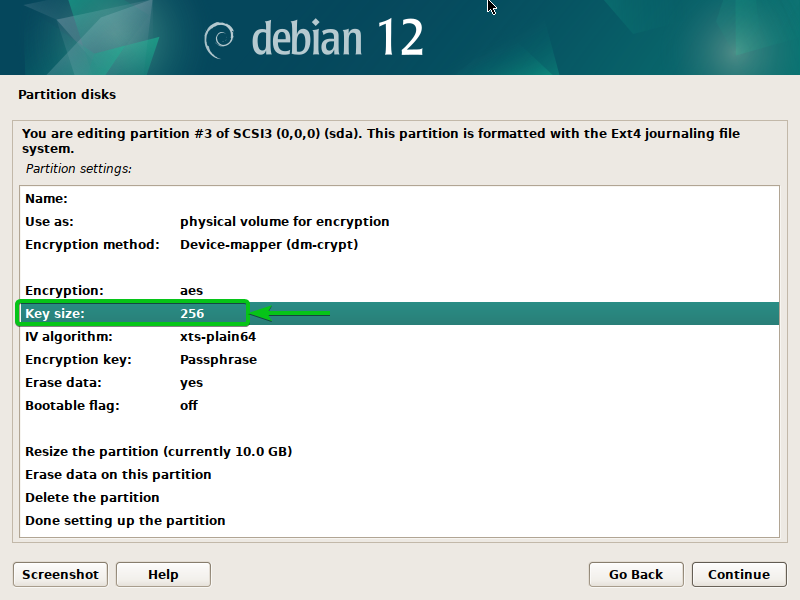
Select your desired key size for the encryption algorithm from the list and press <Enter>.
The larger the key size, the more secure the encryption will be. The larger the key size, the more time (or processing power) it takes to decrypt the encrypted file.

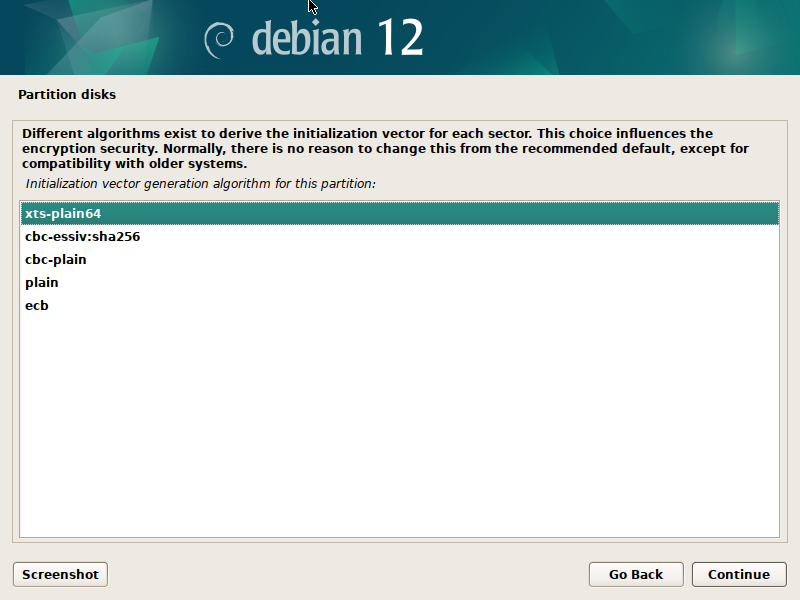
To select an Initialization Vector (IV) algorithm for the encryption, select the “IV algorithm” and press <Enter>.
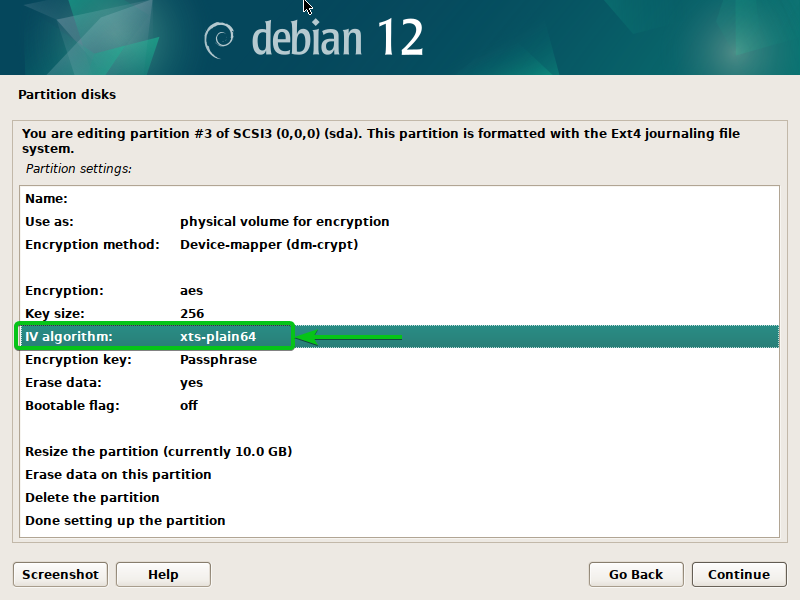
Select your desired initialization vector generation algorithm from the list and press <Enter>.
To select the type of encryption key that you want to use, select the “Encryption key” and press <Enter>.
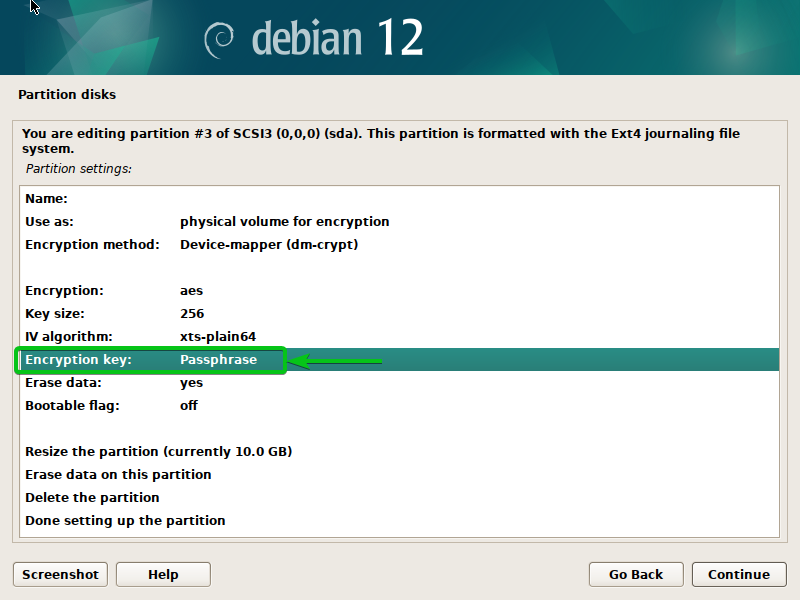
Select one of the encryption key types from the list and press <Enter>.
Passphrase: Select this option if you want to use a password as an encryption key. You will be asked for it every time you boot your Debian 12 system. The password will be used to decrypt the encrypted disks.
Random Key: Select this option if you want to use a randomly generated encryption key. You will not be asked for the encryption key while booting Debian 12. Instead, the randomly generated encryption key will be read from a secured file.

If you want to erase all the data from the partition, toggle on “Erase data” to “yes”.
To toggle on “Erase data”, select it, and press <Enter>.

Once you’re done, select “Done setting up the partition” and press <Enter>.
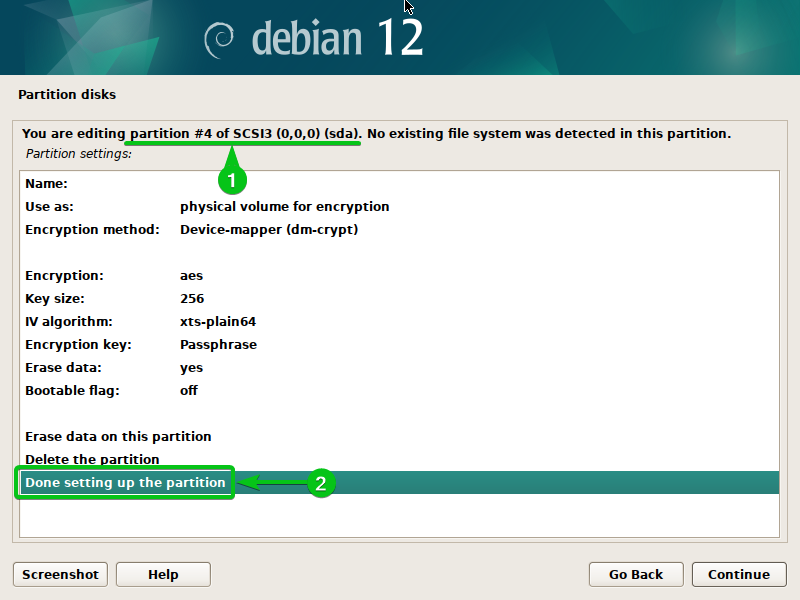
You can configure the encryption for the other partitions in the same way.
Just select your preferred encryption options for the partition[1], select “Done setting up the partition”[2], and press <Enter>.
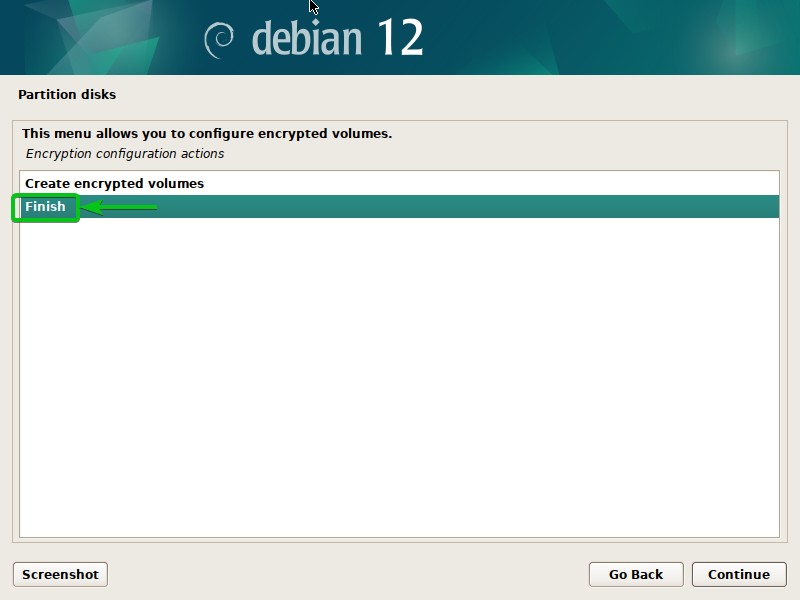
Select “Finish” and press <Enter>.
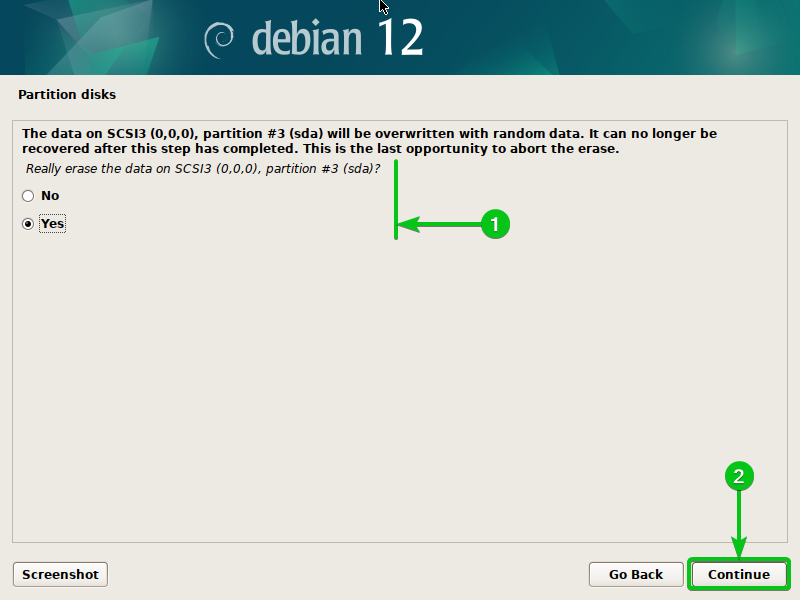
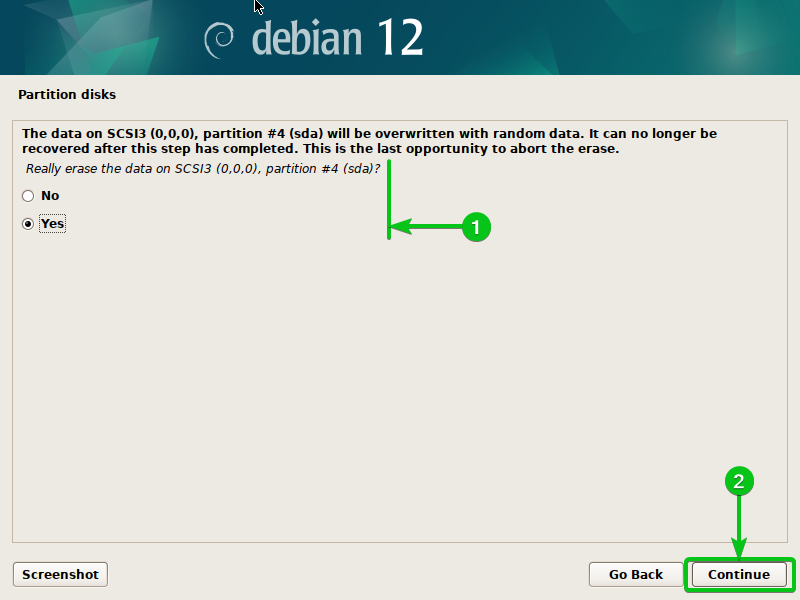
You will be asked whether you want to erase the data of the partition (sda disk partition #3) that you selected for encryption.
Select “Yes”[1] and click on “Continue”[2].
The data of the partition (sda disk partition #3) to be encrypted is being erased. It takes a while to complete depending on the size of the partition.

You will be asked to erase the data of all the partitions that you selected to encrypt one by one.
Just select “Yes”[1] and click on “Continue”[2] as you did earlier.
The data of the partition (sda disk partition #4) to be encrypted is being erased. It takes a while to complete depending on the size of the partition.

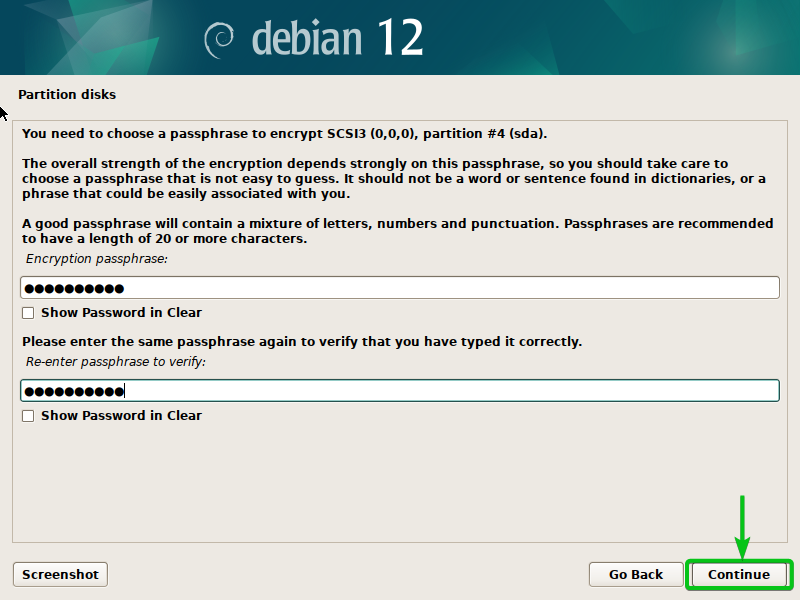
Once the data of all the partitions are erased, you will be asked to enter an encryption passphrase for each of the partitions that you selected for encryption.
Type in an encryption passphrase for the partition (sda disk partition #3 in this case) and click on “Continue”.

Type in an encryption passphrase for the partition (sda disk partition #4 in this case) and click on “Continue”.
The selected partitions should be encrypted.
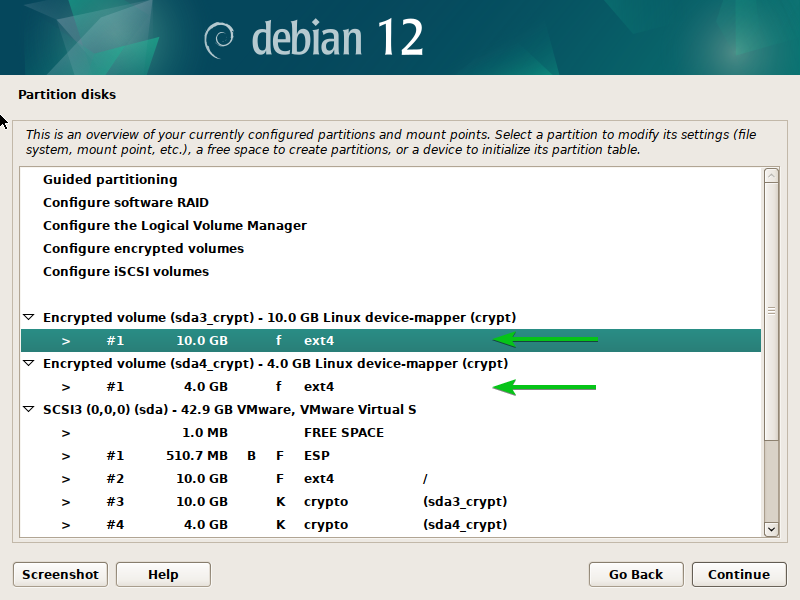
The filesystem and mount point configuration of the partition that you encrypted might be lost. So, you have to reconfigure the filesystem and mount point for the encrypted partitions.
To reconfigure a filesystem and mount point for an encrypted partition, select it and press <Enter>.
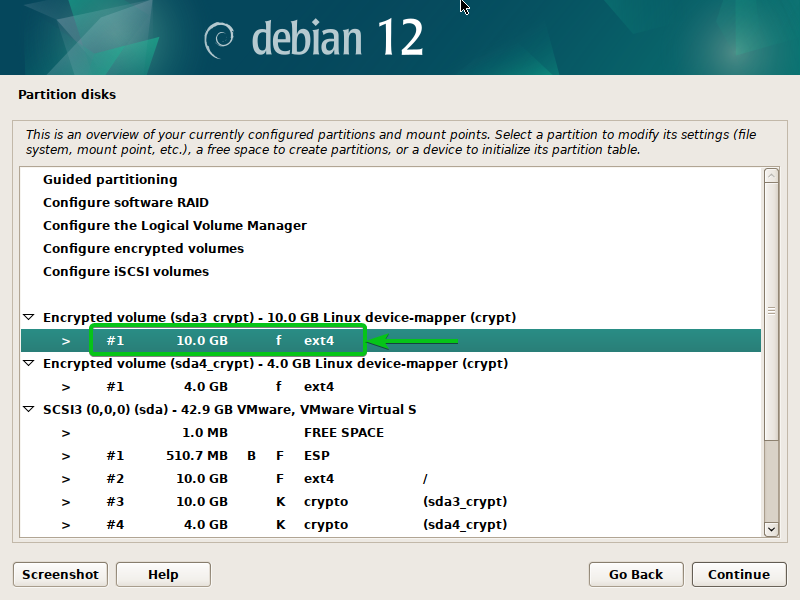
For this partition, the filesystem is selected correctly; only the mount point is not correct.
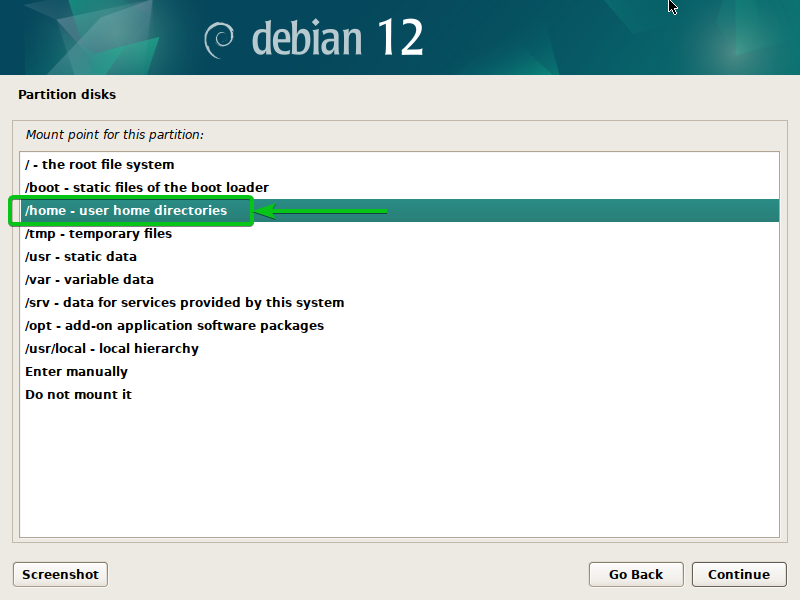
So, select the “Mount point” and press <Enter>.

Select the correct mount point for the encrypted partition and press <Enter>.
Once you’re done, select “Done setting up the partition” and press <Enter>.
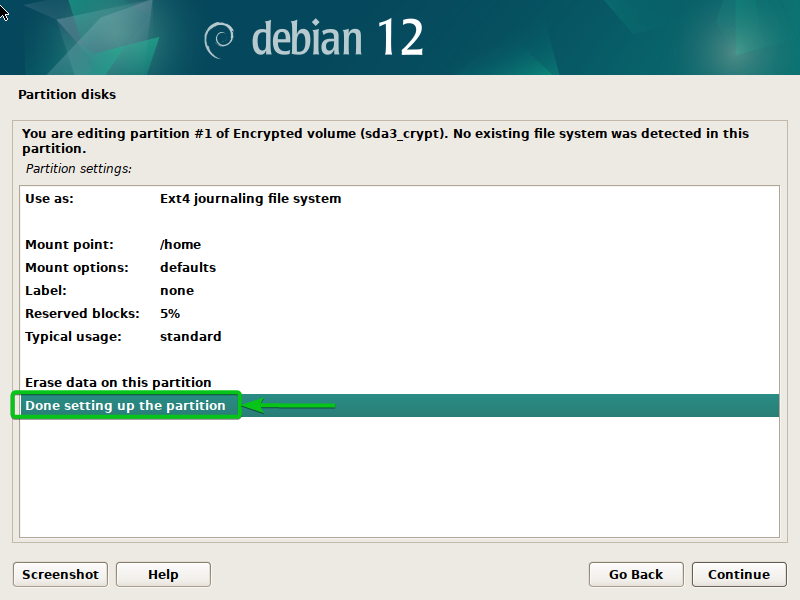
The correct mount point should be set for the encrypted partition.
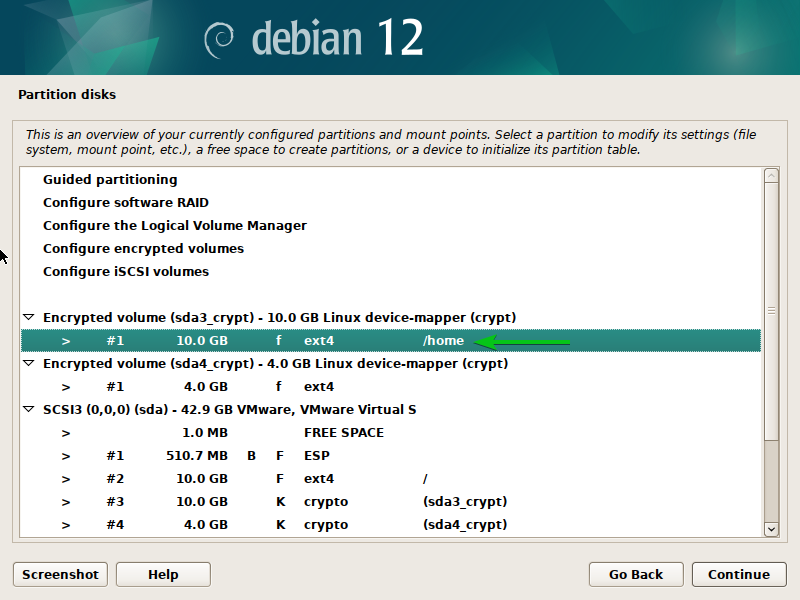
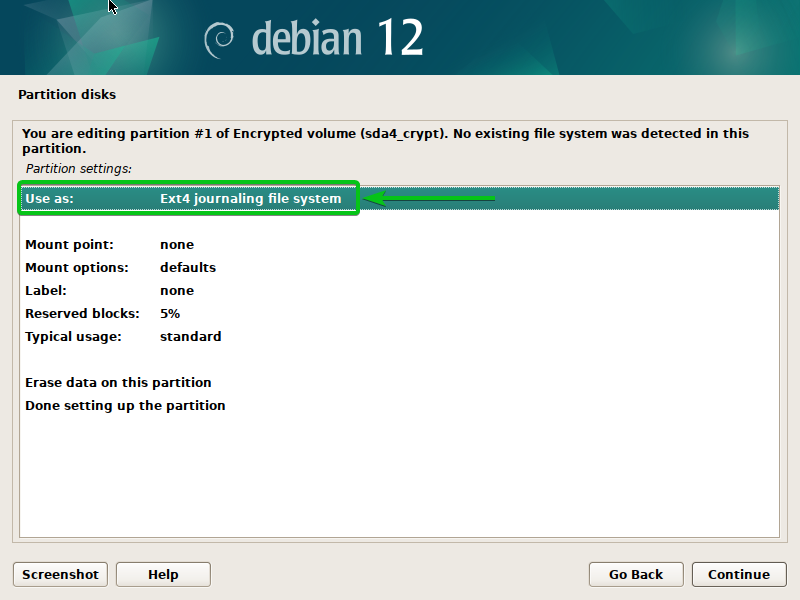
In the same way, select the second encrypted partition and press <Enter>.
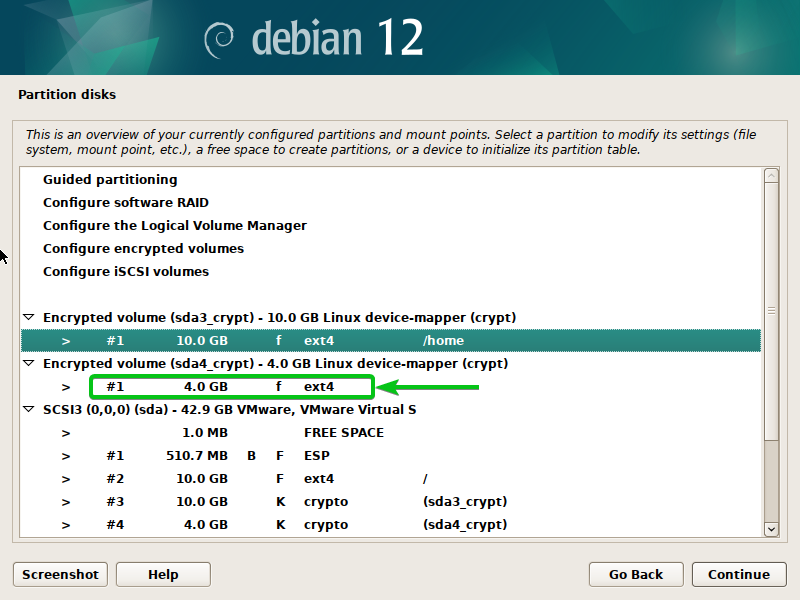
Since this was a swap partition, the filesystem type should be changed for this partition.
Select “Use as” and press <Enter>.
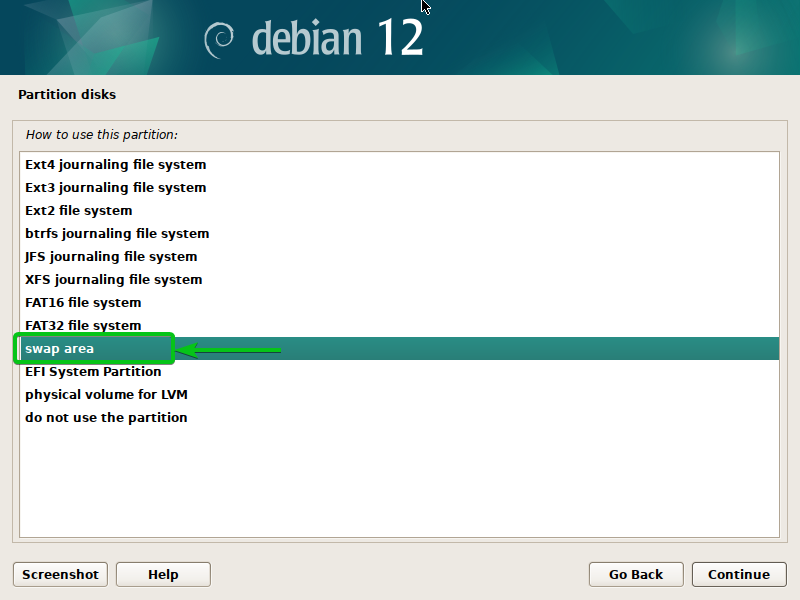
Select “Swap area” and press <Enter>.
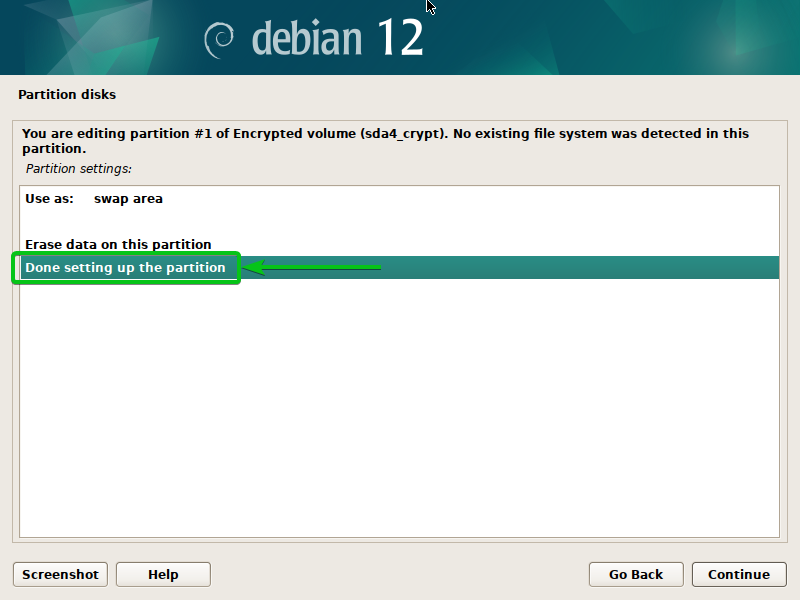
Select “Done setting up the partition” and press <Enter>.
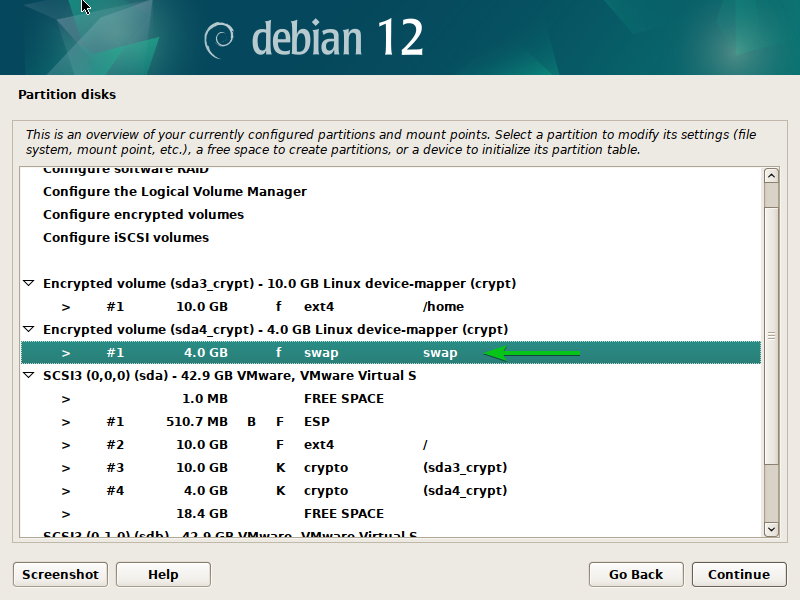
An encrypted swap partition should be configured. Now, you can save the changes and install Debian 12 on the disk.
Partition the Disks to Install Debian 12 on Fully Encrypted Disks
To install Debian 12 on a fully encrypted disk, you must create an EFI boot partition and a /boot partition on the disk first. Then, you have to encrypt the remaining FREE SPACE and manage the encrypted disk with LVM. Finally, you can create an encrypted ROOT and a SWAP partition using LVM and install Debian 12 on the encrypted partitions.
For more information on LVM disk partitioning from the Debian 12 installer, read this article.
For more information on disk partitioning (MBR/GPT) from the Debian 12 installer, read this article.
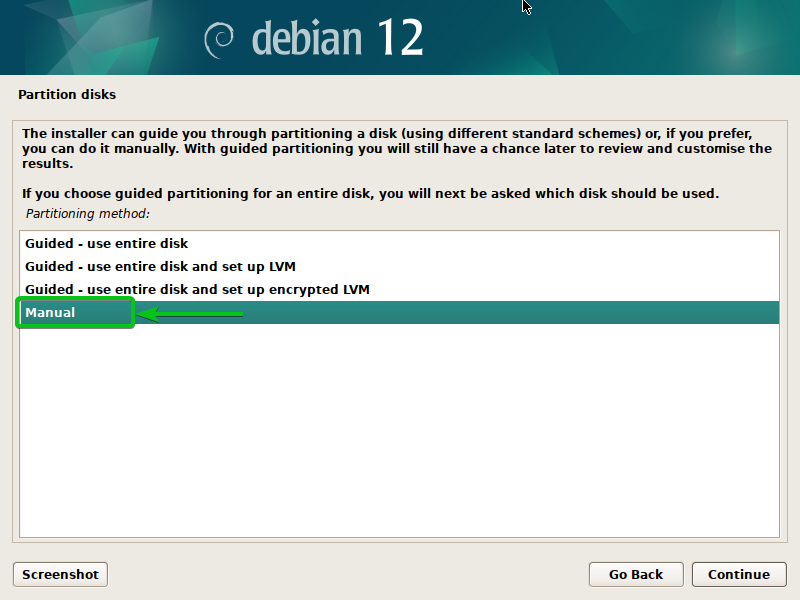
For manual disk partitioning, select “Manual” and press <Enter>.
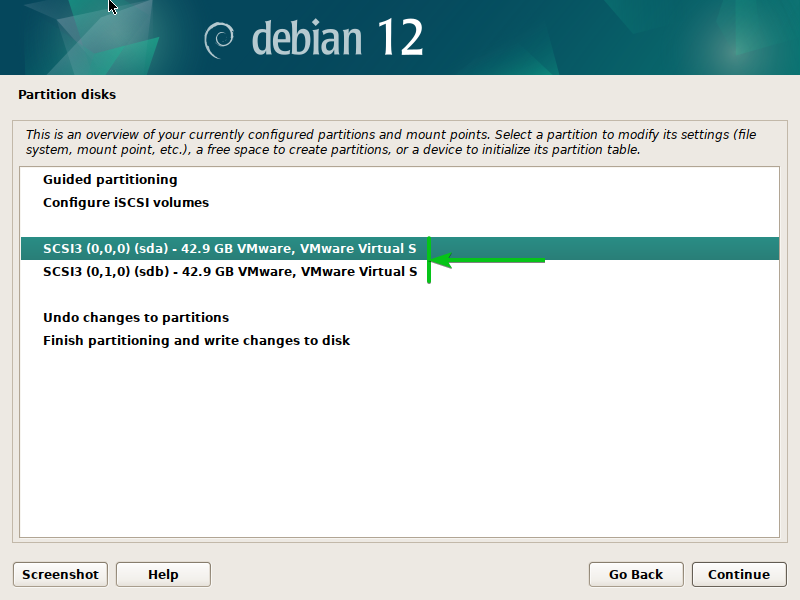
You will see all the disks that are installed on your computer.
To create a new partition table on a disk, select it and press <Enter>.
Select “Yes”[1] and click on “Continue”[2].
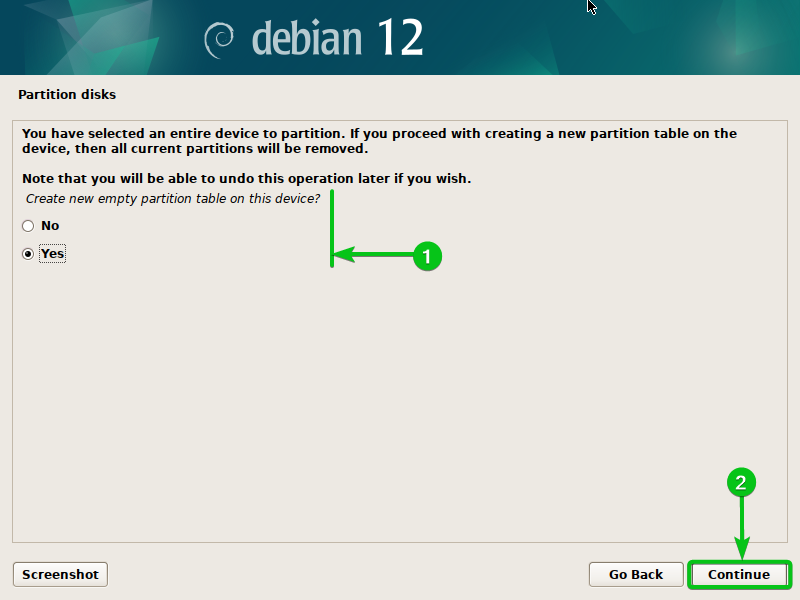
A new partition table should be created.
To create a new partition on the disk, select “FREE SPACE” and press <Enter>.

Select “Create a new partition” and press <Enter>.

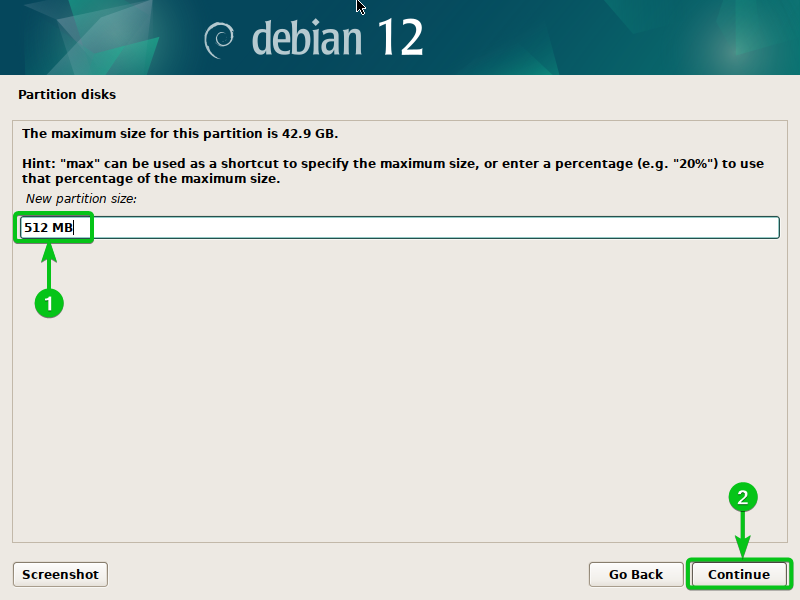
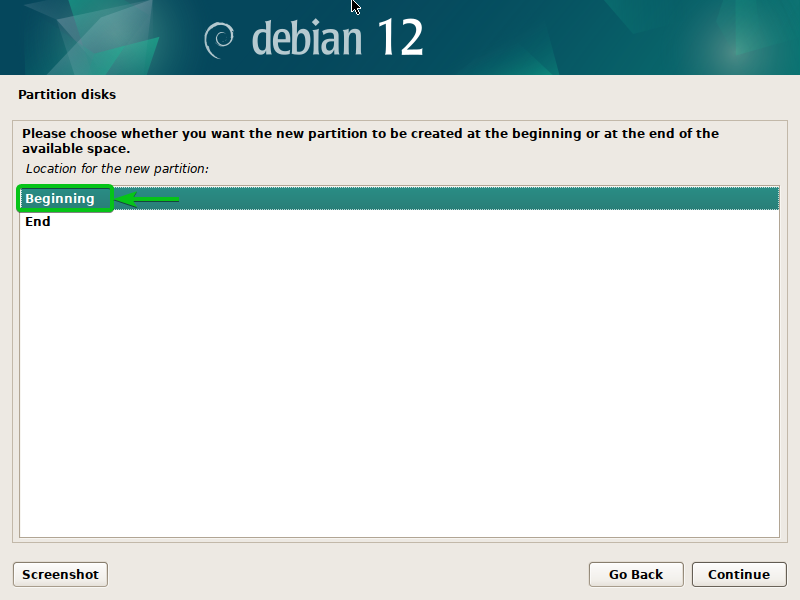
This will be the EFI boot partition. So, type in “512 MB” as the partition size[1] and click on “Continue”[2].
Select “Beginning” and press <Enter>.
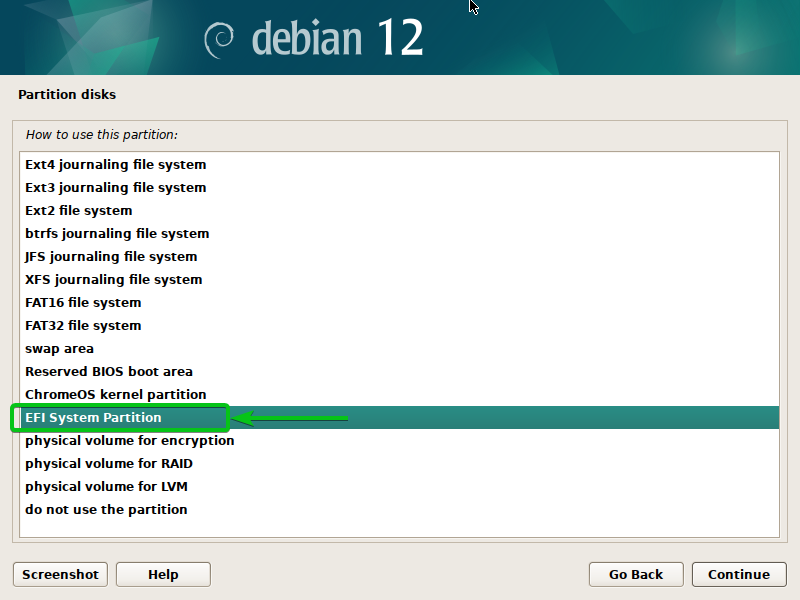
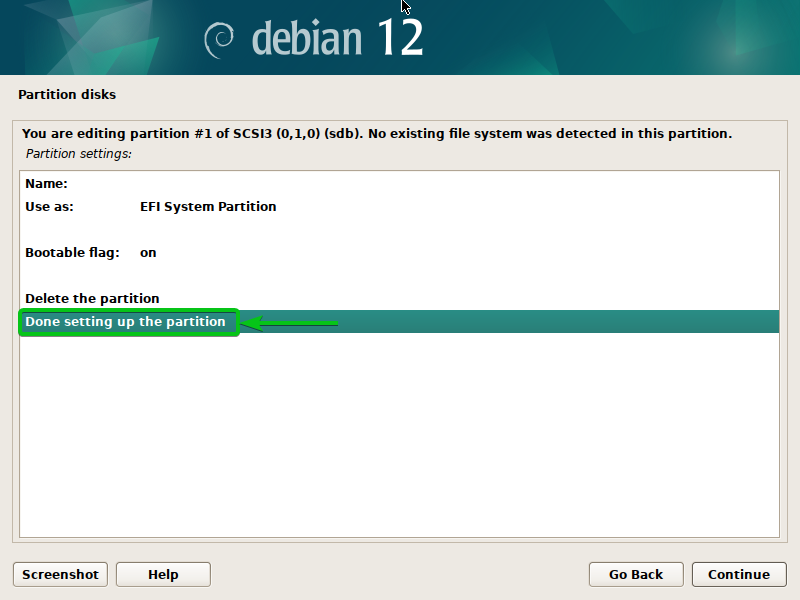
Select the “EFI System Partition” as the filesystem type (Use as)[1], select “Done setting up the partition”[2], and press <Enter>.
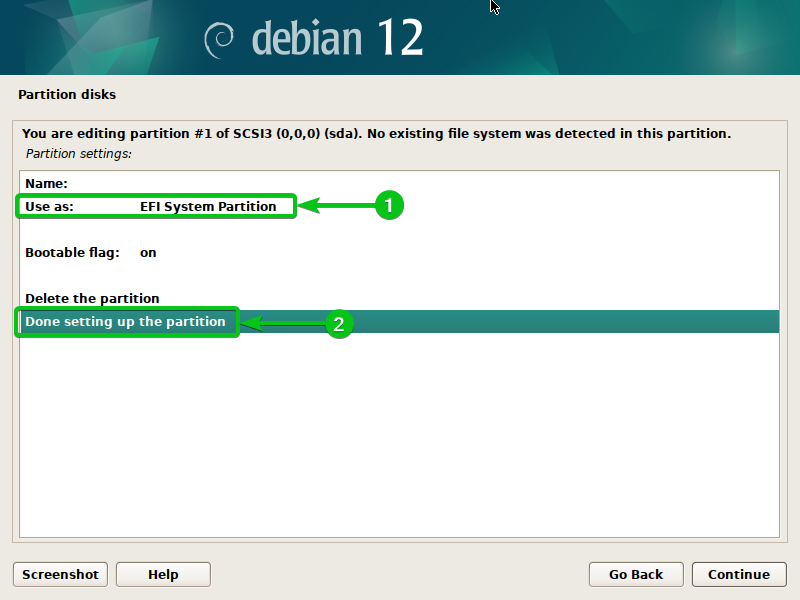
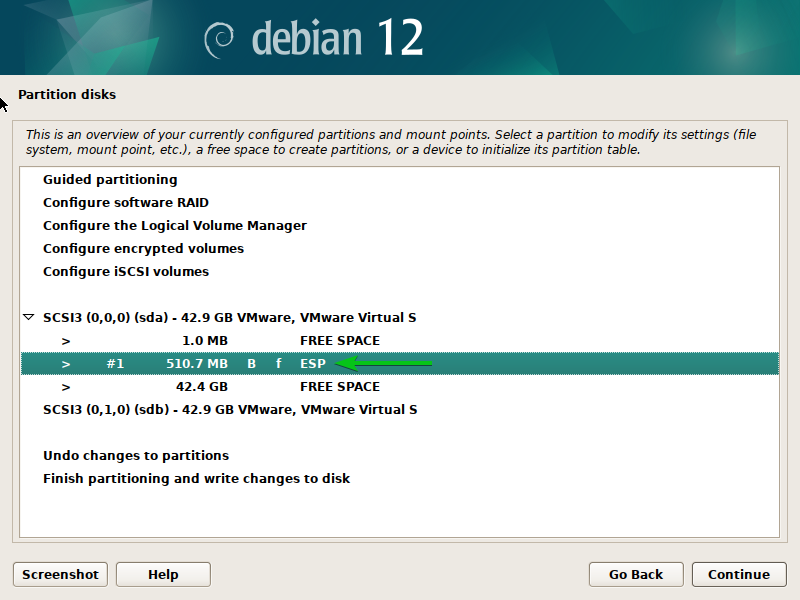
An EFI boot partition should be created.
To create another partition, select “FREE SPACE” and press <Enter>.
Select “Create a new partition” and press <Enter>.

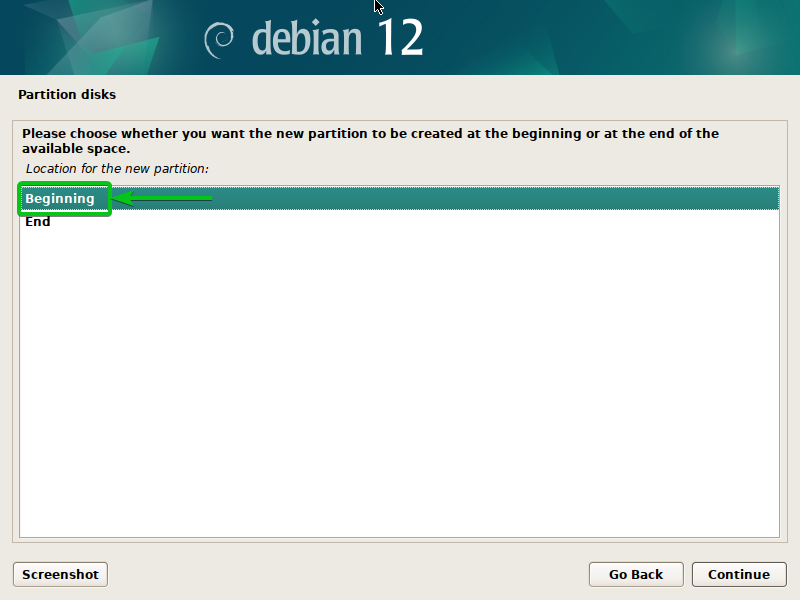
This will be the /boot partition. So, type in “1 GB” as the partition size[1] and click on “Continue”[2].

Select “Beginning” and press <Enter>.
Select the “Ext4 journaling file system” as the filesystem type (Use as)[1], select /boot as the Mount point for the filesystem[2], select “Done setting up the partition”[3], and press <Enter>.

A /boot partition should be created.

To encrypt the remaining FREE SPACE, select “Configure encrypted volumes” and press <Enter>.

Select “Yes”[1] and click on “Continue”[2].
Select “Create encrypted volumes” and press <Enter>.
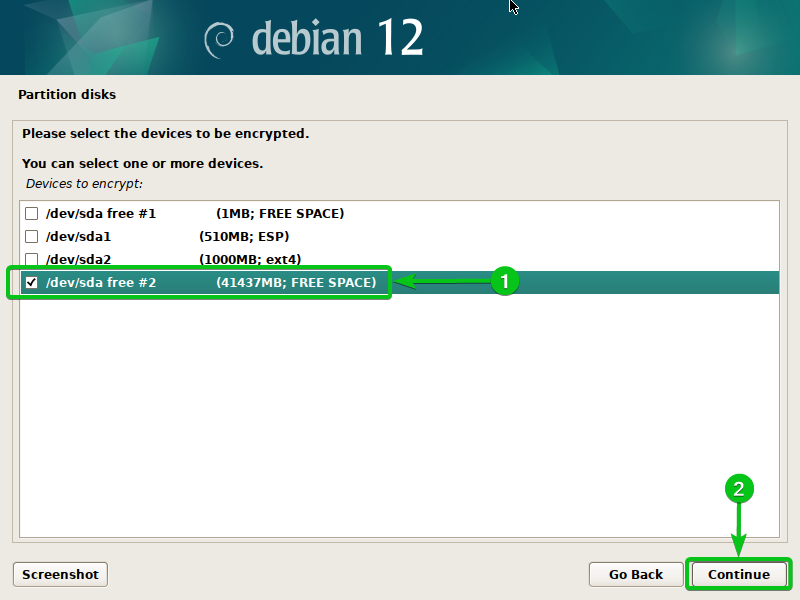
Select the remaining FREE SPACE[1] and click on “Continue”[2].
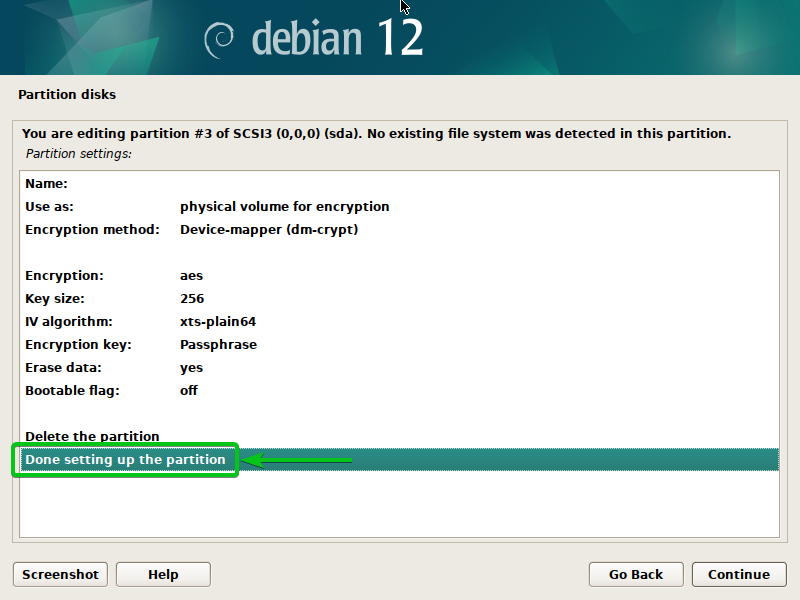
Configure the encryption settings for the disk, select “Done setting up the partition”, and press <Enter>.
We explained each of the encryption settings in the Encrypt Specific Partitions from Debian 12 Installer section of this article.
Select “Yes”[1] and click on “Continue”[2].
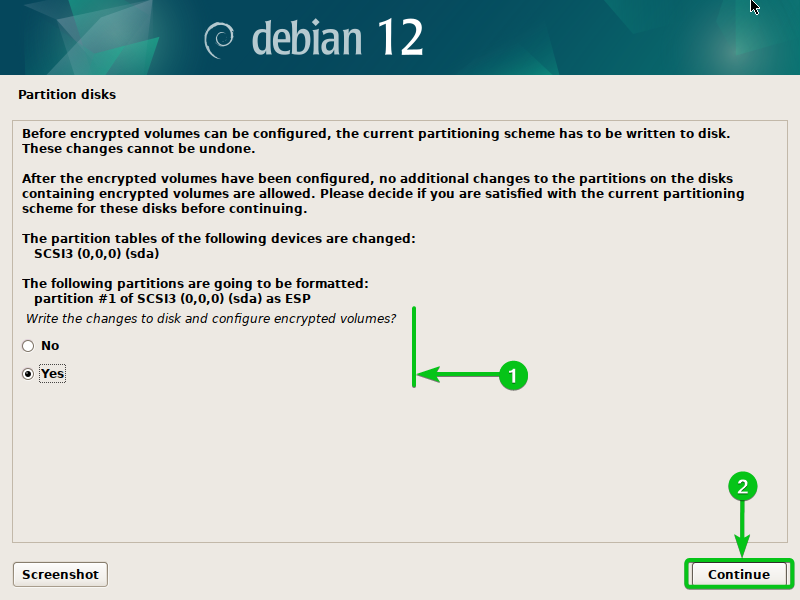
Select “Finish” and press <Enter>.

Select “Yes”[1] and click on “Continue”[2].

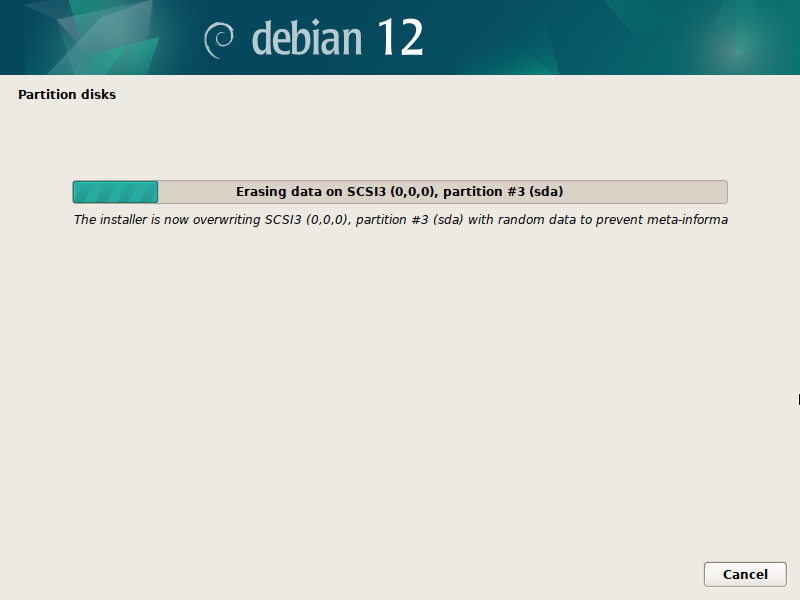
The data of the partition is being erased. It takes a while to complete depending on the size of the partition.
Once the data of the partition is erased, type in an encryption passphrase and click on “Continue”.

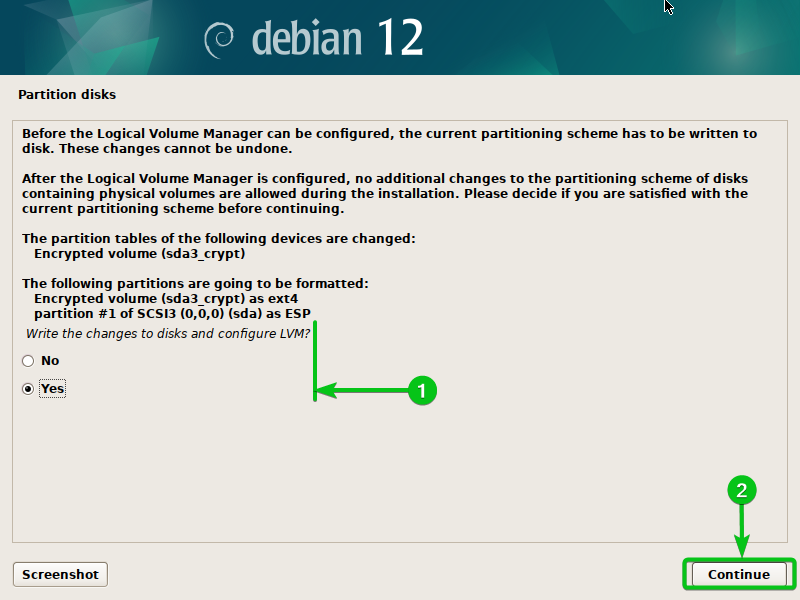
An encrypted partition should be created[1]. To configure LVM on the encrypted partition, select “Configure the Logical Volume Manager” and press <Enter>[2].

Select “Yes”[1] and click on “Continue”[2].
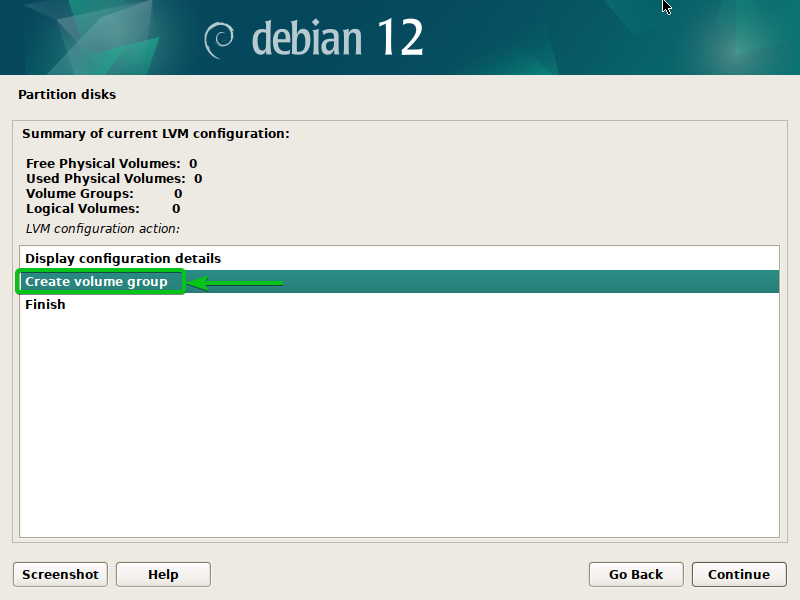
Select “Create volume group” and press <Enter>.
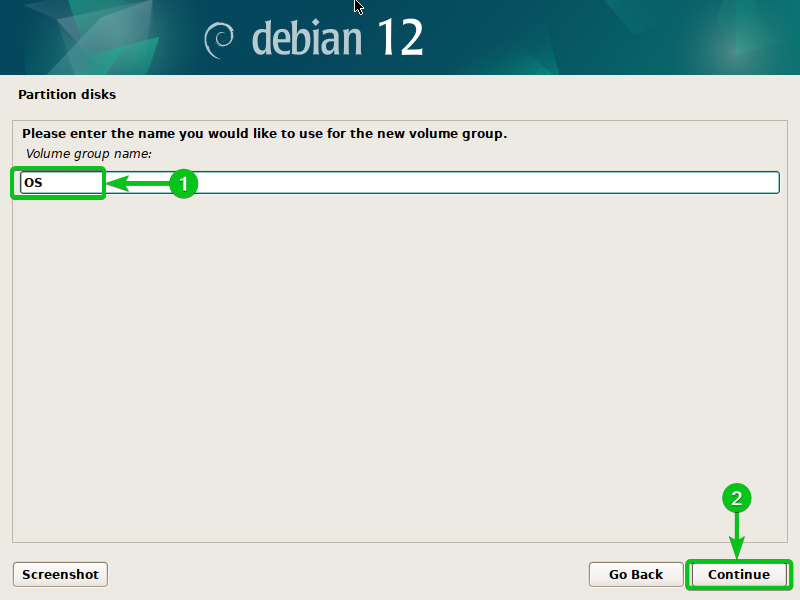
Type in a name for the volume group[1] and click on “Continue”[2].
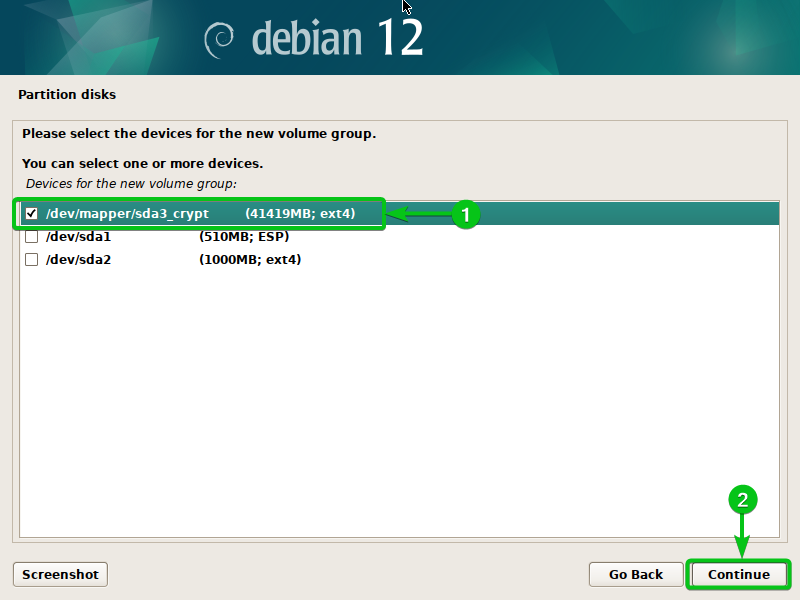
Select the encrypted partition from the list[1] and click on “Continue”[2].
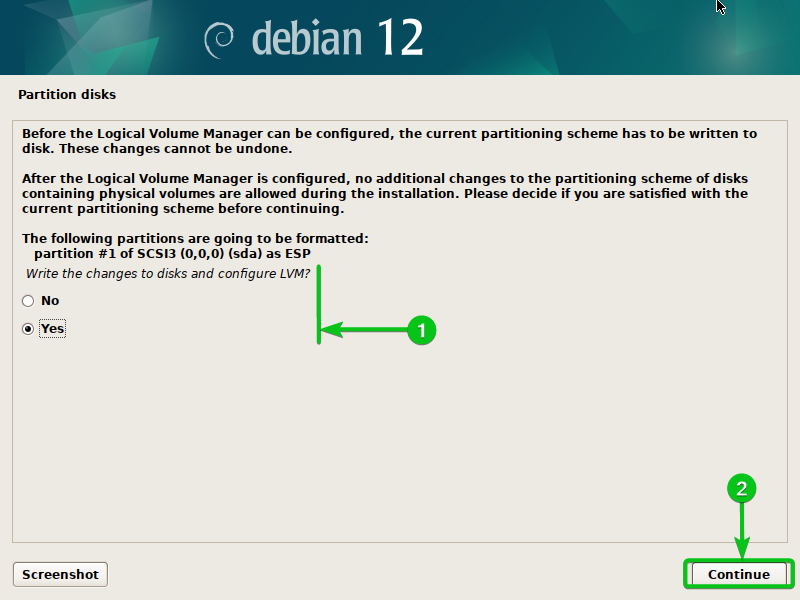
Select “Yes”[1] and click on “Continue”[2].
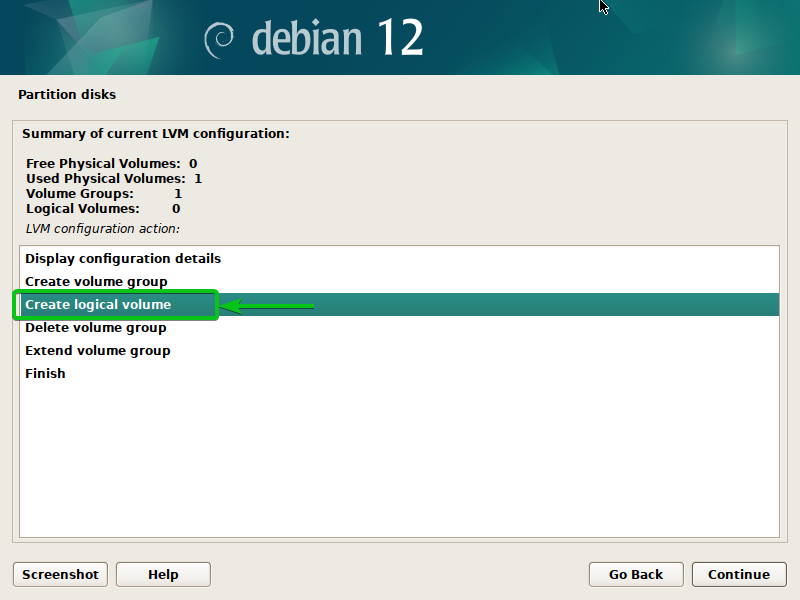
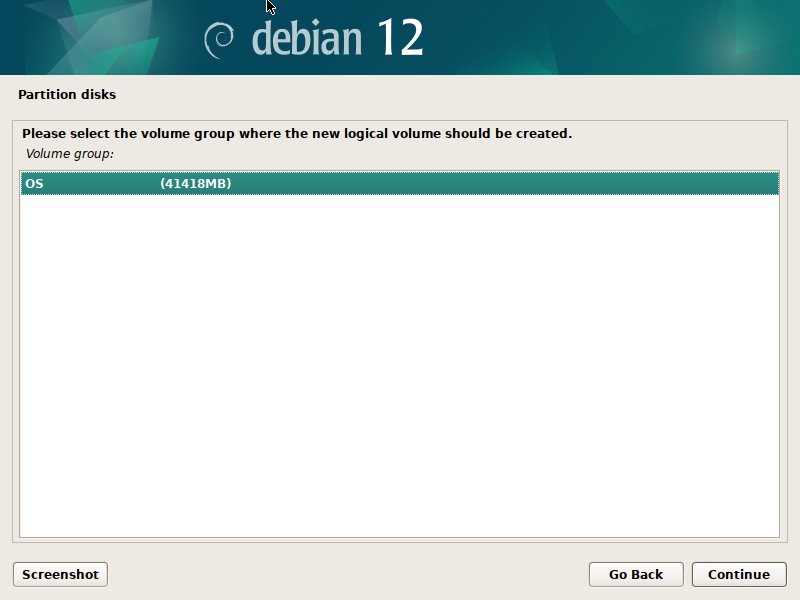
Select “Create logical volume” and press <Enter>.
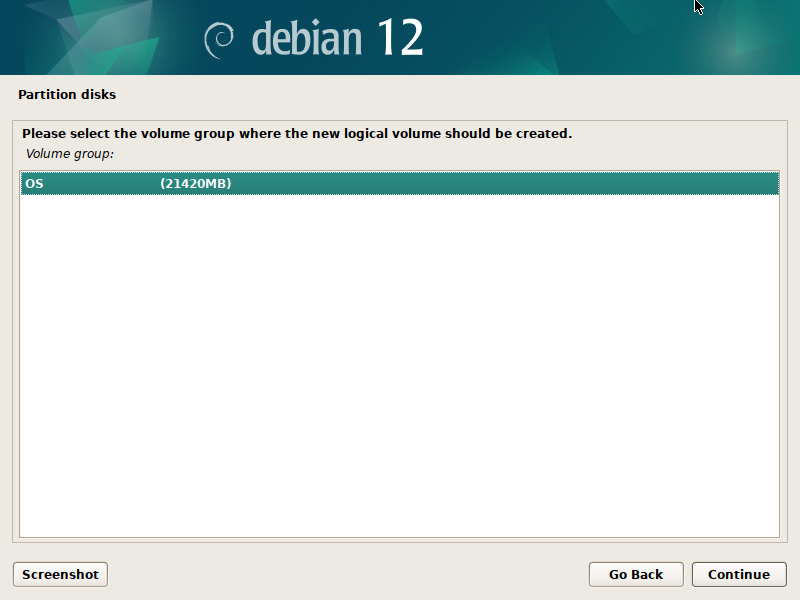
Select the volume group that you created earlier and press <Enter>.
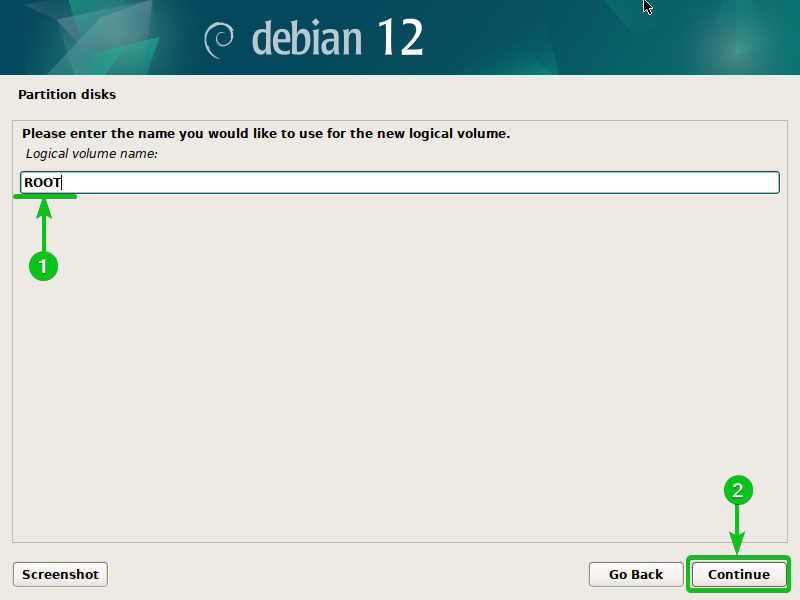
Type in “ROOT” as the name of the LVM logical volume[1] and click on “Continue”[2].
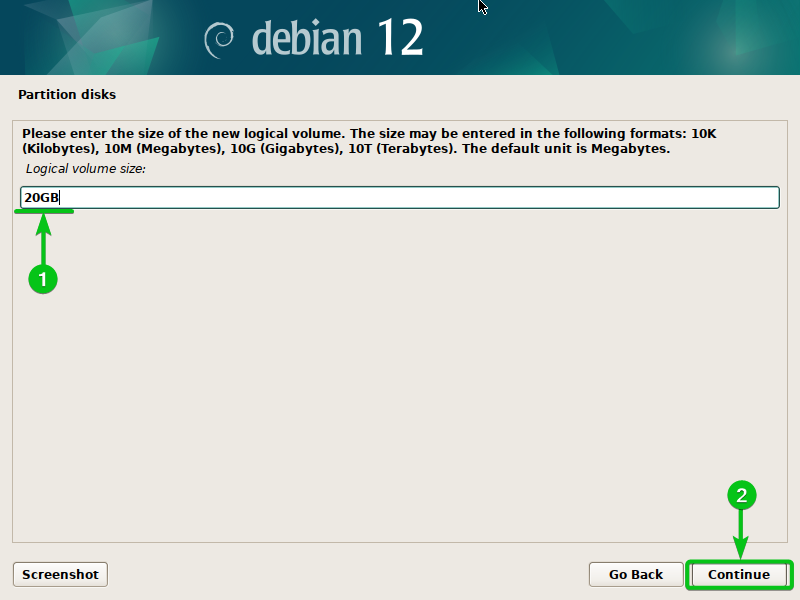
Type in a size for the ROOT LVM logical volume[1] and click on “Continue”[2].
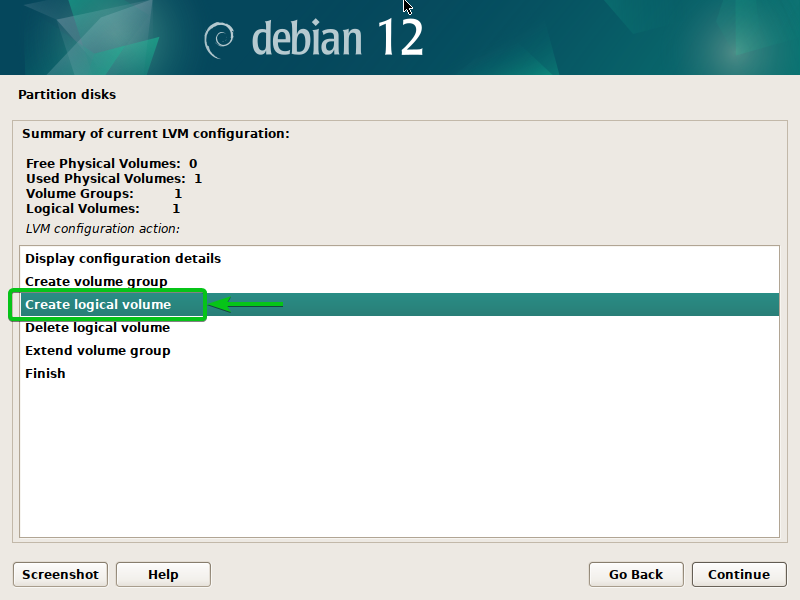
An encrypted LVM logical volume ROOT should be created.
To create a new partition, select “Create logical volume” and press <Enter>.
Select the volume group that you created earlier and press <Enter>.
Type in “SWAP” as the name of the LVM logical volume[1] and click on “Continue”[2].
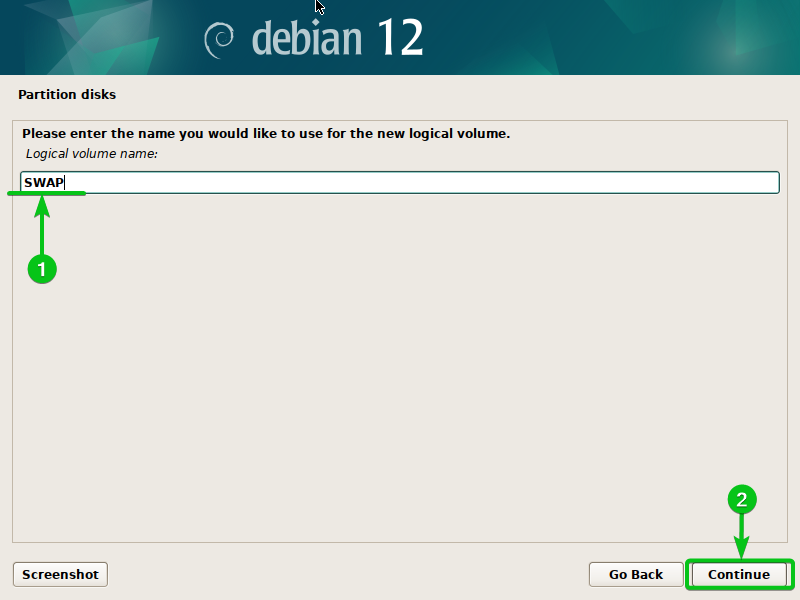
Type in a size for the SWAP LVM logical volume[1] and click on “Continue”[2].

An encrypted LVM logical volume SWAP should be created.
Select “Finish” and press <Enter>.
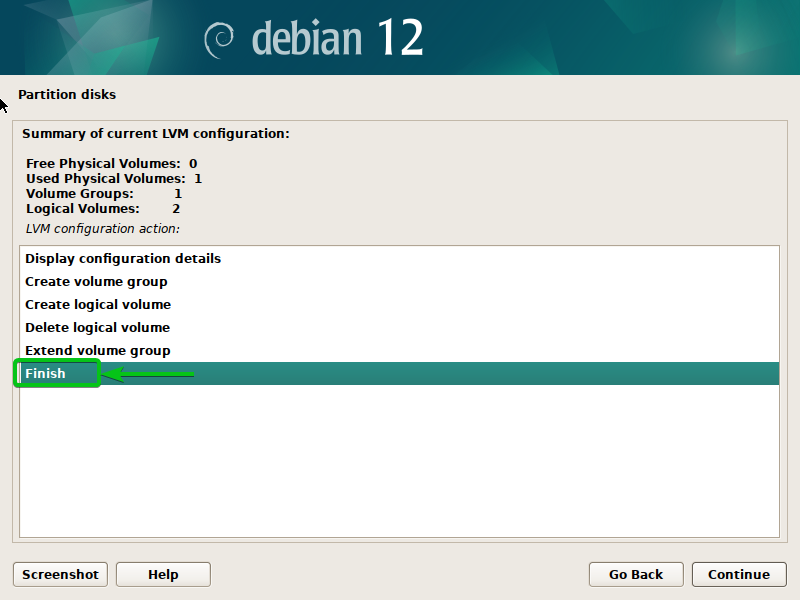
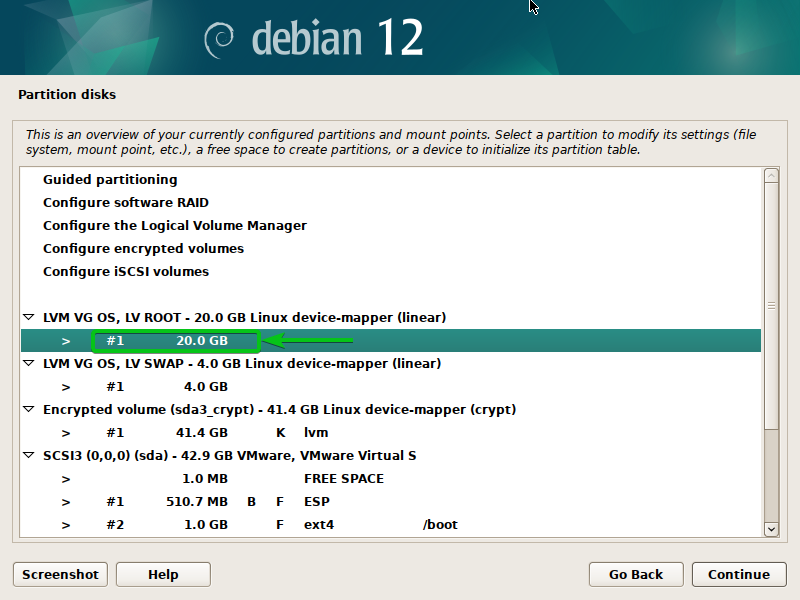
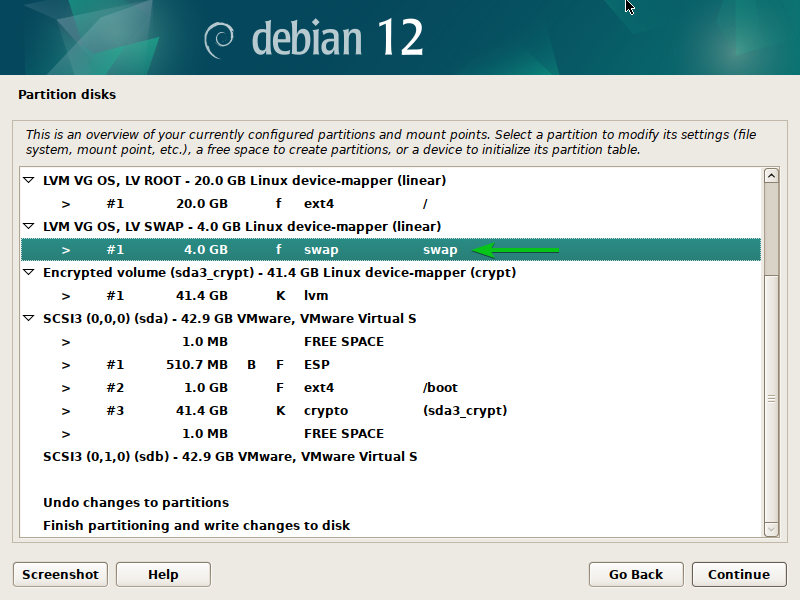
The encrypted LVM logical volumes ROOT and SWAP should be created.
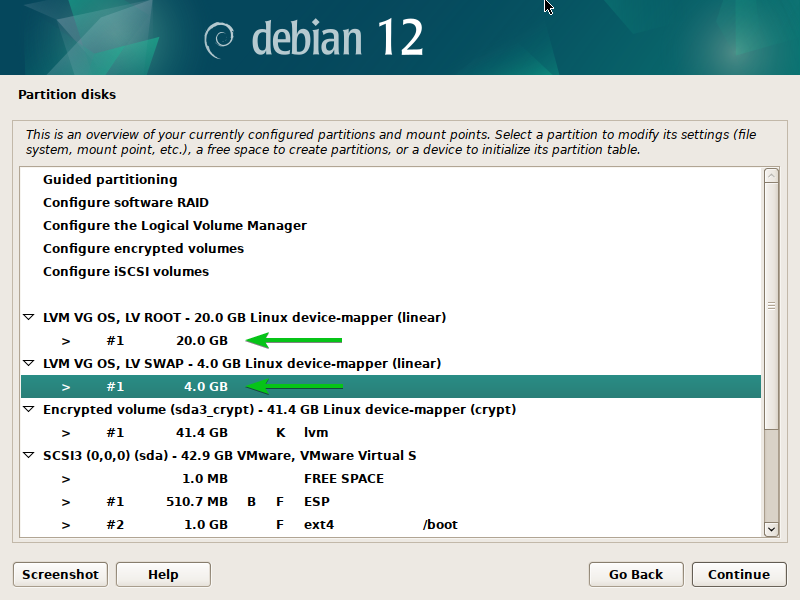
Select the encrypted LVM logical volume ROOT and press <Enter>.
Select the “Ext4 journaling file system” as the filesystem type (Use as)[1], select “/” as the Mount point for the filesystem[2], select “Done setting up the partition”[3], and press <Enter>.
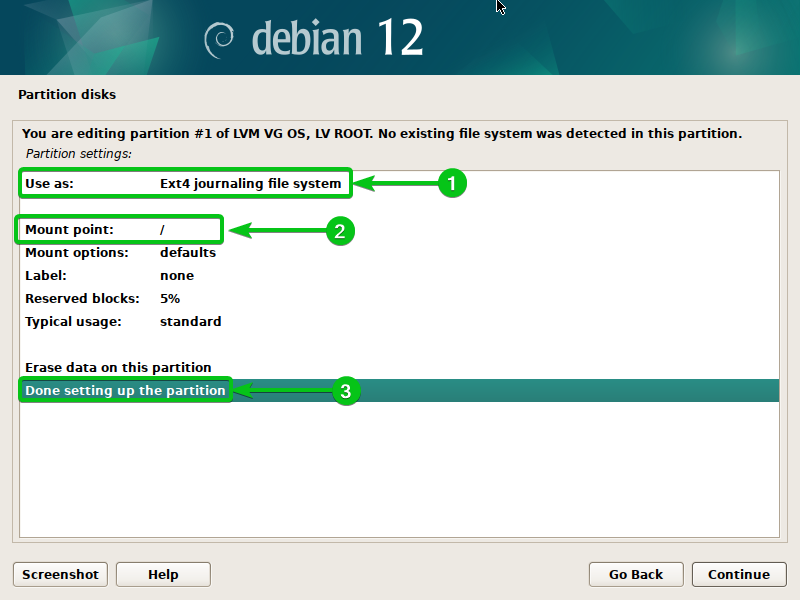
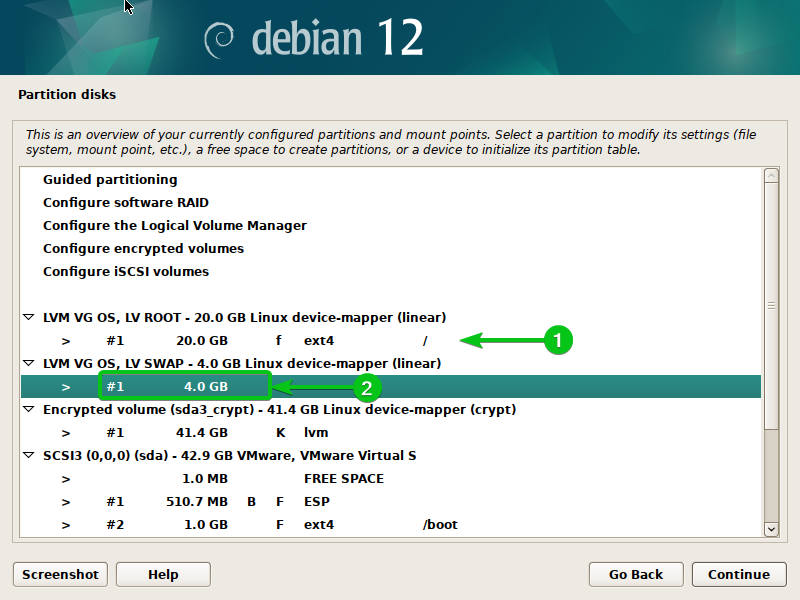
The correct filesystem and mount point should be set for the encrypted LVM logical volume ROOT[1].
Select the encrypted LVM logical volume SWAP and press <Enter>[2].
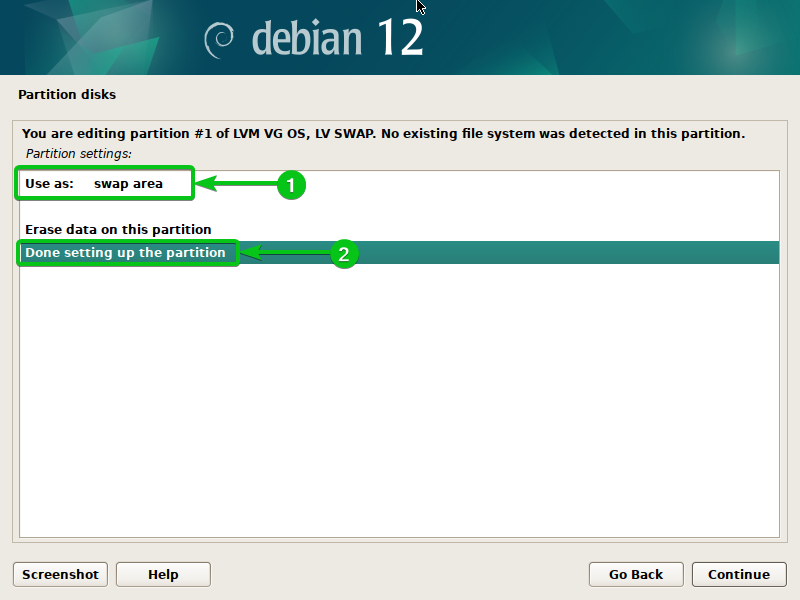
Select the “Swap area” as the filesystem type (Use as)[1], select “Done setting up the partition”[2], and press <Enter>.
Select the encrypted LVM logical volume SWAP and press <Enter>. Now, you can save the changes and install Debian 12 on the disk.
Save the Changes and Continue the Debian 12 Installation
Whether you decided to encrypt specific partitions or install Debian 12 on fully encrypted disk, once you’ve done the necessary partitioning, save the changes to the disk and continue the Debian 12 installation.
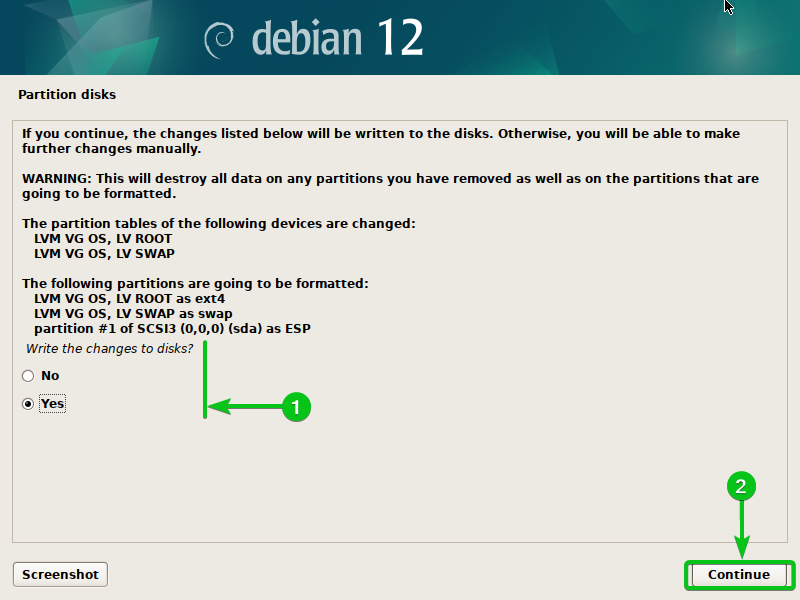
To save the changes to the disk, select “Finish partitioning”, write the changes to disk, and press <Enter>.

Select “Yes”[1] and click on “Continue”[2].
Debian 12 is being installed on the encrypted disk. It takes a while to complete.

Boot the Installed Debian 12 on Encrypted Partitions
Once Debian 12 is installed on the encrypted disk and you boot Debian 12, you will be prompted to enter the encryption passphrase for the disk.
Type in the encryption passphrase and press <Enter>.

Debian 12 will boot as usual.
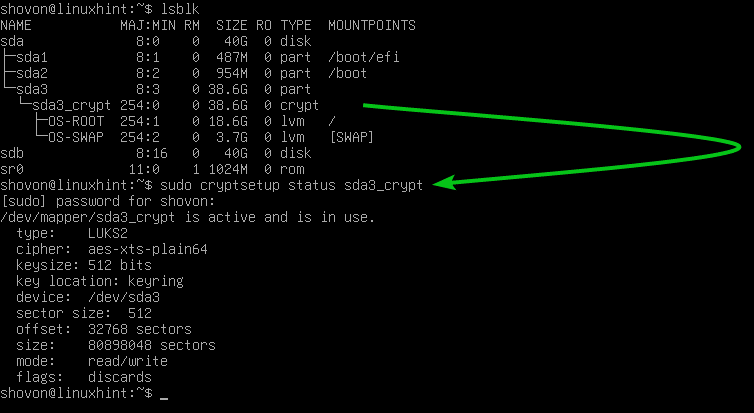
As you can see, Debian 12 is installed on encrypted partitions.
$ sudo cryptsetup status sda3_crypt
Conclusion
We showed you how to encrypt specific partitions from the Debian 12 installer and install Debian 12 on the encrypted partitions. We also showed you how to install Debian 12 on a fully encrypted disk and how to verify whether Debian 12 is installed on encrypted disk/partitions as well.