Installing and configuring SSH in your Linux systems is not the end game. Using SSH to access your systems remotely goes beyond that. You will need to ensure that you enable your SSH to establish a connection.
But this is impossible to accomplish if you do not understand how SSH works. Notably, you need a client machine and a host or server to initiate and accomplish an SSH connection. Both sides must agree based on the provided credentials to enable a secure connection and access between the two sides.
In this article, we will outline how you can enable an SSH connection in Linux systems. But before that, it is vital to note that the client machine needs the remote host credentials or information to initiate the connection. This information could be an IP address or hostname.
Enabling SSH in Linux Ubuntu
An important prerequisite when enabling SSH on your systems is to ensure that you log in as a user with the necessary sudo privileges since it will not be possible to make the required commands if you lack them. And since SSH does not come by default in Linux computers, this process must begin with installing the SSH framework.
The following is a step-by-step guide on how to enable an SSH connection on your system:
Step 1: Install SSH If Not Yet Installed
First, open your computer terminal. You can achieve this by clicking on the machine’s terminal icon or using the keyboard shortcut Ctrl+Alt+T. Once opened, install the OpenSSH server using the following command:
The first command updates your Linux system to ensure that you have the latest version, while the second command installs the SSH. The system prompts you to enter a password. Enter Y when prompted so that you can continue with the installation process.
Step 2: Confirm If SSH Is Active
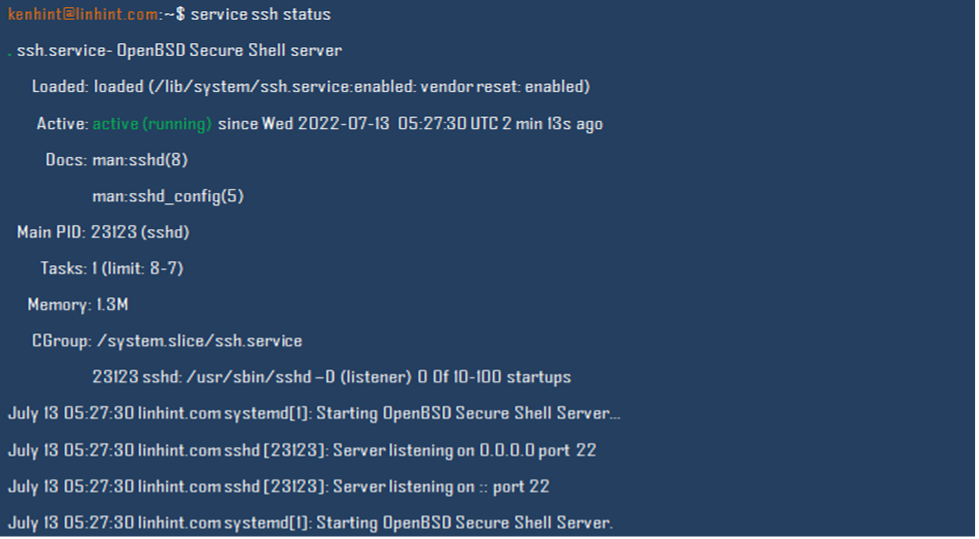
The SSH on your machine should be running once you complete the installation. However, this is never certain, hence the need to confirm if the system is running. You can verify this using the following command:
An actively running SSH service should bring back a result similar to the one in the following illustration:
Step 3: Enable SSH If Not Active
If your system does not show that SSH is active, you can proceed to enable it. Once enabled, proceed to start the SSH service. These two commands will help:
Step 4: Bypass SSH Over the Firewall
Ubuntu machines have a preinstalled firewall. The firewall, UFW, can restrict the enabling of an array of programs and applications into your systems—the SSH protocol is one example of the programs it can restrict.
You can open the SSH port using the following commands:
The previous command should allow your firewall to permit the SSH connection. If the firewall is not enabled, you can proceed to enable it using the following command:
Proceed to refresh your system to help load the new changes in the system for implementation. The following command will help you reload the changes:
Connect SSH to Remote Server
As we already mentioned, you need to know the IP address of your server to initiate a connection between the two ends. You can use the Linux IP command to query the system. Besides, the client machine that you are using should also have your username.
The following command will work:
On your first attempt, you will receive a message similar to the one in the following illustration:
Type “yes” to proceed. The system will prompt you to enter a password using a message similar to the one in the following:
Entering your password will log you into the system and establish a connection to your LAN. A correct password will give you a message similar to the one in the following:
Disabling SSH in Ubuntu
The following steps are necessary should you want to disable SSH in Ubuntu:
a. Stop SSH Service on Your Systems
The following command will disable SSH on your machine:
b. Start SSH Service Again
The following command comes in handy should you want to restart the SSH service after disabling it:
c. Disable SSH Service
You can use the following command to disable the SSH service during a boot run of your system. In this case, the SSH service will not start when your system reboots.
d. Enable After System Boot
You can enable and start the SSH service again using the following two commands:
Conclusion
With the given illustrations, we believe you can enable and disable the SSH service on your systems. Besides, we also discussed, albeit briefly, how you can establish an SSH connection remotely. These actions help you acclimate with SSH for easier use and network management.
Sources
- https://www.servermania.com/kb/articles/ssh-linux/
- https://opensource.com/article/20/9/ssh
- https://www.javatpoint.com/ssh-linux
- https://www.cyberciti.biz/faq/ubuntu-linux-install-openssh-server/#:~:text=Type%20command%3A%20%23%20sudo%20apt%2D,Your%2Dserver%2Dname%2DIP
- https://linuxize.com/post/how-to-enable-ssh-on-ubuntu-18-04/
- https://phoenixnap.com/kb/ssh-to-connect-to-remote-server-linux-or-windows


