
A secured connection between a client and a server can be established using the Secure Shell (SSH) network protocol. Every exchange of information between a client and the server is encrypted. You may get a remote access to your machine and carry out the administrative operations by turning on SSH. Secure file transfers via SCP and SFTPS will also be possible. Upon the first installation, SSH for remote access is, by convention, prohibited on Ubuntu. It’s not too difficult to enable SSH on Ubuntu. To set up and activate SSH on your Linux system, complete the tasks that are listed in the following as administrator or sudo user.
Install the SSH Client
Let’s get started with the process of updating the Ubuntu repositories. This is an important stage each and every time you carry out an installation. Therefore, the “apt-get” repository is utilized in the “update” instruction as depicted in the following:
$ sudo apt-get update

After the successful update of your system, it’s necessary to upgrade the system repositories and packages to get the effects of new installations to be made shortly. Therefore, the “apt-get” package is used with the “upgrade” keyword.
$ sudo apt-get upgrade

The SSH client always starts the establishment of a safe connection. Therefore, installing the SSH client is necessary if you want to initiate the connection, and the other node will be listening. So, the “apt-get” instruction will be useful here within the “install” keyword, followed by the “OpenSSH-client” keyword (to install the client-server). Use the “sudo” rights to run this instruction as shown in the following. It may require your password for the currently logged-in user to initiate the installation process smoothly. Thus, we added our password and successfully installed it.
$ sudo apt-get install openssh-client

Install the SSH Server
It might be possible that you are at the other end, i.e. only listening to the client-server. Therefore, you need to install the SSH server on your end. Before that, update your system with the “apt” package in the following “update” instruction:
$ sudo apt-get update

Make sure that your system packages are upgraded as well. Sometimes, the packages don’t get the effects of new installations because they are obsolete and require an upgrade for smooth compatibility. Use the same upgrade command as used previously.
$ sudo apt-get upgrade

Now, it’s time to install the OpenSSH server so that you can accept the connection from the client. The installation command should be executed with the “Sudo” rights followed by the “Apt” package usage and the “OpenSSH-server” keyword at the end.
$ sudo apt install openssh-server
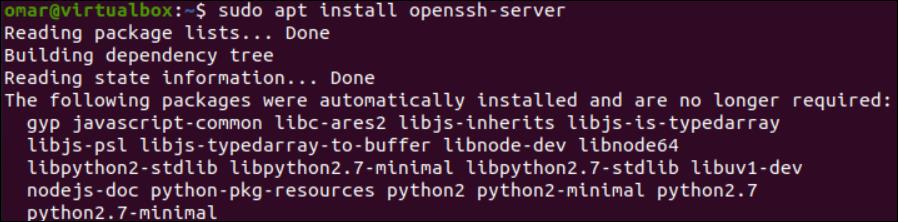
You have to be sure that you want to install the “openssh” server as it is safe for communication and doesn’t affect the system’s performance. Thus, press the “y” key to continue the installation setup on the command shell.

Enable the SSH Service
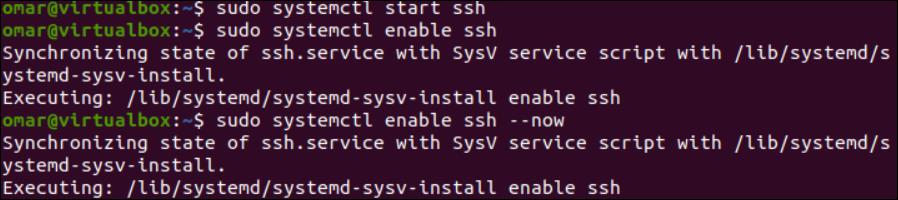
After a while, the OpenSSH server will be successfully installed on your machine. Now is the time to configure the OpenSSH in our system. For its perfect configuration, we will use the “systemctl” utility which is more likely to enable it on our end. The “systemctl” utility is used to start the SSH service on our system with the “sudo” rights. Then, it enables it with the “start” and “Enable” keywords. The synchronization link has been created as shown in the following image. You can also make use of the “—now” option in the same “systemctl” instruction to enable the SSH server right now.
$ sudo systemctl start ssh
$ sudo systemctl enable ssh
$ sudo systemctl enable ssh –now
Check the SSH Service Status
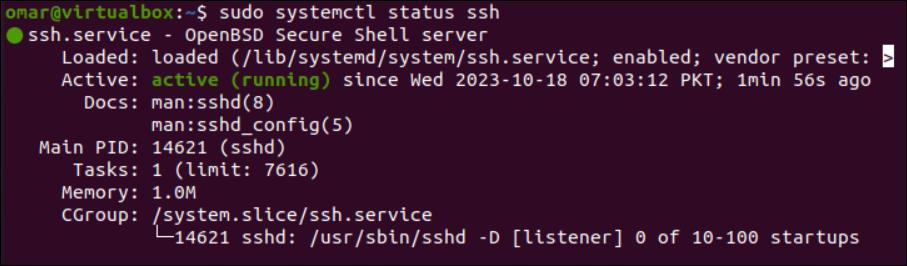
After enabling it successfully (as per the synchronization link), you can look for its current loading status via the “systemctl” utility using the “status” and “ssh” keywords in the command. The output of this command displays the current status of the ssh service. A green indication displays that the service is active and running.
Check the SSH Service Status
Open the SSH Port
A utility named UFW for configuring the firewalls is included with Ubuntu. Be careful to open the SSH port if your machine’s firewall works. To do that, Ubuntu provides us with the “ufw” utility as a command that can be used with the “allow” keyword to open the SSH port. Make sure to run it with the “sudo” privilege. You will see that the execution of this command may update
the rules of the SSH port as depicted in the following image:
$ sudo ufw allow ssh

Connect to the SSH Server
Now, you need to check for your system’s IP address, i.e., whoever SSH side you have been working on. To look for the IP address, we utilize the “ip” instruction followed by the “a” option, and the data regarding our network will be displayed. You have to look for the specific network that you have been using and look for the IP address within the line that starts with “inet”. In our case, it’s also 10.0.2.15 as displayed in the following image:
$ ip a

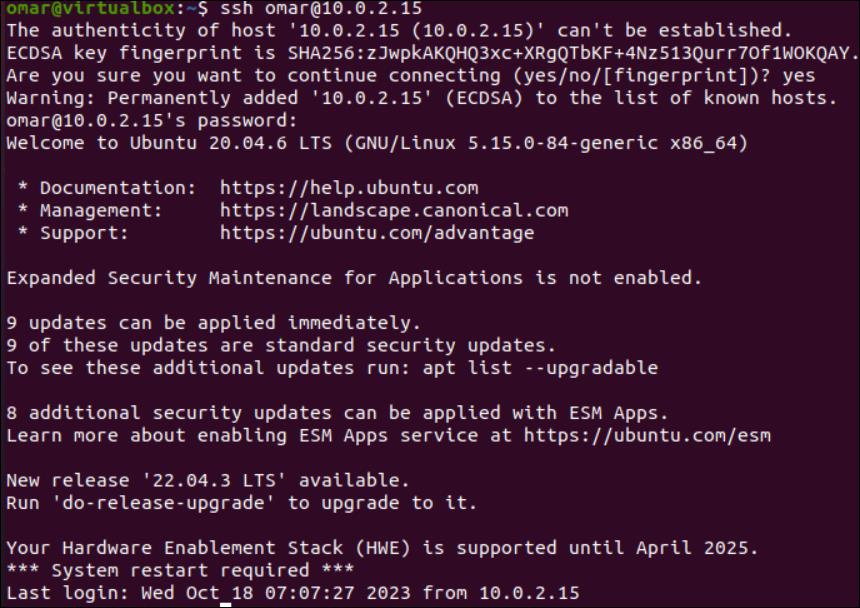
It’s time to sign into the remote system after we have the IP address of our system. For this, we execute the following SSH command to establish a connection with the remote system. The command starts with the “ssh” keyword followed by your system username; the “@” character followed by the IP address. Since we are using SSH for the first time in our system, it displays that the authenticity of a host cannot be established. Thus, you have to enter “yes” to confirm that you want to continue connecting as an SSH server or client. After a warning, it will ask for your system password, and you have to provide it to continue. It will make you successfully log in from your Ubuntu system and the secure connection will be established.
$ ssh username@ipaddress
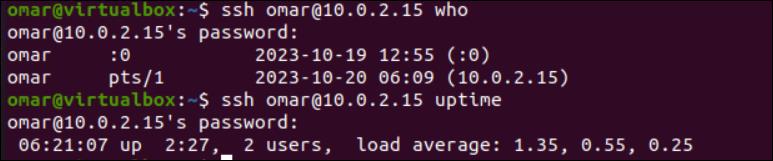
Using SH, you can now connect to the other node successfully. Shown instructions depict the use of “ssh” on the Ubuntu machine.
$ ssh username@ipaddress who
$ ssh username@ipaddress uptime
Conclusion
Within this guide, we successfully demonstrated the use of SSH in the Ubuntu system. After that, we discussed the installation of the SSH server and SSH client separately and provided the details about enabling SSH and establishing a connection.