This article will show you how to install the VNC server on Ubuntu 20.04 LTS and access it from a remote computer. So, let’s get started.
Installing VNC Server on Ubuntu 20.04 LTS:
This article will use the GNOME desktop environment’s built-in Screen Sharing feature to access the Ubuntu 20.04 LTS graphical desktop environment remotely. The GNOME desktop environment uses the Vino VNC server to implement the Screen Sharing function.
The Vino VNC server might not be installed on your Ubuntu 20.04 LTS operating system by default. But it is available in the official package repository of Ubuntu 20.04 LTS. So, you can install it easily.
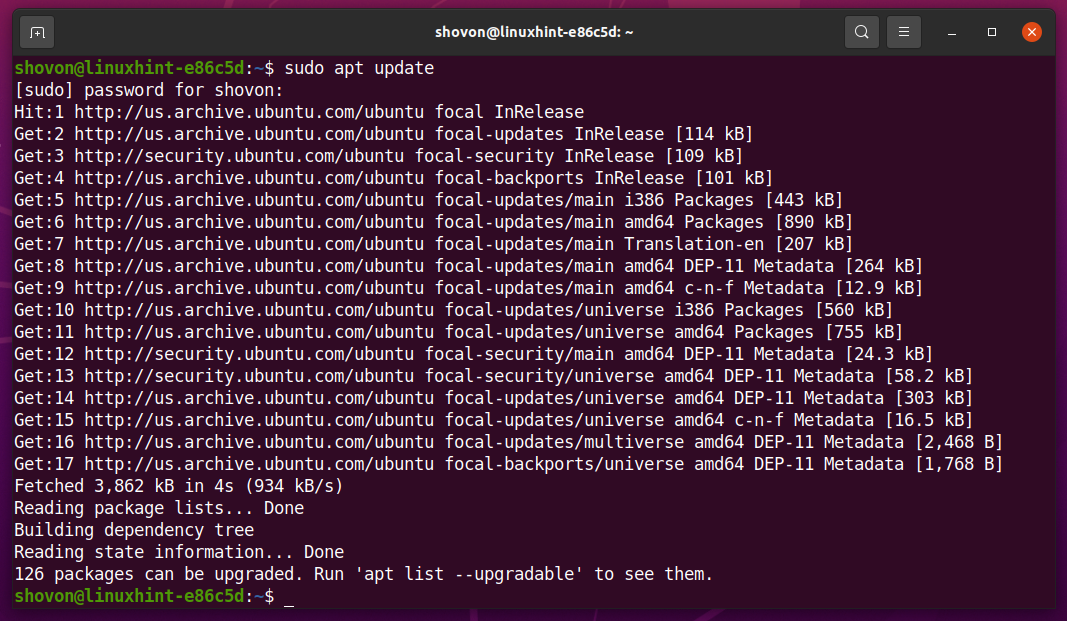
First, update the APT package repository cache with the following command:

The APT package repository cache should be updated.
To install Vino, run the following command:
To confirm the installation, press Y and then press <Enter>.
Vino should be installed.
Enable Screen Sharing on Ubuntu 20.04 LTS:
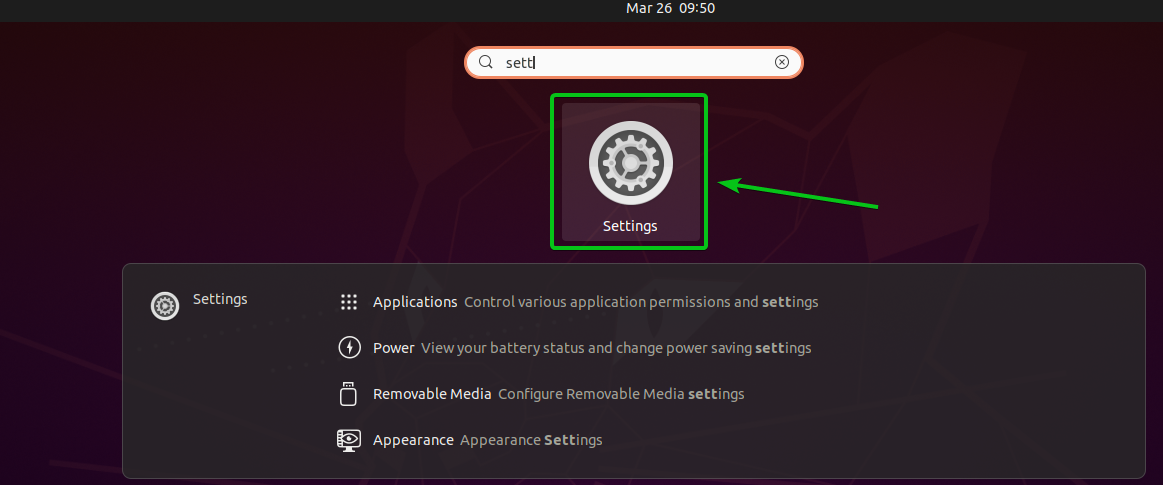
Once you have vino installed, you can enable Screen Sharing from the Settings app.
Open the Settings app from the Application Menu of Ubuntu 20.04 LTS.
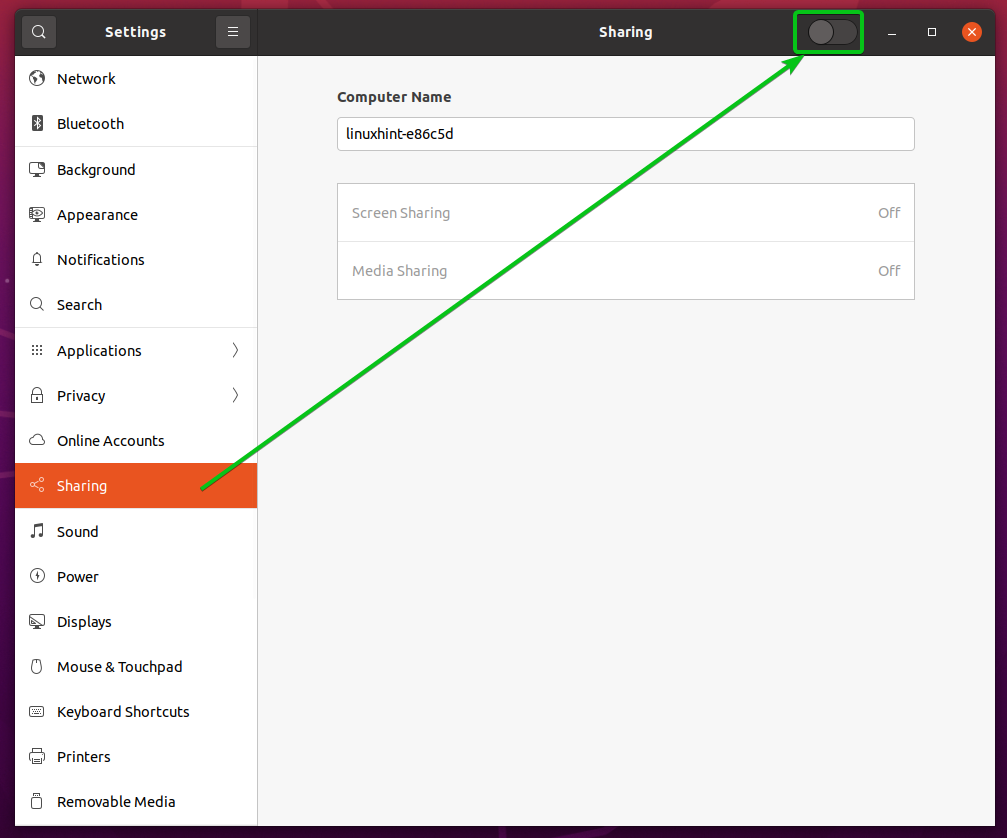
Navigate to Sharing section and click on the toggle button as marked in the screenshot below to enable Sharing.
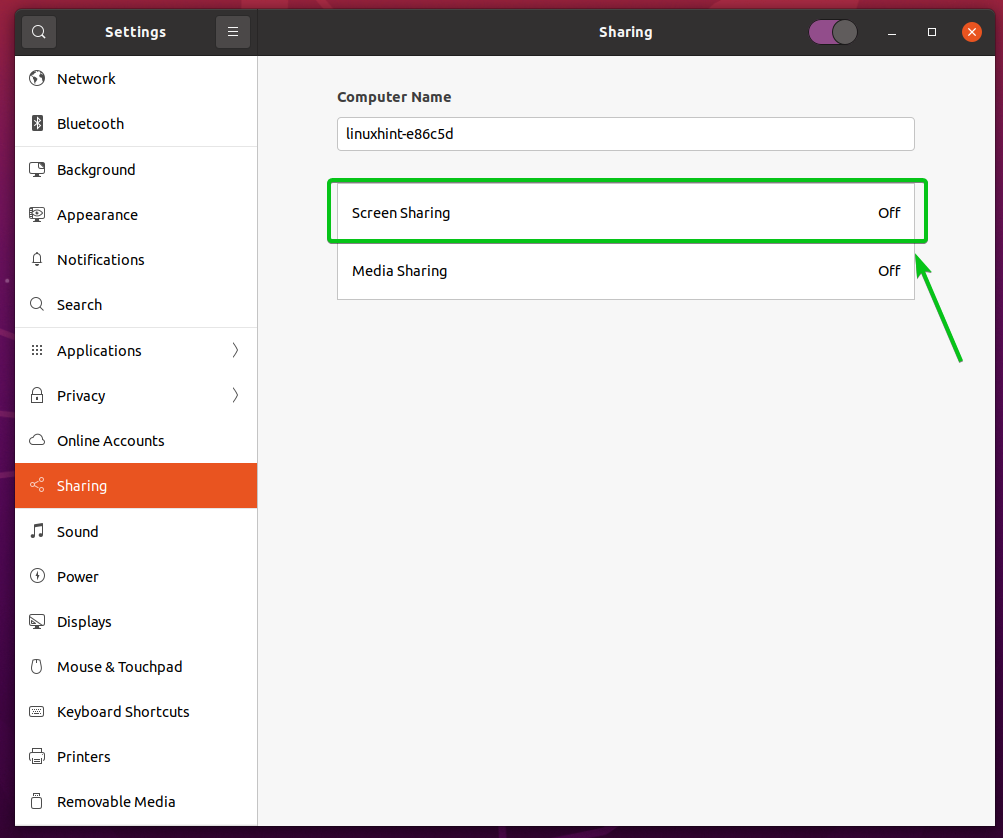
Once Sharing is enabled, click on Screen Sharing as marked in the screenshot below.
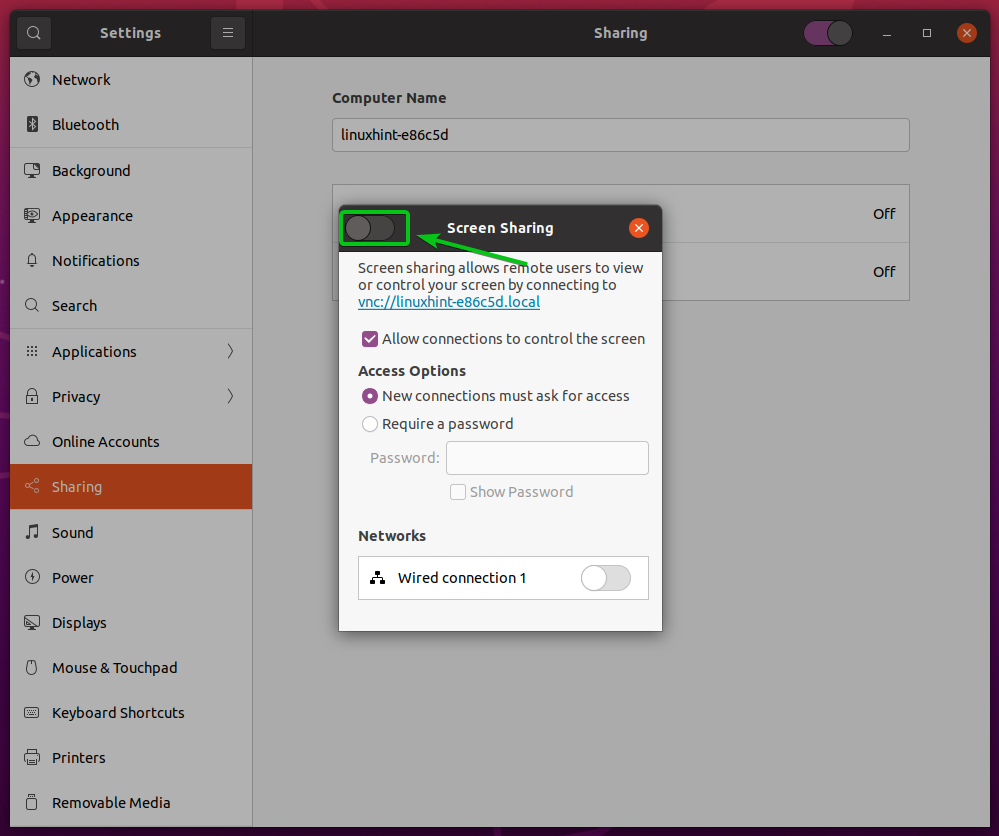
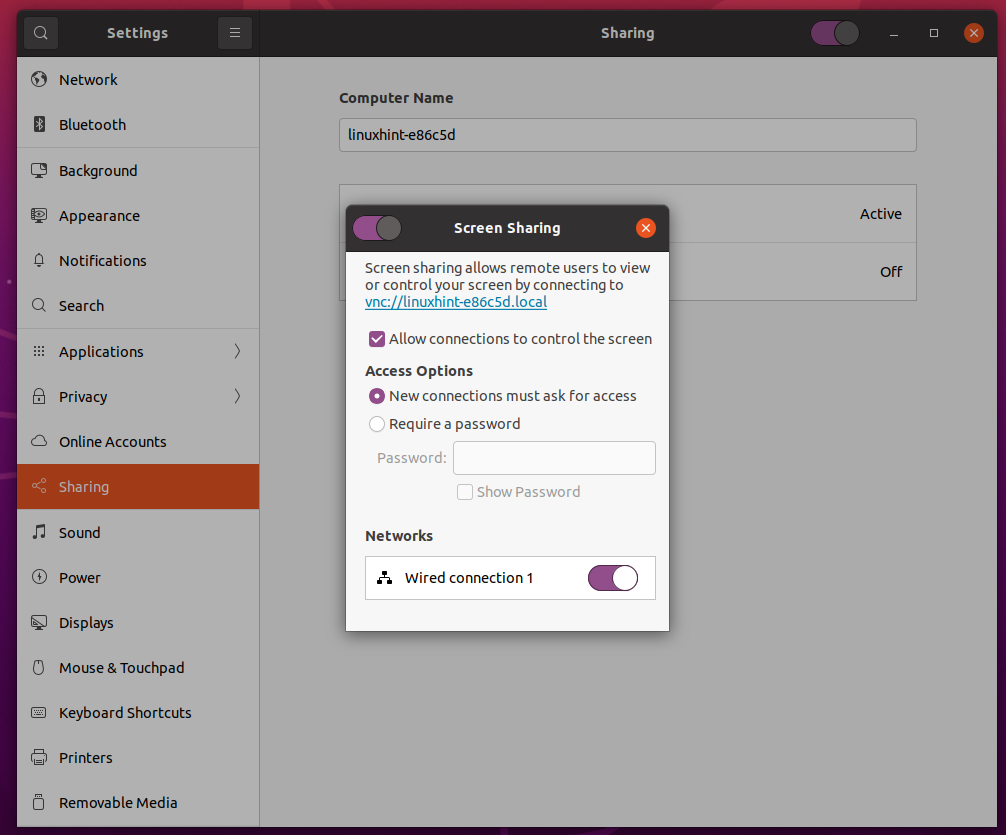
From the Screen Sharing window, click on the toggle button as marked in the screenshot below to enable Screen Sharing.
Screen Sharing should be enabled.
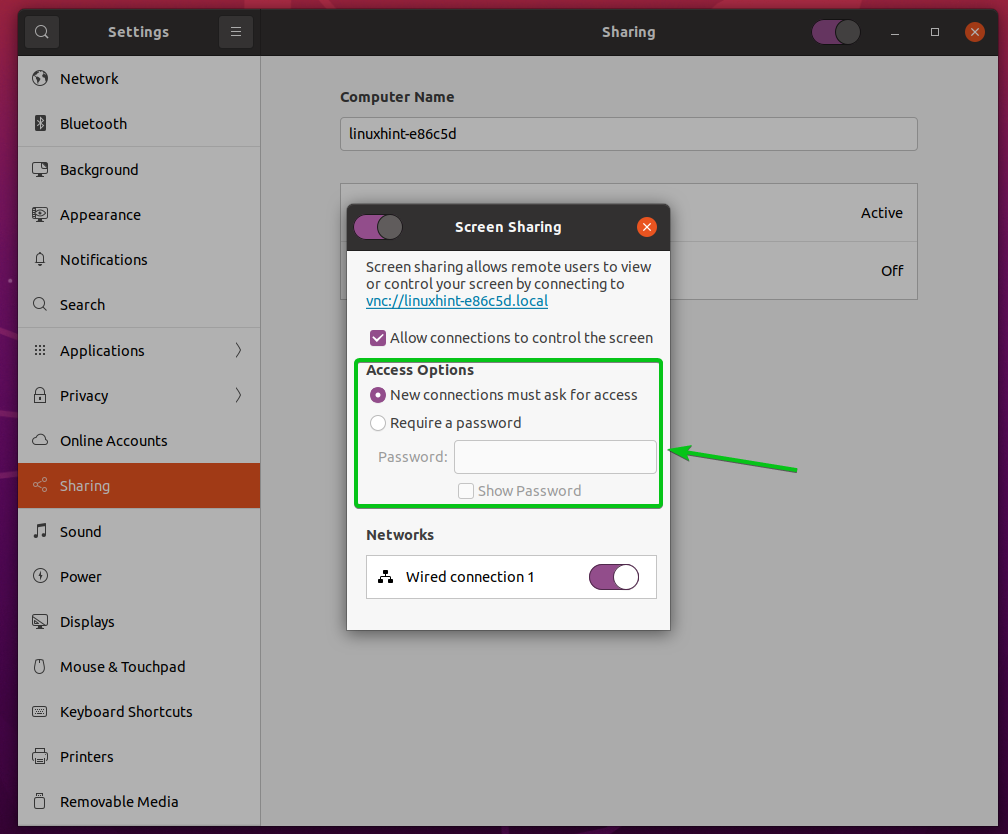
From the Access Options section, you can configure authentication methods for your VNC server.
New connections must ask for access: This is the default authentication method. When this authentication method is selected, you will get a prompt message every time a remote VNC client tries to access your computer. If you allow access to your computer, only then the remote VNC client can access your computer.
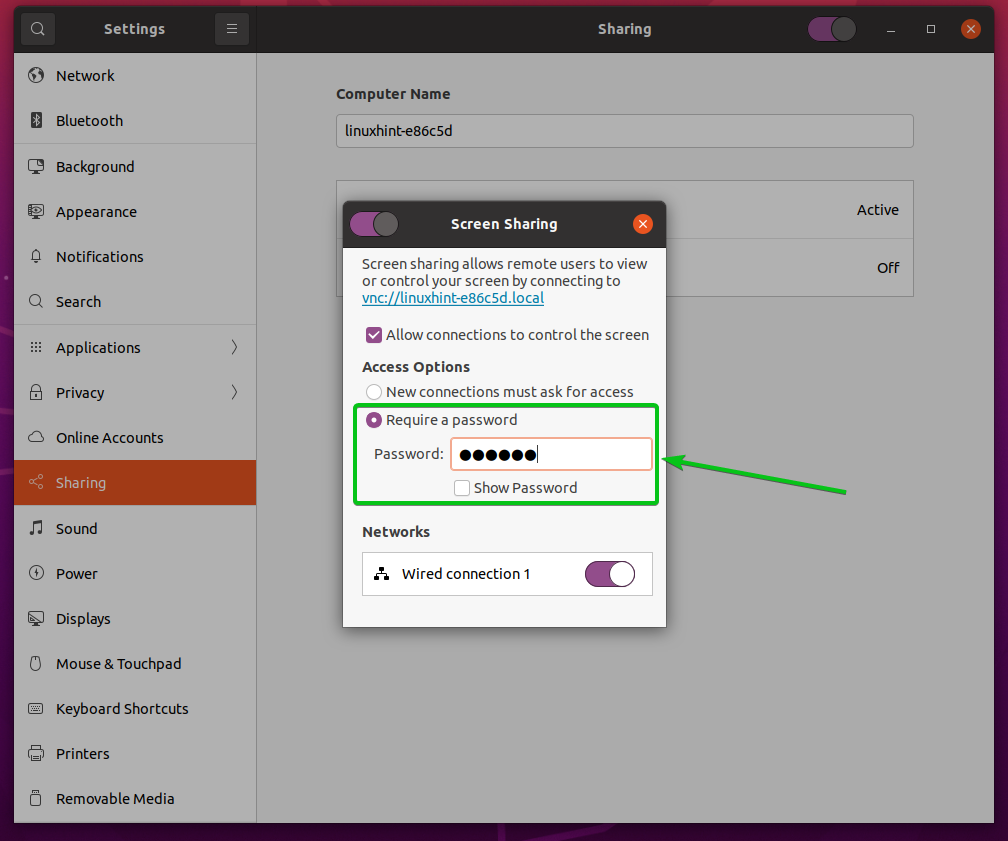
Require a password: In this method, you can set a password for the VNC server. The remote VNC client must enter the password to access your computer.
I prefer the password authentication method. So, I will set password authentication for the VNC server in this article.
To set a password for your VNC server, select Require a password from the Access Options section and type in your desired password in the Password textbox as marked in the screenshot below.
Finding the IP Address of Your Computer:
Once you have Screen Sharing enabled, the person who wants to connect to your computer remotely needs to know your computer’s IP address.
You can find the IP address of your computer with the following command:
The IP address of my computer is 192.168.20.131. It will be different for you. So, make sure to replace it with yours from now on.
Accessing Your Computer Remotely with Vinagre:
This section will use the Vinagre remote desktop client to show you how to connect to your computer via VNC. But you can use other VNC clients as well.
The Vinagre remote desktop client may not be installed on your computer. If you need any help installing Vinagre on your Linux distribution, you can read the article How to Install Vinagre Remote Desktop Client on Linux.
First, open Vinagre remote desktop client from the Application Menu of your computer.
Once Vinagre is opened, click on Connect.
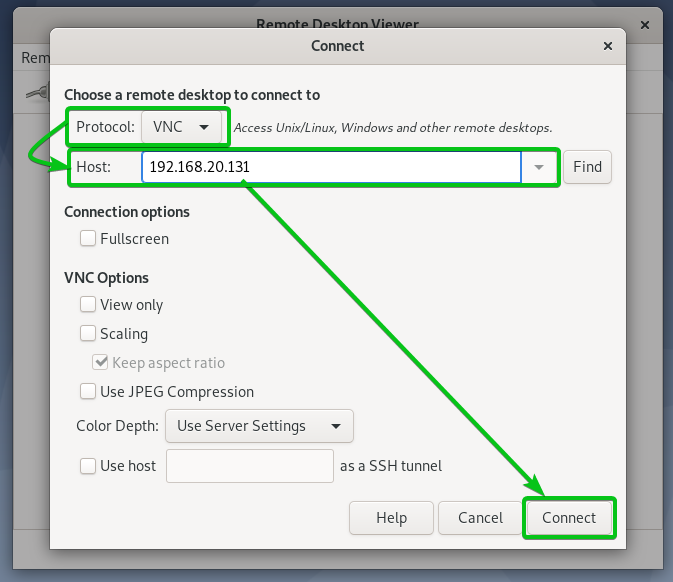
Now, select VNC from the Protocol dropdown menu, type in the IP address of your remote computer in the Host textbox, and click on Connect as marked in the screenshot below.
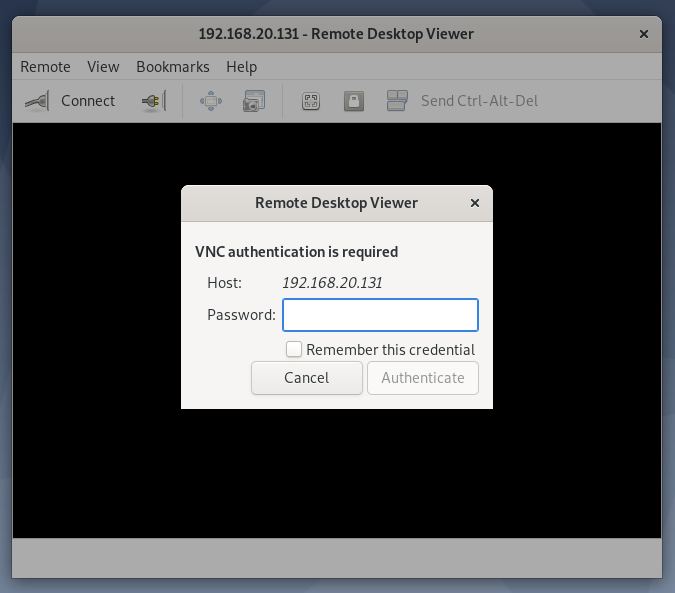
You will be prompted for the VNC password if you have configured password authentication as I did.
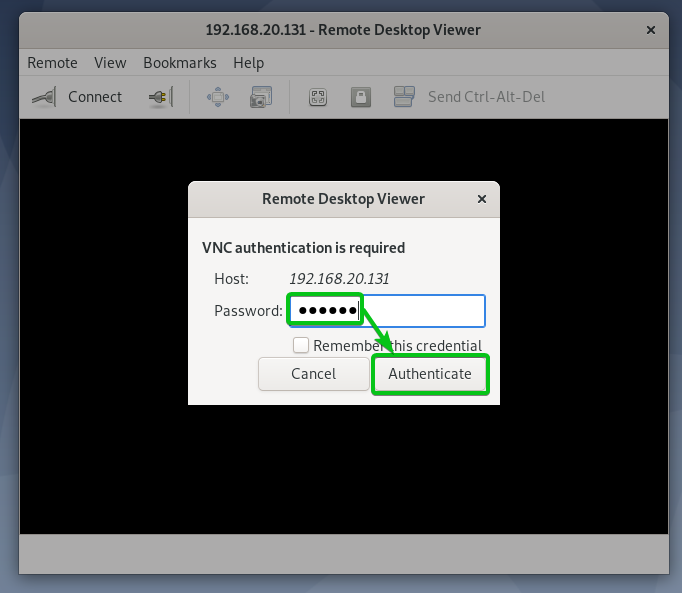
Type in your VNC authentication password and click on Authenticate as marked in the screenshot below.
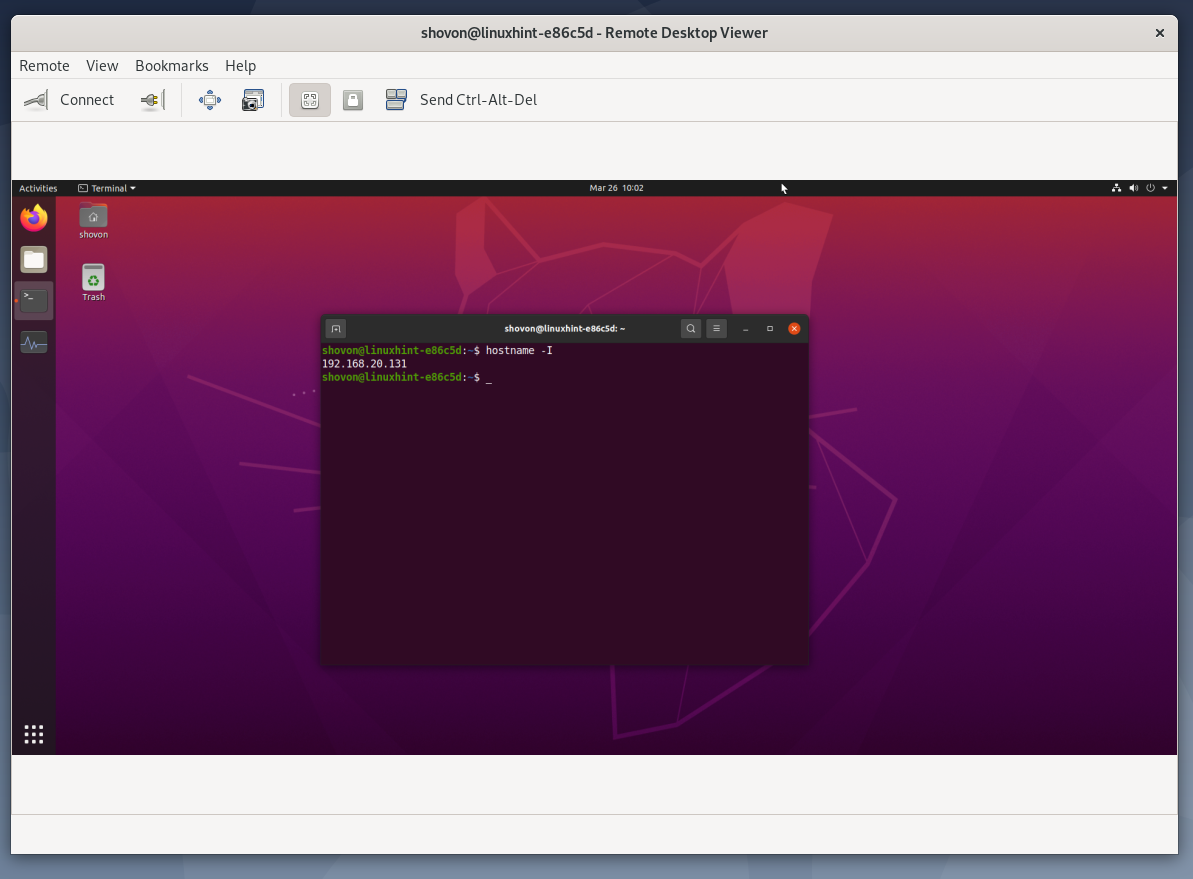
You should be connected to your Ubuntu 20.04 LTS computer remotely.
Accessing Your Computer Remotely with VNC Viewer:
One of the most popular and cross-platform VNC clients is RealVNC’s VNC Viewer. The RealVNC VNC Viewer does not support the type of encryption that the Vino VNC server supports. So, to be able to access your Ubuntu 20.04 LTS computer remotely with the RealVNC VNC Viewer, you need to disable encryption for the Vino VNC server.
To disable encryption for the Vino VNC server, run the following command on your Ubuntu 20.04 LTS computer.
Once encryption is disabled, you can access your computer with the RealVNC VNC Viewer as usual.
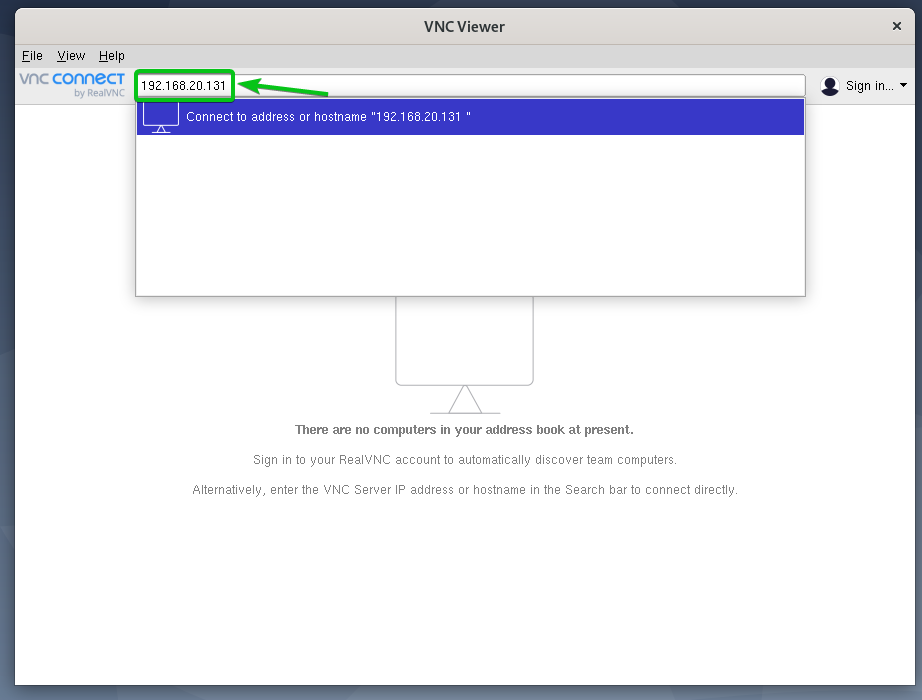
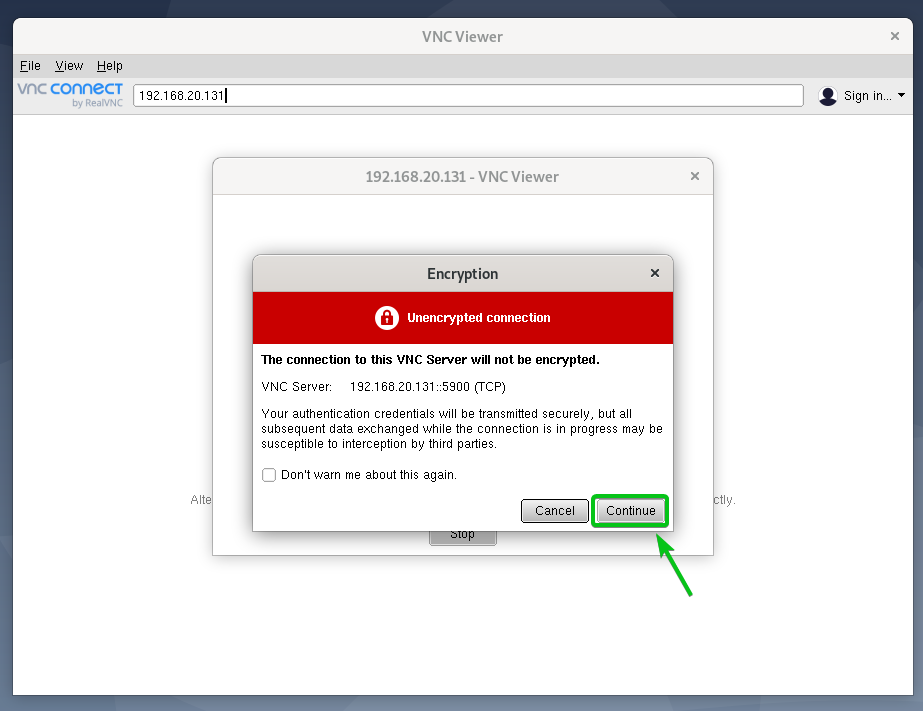
To connect to your computer remotely with the RealVNC VNC Viewer, type in your computer’s IP address in the VNC Viewer app and press <Enter>.
Click on Continue.
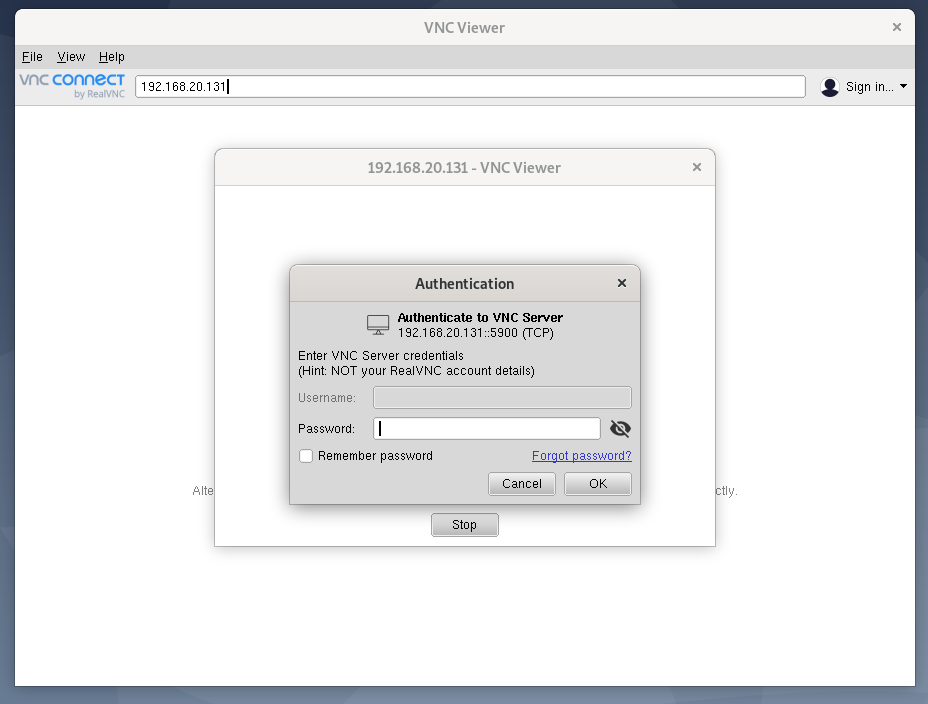
You will be prompted for the VNC password if you have configured password authentication as I did.
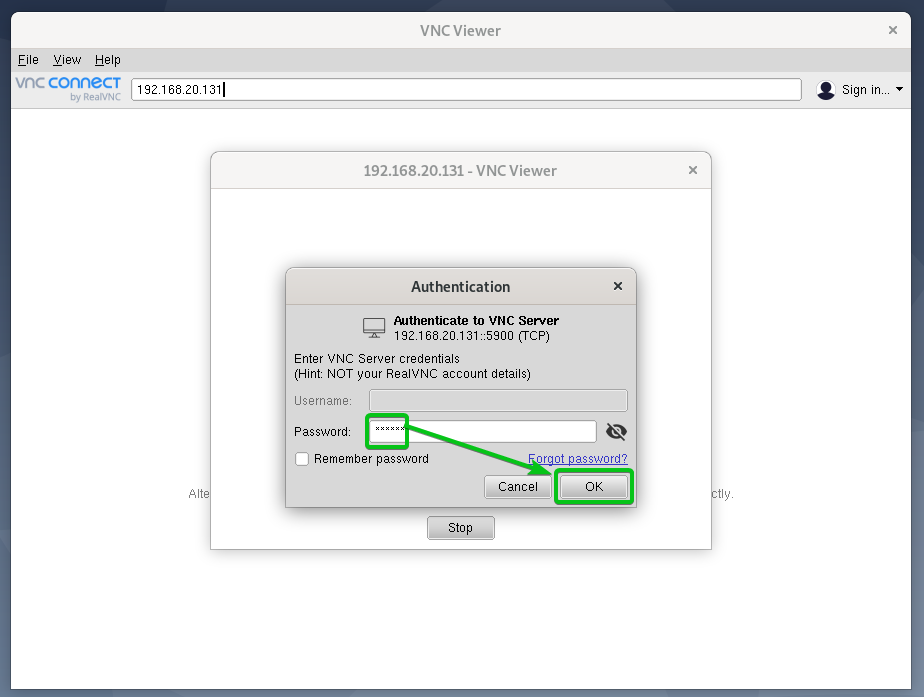
Type in your VNC server’s authentication password and click on OK as marked in the screenshot below.
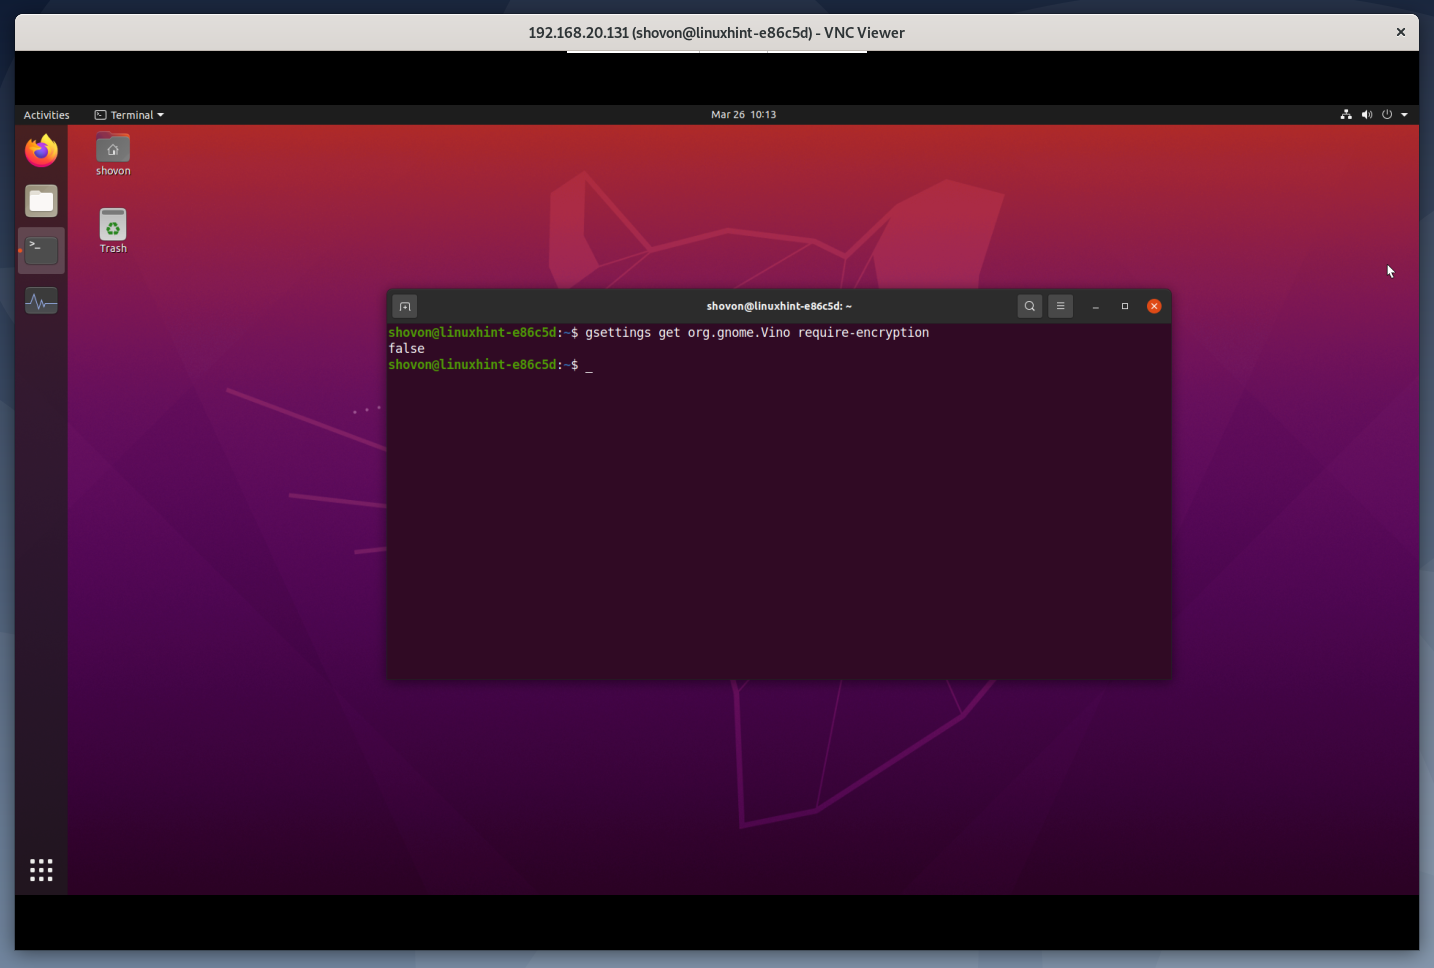
You should be connected to your Ubuntu 20.04 LTS computer.
Conclusion:
This article shows you how to install the Vino VNC server on Ubuntu 20.04 LTS and enable Screen Sharing from the GNOME Settings app. I have also shown you how to configure authentication methods for the Vino VNC server from the GNOME Settings app and disable Vino VNC server encryption from the command-line. I have shown you how to access your Ubuntu 20.04 LTS computer remotely using the Vinagre remote desktop client and RealVNC VNC Viewer.


